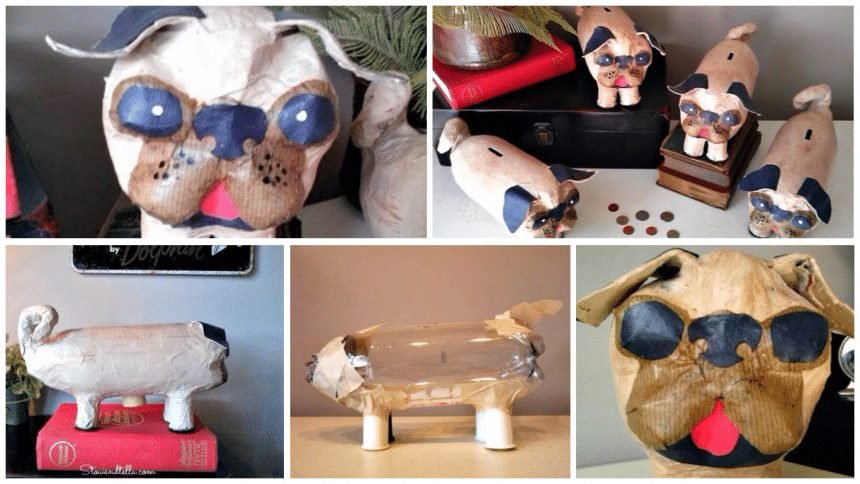
To make the puggy banks, I followed most of Martha’s instructions, which you can find here. I made a few changes as well, to turn the plastic soda bottle from a pig to a pug. Come along, I’ll show you. I’ve included free printable instructions and a puggy bank face template at the bottom of this post, as well.


Supplies
2 Liter Soda Bottle – cleaned and dried
4 Empty spools of thread
Hot glue gun
Masking tape
Torn newspaper strips (make sure 1/3 of the strips have black writing only)
Flour and water at 1:1 ratio mixture
Craft paint ( I used Martha Stewart’s Multi-Surface Craft Paint in colors: Wedding Cake, Acorn, and Black)
Decoupage ( I used Mod Podge Matte)
Brown paper bags or craft paper
Black and red construction paper
Black felt
Cork – large enough for coins (I purchased mine at the local hardware store)
Thin tipped craft paint brush (for the face details)
Sanding block
Craft knife
Black marker
Handheld hole punch (optional)
File folder or thin cardboard (for the puggy ears #8 on template)
Puggy Bank face and ears template (see below)

Steps
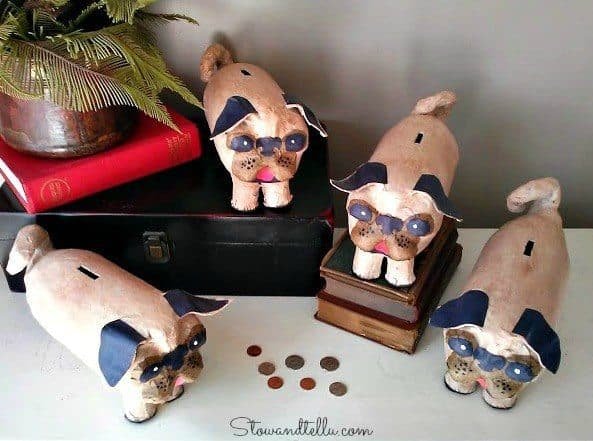
1-With a marker draw a line down the center of the bottle, making the top of the puggy head line up with one of the bumps at the bottom of the bottle.
2-Hot glue the empty spools to the bottom of the bottle for legs; and then tape them down to secure.
3-Cut out all of the pieces on the Puggy Bank face template.
4-Using the template piece #8, trace cut out the ears from a file folder or thin cardboard.
5-Using template pieces #1, 5, 6, and 7 traces and cut out from the black construction paper.
6-Using template pieces #4 and 8 traces and cut out from the paper bag or brown craft paper.
7-Fold ear template on dotted line and tape the ears to the bottle.

8-Remove the soda bottle cap, scrunch up a piece of newspaper and tape it around the soda bottle nozzle to create the puggy bottom.

9-Twist 1-1/2 pieces of newspaper together to create a tail that starts thicker and gets thinner, and then tape the thicker portion the back- top side of the puggy bottom. Add more tape, making sure to cover the bottle opening.

10-Continue to twist the tail and wrap with masking tape until you have a tail shape. Cut off excess.

11-Mix up a flour and water mixture until no lumps.
12-Dip newspaper strips into the mixture and starts applying. Apply one coat and let dry overnight.
13-Apply second coat and let dry again.
14-Apply the third coat using the black print-only newspaper strips. Let dry. To speed up drying I used a hairdryer, but you can also use a fan like Martha suggests.

15-Cut out a circular hole in the bottom of puggy for the cork, making sure hole is smaller than the largest portion of the cork; and cut a slit in the top of the puggy for inserting money.
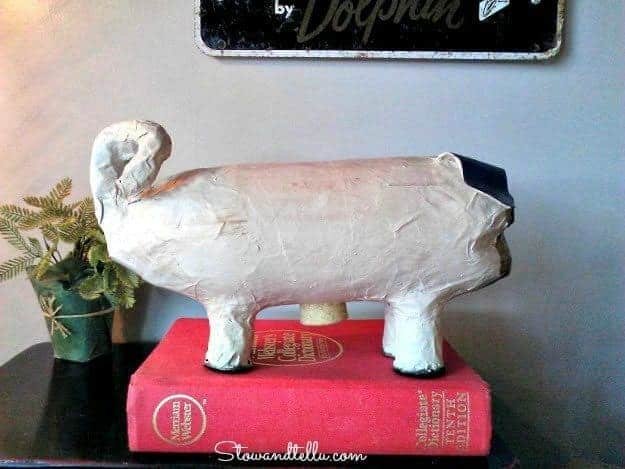
16-Mix paint 2:1 Wedding Cake and Acorn; add 1 part decoupage and a few drops of water and apply with a paintbrush, two light coats. Let dry.
17-Apply a coat of decoupage only.

18-For the nose (piece#6) fold width-wise and punch a hole using the hole punch to make nostrils, or cut out small hole if a hole punch is not available.

19-Using decoupage, apply pieces #1 and 2 to face, and then and then #3 and 4, and then #5 and 6. Finally, attach pieces #7 to ears. Smooth all pieces down with damp fingers to get good adhesion on the bumpy surface. Let Dry. Apply second coat decoupage, smooth down some more, if needed and let dry.
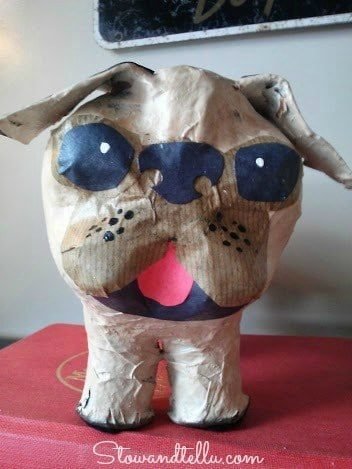
20-Add two white dots for the eyes and black dots as whiskers, let dry. re-coat with decoupage if desired.
21-Dab black craft paint on the bottoms of the paws and around the edges of the paws.
22-Cut out black felt pieces for the bottom of the paws, attach with decoupage – TIP: Trim off a small inside section of feeling on the inner part of the paws to make the piggy bank more sturdy.

Thank you!
courtesy: stowandtellu