Now it’s time to add the second segment in Sheaf Filling Stitch, which is a lot of fun to work – let me show you how simple it is!
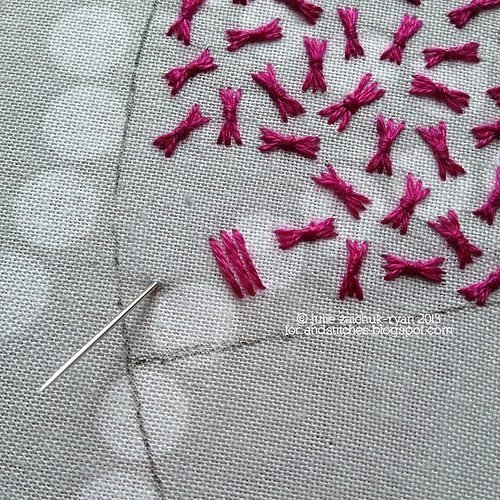
First stitch three straight stitches side-by-side:
Then bring the needle back through the fabric, coming from beneath your straight stitches:
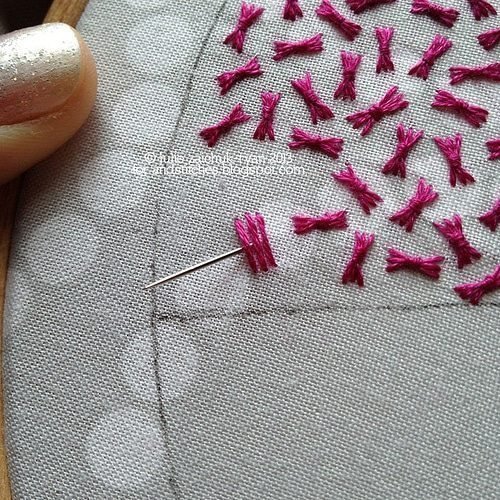
Bring your needle under the straight stitches from the other side, wrapping your thread around them:
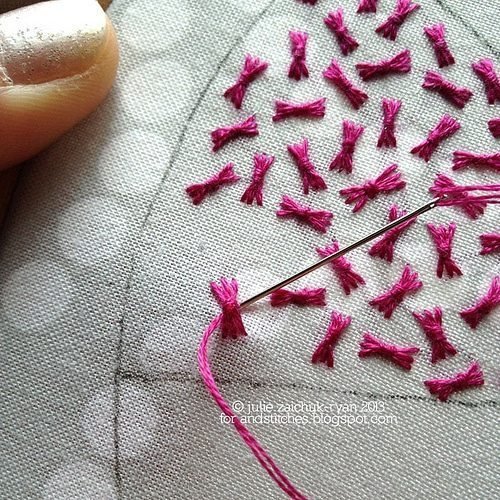
And then take your needle back down through the fabric on the other side, essentially creating a second wrap around your little stitch bundle:
And there you have it, a sea of tiny little Sheaf Stitches!
Sheaf Filling Stitch is fun because you can change the look of it in so many ways – play around with the length of your stitches, how far apart they stand, how many wraps you give them. You can place them randomly as I have, work them in alternating rows checkerboard-style, or end-to-end in long columns!