
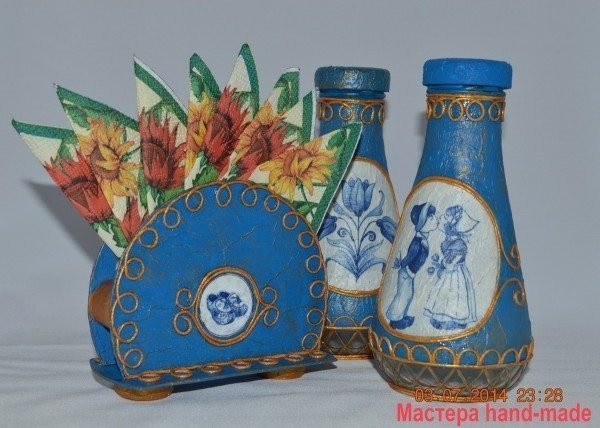
Tissue holder from CD
Today I share with you my new experience, it will be – Tissue from the drive. I’ll tell you how you can make Tissue from CD / DVD drives. Themselves drives is now little used. But I’m sure that many of them lie idle. I, too, like a hamster, not to throw them all hoped that the farm will be useful. And finally – it has found a use for them. In one of the previous workshops, I decorated bottles for bulk items. in techniques – Decoupage and Pape art. Therefore, Tissue, I decided to do the same style, so to speak, set.
For work I needed:
- CD / DVD drives – 3 pieces;
- Napkins;
- PVA glue;
- Glue gun;
- Acrylic, gold;
- Acrylic paint, white;
- Acrylic lacquer;
- Wine cork.
Just want to say that this Tissue decorated, just like a bottle. Therefore, in this master class, describe in detail Decoupage Pape and art will not only a general principle. More decor itself, can be found here
And so, two disks will go to the wall of the napkin, one disk will be the base.

U disk, I cut one piece. I attach a metal ruler and several times held office knife. When the incision is deepened simply had broken disk. With the second disc made similarly. It will sidewall napkin.

The third cut the edge of the disc, it will be the foundation napkin.

In the middle of a disc, PVA glue, glued small circles of polyethylene. This is to ensure that the holes would not have broken.

Divorced PVA glue with water and decoupage technique, pasted napkins on wheels

Now you have to give a napkin to dry (to accelerate the process, constantly use a hair dryer).
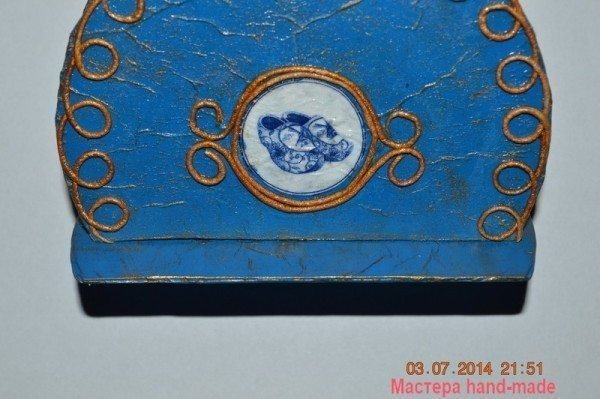
Then, midway, where polyethylene, painted white acrylic paint. Color, only from the outside, there will be a drawing. When the paint has dried, cut two pictures of napkin decoupage and acrylic paint pasted.
After that, the varnish has dried, all (except for figures of course), covered the blue acrylic paint. For uniformity, painted for the second time. Dry. And gold paint walked across the blue background.

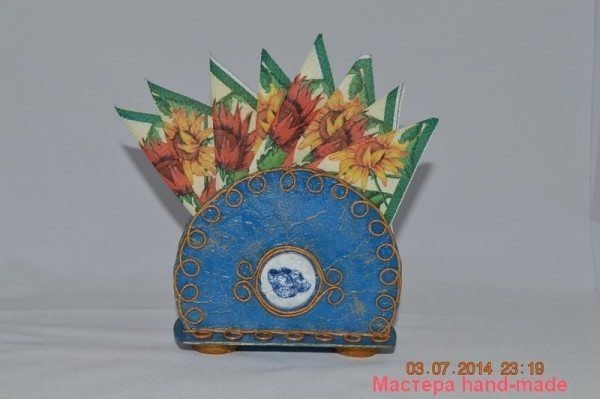
It remains only to apply the tissue flagella (Pape art). This is probably the most tedious part of the job. But, due to the flagella, Tissue get smart and openwork. Pape art done until only bokovinki. Bottom, will be decorated, after glue the side panels.

Decoration napkin over, left to collect it.
Stationery knife, cut a wine cork into four parts.

And covered it with gold paint.

On the one side wall (on the inside), glue gun taped two plugs. They will serve as stops for napkins.
Then caused the adhesive on the other side tubes, and glue the second sidewall. To get even, at first, I put the side wall with plugs example, caused the glue and put a second sidewall.

Now, quickly and accurately, caused hot melt on the bottom and side insertions glued to the base.
It remains only to make a napkin at the “legs”. The remaining two circles, glue gun taped to the bottom of the napkin. And acts of the base, the tissue decorate flagella.
All of Tissue discs ready.
Well, now complete with bottles of spices

Courtesy : mactera-rukodeliy.ru