
Decorate a box
For this article, I did not decorate a box for everything to be clearer, and you could see all the auxiliary lines.

Materials:
- Cardboard – preferably very thick
- scissors,
- glue,
- ruler,
- pencil,
- paper, and accessories for decoration
In the beginning he made the drawers. They will have a 6 * 6 cm in width and 2 cm in height.
In accordance with these sizes corresponding paint pattern on the cardboard.

In continuous lines indicated in the photo box bend the future.
Now, along the lines marked on photo orange incision.


Squares 2 * 2 cm. Was adhered to the walls.
It turns out that’s such a box.

Now you can decorate the box.
Such capsules do 4 things.
Make a “wall.”
For this cut a cardboard rectangle length 26 cm., A width of 9 cm.
Dimensions are based on the following: height – is the height of all boxes (2cm. * 4 pcs. = 8 cm.), Plus a small margin (I took stock of 3 mm.); Length is the length of the boxes (6cm. * 4 pcs. = 24cm.) plus the stock (by 5mm.).
Now divide the rectangle into 4 pieces, 6.5 cm. In length.

Bend.

Now you can decorate the “wall” as we begin to stick boxes.
Now, on the second, third and fourth “wall” we draw a horizontal line, as shown on the photo (the lines are marked in orange). The stock of 3 mm. We need to boxes not “crawl” one over the other, even if the cave boxes.


Glue boxes for “wall”, the first on the first wall at the bottom, second, third and fourth, respectively, for the second, third and fourth “wall” in the marked lines on.

This is what happens

It remains to make the cover. Cover makes the same manner as the drawers, but the size caps must be slightly larger than the dispenser. You can just along one side to make a small margin over the entire length (I added 2 mm.).
Once they dry, fold the box and close the lid.
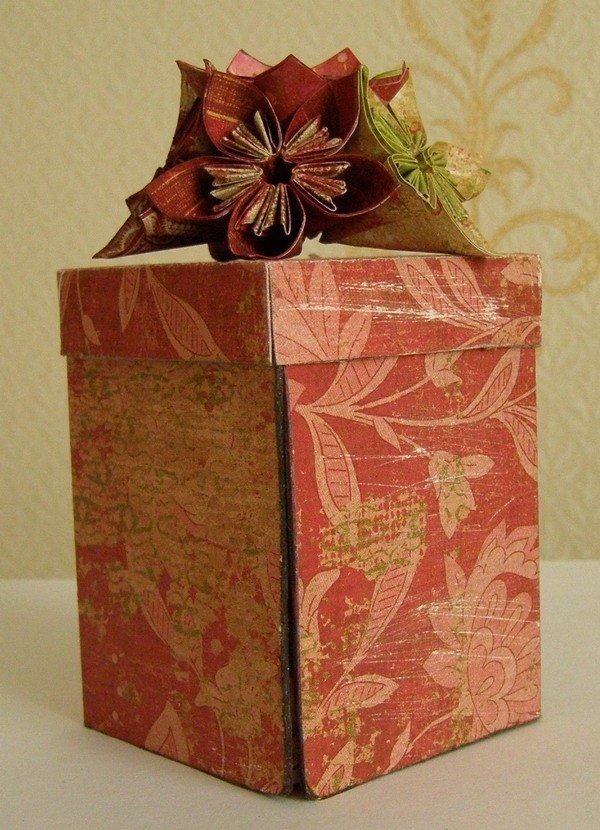
Here is a box I have finally turned.

Courtesy: liveinternet.ru