We will cook a cart in the winter, that is, knit a summer universal handbag 🙂
She came up with knit satin ribbons from Svetlana Tregub from Kiev. Her handbags are stunningly elegant and, of course, cannot be every day – it’s a pity to take such beauty to the dacha or take a store with you. I was seized by the idea of a tie a bag that would be roomy, smart, and practical. I wash them in a typewriter in a delicate washing mode, if necessary I shove a loaf of bread or a packet of milk, and nothing is done with them. So I want to share with everyone how to get such a handbag.

We need the following materials:
– satin ribbon with a width of 1-1.5 cm 10-14 rolls;
– a satin ribbon with a width of 2.5 cm for small flowers;
– Satin ribbon 4 cm wide for roses;
– beads;
– a flap of tulle for the decoration of the front wall;
– rigelin;
– fishing line, monofilament or strong threads in the color of the tape;
– magnetic clasp;
– hook number 5-6.
Let’s get started!
I did not manage to buy a large quantity of ribbon of the same color and width. Therefore I had to take a razor, 2-4 rolls of each color, but related colors. And I wanted a chocolate color 🙂 Not destiny … I had to combine.

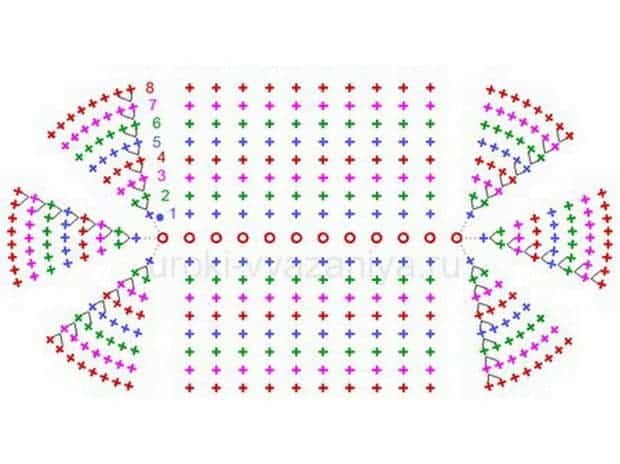
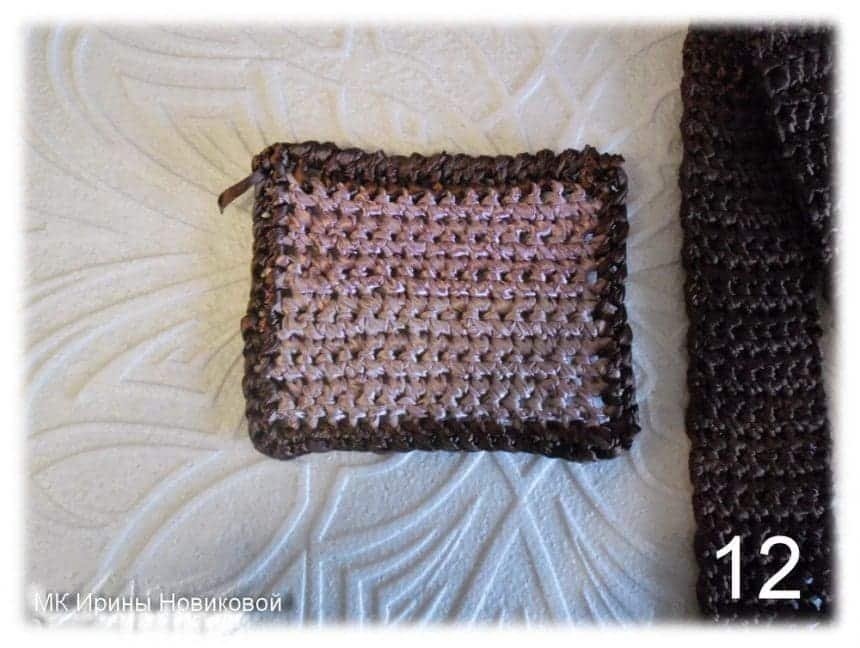
Knitted according to the standard scheme of knitting oval with columns without a crochet.

Tape width 12 mm, hook number 5. The hook was in the hands of her husband, he picked them out some kind of glue from the bubble. Clear completely failed, only the “knitting” part … So I apologize for the inelegance of the hook in the photo
Knitting clearly according to the scheme. Has typed 12 air loops, then 2 more for lifting, in the third from the edge (that is the extreme under the scheme) has connected 3 columns without a crocheting. Next, we knit 10 sticks exactly, in the last stitch again we knit 3 sticks at once, then again 10 sticks straight (one in each loop). Having reached the end.
In the next row, in each of the three sticks, we knit 2 sticks (it is already 6 in the semicircular part), then again 10 sticks exactly to the second semicircle – 2 sticks in each of the three, again 10 sticks exactly, we connect by half-tumbler.
The third row starts with knitting two bars into the last column of the semicircle, the next one is a single bar, then again 2 bars and the next one is single. It turns out already on 9 tables in each semicircle. A straight section of both on one side and the other side remains unchanged – 10 bars.
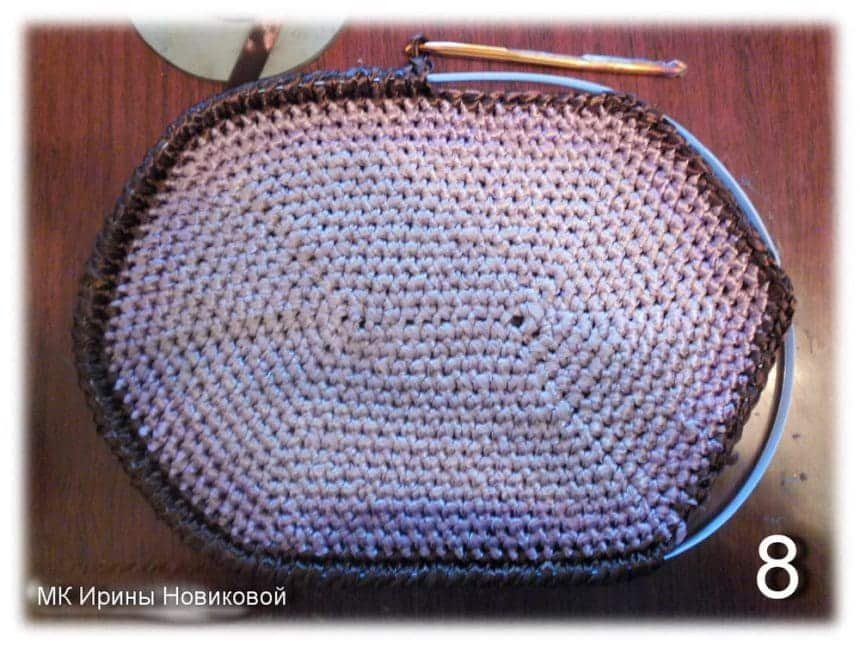
So, we continue, increasing in each row the number of single columns between double by one. I knitted up to 13 posts, that is, one double, 13 single, again 1 double, 13 single, again 1 double, 13 single, 10 bars flat, then – the second semicircle similarly to the first – one double, 13 single, again 1 double, 13 single, again 1 double, 13 single, 10 bars flat section, connecting half-pit. All. One half of the bag is ready. The perimeter is 110 bars.
Since I had a ribbon of different colors, I began to knit with the brightest, ending with the darkest. It took one-half of 3 rolls.

In the same way, we knit the second half.
Then we take rigelin. I have it in the form of a ribbon, flat. It is better, of course, to use around one, but I have not found one. When I was knitting the first handbags, I did not have any at all. And I inserted a regular telephone cable in place of the crossbar to fix the form.

Cut off a piece of crossbelt, equal to the length of the perimeter of the connected half of the bag, with a reserve of a centimeter of 2-3. Perimeter can be measured with a centimeter tape or thread. Then I wrap the girth around the perimeter, looking at my eye, what kind of overlap in the junction. I connect, slightly heating the ends with a cigarette lighter and pressing them against each other. And for reliability from above, I do another couple of turns with transparent tape. When the bonded crossbelt is released, it will take the form of a circle.

For around purse at the time, but we have an oval! To be frightened it is not necessary. In the binding process, the crossbar will be fixed and keep the shape of the oval.
We tie it with a step by step. Rigelin we press to a knitted cloth, tying it together with a cloth.


Then from the middle of the upper part of the bag, we count 15 columns of the step of the step and from the wrong side, we begin to do the strapping with the usual posts without the crochet. I do exactly 80 of them. This is to make it more convenient to connect the parts during assembly.

It’s the same with the other half.

The knitting for the side and the bottom is knit with a single cloth with usual stitches without a napkin. Since I was limited in the tape, and I wanted to emphasize the brown color, I saved the tape and tied a not very wide strip. I would like more. I have it only 8 bars wide. The length should correspond to the binding (80 bars), that is 80 rows.

The brown tape is very little, so I decided to make the handles combined. Benefit caught the eye of the wooden rings, which will be the link between the different parts of the handles of the bag. I knit small brown strips, which will be inserted into the rings and sewn to the bag. Two on each pen.
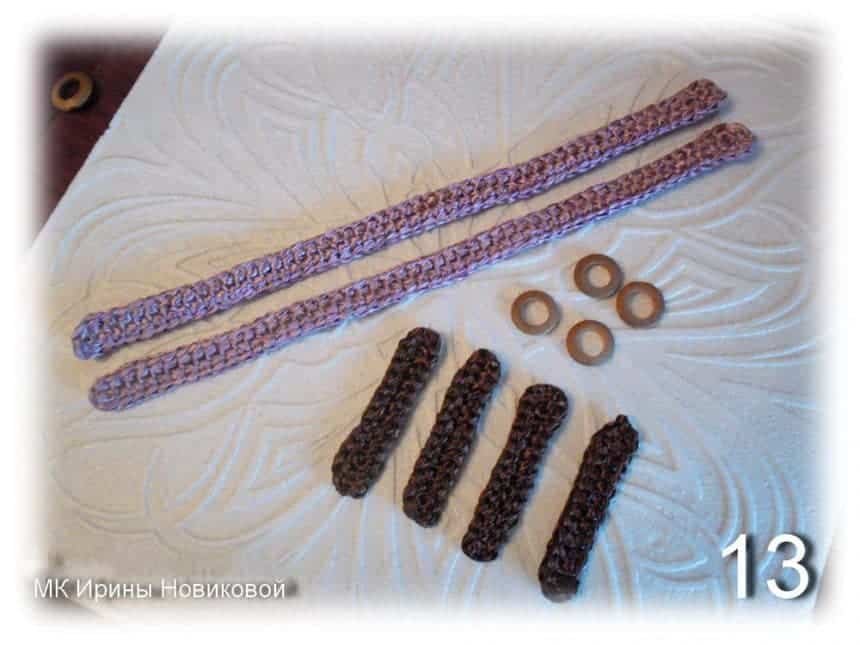
From the light tape, I already knit strips more authentic, for 50 loops. Strips are knitted in the same way as the canvas of the bag, that is, according to the scheme of the oval. I type 50 loops, then 2 lifting loops, in the third from the edge of the loop I knit 3 stakes without a crochet, then 48 sticks, one in each loop, straight. In the last loop again 3 bars, the rest right before the beginning of knitting. I connect it with a half-thread, I hide the end of the tape with a crochet in a strip of knitting. We do not forget to cut off the ends with a cigarette lighter so that they do not wave and do not pour. The small brown stripes were knitting in the same way, only the number of the original loops was only 15.

From what’s left, I knit an inner pocket. I tied him around the perimeter with the last meters of a brown ribbon. The top of the pocket is also tied with a step, but without the crossbar, of course.
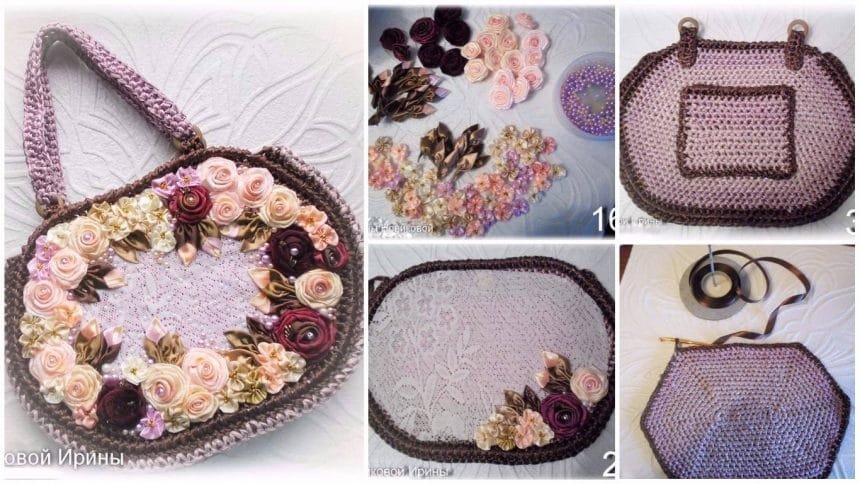
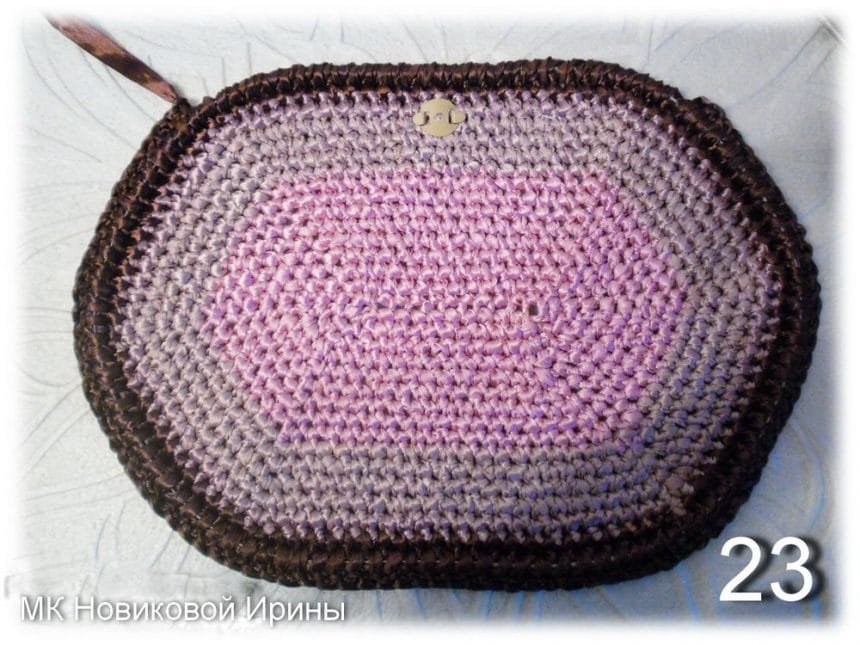
The first stage is finished – all the details are connected and ready for assembly.
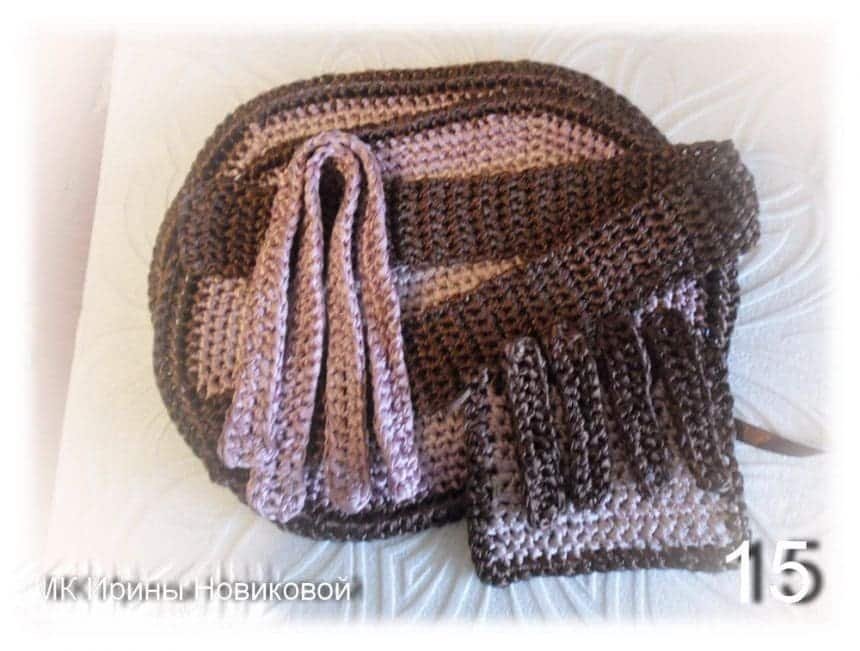
As a rule, knitting takes one day.
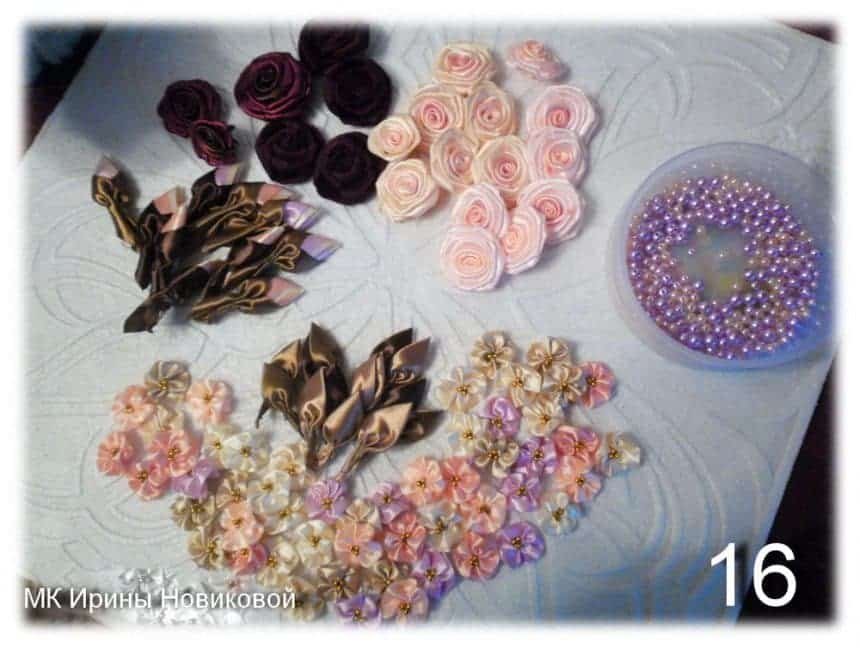
Before we proceed to the assembly, let’s go into the embellishment of the front wall of the bag. We prepare flowers and beads in the color of the general idea. How to make roses, buds and little flowers, if you have any questions, I can tell you separately. So I hammered them in the right shades since I never have an idea what the result will be and how many florets will be used.
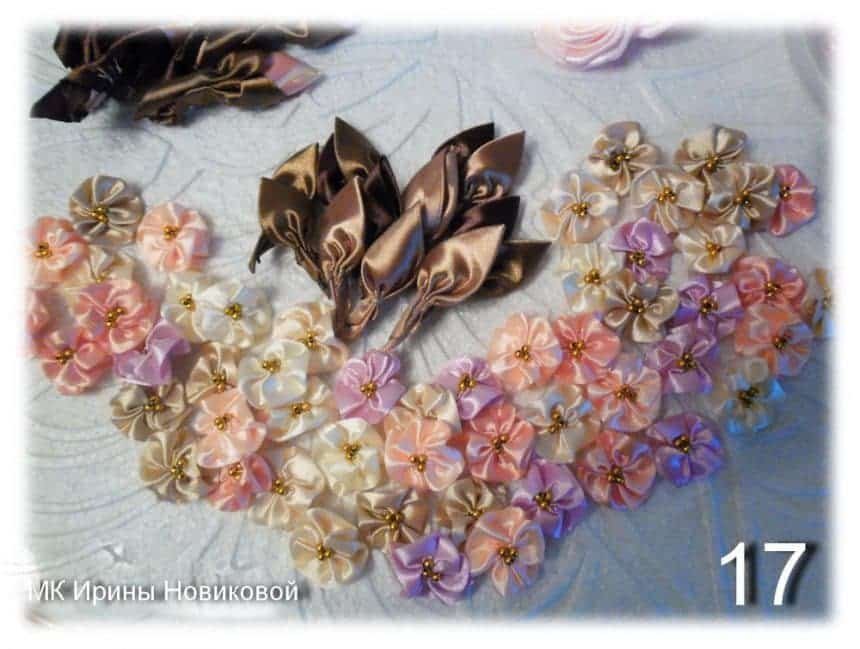

It is possible to sew them simply to a knitted fabric, but I prefer to make a backing from the old tulle, which I still have in the storerooms since Soviet times. Therefore, I can safely say that there is an element of vintage in the bag. We cut out of tulle, guipure, lace or other fabric, which you like, an oval, which we try on.
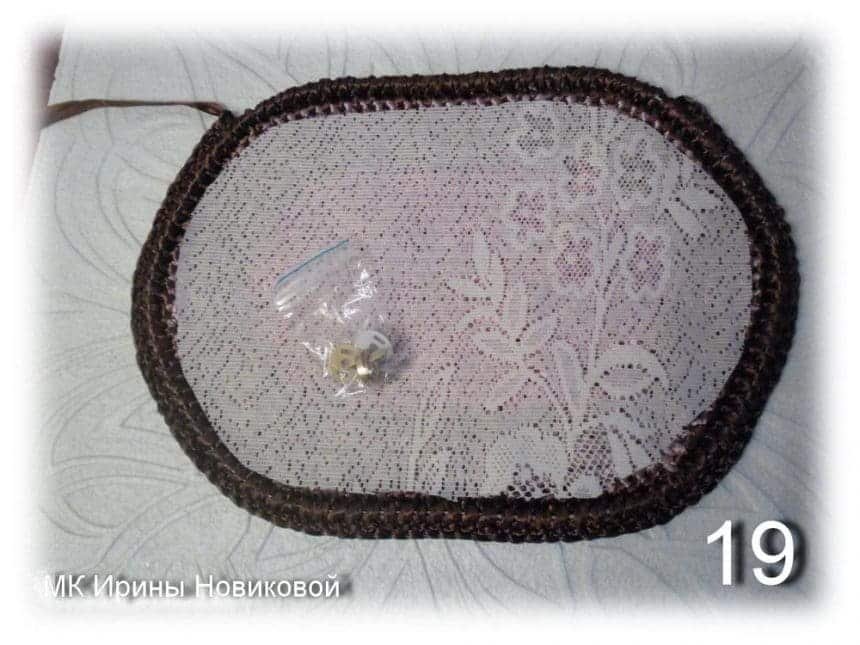
Do not forget about the clasp! I once forgot … I had to break off all the beauty from the top, insert the buckle, and then recover the lost.

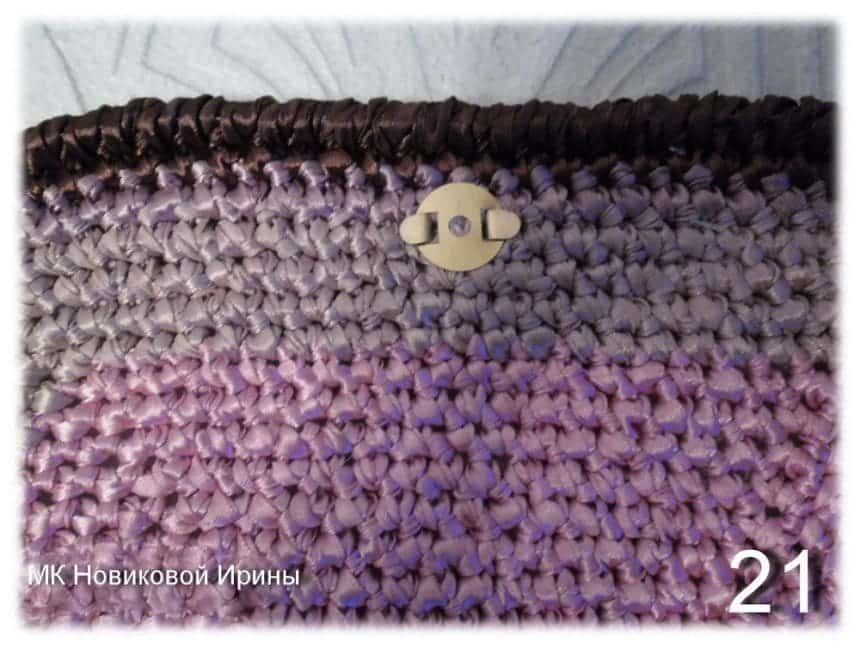
Therefore, first, insert and strengthen the clasp. My hands are already trained by forging, that’s why I’m using my fingers. Those with weaker hands – help you with a hammer or husband.


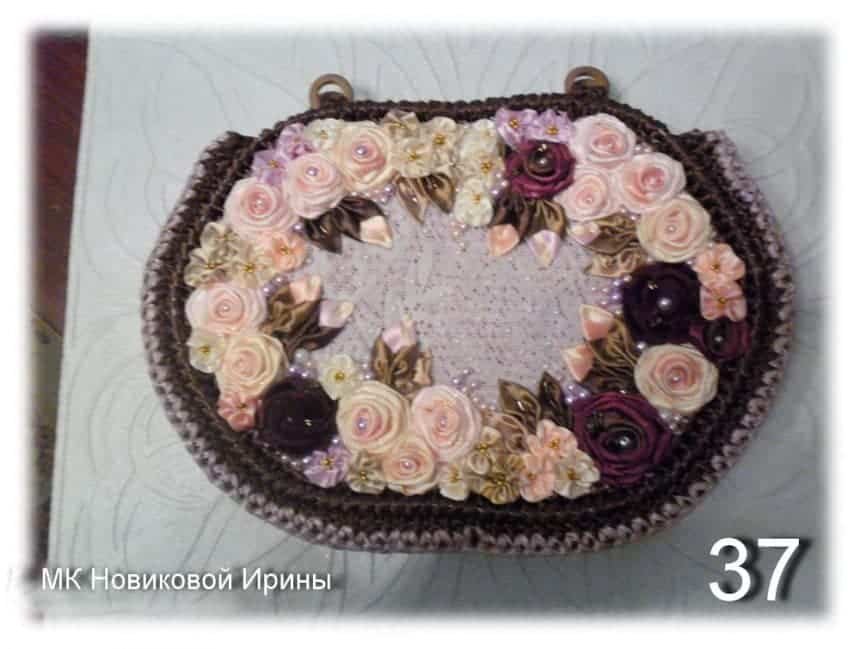
Then we take the monofilament tulle on the front side. And we begin to sew flowers. That is, we will “draw” with ribbon! My favorite part of the job!
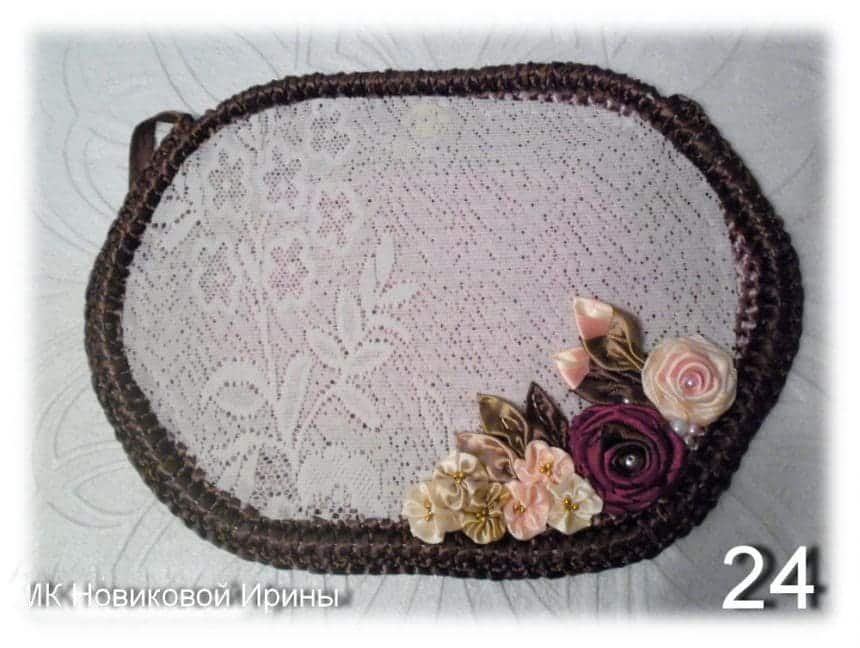

Sewing I started monofilament, which in my process suddenly disappeared. After half an hour’s search, the coil was found in a cat’s house, already very qualitatively gnawed and tangled. I did not unravel the shreds. I threw out the cat’s hooliganism in a bucket and stole my husband’s coil with a thin line, which safely and sewed everything else.


Pocket sewing on the inside of the second wall of the bag. I sewed the same line.
In the wooden ringlets, she put in brown spare parts from the handles, stitched them together, then sewed bags to both halves.


Then you can start the general assembly! I take the side. Its length is 80 rows. The strapping of each half of the bag also has 80 stakes. That is, we connect the crochet, the columns without the crochet, every ridge of the side with each stalk of the strap.

When we reach the end of the side, we tie its “butt”, too, with columns without a crochet and go to the second half, which we tie just as well – a column in a column!
Yes, do not forget about the second part of the clasp !!! I immediately magnetize it to the first, already attached to the front part, I combine with the back of the bag. And I thrust the ears of the fastener into those holes of knitting, where they rest. Straighten the ears – the second part of the fastener is in place.


It remains only to insert in the rings long stripes for handles and sew them. All. The handbag is ready.

The size of the finished handbag is 35 cm wide, 25 cm high.
Ribbons left – 4 rolls of brown, 4 rolls of light coral, 2 rolls of dark coral and 2 rolls of pink.
Rigelin – about two meters.
Magnetic closure – 1 pc.
Timber 0.18 – coil 30 m.
Tulle – 30 square meters. see
Beads and flowers are not read
Remained 3 rolls of pink ribbon and half a morsel of flowers. I will do an appendage! But this is the next time!
I hope that the master class will come in handy and help everyone who wants to bind themselves by the handbag by the summer.
courtesy: livemaster