
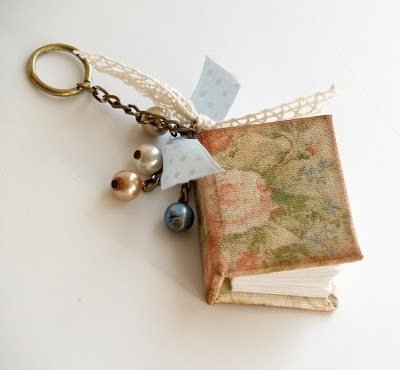
Today we will look at how you can make a miniature hardcover book in the size of 3 by 4 cm, which you can use as a pendant, like a keychain for a handbag or keys.


Materials and tools:
1. Paper is simple (office or watercolor)
2. Cardboard
3. Scrap paper
4. Studio fabric for printing on a printer
5. Distress Ink
6. Glue, glue for decoupage, brush
7. Threads, a needle, a cutter, a ruler, an awl
8. Accessories and elements for decorating
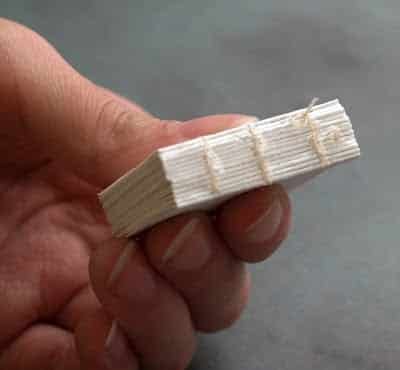
Step 1. We cut the paper: in this case, I bent several leaves and cut them into rectangles measuring 1 by 1.5 inches. In total, 12 mini-books of 6 sheets were produced – this is our book’s base; if you do not want to boast of a large number of pages in your miniature, then you can use watercolor paper, in which case you only need to add 12 leaves.

Step 2. Now you need to sew your mini clips into one. This is not at all difficult. Sewing books, in turn, using Coptic binder or any other method familiar to you, you can and on the typewriter.
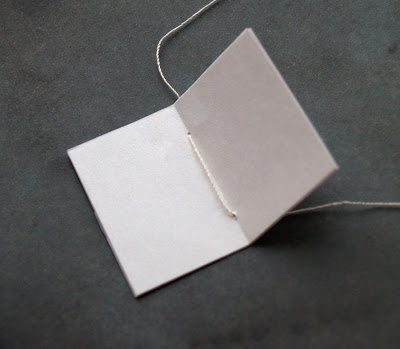


Step 3. After our booklet is sewn, put the glue on the spine and let it dry,
Since I used the Glue Moment, I did not have to wait long to proceed to the next step.
Cover 1:
So that the booklet can tolerate friction and all sorts of influences in our purse or on it, we’ll make a hard cover for it.
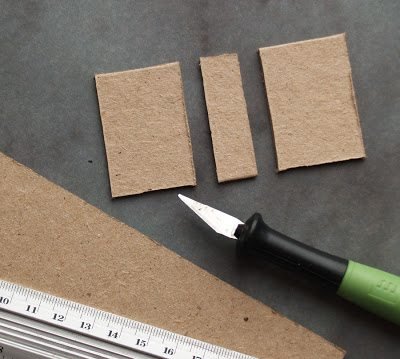
Step 4. Cut out the cardboard base for a hardcover: two covers size 3 by 4 cm and a spine corresponding to the thickness of the booklet (about 1 cm), glue to the scrap paper you selected, leaving a small distance between the covers and the spine.
Step 5. Cut, bend and glue the paper from the inside of the cover.

Step 6. Shilom makes a hole in the spine of the binding and inserts the ring, to which we will then fasten the base of the keychain and the ornaments.
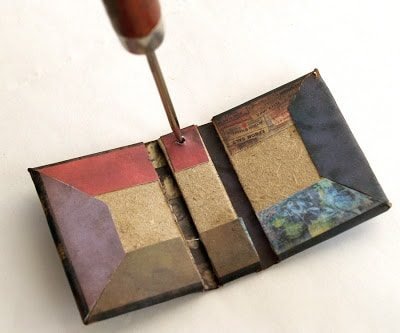

Step 7. Paste the booklet: apply the glue on the inside of the cover, on the outer pages and the back of the booklet, glue it. If necessary, you can put the book under the press for 30-40 minutes. The book is ready!

Step 8. We decree at our discretion.

Cover 2:
Step 4. Take the fabric to print on the printer and print on it any desired pattern, pattern, etc

Step 5. Cut, bend and glue the paper from the inside of the cover.

Step 6. Tone the distress ink edges to give the vintage appearance to our cover.

Step 7. We cover with glue for decoupage on the fabric, to protect the cover from various effects.

Step 8. Shilom makes a hole in the spine of the binding and inserts the ring, to which we will then attach the keychain and jewelry.
Step 9. We paste the booklet: put the glue on the inside of the cover, on the outer pages and the spine of the booklet, glue it .. If necessary, you can put the book under the press for 30-40 minutes and the booklet is ready!
Step 10. Decrypt.
In addition, as a cover, you can use pieces of leather or make a soft cover, which also looks very attractive, but less wear-resistant.

Enjoy your creative work and inspiration!
courtesy: liveinternet