Marigolds in the technique of quilling
Hello friends! Today, exactly two years of my plaguing bytya Masters in a wonderful country. I decided to mark the occasion of the new work in autumn colors. At the same time, and a small workshop to you as a gift!

Need paper strips 3, 7 mm and 1.5 cm yellow and red hues. I have them 27 cm long – a Korean version. More will be needed in the green winding wire, cardboard, sticks, PVA glue gun, punch leaf, background paper frame.

Flowers lush marigold petals with jagged edges, so to create the appearance of sharp bends, I took as a basis for a heart shape of two “drop” to 1 n. Red. On the edge I bypassed layers 2 yellow stripes.

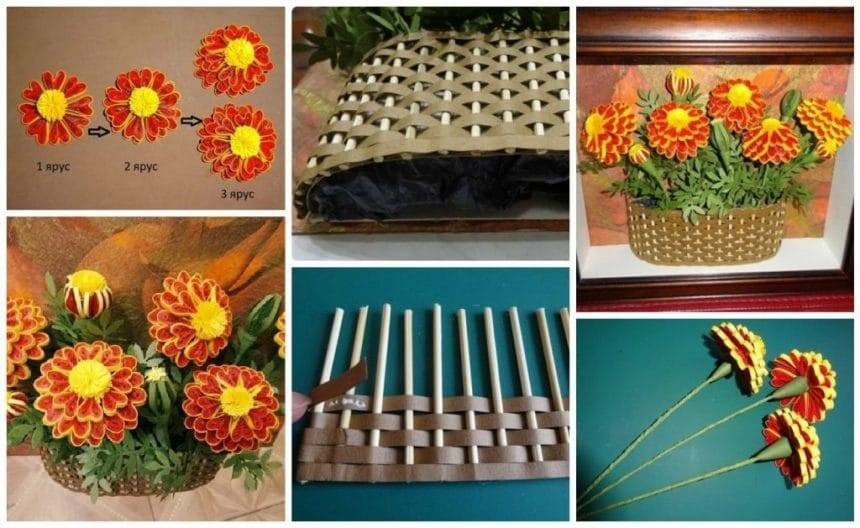
In a flower out primerno34-36 bands. Petals have to do in three sizes: large (7-8 pcs.), With the promotion of the spiral to 17-18 mm; average (7 pcs.), with promotion to 13-14 mm; and small (6-7 pcs.) – halves of the strip at each “drop” to the promotion of up to 10 mm. We glue them in pairs and go around the contour of the two layers of yellow stripes. In the middle of a I took a 1.5-cm-hand yellow strip and slice it thin fringe at a depth of 6-7 mm. After stranding remains below a dense column, which then is going to flower.

Here is a diagram of the assembly. First glue the lower tier of the largest petals. They fit 7-8 pieces. Can be glued much closely, you can with a slight indentation. But be sure to tilt slightly downward petals to receive the domed shape. Further, sticking onto the second tier is already in a staggered arrangement with respect to the 1st tier. And last of all – the top tier of the youngest leaves. They just fall right up to the midway.

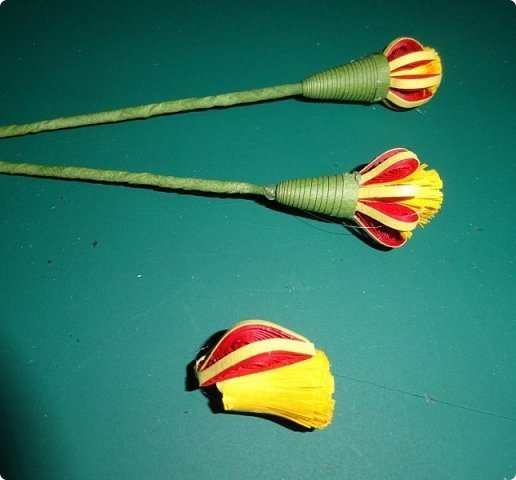
Then twist the two 3-mm-O cup of green cone-shaped strips, process inside with white glue and give dry. With the end of the leave 1.5mm hole to insert the wire. Fasten it inside the adhesive gun. On top of the same gun “plant” assembled flower.

For all the buds do the same, only the twist is not “drop” and “eyes” with a smooth back. These backs glue them to the same fringe middle, cut a circle, and then sit down on the stem with a cup. By the way, I stalk thickens napkins to 2-3 mm, since wire was initially quite thin.
You can make and such unopened, buds. Then need “eyes” with a smooth back green. To one another in a circle of glue is very difficult, so I first tokuyu twisted-tube column of green stripes 1.5 cm, and has stuck to her “eyes.” Top remains a small depression in which you can insert a tiny pussy. Well, it’s like a flower just beginning to proklёvyvatsya.

I looked at the street to living marigolds. They are like leaves on rowan, only smaller and with numerous branches. Luckily found a suitable punch, nashlёpala a bunch of leaves. But they turned out to be very much smaller. So long green strips (2 mm wide with 2 layers) stuck them in several pieces – for the pomp.

Foliage had to do very much, because it really marigolds just drowned!

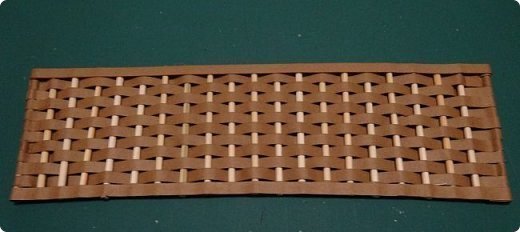
Go to the basket. Came up with this … And do not take it based on sticks, skewers for BBQ, I think … They are quite strong and long, so cut them with a sharp knife into three parts 6 cm. She took a strip of brown 7 mm width and wrap the ends to stick it to between minus 20 cm. Fix the PVA glue.

Pencil put notes on the strip through every centimeter and become a glue gun trained on her wand.

Next pletёm 3-mm strips of the basket, securing the ends of the rear side with white glue.

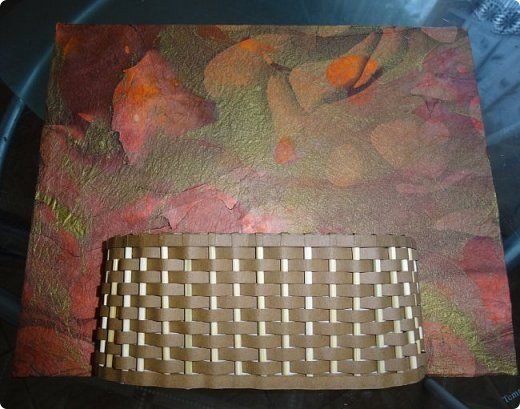
Braids ready. Above and below the glue from the front of two restrictive bands.
Inside glue to the base with the desired bending small soft cardboard rectangle larger than the basket to get valves.

And then back to the valves a hard cardboard glue to fix the shape.

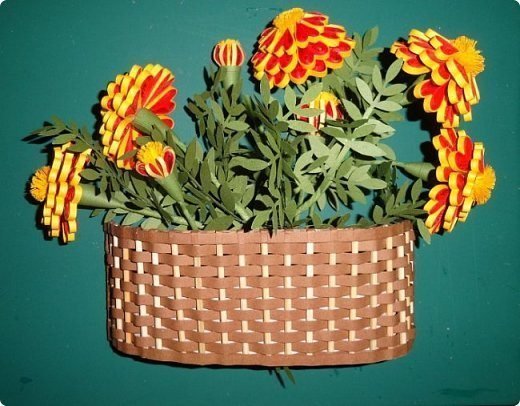
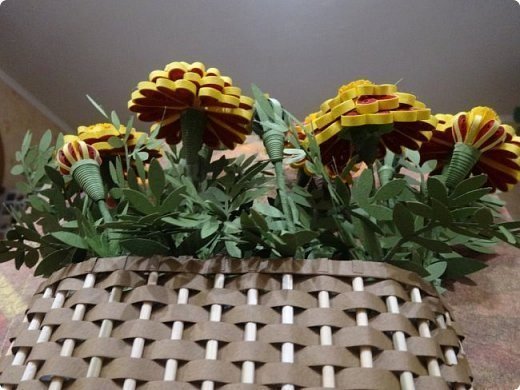
This is the stage of fitting a basket of flowers. It turned out that the stems were very long, and they had to be cut almost in half.
Now you can do the most enjoyable – assembly. Background chose this, although perhaps a bit darkish still work, but very autumn. Other options, like it or not, in general does not fit, and can not draw.

Glue stick adhesive pattern to the substrate on the gun – the basket to the background but not in the region, so as to remain below 5 mm to be inserted into the frame.
Flowers glue inside the gun. Something at the very backdrop and under something puts a pile of thick cardboard to the flower come to the fore.

And finally, buds.

In the last step from the bottom depth invested basket black soft paper (from shoe boxes) to create the effect of the soil.

That’s all.

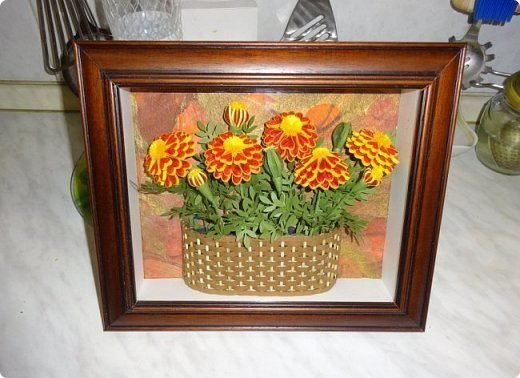
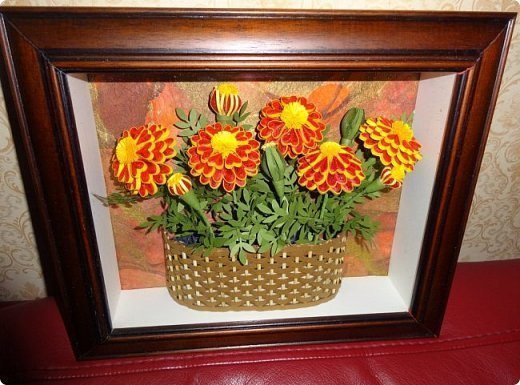
So the composition looks from different angles.

Rama did my husband’s favorite, for which he obeisance and respect !!! Frame size 30h25 see the edges of baguette, depth – 5 cm, width 3 cm baguette.

Courtesy: stranamasterov.ru