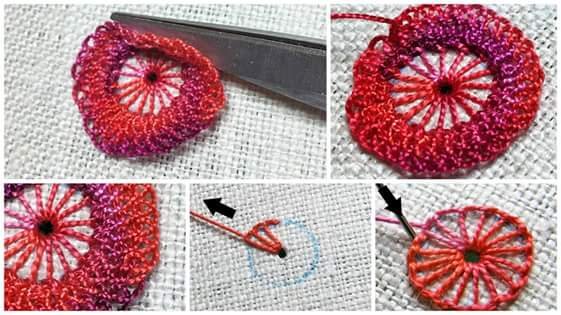
Today’s Stitch! tutorial explores the buttonhole wheel eyelet, expanded a bit with some lacy surroundings.
This stitch combination can be worked in any kind of embroidery thread, and it can be sized up or down. It would make a terrific addition to encrusted, textured embroidery projects.
You might put it to good use in stumpwork or in Brazilian dimensional embroidery. It can be used for flower centers – or just as is, to add a spot of interest to your project!
Let’s get started!Let’s get started!
We’re going to start with a buttonhole wheel eyelet.
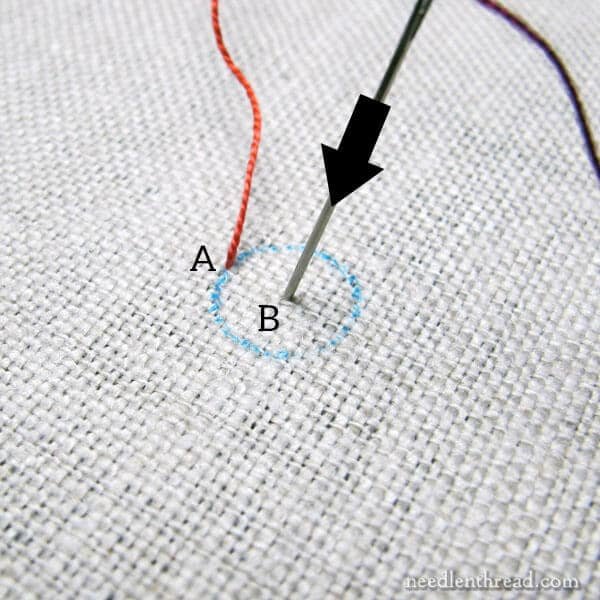
I’ve marked a small circle on my fabric – it’s just smaller than 3/8″ of an inch in diameter. The finer the thread you use, the smaller you can make your circle. You’ll have to experiment with different threads to see what kind of proportions you like, between the size of the circle and the weight of your thread.
For the foundation wheel here, I’m using a piece of thread that’s about 18″ long.
Bring the needle and thread to the front on the design line, and take the needle down into the fabric in the center of the circle.
Because we’re working an eyelet, linen is a terrific fabric to use for this. If you enter the fabric at B in the “hole” in the weave (rather than splitting any of the linen threads), you’ll be able to form a small eyelet, or open hole, quite easily, by simply forcing the linen threads to part.
To make the hole, before you pull your needle through to the back, just twirl your needle around in the fabric a bit, forcing your fabric to open up in a larger hole.
I just swirled my needle around in that space, until I had a nice sized hole.
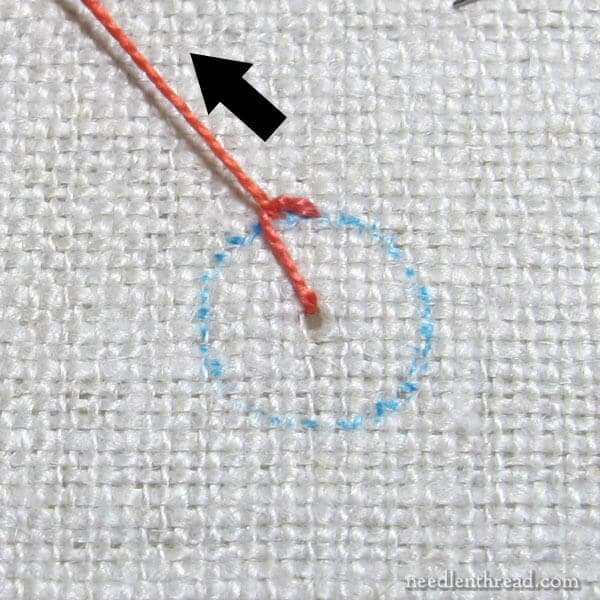
Now, I know a lot of stitchers have problems making buttonhole wheels and keeping the outline of the wheel from buckling in on itself.
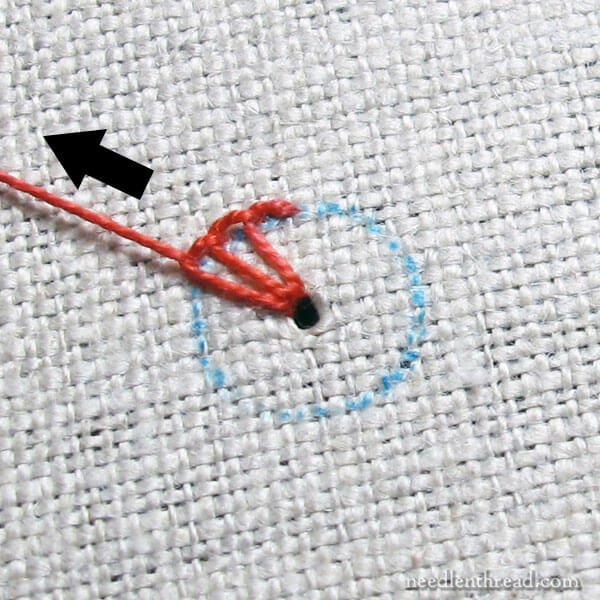
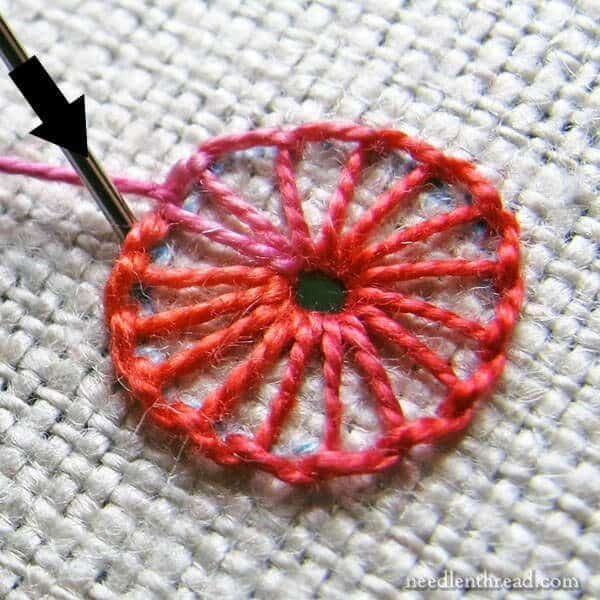
When you make each buttonhole stitch around the wheel, it’s important to maintain tension on the working thread, pulling it in the direction that the little “elbow” in the buttonhole stitch points.
This tension on the working thread will also help open up your eyelet hole a little bit.
As long as you maintain tension on your working thread with each stitch, the edges of your buttonhole wheel shouldn’t buckle inwards.
Continue around the wheel, maintaining good tension on that thread!
Now and then, you can swirl your needle in the center hole, too, to open it further as you go along.
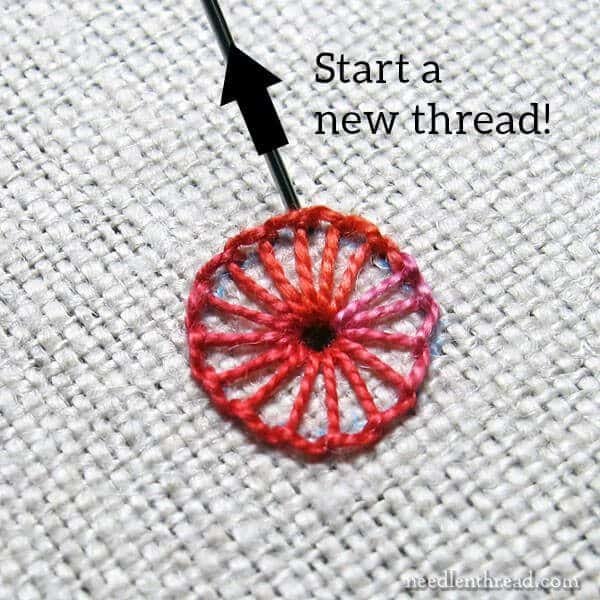
When you get all the way around your wheel, make sure to gauge the final stitches so that they are more or less evenly distributed. The “elbow” of your last stitch should line up right next to where you initially began stitching (point A).
To secure the wheel, take the needle and thread down into the fabric behind your very first buttonhole stitch.
Once the wheel is complete, change threads!
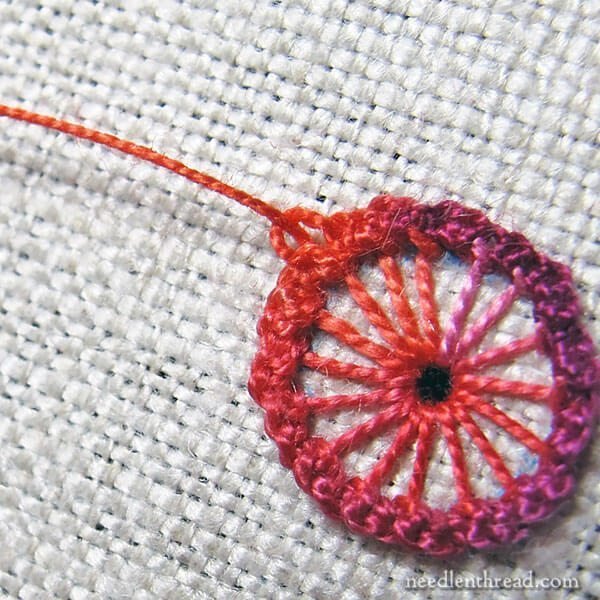
This time, you’ll want a long thread. For the rest of this element, I’m using a 37″ long piece of thread!
It’s important at this point to take your time and go slowly. If you’re working with a long thread, chances are, it will twist up now and then, and if you’re working really fast, you’re bound to get slip knots. So take your time! Occasionally, you might hold your work up in the air and let your needle and thread drop towards the floor, to allow your thread to untwist if it’s getting cranky.
Bring the needle and new thread to the front of the fabric under the end of the buttonhole wheel, at the tip of any spoke.
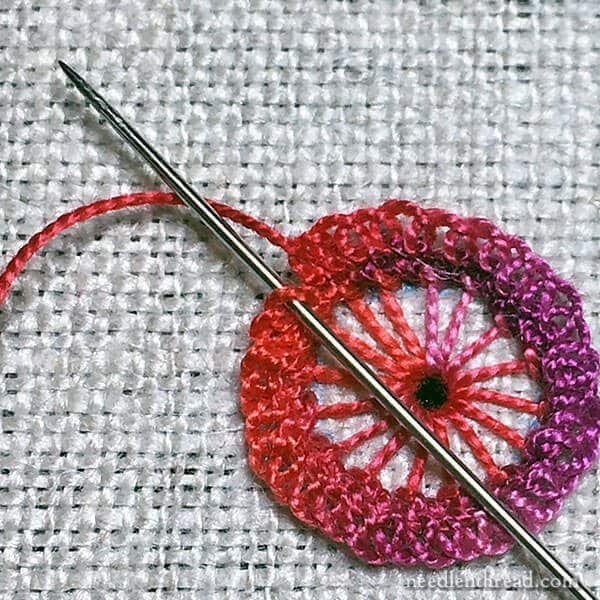
Now you’re going to work three buttonhole stitches over the edge of each buttonhole stitch on the wheel.
These three stitches should be worked rather tightly so that they snug up around the previous buttonhole stitch edge. The three stitches may seem a bit tight in that small space – and that’s ok! They might even ruffle up a bit – and that’s ok, too!
In the photo above, I’ve completed three buttonhole stitches over the edge of the first foundation buttonhole stitch, and I’m moving on to the second foundation stitch.
Notice how tight and close those three little buttonhole stitches are. That’s what you’re aiming for!
Work all the way around the buttonhole wheel, buttonholing the edge.
When you arrive back at your first set of loops, without going to the back of the fabric, you’re going to start another round of buttonhole stitches worked into the small, tight buttonholes on the edge of the wheel.
This second round of buttonhole stitches will be a bit different, though!
Working over the edge of each of the small, tight buttonhole stitches on the first round, you’ll work one buttonhole stitch. But instead of tightening the stitch up, leave the loop somewhat loose and open.
You can experiment and play around with just how loose you can leave these stitches. I’ve left them open enough that I can see the open loop clearly, but not so open that they are particularly floppy.
Work all the way around the wheel, making one loose buttonhole stitch in each of the tiny, tight buttonhole stitches you worked in the first round.
Eventually, you’ll be back at your first loose loop!
Without passing your needle and thread through the fabric, you’ll pass into the middle of that first loose loop, and work another loose buttonhole stitch.
And then, you’ll progress all the way around the circle again, working one more loose buttonhole stitch in each loose buttonhole stitch of the previous row.
Now you know why you want to work with a long thread! You’re continuously circling, without the opportunity to pass to the back of the fabric to end and change your thread again.
Eventually, you’ll end up back at the first loop of your second round of loose buttonhole stitches.
And you could keep going like this forever, I suppose! But this is where we’ll end it!
To end the thread and secure the stitches, you’ll just cross into the first loop of this second loose round, crossing the intersection where you’ll see the last stitch and the first stitch of the round overlap.
Take the needle and thread to the back of the fabric and secure the thread by passing under the back of the stitches from the buttonhole wheel eyelet.
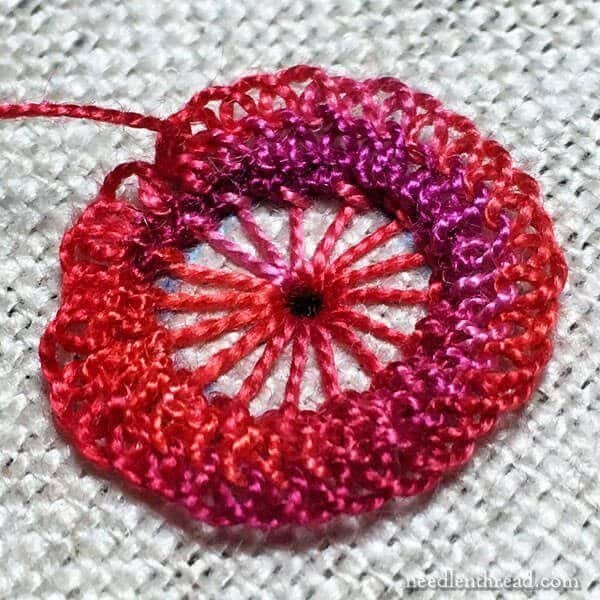
You’ve just created a detached, lacy circle that grows out of the buttonhole wheel eyelet!
You can see that most of the lacy circle is completely free of the fabric, except where the first round is worked in the buttonhole wheel eyelet and where you’ve anchored your last stitch.