Stands for pens from CD
– Seven drives
– Saw (jig saw, a red-hot nail or husband Bulgarian 🙂 choice)
– 2-3 leaves from a school notebook in the box (Drawing templates)
– Do the drawing tools (pencil, pen – who is more convenient).
– Sandpaper or file for processing edges.
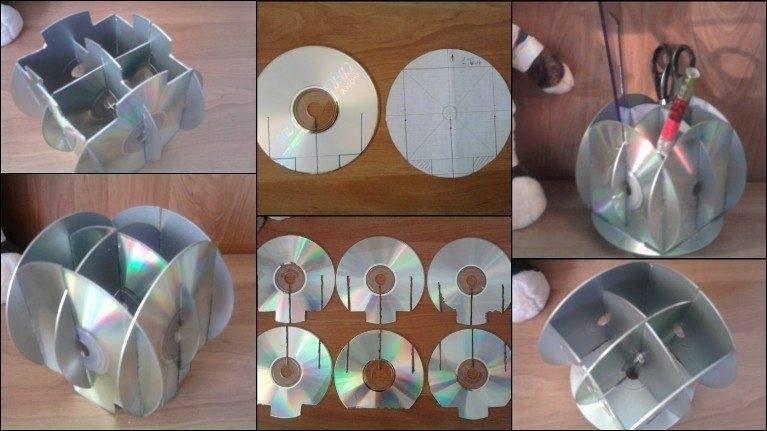
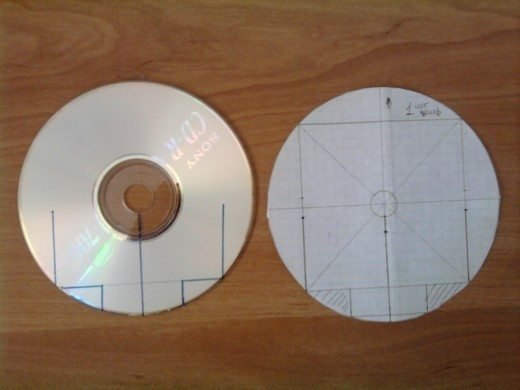
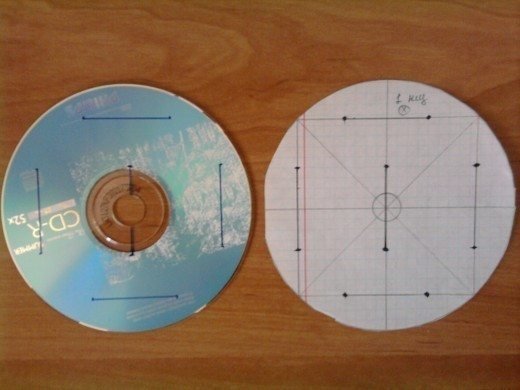
1. contours on a paper disk on the outside and inside. We inscribe a circle in a large square. This will be the basis of all templates. Then we will see in the photos that remain to finish.
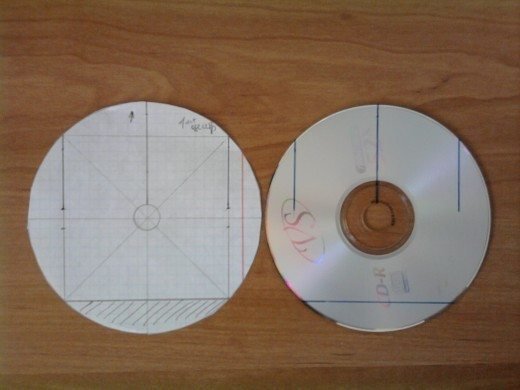
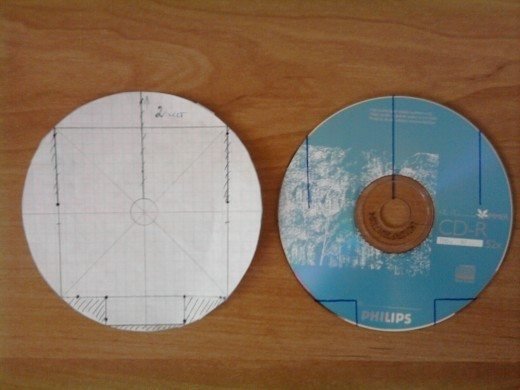
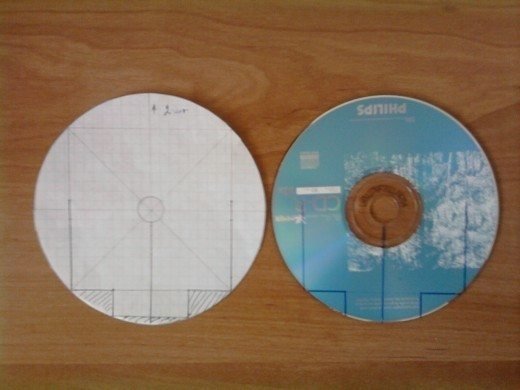
2. Cut the templates and using portable sewing key points on the disks. Then, on the disks themselves and connecting these points we get the cut line.
a) It is a central part, we call it A. Cut on one disc.
b) The central part B. Also in the single copy.
c) The bottom of the (call just in case B). One detail.
d) The lateral part, their needs to be done on two discs.
d) And the last part of the D side, too, the two parts. (actually it is one in one cut as a central part … And only now smilenoticed, so you can just cut three central part A).
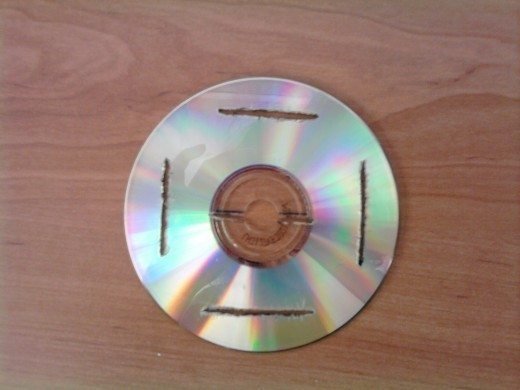
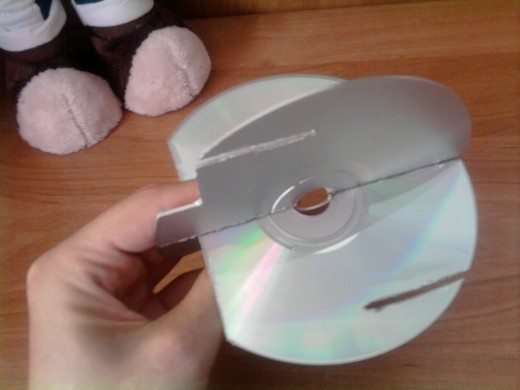
3. Now take a hacksaw, Jigsaw (this time I hot fragment of cloth from a leaky jigsaw – it seemed to me more convenient) and proceed to the cutting out of the planned lines. It should look like this:

– It turned out that some discs poorly kept shiny coat … And I did not know that …
Here’s the finished floor:
Note that after the assembly design is not “grimacing” and last longer, the thickness of the cut should not be thinner than the thickness of the disc, and the need to cut as straight as possible line – no curves and waves.
And one more note: Disks – This place is a fragile construction, may break during cutting. Therefore lozhite drive so that it is only a couple of millimeters advocated working surface (the edge of the table on which the sawing) and keep tight! laugh
4. The edges of the cuts are processing a file or sandpaper to avoid burrs. I then edging covered one side of the disc silver paint from the spray, so as not to be seen graffiti on the disks. Shiny side I did not paint – and it is so beautiful.
5. Now pick:
a) The central part is joined to the central part B:
b) In the remaining sections of the central part

c) Putting the resulting structure with the remaining side cover D:
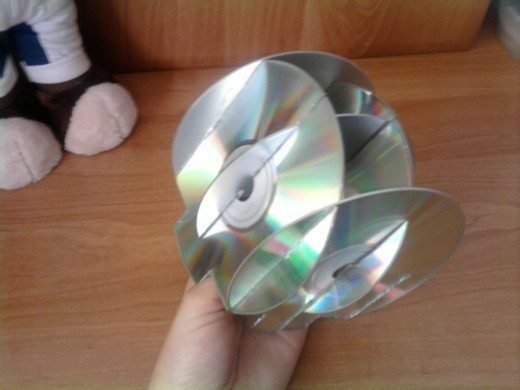
And so
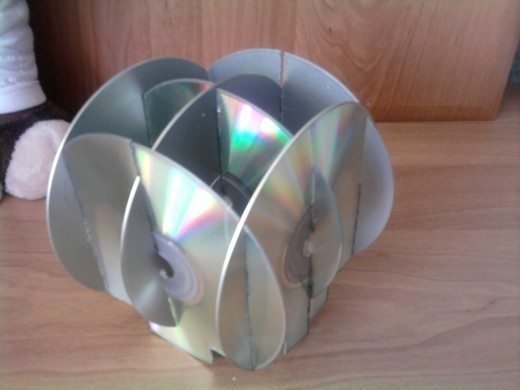
Stand almost ready, lacking only the bottom:

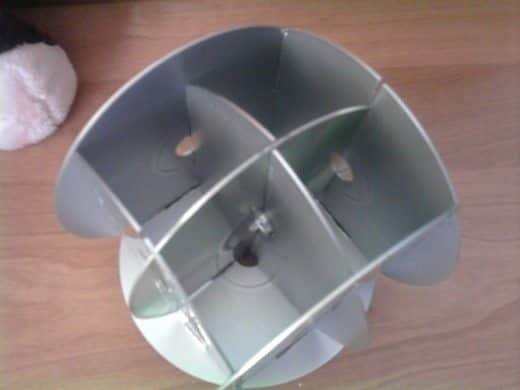
(this is a bottom view)
d) We put in the bottom:

Overturn

top view:
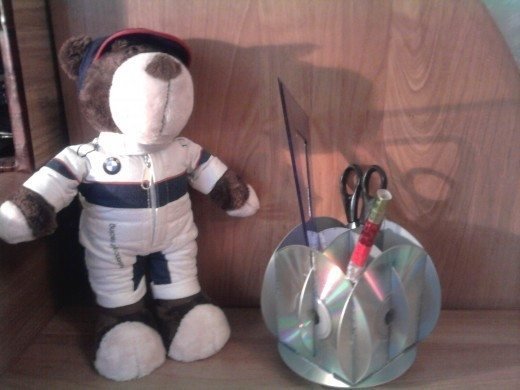
and smile fill. Here’s what happened!

Courtesy: www.liveinternet.ru