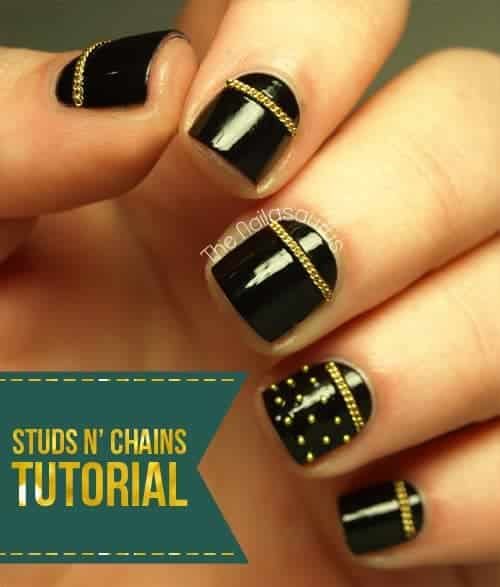
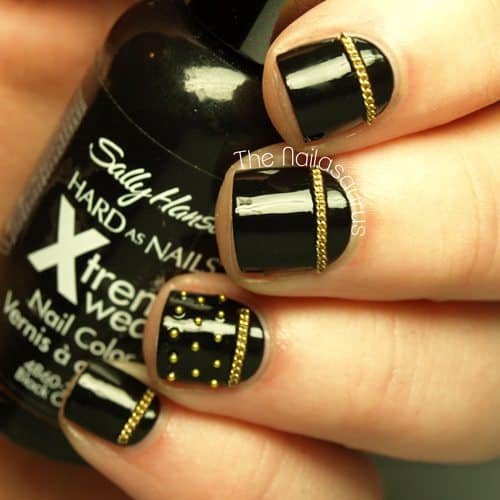
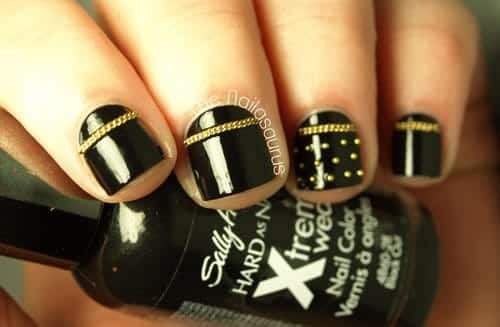
Street Style and the call for inspiration is ‘heavy metal, pop art, and graffiti glam’. I stopped reading at heavy metal… it’s got to be the studs for me!
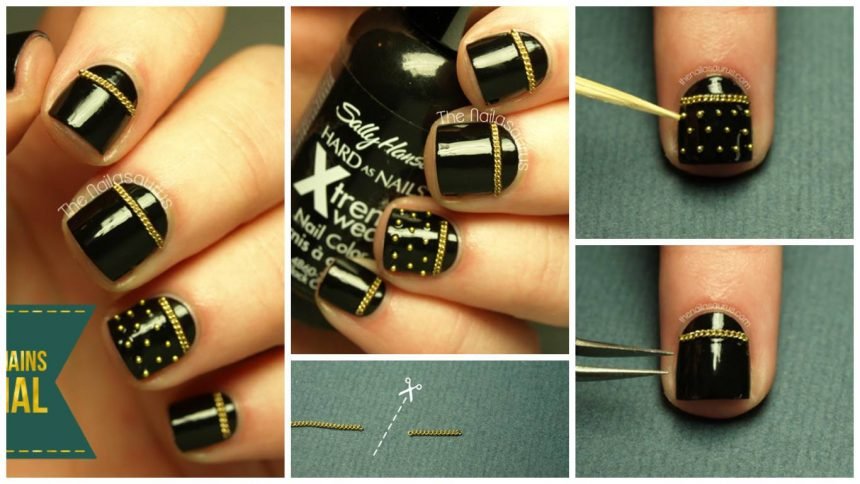
Before you start make sure you’ve got everything you need. The only polishes I’m using for this are Sally Hansen Black Out and Dries Instantly.
I’m using some gold bullion for the studs, an old necklace for the chains, a pair of pointy tweezers, a nail art brush and a few toothpicks.
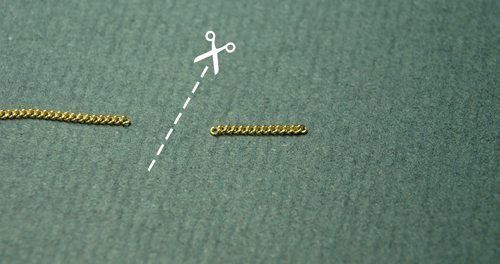
I’ve got a selection of chains which I’ve collected just for nail art purposes! Some of them are necklaces I’ve tired of and instead of throwing them out I’ve done a bit of upcycling and started wearing them on my nails. Others are ones I’ve picked up on the cheap in stores. If you need a chain, just pop into places like Claire’s to see if there are any chains thin enough for your nails.
To avoid any smudges on your polish, before you even paint on the base color measure and cut off a piece of chain for each of your nails. Just rest it across to get an idea of how much you need, then snip it off with scissors, wire cutters or anything else that will do the job!
Start with a base of Sally Hansen Black Out and let it dry.
Using the nail art brush, paint on a line of clear nail polish where you want to stick the chain and move swiftly on to the next step…
Place the chain across your nail and pat it down into the polish to make sure it’s really stuck there!
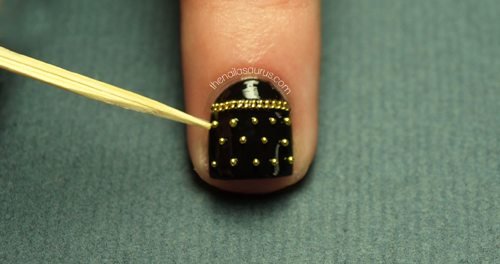
I always use a toothpick to place the studs. I dip the end in a bit of clear nail polish to make it sticky and use it to pick up the fiddly little beads.
Add a coat of Dries Instantly and place the studs onto your nail while it’s still wet.
Finally, when everything is completely dry, dip a small paintbrush in acetone and sweep it along your cuticle line for a nice clean finish.