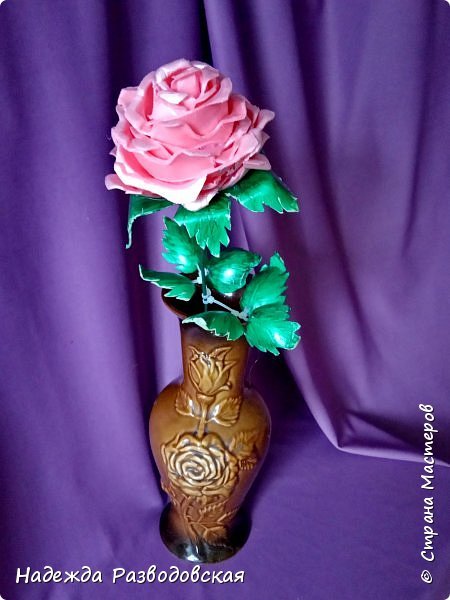
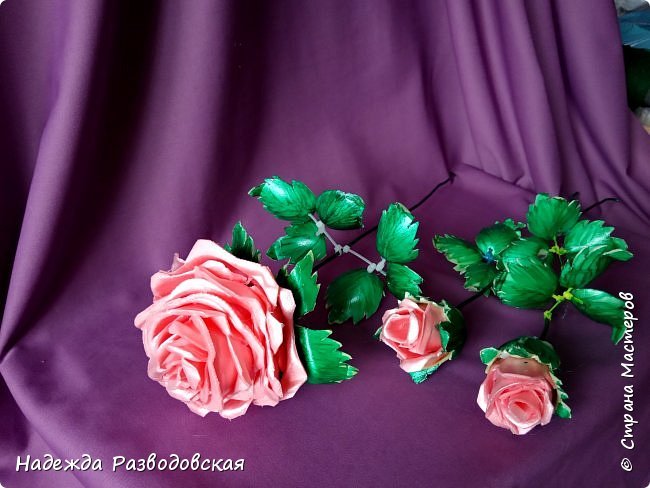
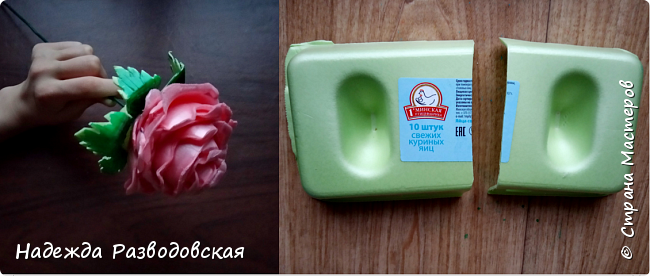
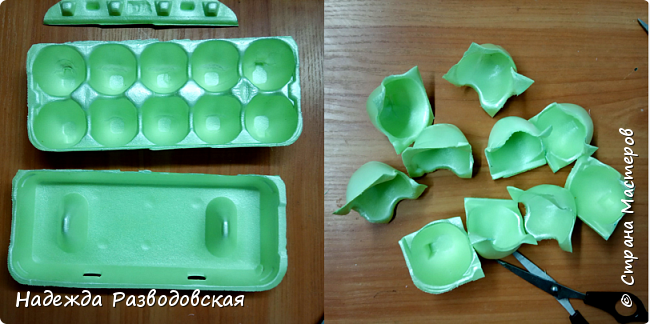
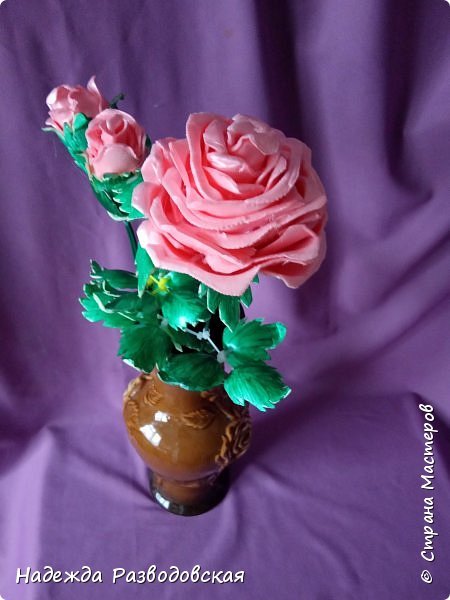
These roses can be made from egg packages.

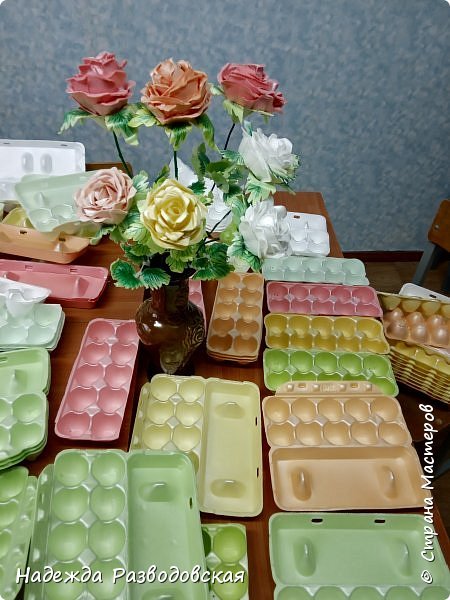
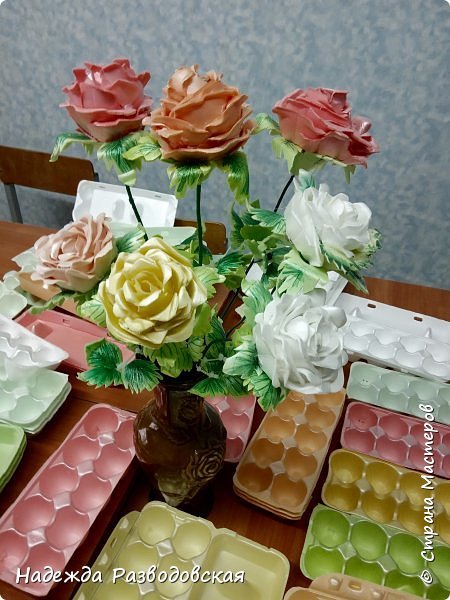
Recently, in Belarus, in grocery stores, they began to sell eggs in colored polystyrene packages. I immediately drew attention to the pink, pearl-casting egg packaging … And I wanted, as always, to experiment with a new kind of waste material. The results of such creative searches you see in the photo.


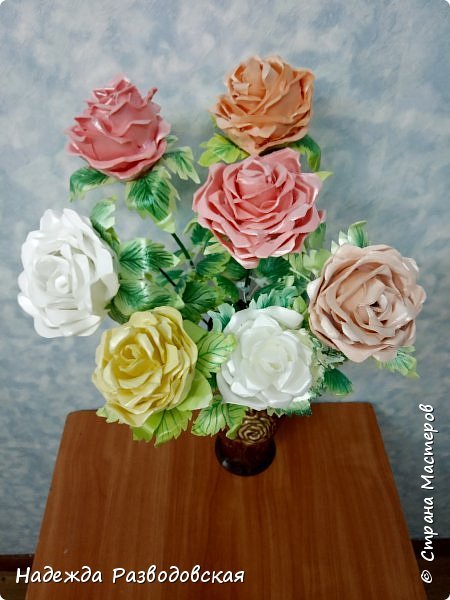
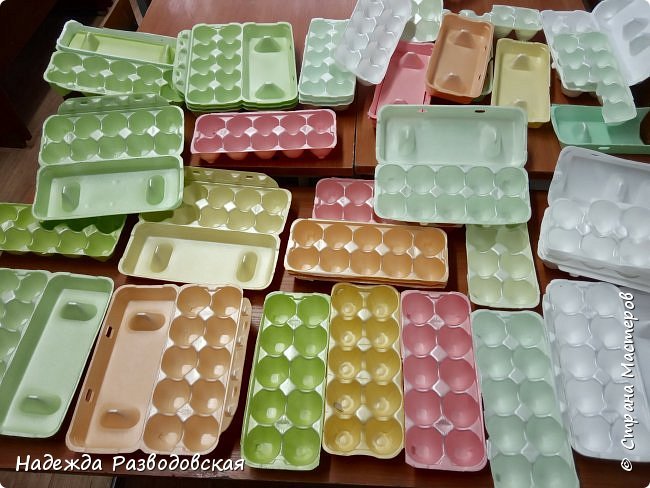
Yellow, cream, pink, green, white polystyrene egg packaging … this is a storehouse for creativity and the creation of beautiful crafts, especially flowers …
And we will try to make such a rose out of pink and green egg packages.
Here we will need such materials to create our rose:
– green and pink egg packaging (and if there is no pink and green, you can use white or another suitable color),
– green wire,
– cable ties, (used to tie cables or wires ) Such clamps come in different colors …
From the tools, you will also need a glue gun, which we will fasten the details of our flower, awl, small scissors. 
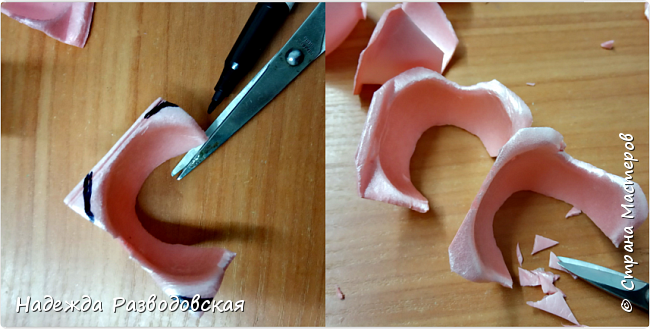
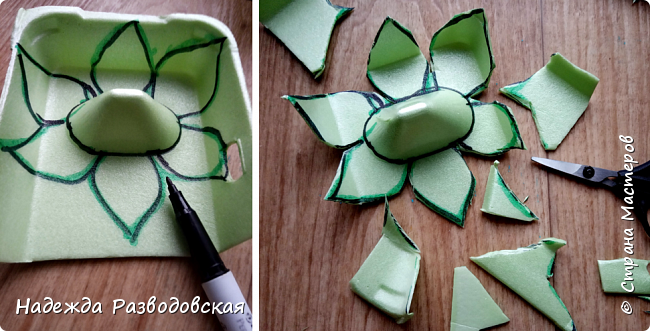
They cut the egg cells with scissors, trying to maintain the most pointed, curved out corners …
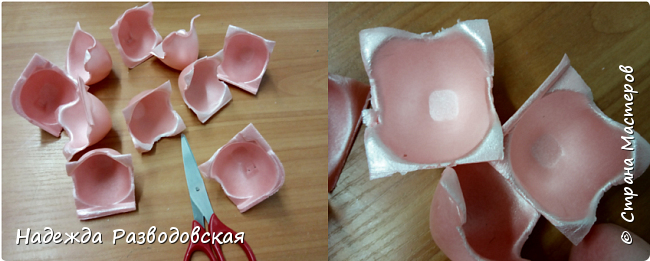
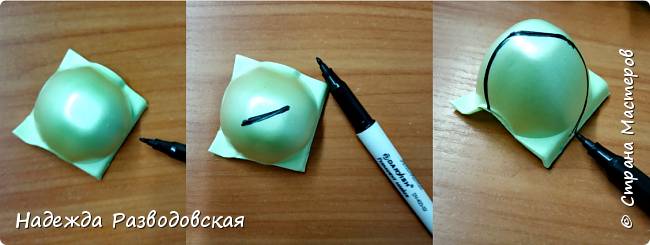
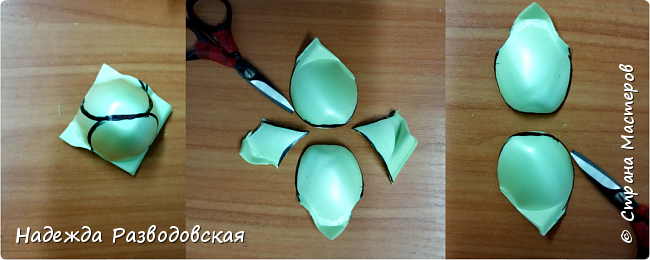
I marked with a marker the petal that we cut out of the cell, and so do with all the other cells … Narrow petals – for the middle of the rose, wide petals will border this middle …
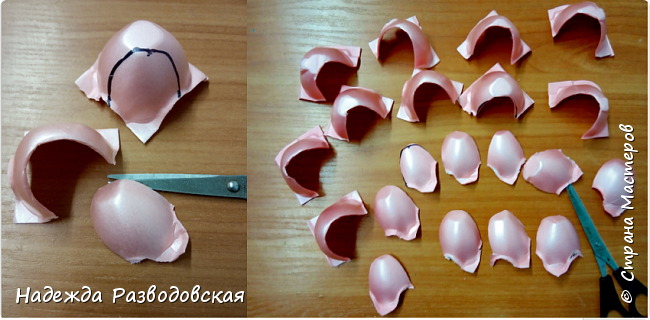
In wide (with three corners) petals-cells, we remove the bottoms with scissors so that such petals are as in the second photo … without bottoms …

I marked with a marker the corners of future petals that need to be cut so as to round them. But do not overdo it … try to leave the edges of the petals curved outward as much as possible, it is they who will give our rose the shape in modeling that we would like to get …
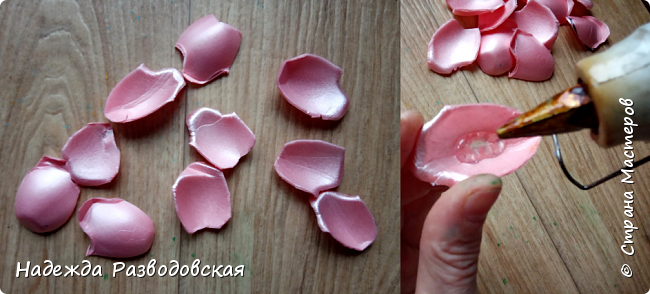
We begin to form the middle of the rose from narrow petals. Put a drop of glue on the first petal …
Glue the second narrow petal, then apply a drop of glue to the second petal .. paste the third …
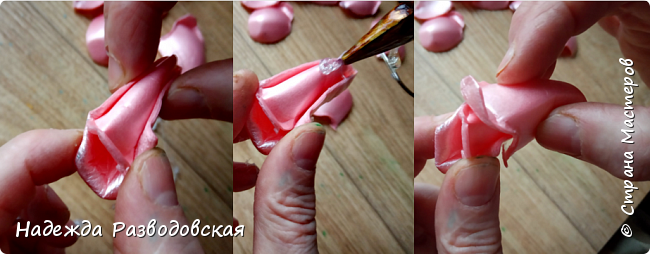
And so, turning the core of the future rose, petal by petal form the middle of our future rose.
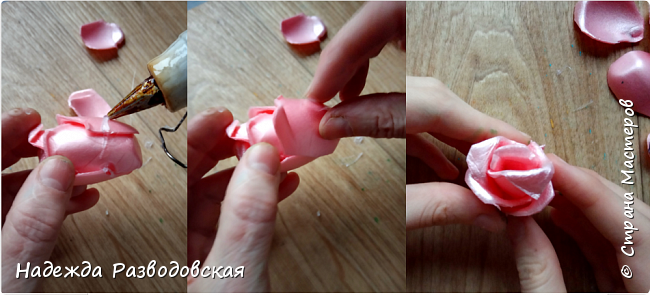
The core of the rose is ready, narrow petals are glued, fitted in shape …

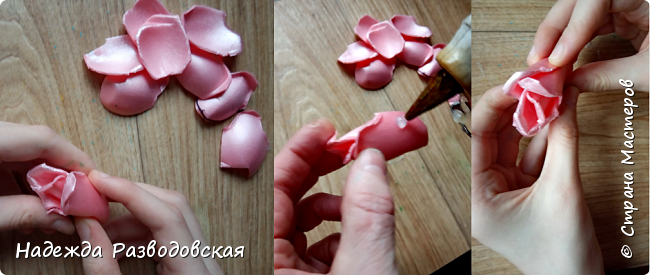
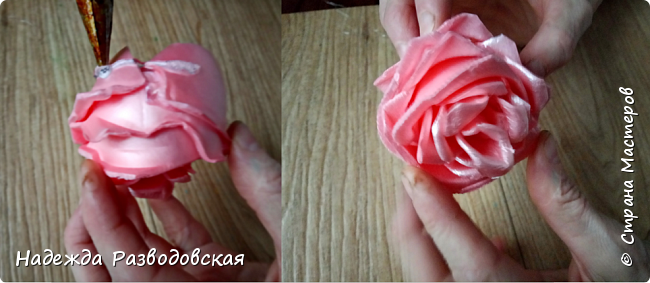
Now we will glue wide petals on the sides of the core …
Put glue on the side of the rose and attach a wide petal. Hold the petal until it adheres firmly …

Before gluing another petal, you must first apply it … look closely at how it is better to settle down … and then apply glue in this place, and then attach the petal and hold until it sticks.
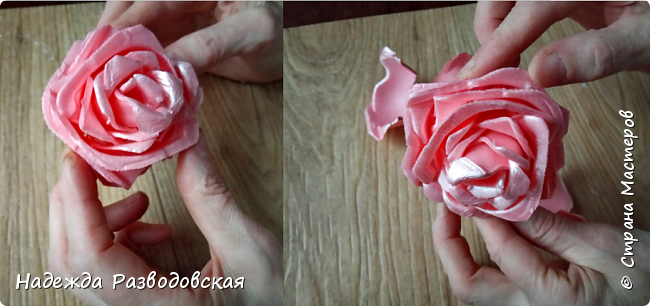
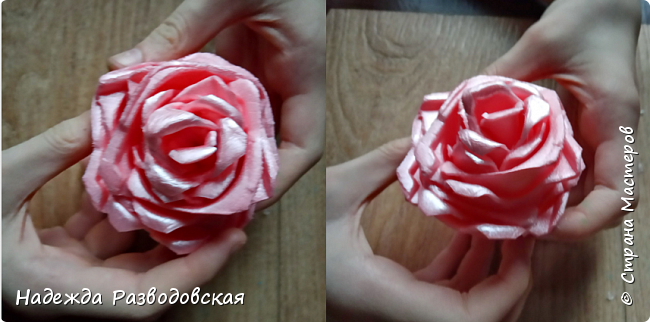
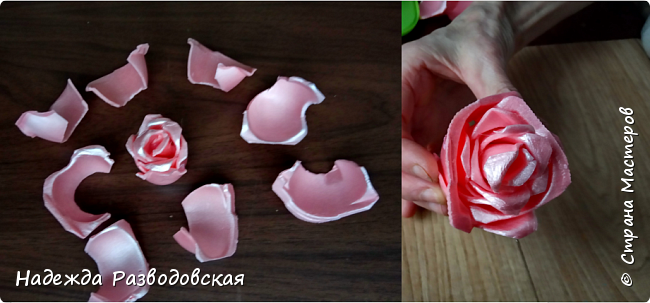
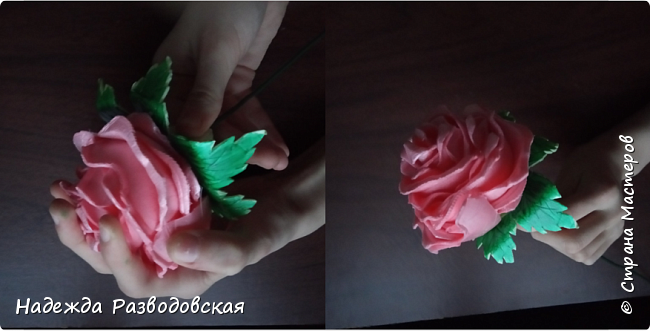
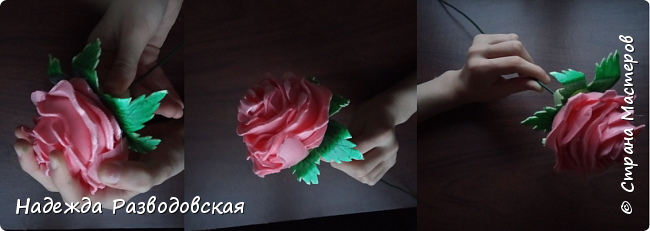
As a result, we got such a pink bud.
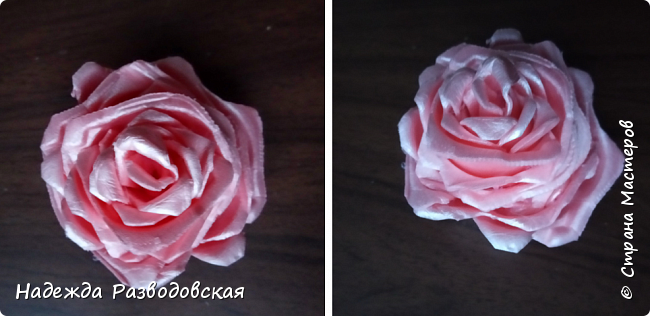
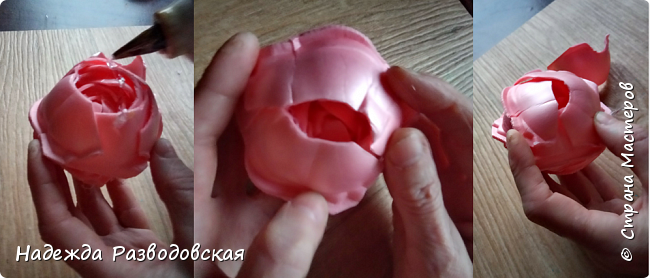
This is how the bottom of the rose looks in the first photo. We put glue on this bottom, and put on top of it another petals …
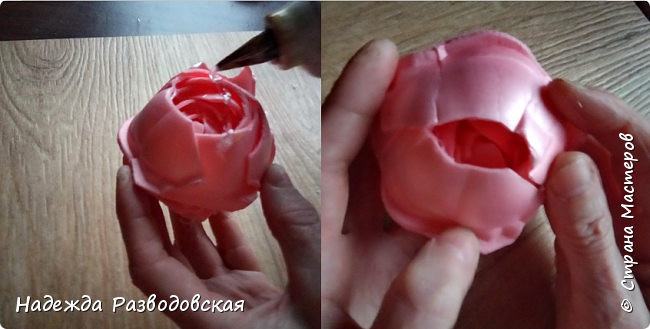
The hole in the lower base of the rose was minimized … Here we drop a drop of hot glue into this hole and put a wire into it …
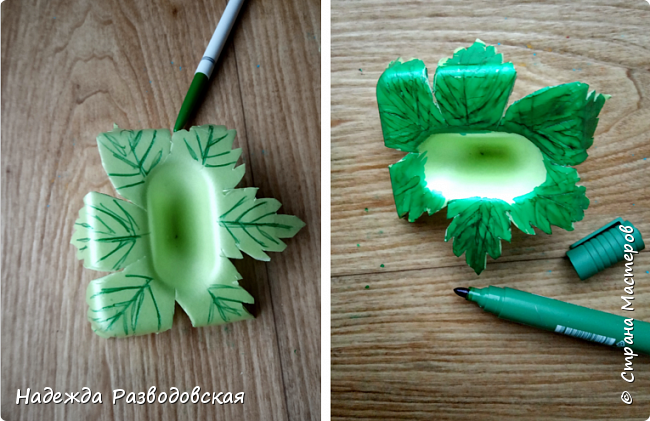
At the base of the rose, green leaves will be made from the top cover of the package. We have this form. It was no coincidence that I cut it into two halves …
On the inside of such a half, I marked with a marker the leaves around the conical cup, and removed the excess with small scissors. You can now see that we ended up with a sepal and receptacle for our rose.
They cut small cloves along the edges of the leaves of our sepals with small scissors …

A pen with a green rod drew veins on leaflets, and then they were tinted with a green permanent marker.
In the middle of a cone-shaped receptacle-sepal, an aperture was made with an awl, through which a green wire with a pink bud was passed.

Sepals glued to a pink bud with a hot gun
Leaves for roses will be cut from egg cells.
In the second photo, I marked the middle of the bottom with a marker. From this middle to the corner of the cell, I drew a leaf for our rose.
From one such cell, you can cut two round leaves with pointed ends …
After slicing the leaves from the cells, as shown above, cut small scissors on the notch leaves …

The green core showed the veins on the leaves.
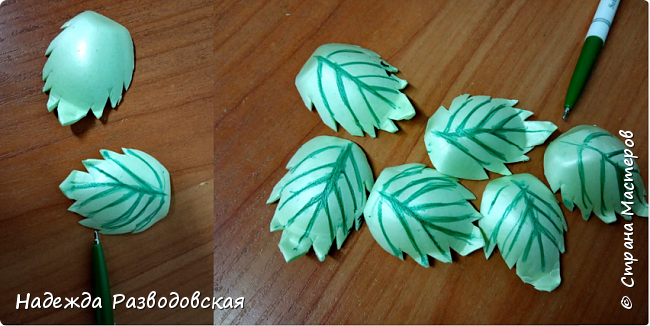
They painted over the leaves with a green permanent marker. And then with an awl, holes were made in the base of the leaves.

To fix the leaves on the wire stem of the rose, I came up with the idea to use these tie clamps

The photo shows how to fix such clamps on the wire-stem
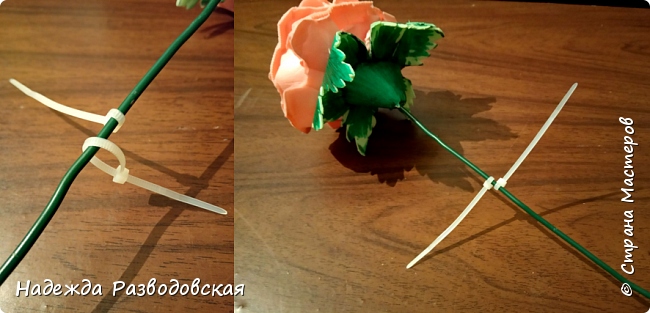
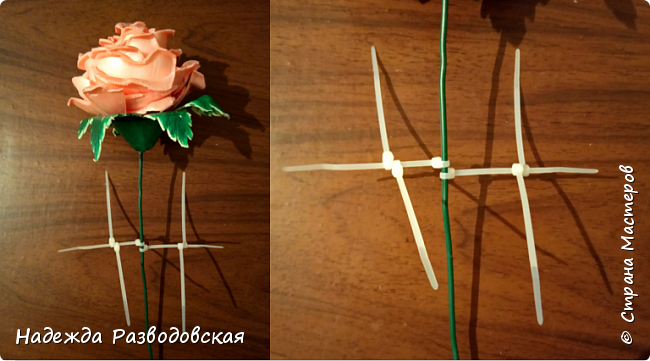
Now on the clamps themselves, mounted on a wire, we fix two ties in the form of a cross …

That’s what we should get …
Now, through the ends of these clamps, we tie our leaves through the holes pierced with an awl

On the underside of the leaf, drip at the hole
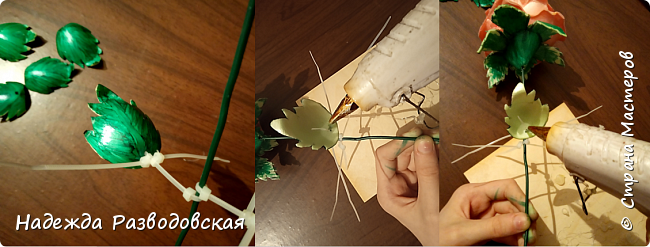
The first photo shows how the leaves of the rose are fixed on the clamps with hot glue after the glue has cooled down.

After the leaves were fixed on the clamps with glue, we cut off the excess ends of such tie clamps with scissors. This rose color turned out in the evening light …

So we made our rose using polystyrene egg packaging.

Thank you!
courtesy: stranamasterov