How to sew a bag with embossment

For this we need:
A piece of skin is about 60 to 80 cm thick, about 2.5 mm thick.
Inner lining by size.
Lower cutters 5 mm and 6 mm.
Threads (length not measured).
Needles 2 pcs. (For understanding in perversions enough one).
Lightning with a runner # 5 60 cm.
Rope diameter 8 mm.
Knife clerical.
Rubber hammer.
Glue.
Marker for the seam.
Set of stamps.
Slicker.
Means for polishing the ends.
Paint for the skin.
Antique.
Finish.
Rags, napkins.
If suddenly something is forgotten and it was found out do not judge strictly 🙂 and slippers do not need
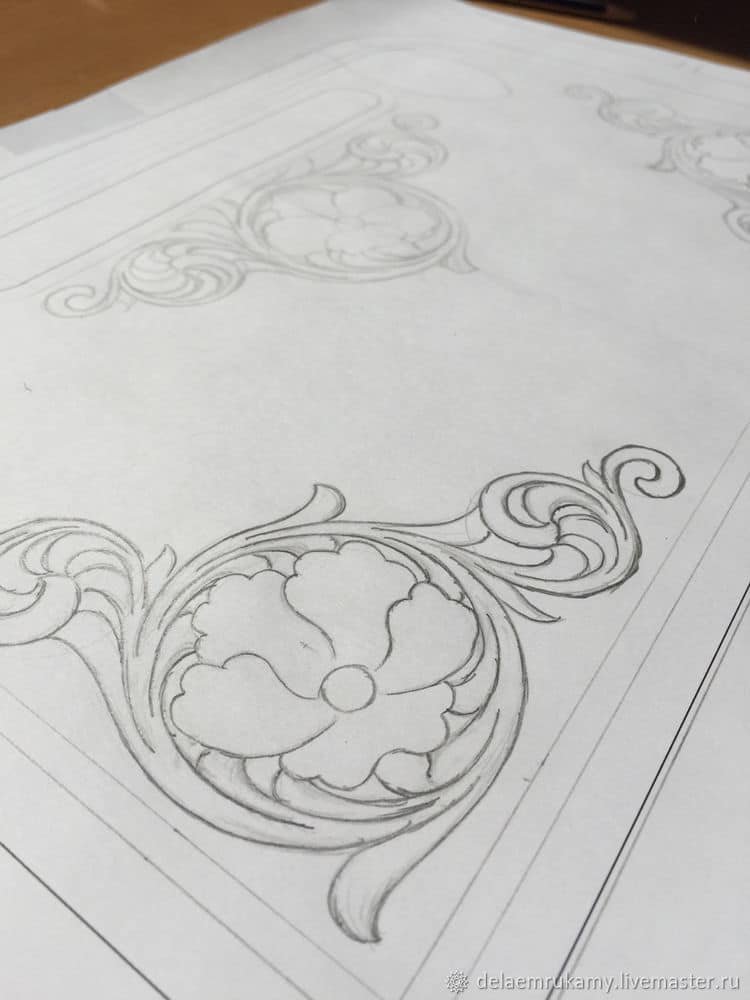
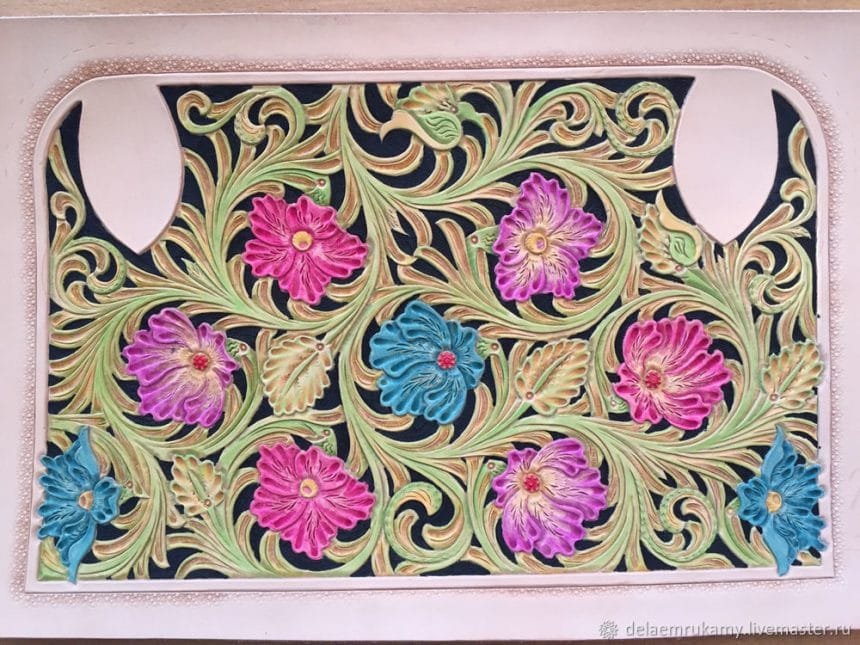
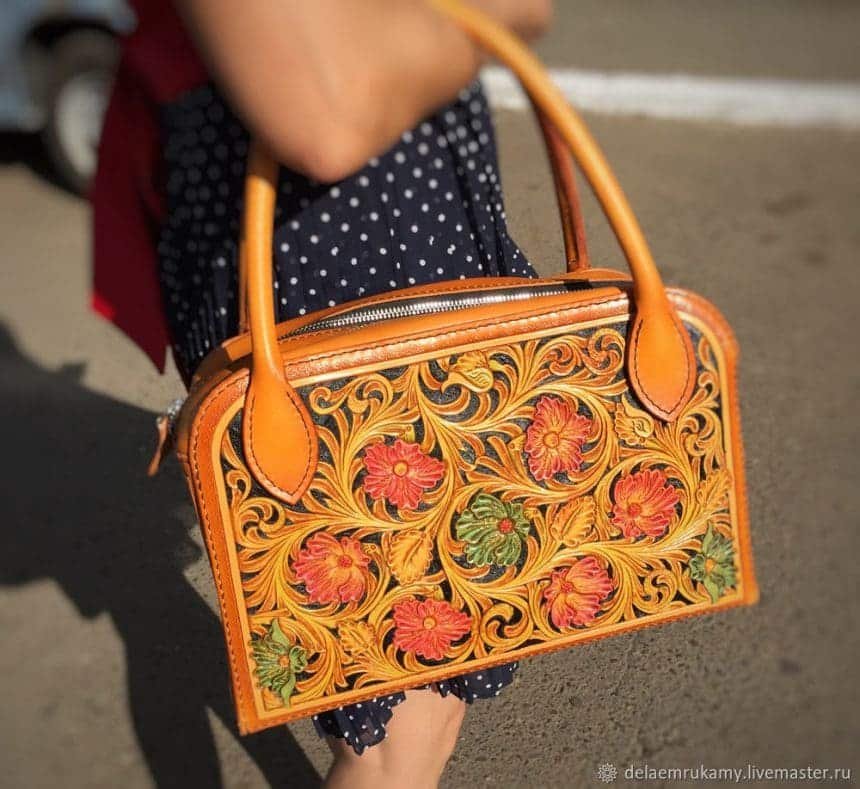
I started with the fact that I drew a picture of the desired result on paper (it’s easier for me), it gives an understanding of what is needed, the number of parts, what hardware and quantity are needed, etc.
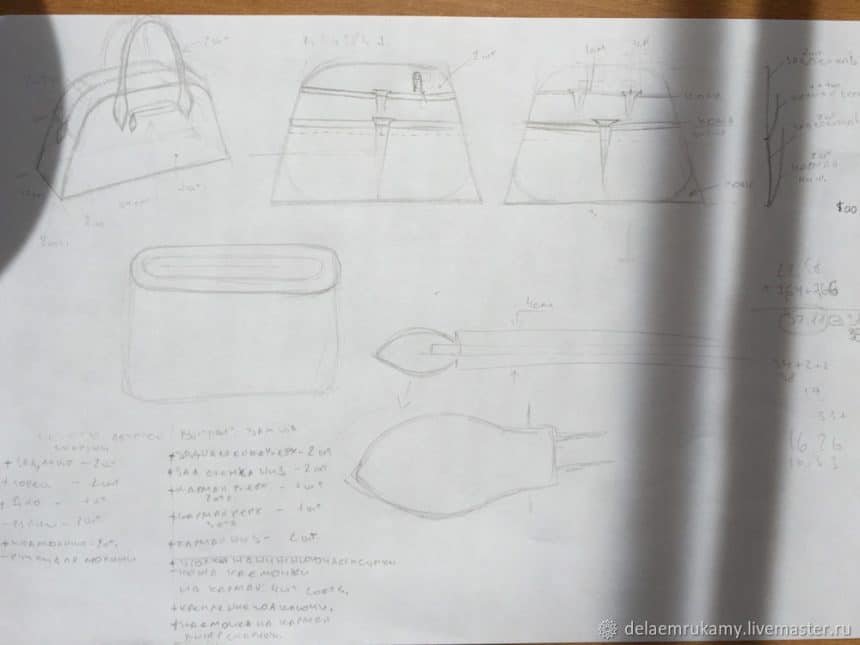
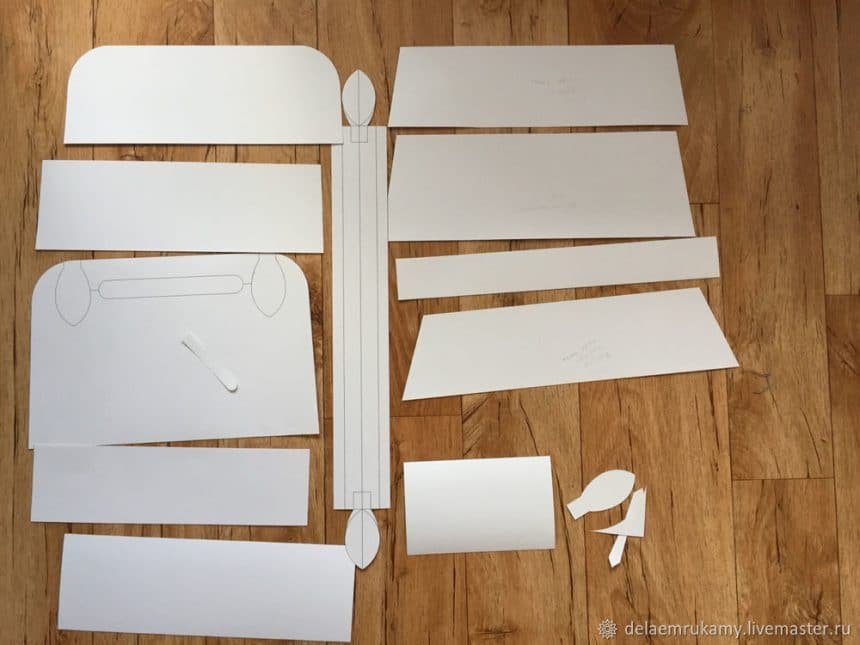
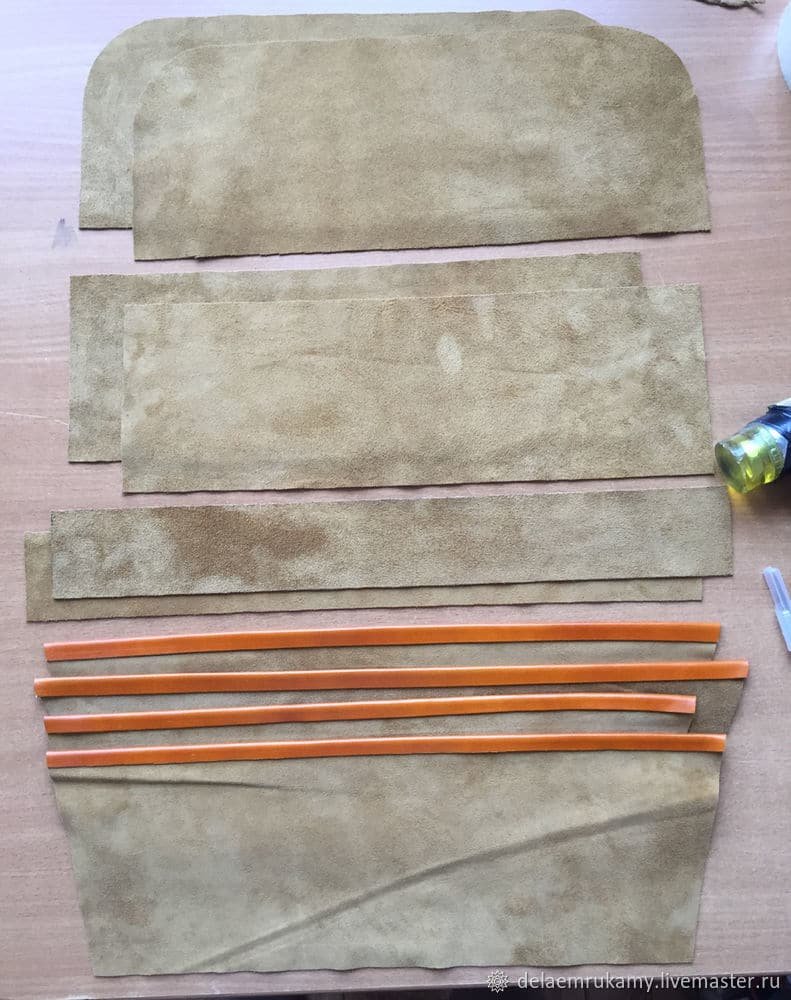
Next, I make a pattern in Autocad already with the sizes. Next, I take the received pattern and go to the RK and print it on the paper, then cut it neatly along the lines and I get in general this:
I glue together 2 A4 sheets for simple ways we are not looking for, and simply there is no A3 format 🙂 and I do a sketch of the drawing of the front and back or inside of the bag.
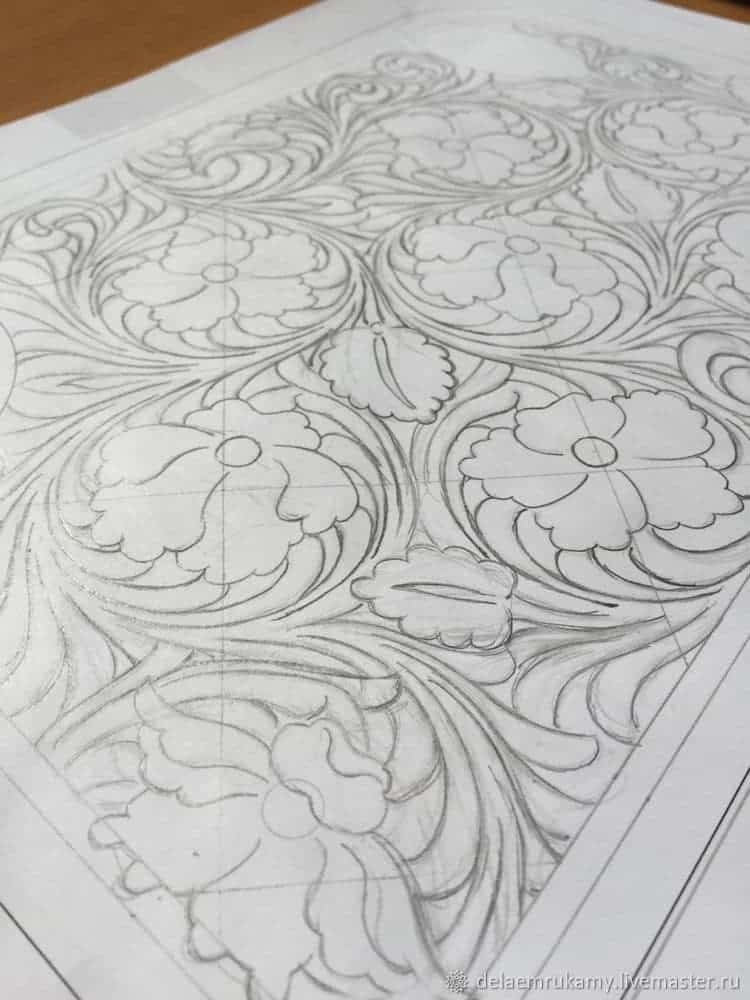
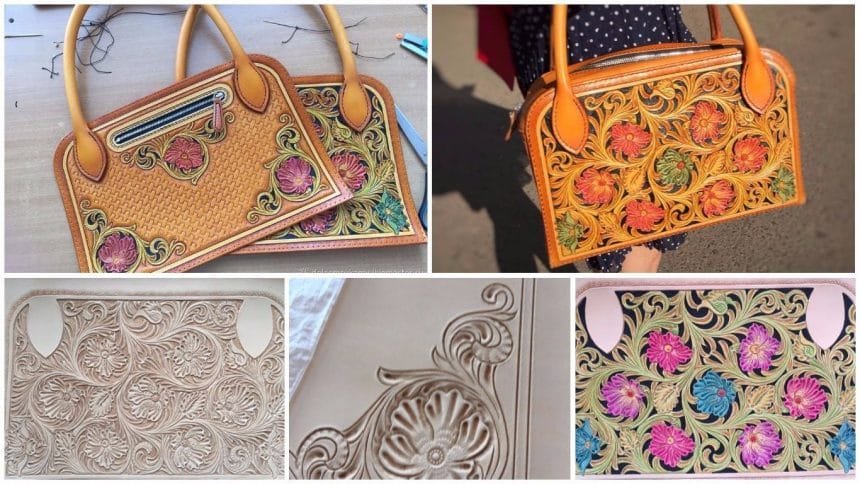
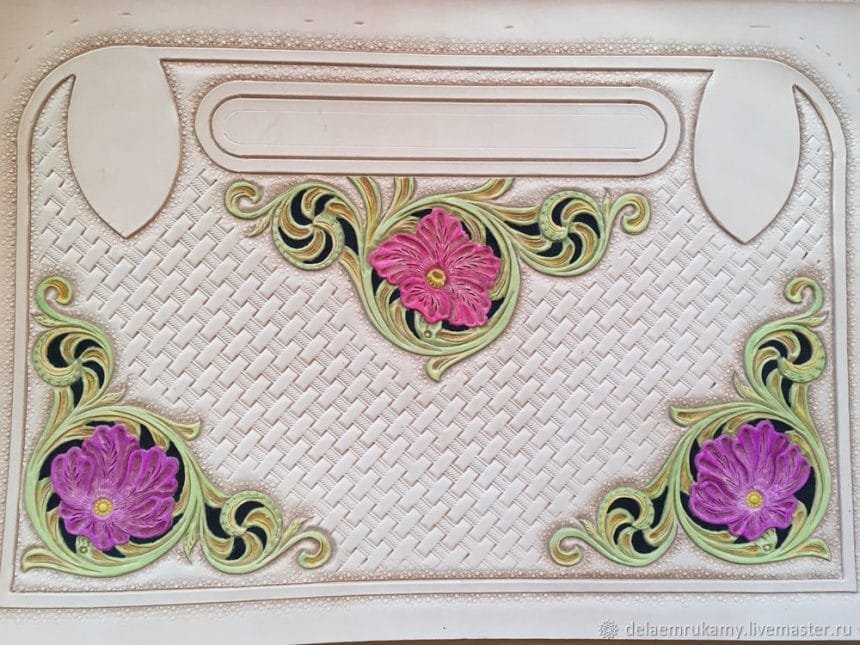
Then I start embossing (in detail about this process I will not write about the topic only briefly the main points) glue tape on the back 🙂 urine skin, translate the skin pattern, cut through the lines and it turns out like this:

After that, I begin to work with “stamps”, covered with the film parts with which I do not work.
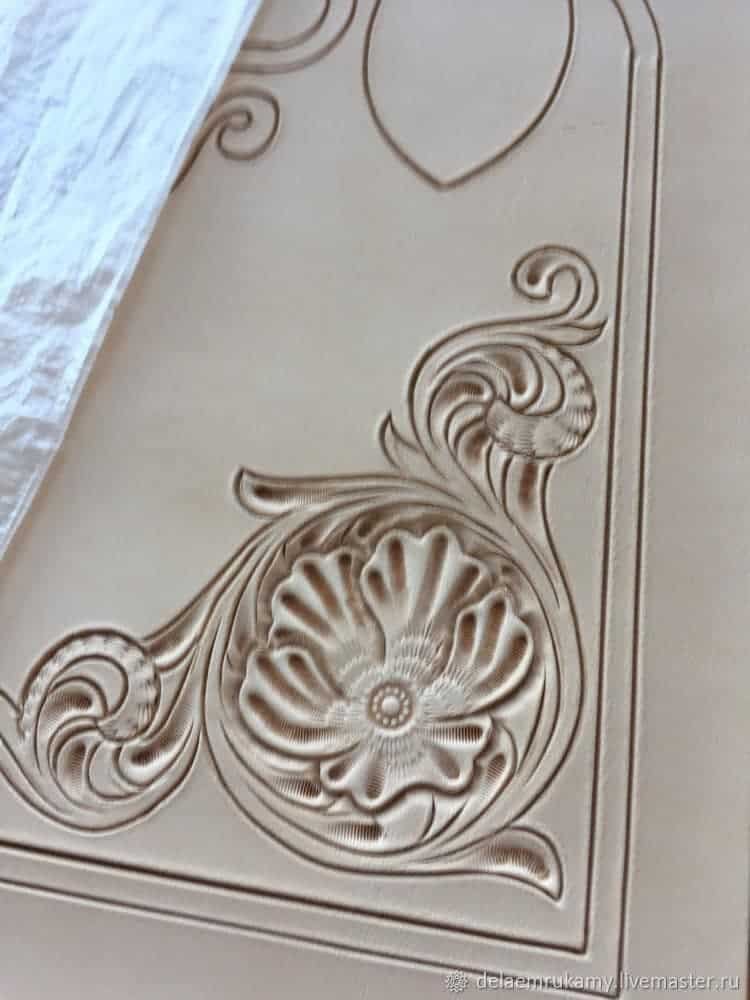
If it did not help and the skin dried up, I wet it. At the output we get the following result:
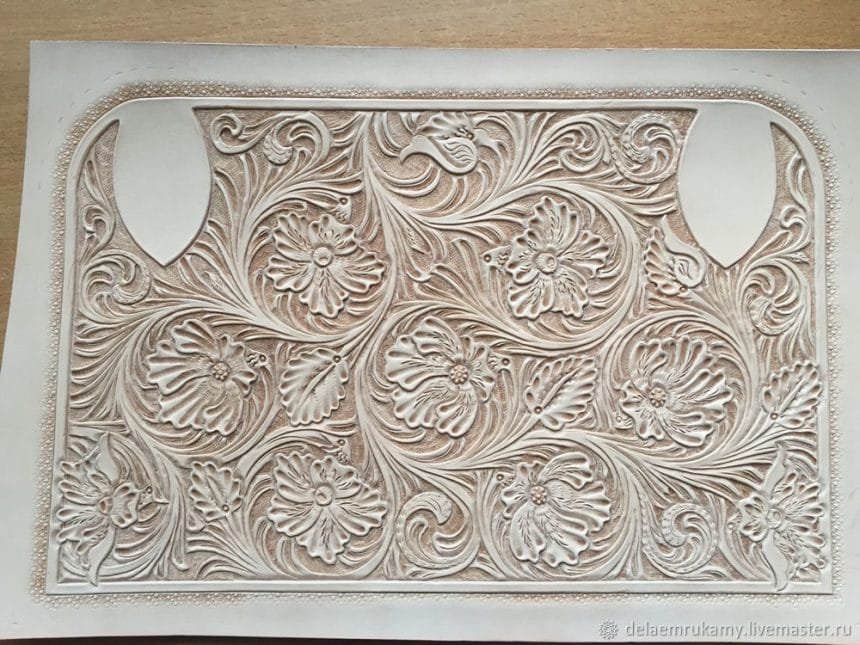
After embossing, I cut out the other parts and the tightness of the “mesh” on the end parts of the bag, after which I start painting the parts. And I’ll start it with the background painting, and it will be black, after I turn to painting the pattern.
After I painted patterns, I paint the edges of the front and back parts of the bag, as well as all other details of the bag which are completely, and which are only on the edge of the brown color. Then I conduct manipulations 🙂 with a superfluous I clean or I take out a napkin and rags and I cover with a varnish (for a photo sorry but as that so).
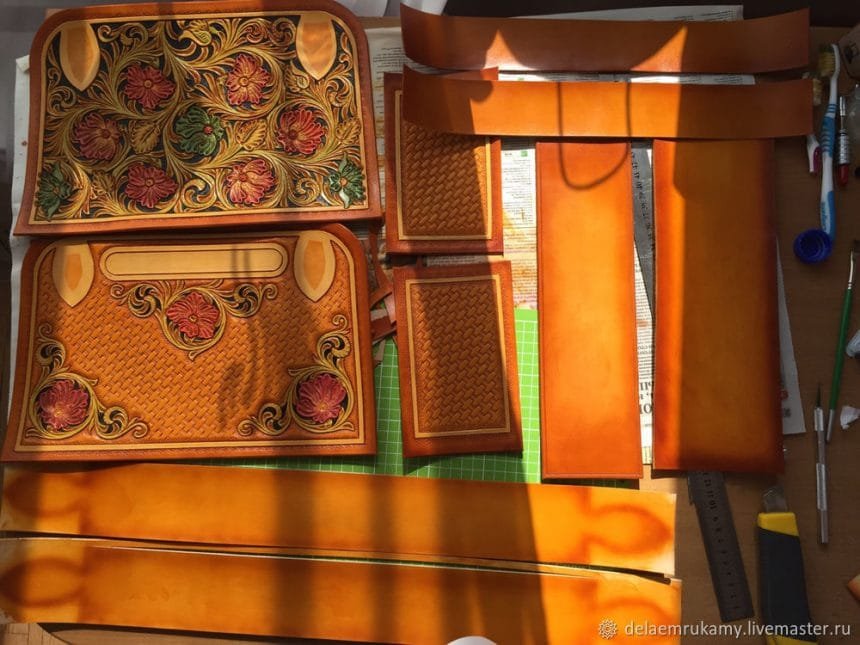
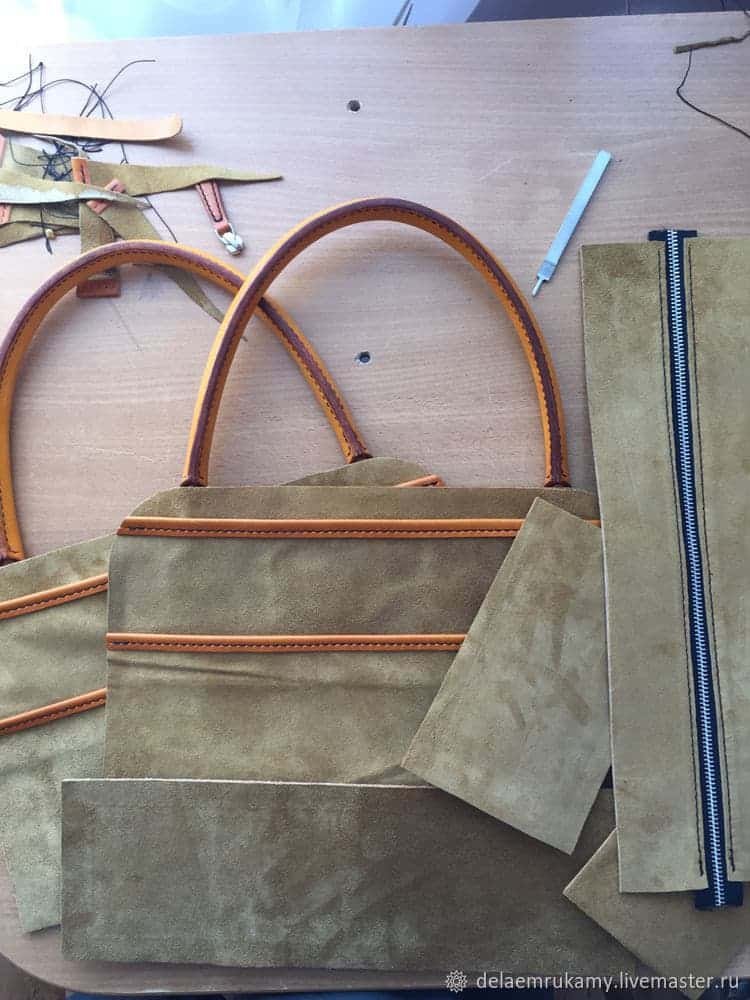
Fuh, now you can collect all this in one handbag and since we have the details that you need to assemble into the “pile” before sewing, then we will start with them.
Namely, the bottom of the bag, the top of the bag with a lock like a zipper, as well as the front and back of the bag with handles and a pocket with a zipper. Such a sequence is not necessary, as they say, who wants to use such markers and waving
The bottom will be with legs.
Before assembling the legs and the bottom itself. it is necessary to process, I do this with a CMC then I cover with Resolen

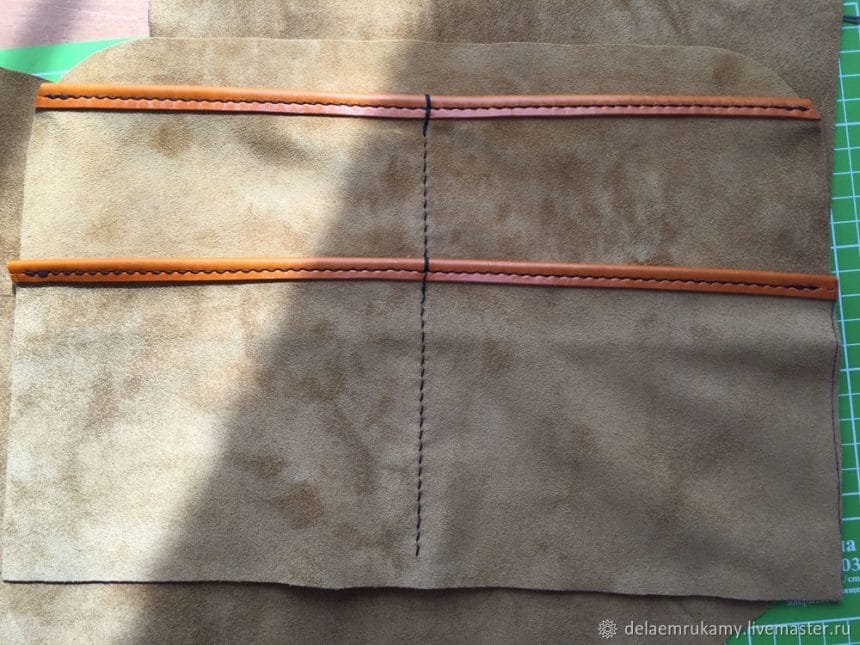
The bottom is one detail, there is also a lock of the type of lighting it also needs to be assembled and by virtue of the fact that if you collect it incorrectly, you can get into an unpleasant situation in general and will encounter the need to redo it, here you have to do it very carefully and accurately that would be The result is a clear rectangle. There is still a moment we should have a lining.
We proceed to cut the lining and inner pockets, simultaneously strengthening the upper parts of the pockets additionally with leather by gluing and stitching them together.
In the photo there is no lining on the butt about them I scored in the afterward had to be cut. Well, the pocket itself is definitely reinforced:
You can continue to work with lightning.
Taki means the outer part with the lightning, we have now glued the inside, we do not glue it 100%, but leave it around the edges for 1cm (about) why I’ll leave it about this, I’ll say below, this concerns all the details.

Having finished with a lightning pass to the front and back of the bag. Here we need to collect the handles and sew the zipper into the pocket.
Let’s start with lightning, there is nothing complicated, we stick the zipper on its place from the inside, glue the oval so that the lightning does not spoil the overall impression and is stitched.
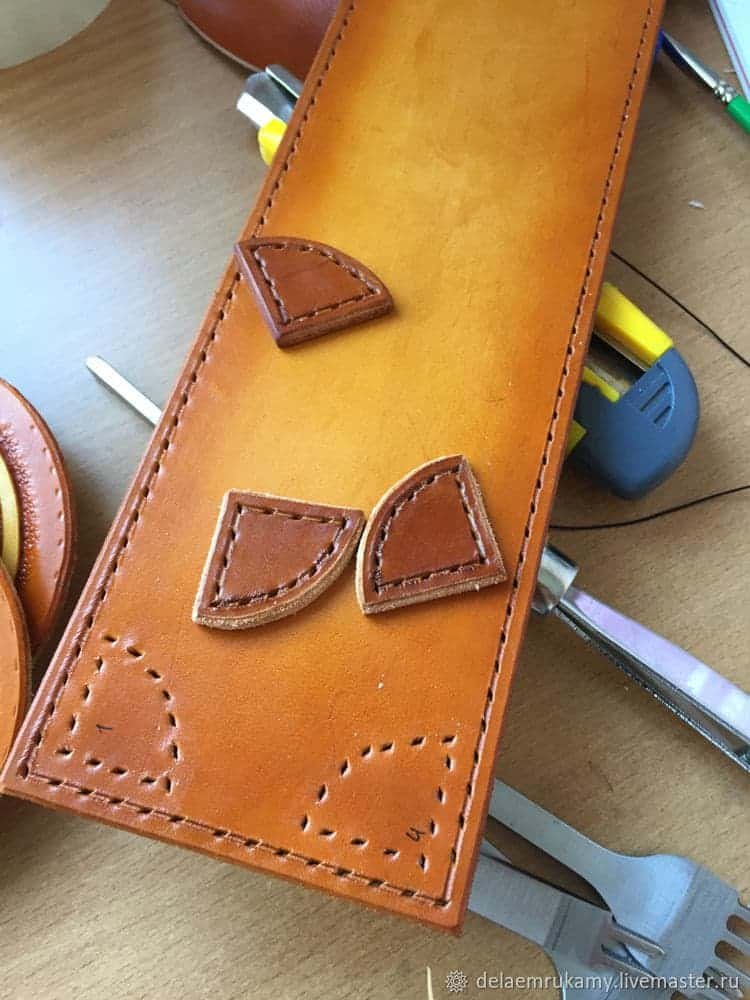
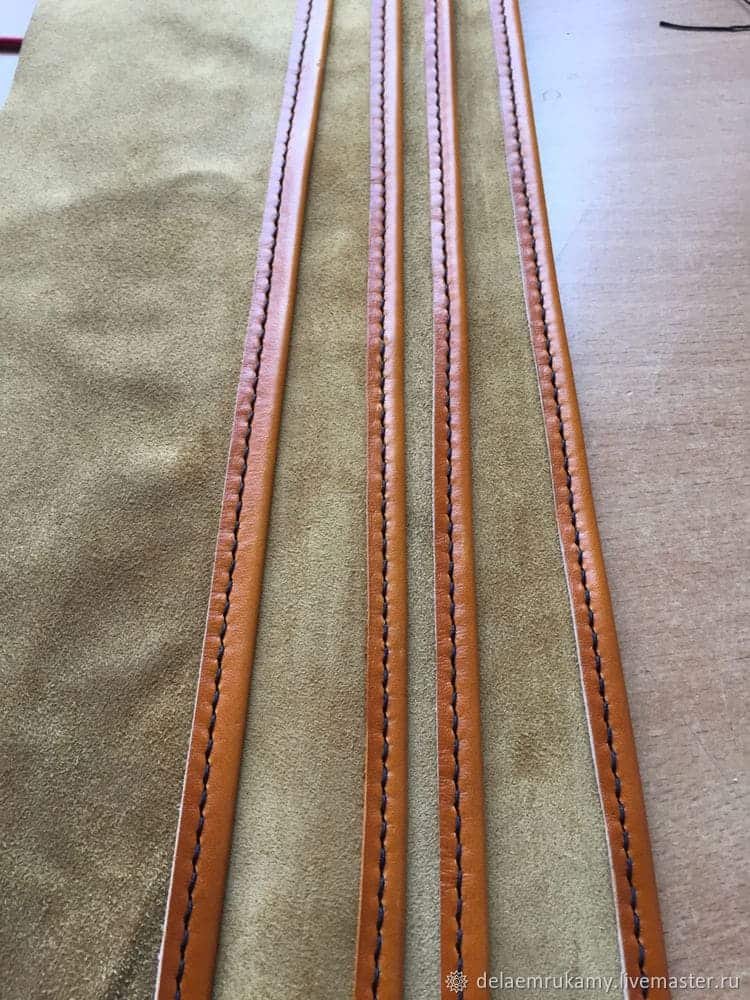
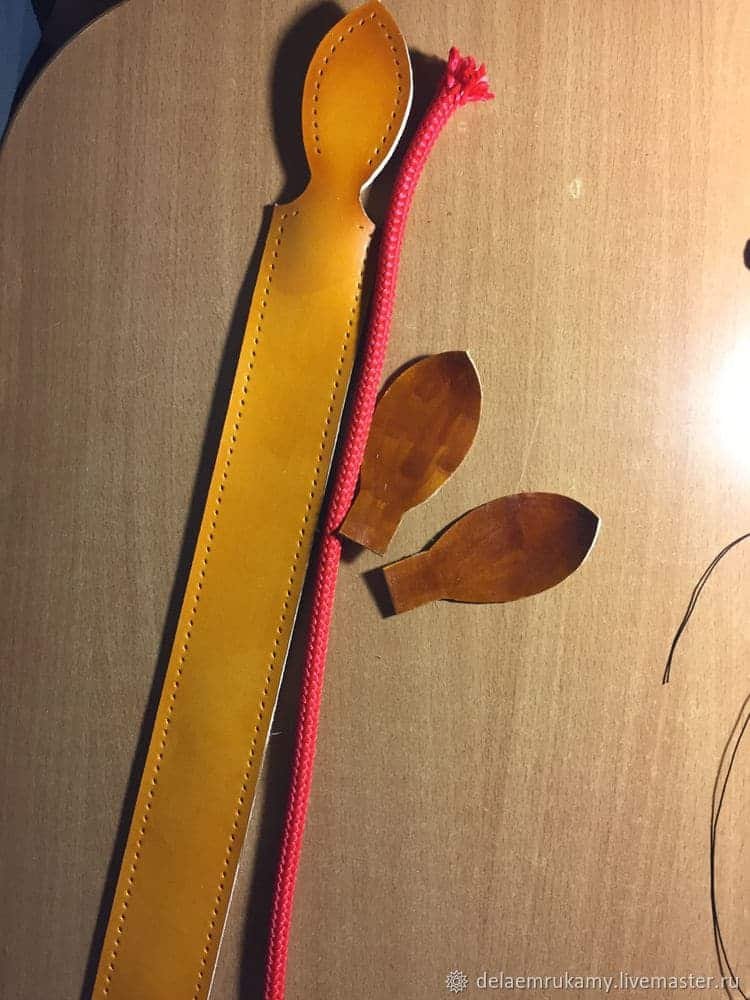
Next, the handle, each handle in this case consists of three parts, let’s name their base, the rope, how to name the third detail … let’s fix it. The latch is such an interesting detail that it does not seem to be exactly what you need, except that it hides the rope from prying eyes, and does not let its scattered parts enter the seam holes, accordingly preventing them from getting to the outside) with all this hardly visible at all .
Well, well, we mark out and make holes for the seam, in the same number of seams of fastening to the bag without forgetting to note which handle to what is attached.
We paint, polish and varnish the places that after assembly will be difficult to access.

The base and fixators are glued with glue (in our case, the glue in the people is called “Nairit” 🙂 and we paste the rope into the base, we try to paste it as accurately as possible to the middle. We fix the fixative.
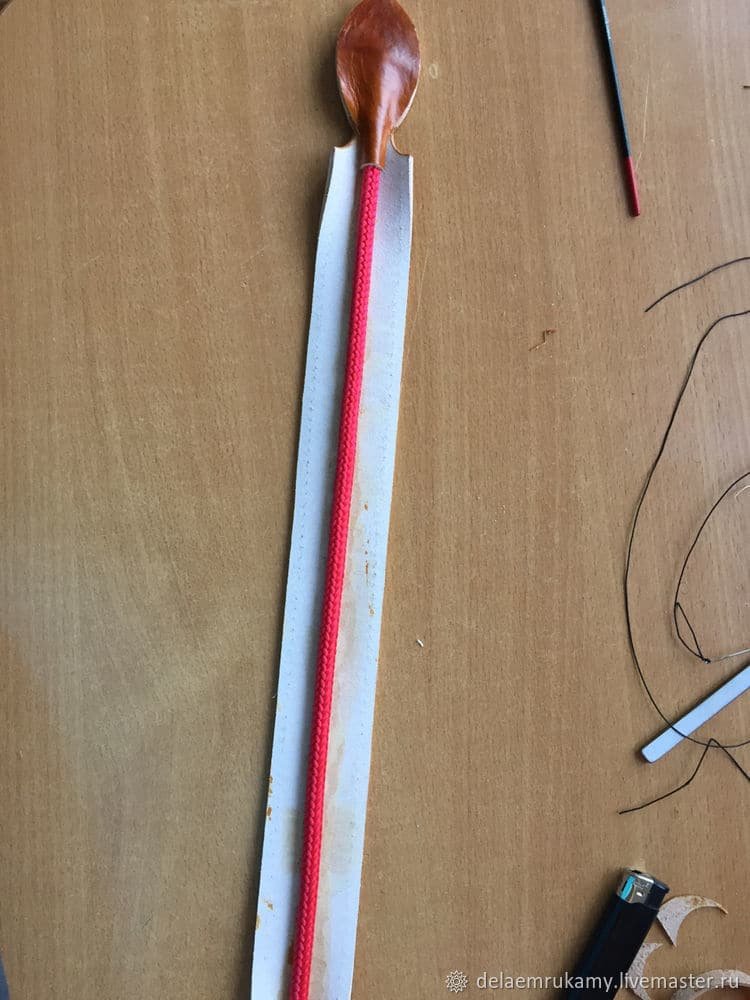
And we collect the handle in one piece. After assembling, polish the edges and sew each handle to its part. At the output, we have this option
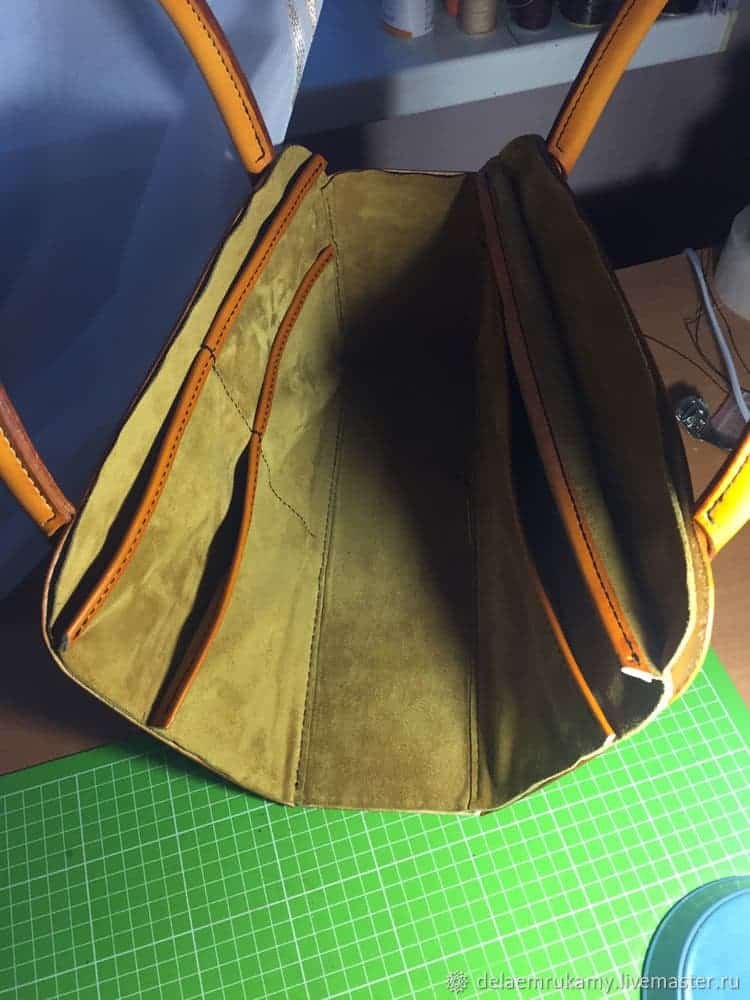
After we have collected everything, we need to collect the “inner world” of the women’s handbag for this we need to collect pockets (we will not deviate much from the project, since we finally decided to stop it, not as on a sketch), one side will have four pockets, and the other with two that we glue pockets on both internal parts, and we sew in the middle pockets of only one side.
Now when everything is almost ready, you can glue the inside of the face to make it look beautiful 🙂 we glue on the “Nairit” on the whole area except for an indentation of about 1 cm from each edge and to the back side we glue only along the edge (indentation is also present) , since there we have a pocket.
When using “Nairit” the room should be well ventilated (smell to put it mildly not very).
Now you can collect.
Assembling begins with the fact that we sew the front and back sides to the bottom (about the photo forgot , after sewing the end.
I almost forgot! Why do not we have to glue 1 cm around the edges, so that they would have their edges neatly fill each other.

After sewing up the end parts we have in general almost ready bag, if you fantasize of course 🙂 it remains to sew part with a lock such as lightning.

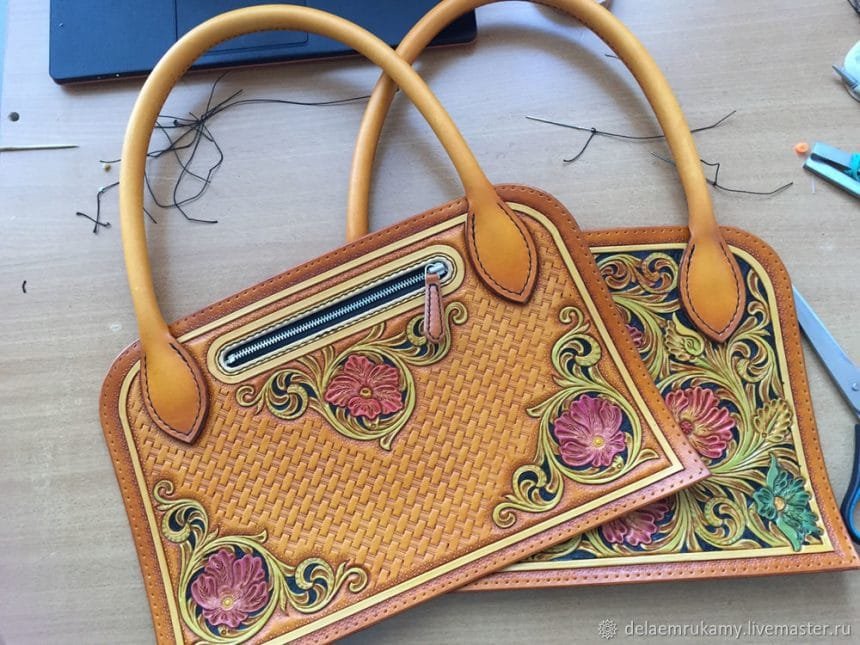
As a result, the output is this result.
Thank you all for your attention, I will be happy if this information is useful
couretesy: livemaster