Working with paper has always been a favorite hobby to me. It can be used in many ways like making & decorate cards, flowers, boxes, gift bags, picture frames, or even be made into 3D stand-alone art pieces. Your imagination only limits the possibilities. Today I am going to share another use of paper as 3D Quilling arts.
It’s going to be a long journey. So hold your seat and start the tour!!
Don’t forget to share your thoughts


Working with paper has always been favorite hobby to me. It can be used in many ways like making & decorate cards, flowers, boxes, gift bags, picture frames, or even be made into 3D stand-alone art pieces.Your imagination only limits the possibilities. Today I am going to share another use of paper as 3D Quilling arts.
It’s going to be a long journey. So hold your seat and start the tour!!
Don’t forget to share your thoughts
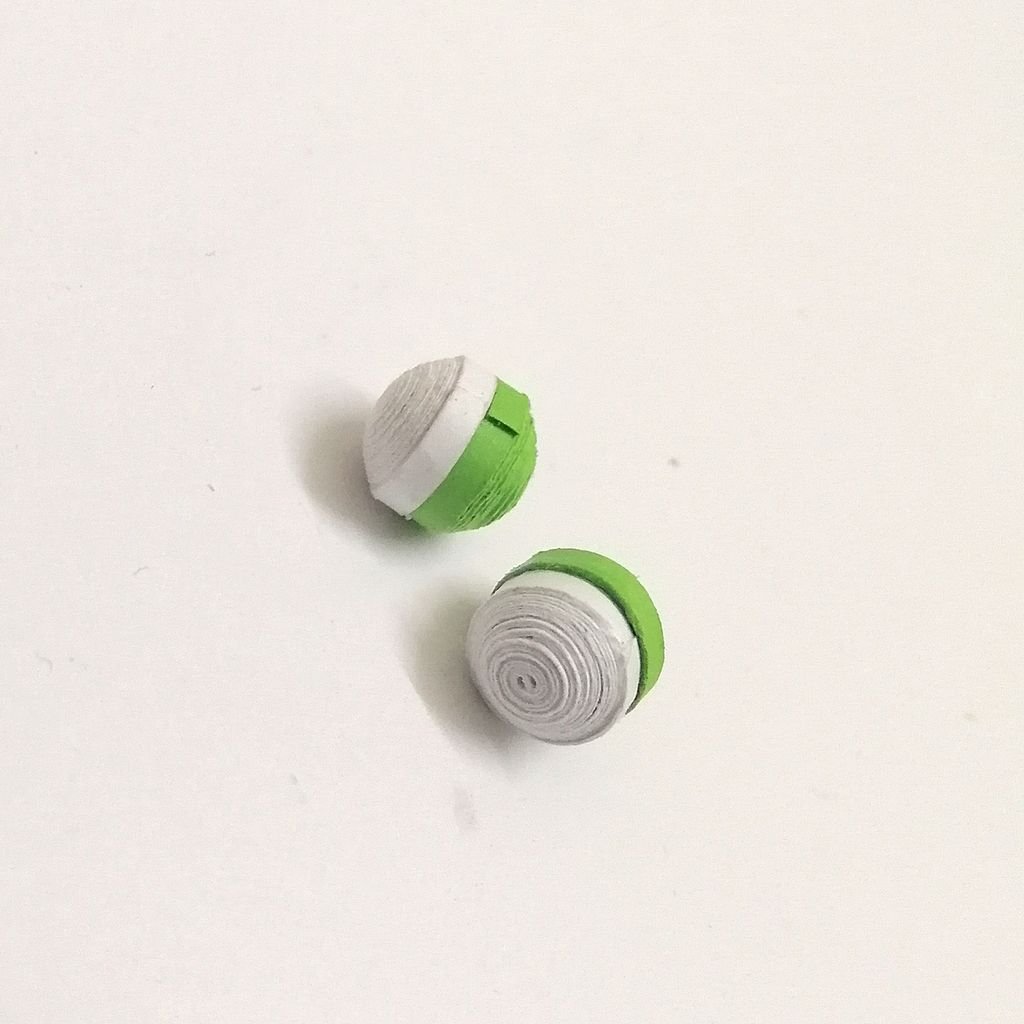
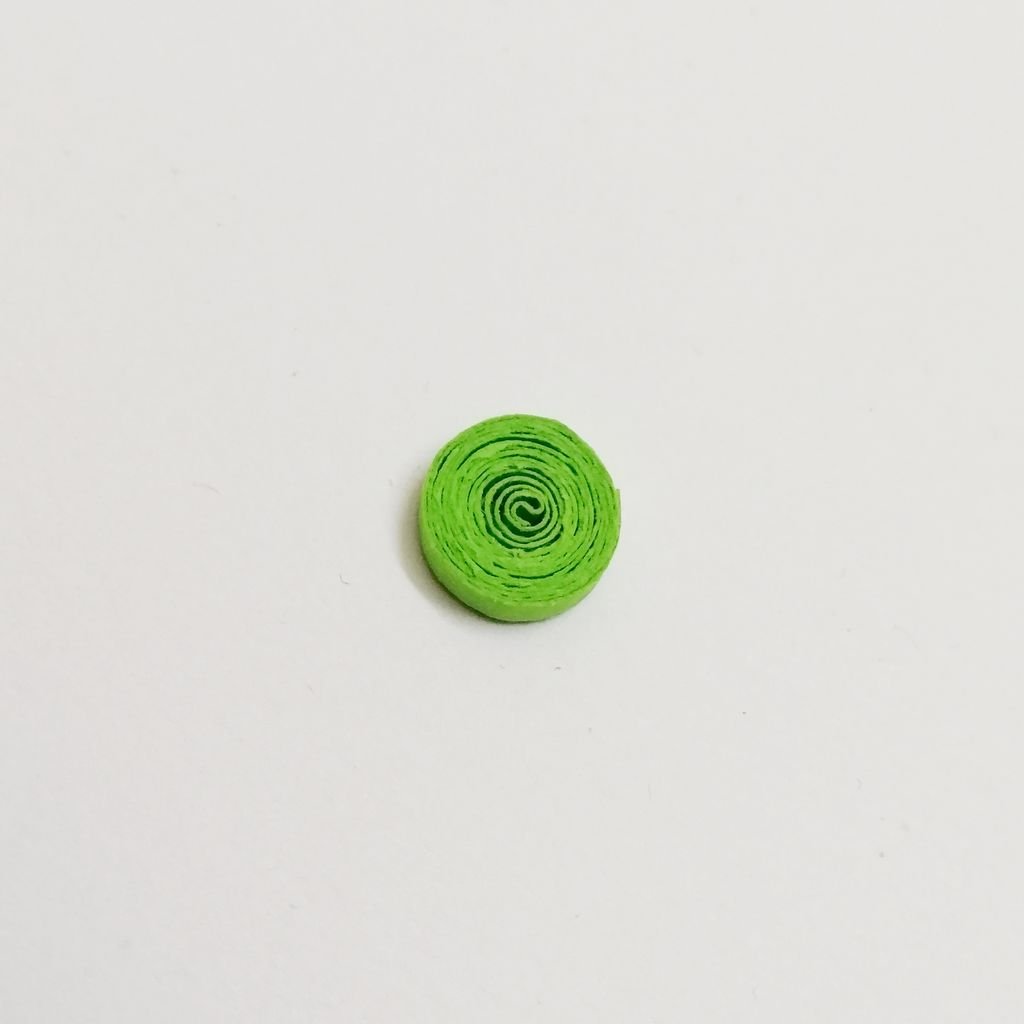
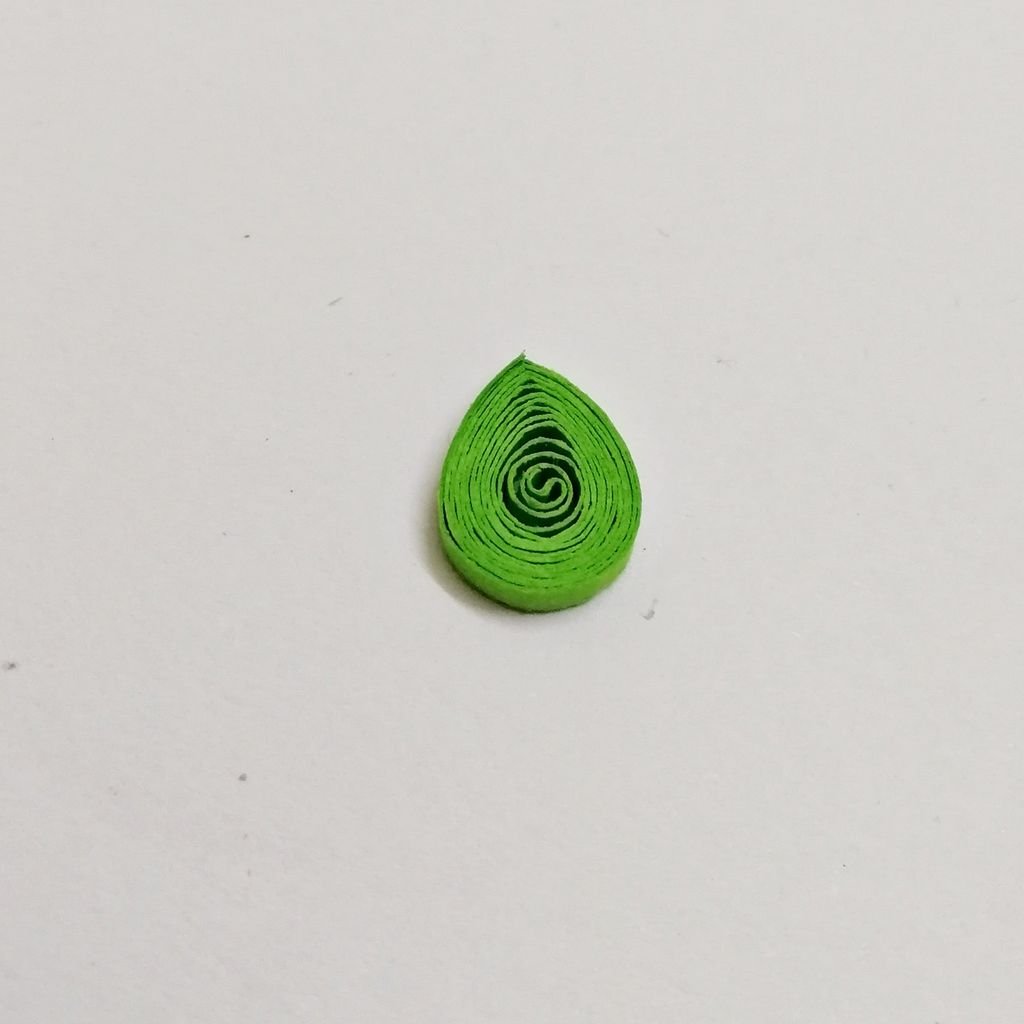
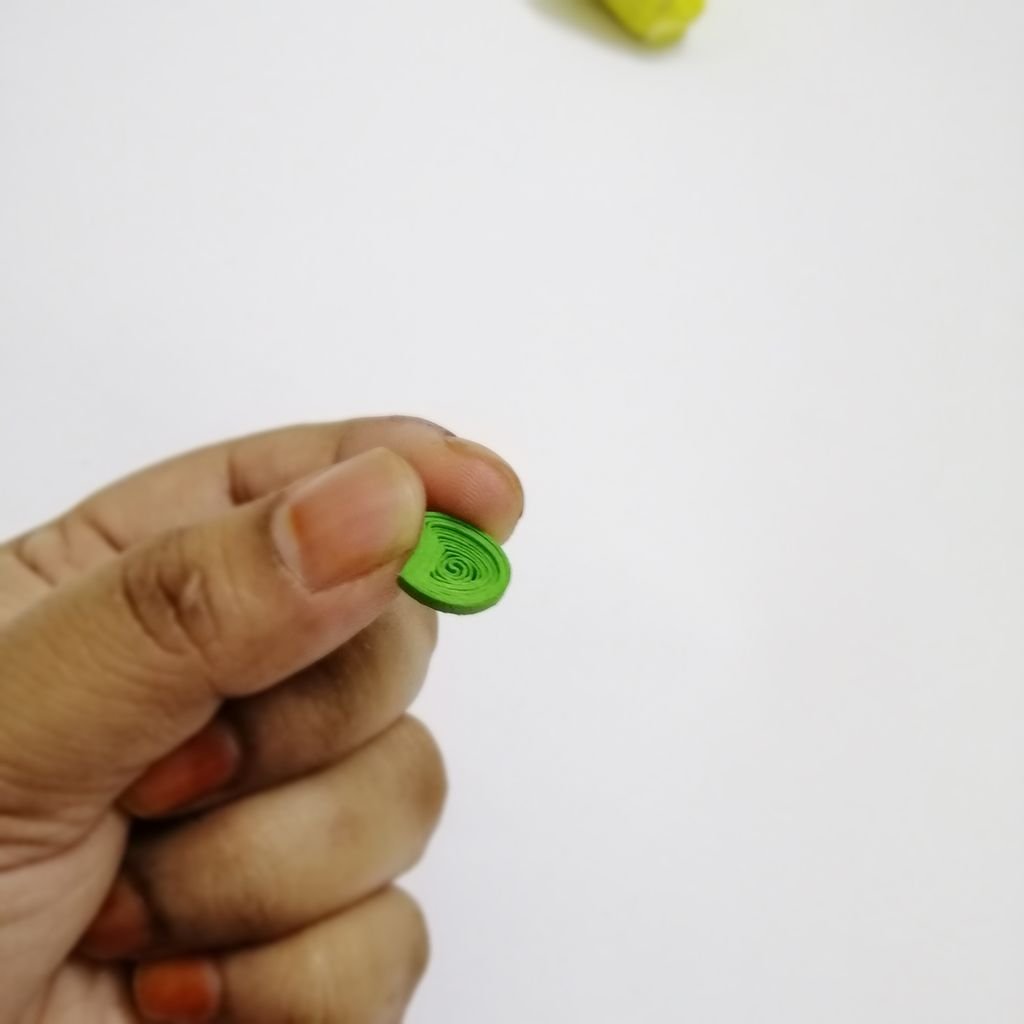
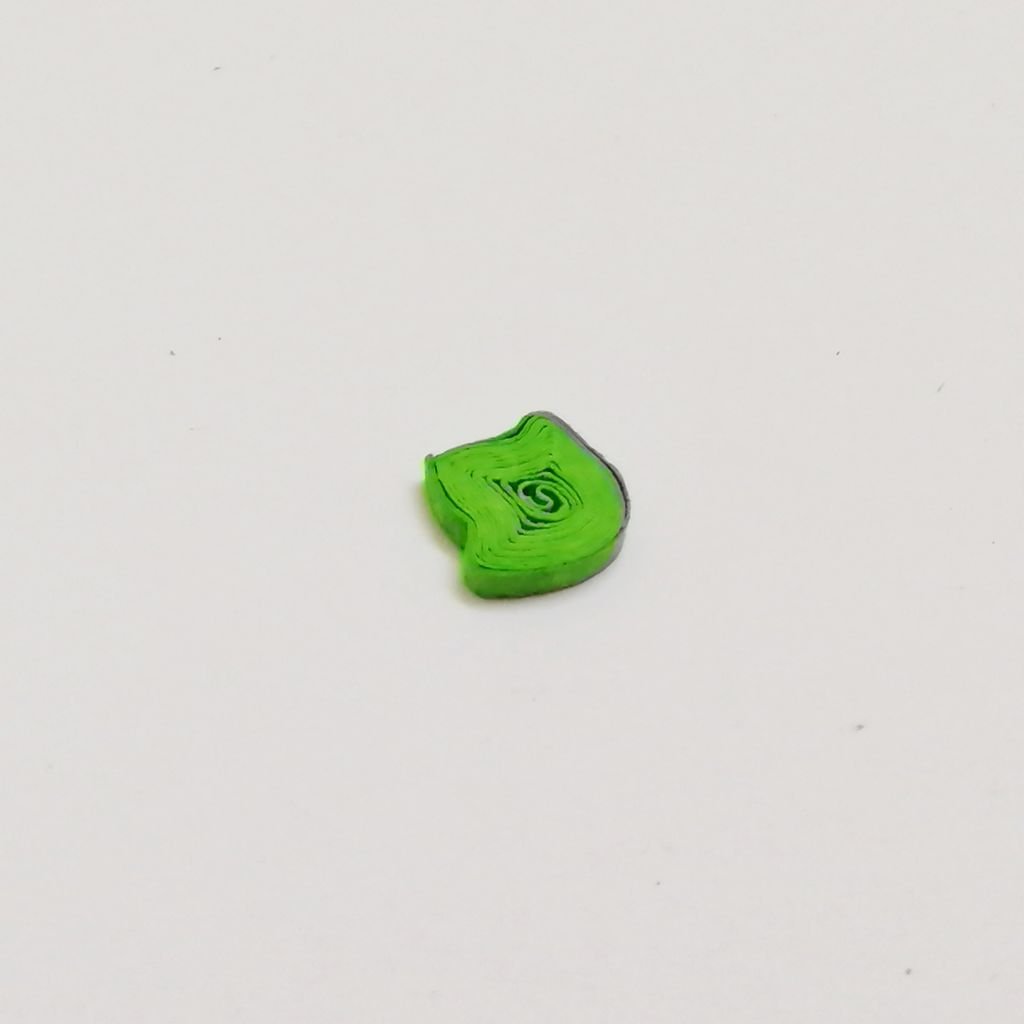
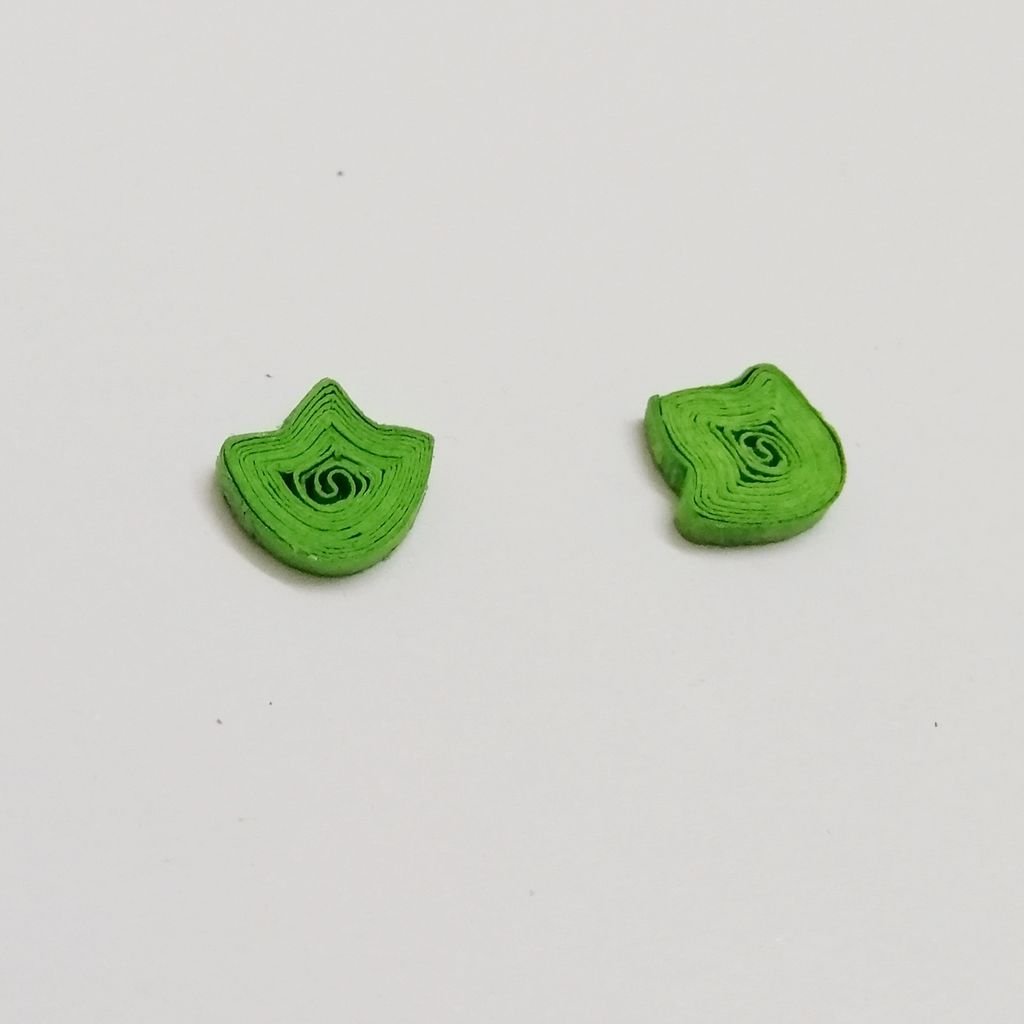
Step 1: Bushes Tutorial
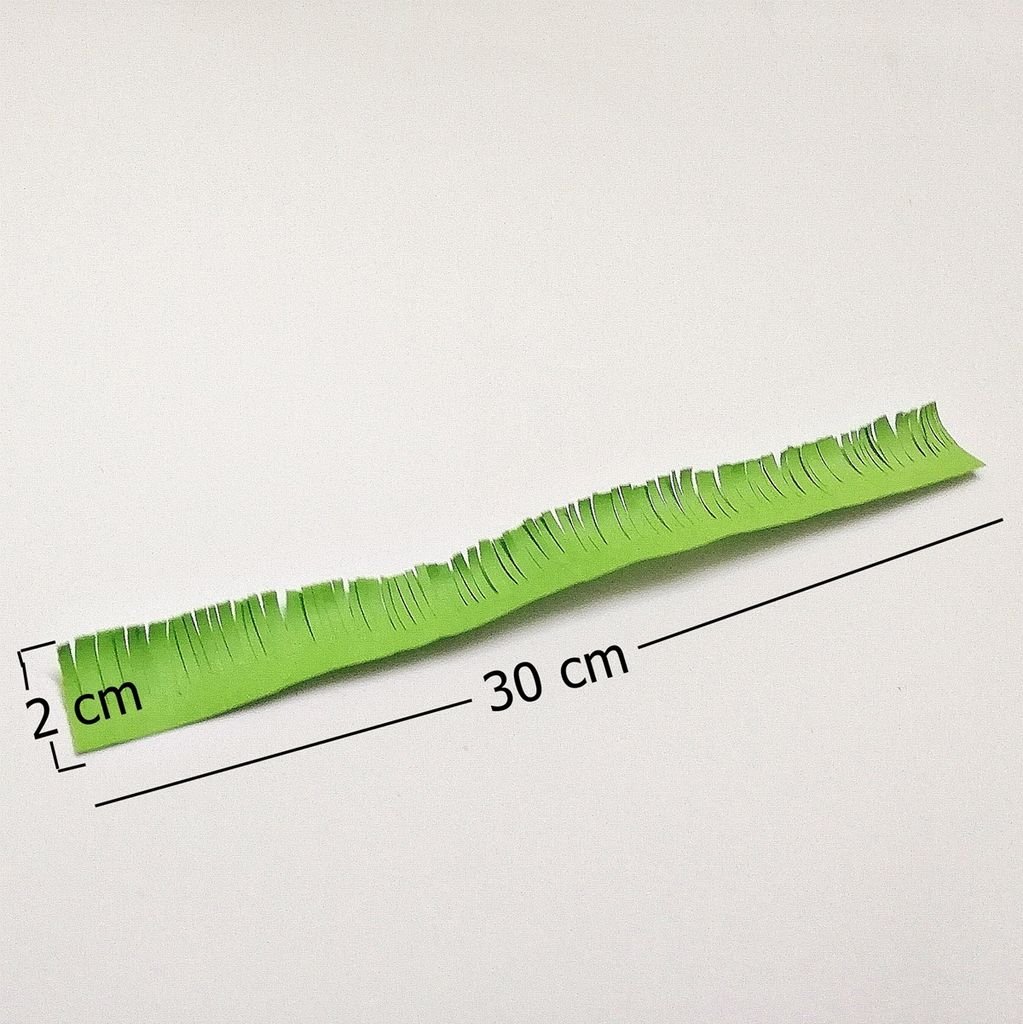


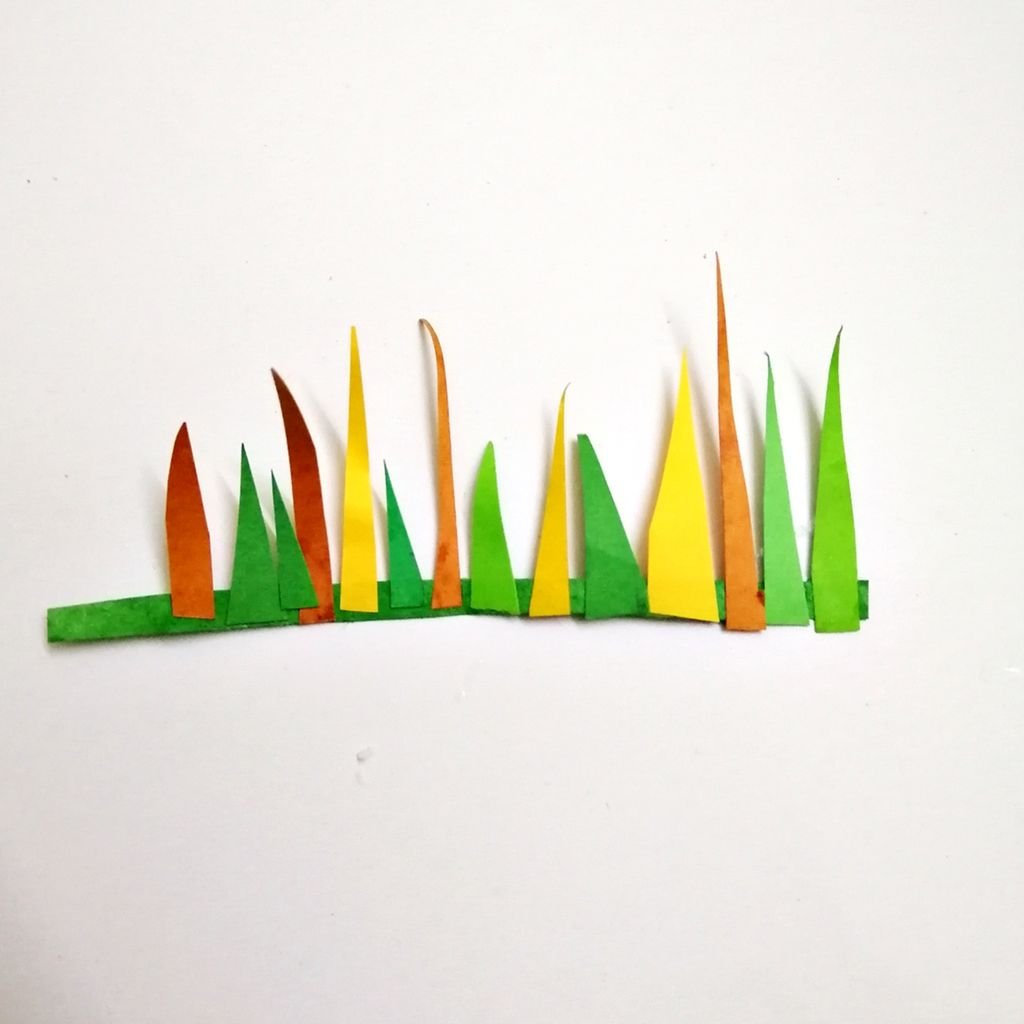
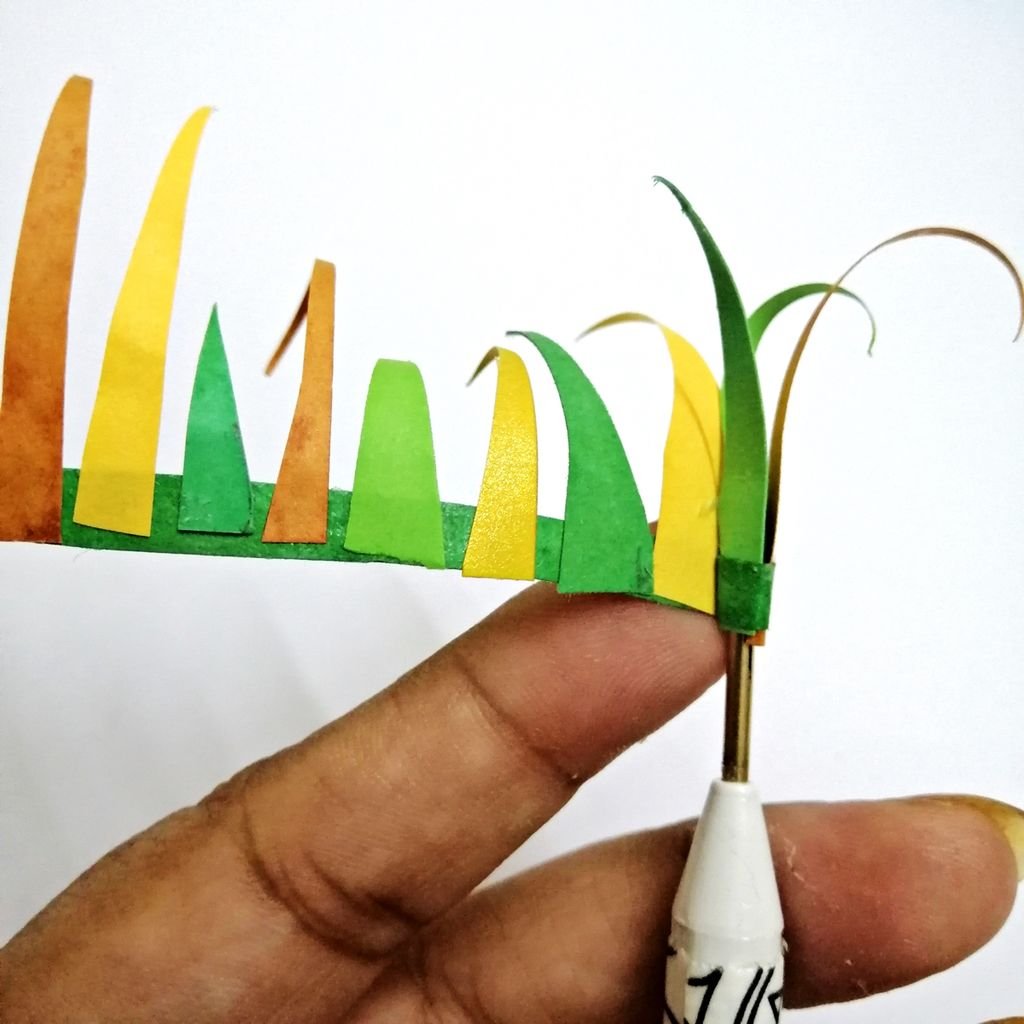

Here I made two types of bushes. Making process of both is nearly the same.
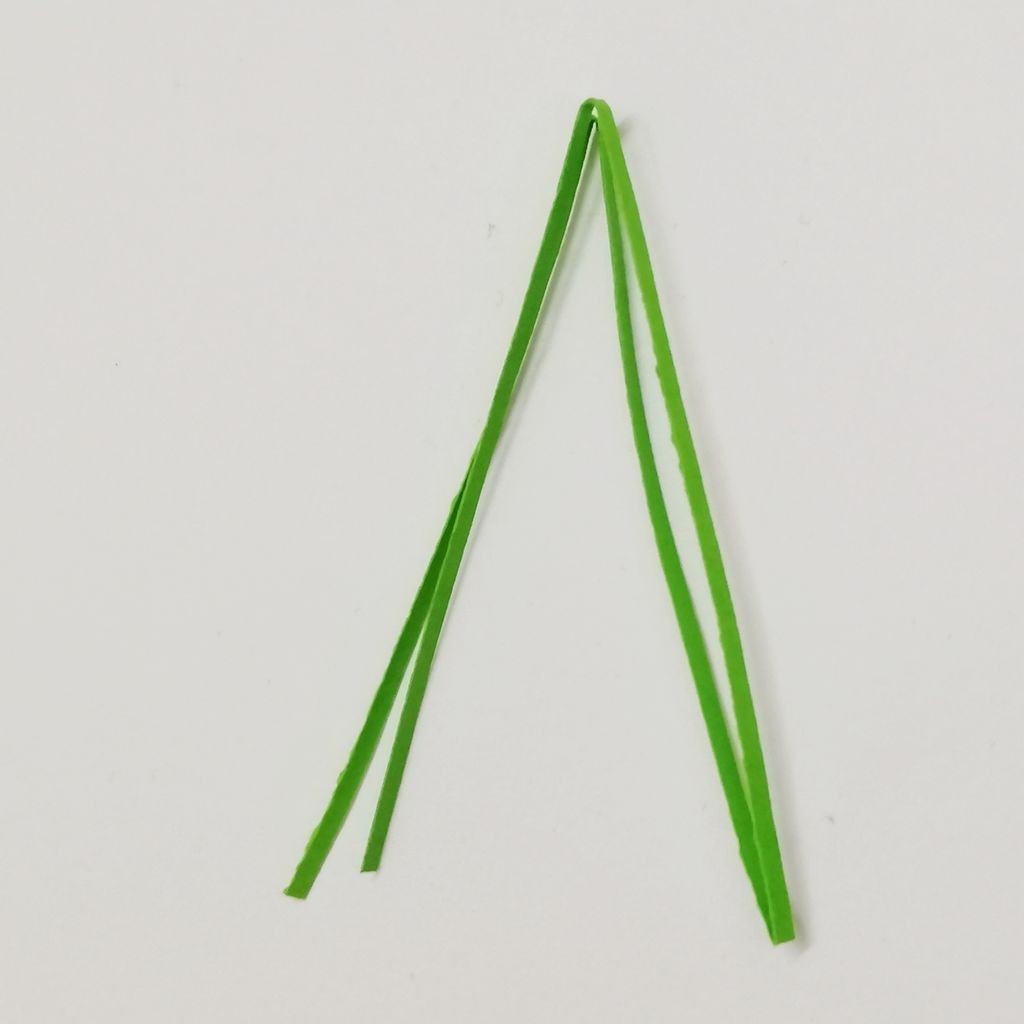
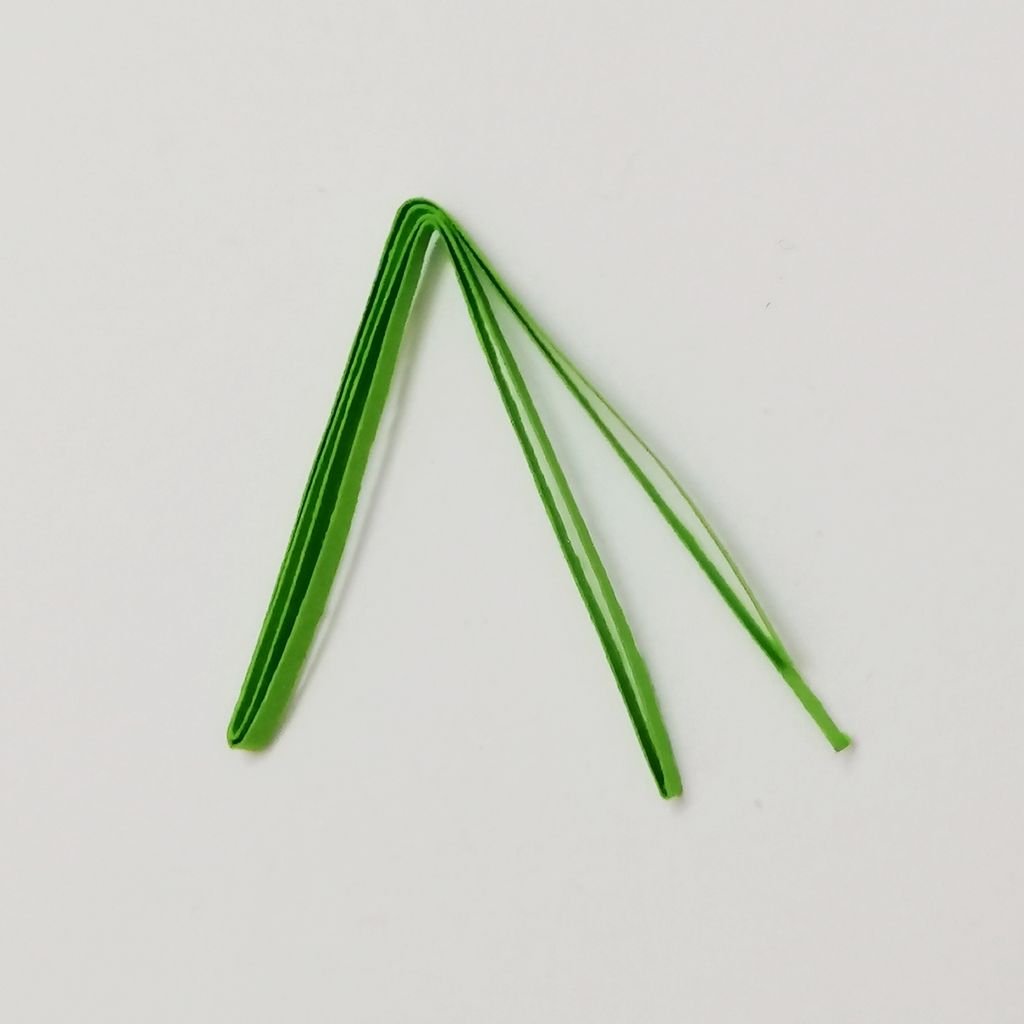
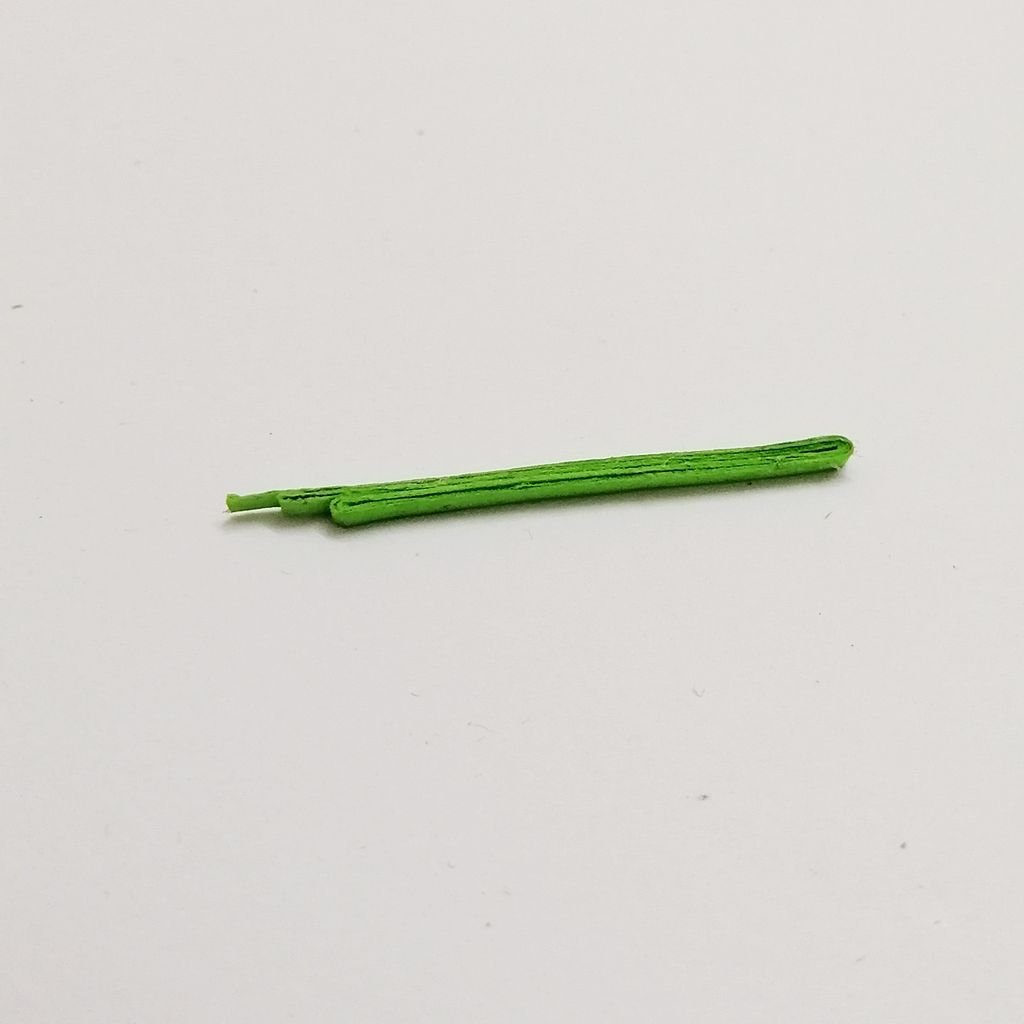
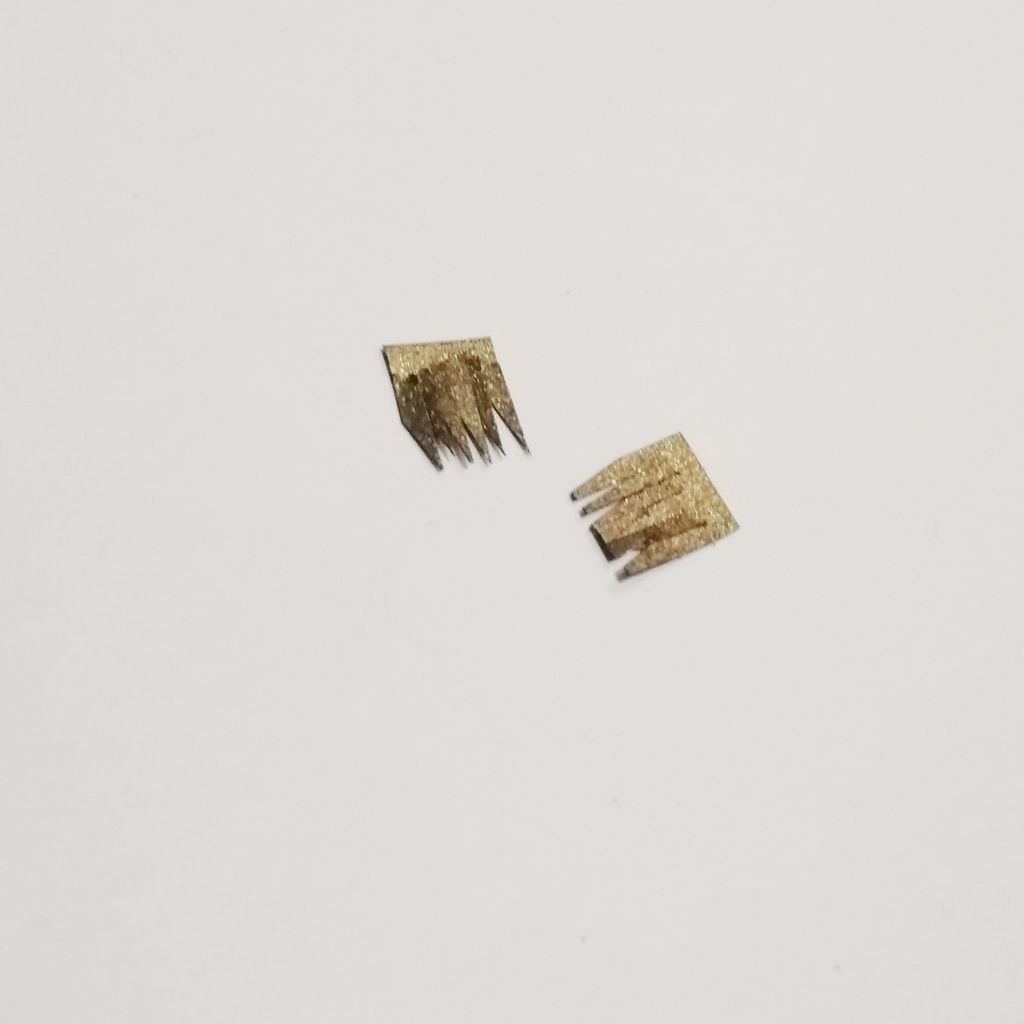
To make it, take a strip of quilling paper with a width of 10 mm. Make small and even cuts about three quarters across the width of the strip. The cuts should be at right angles to the edge of the paper. Insert one end of the quilling paper into a slotted quilling tool. Roll the fringed paper into a tight coil. Apply a little glue at the end of the strip to stick. Wait for the glue to dry, then press the fringes down.
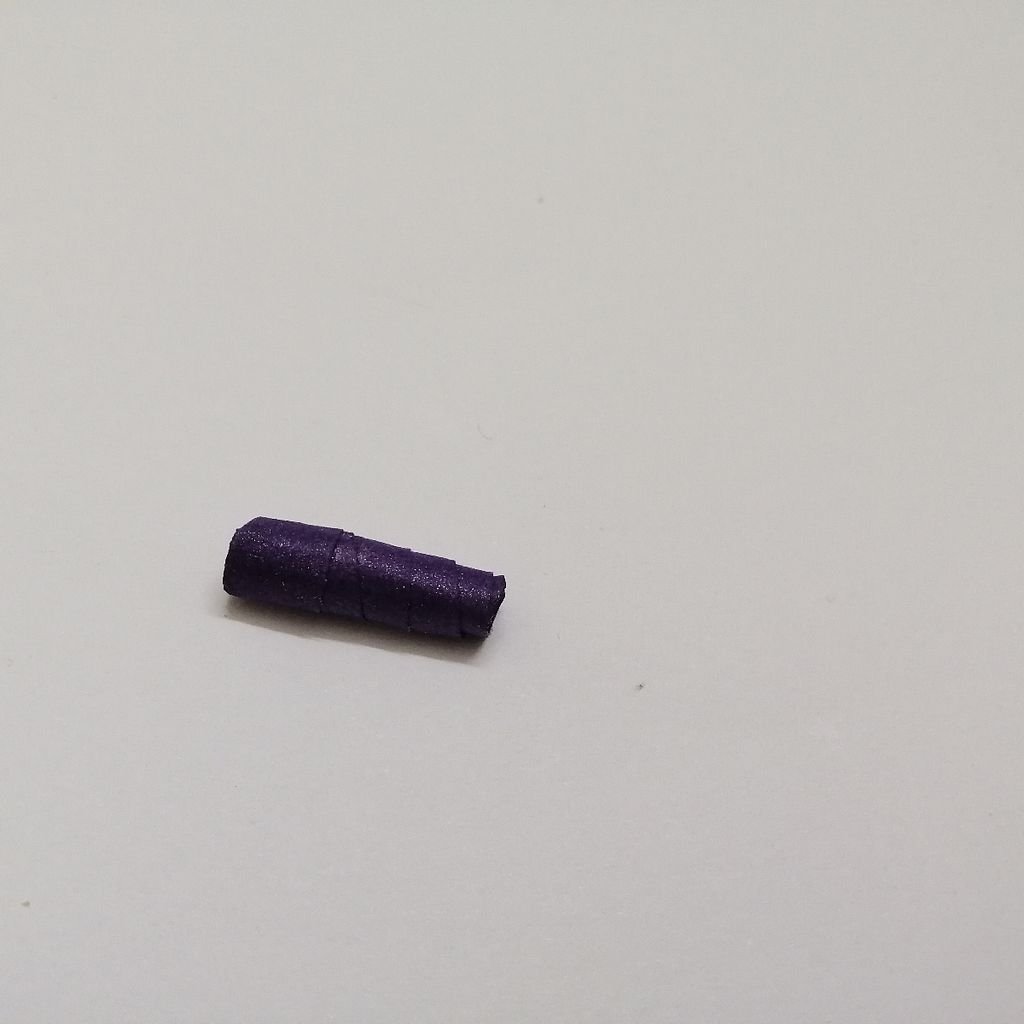
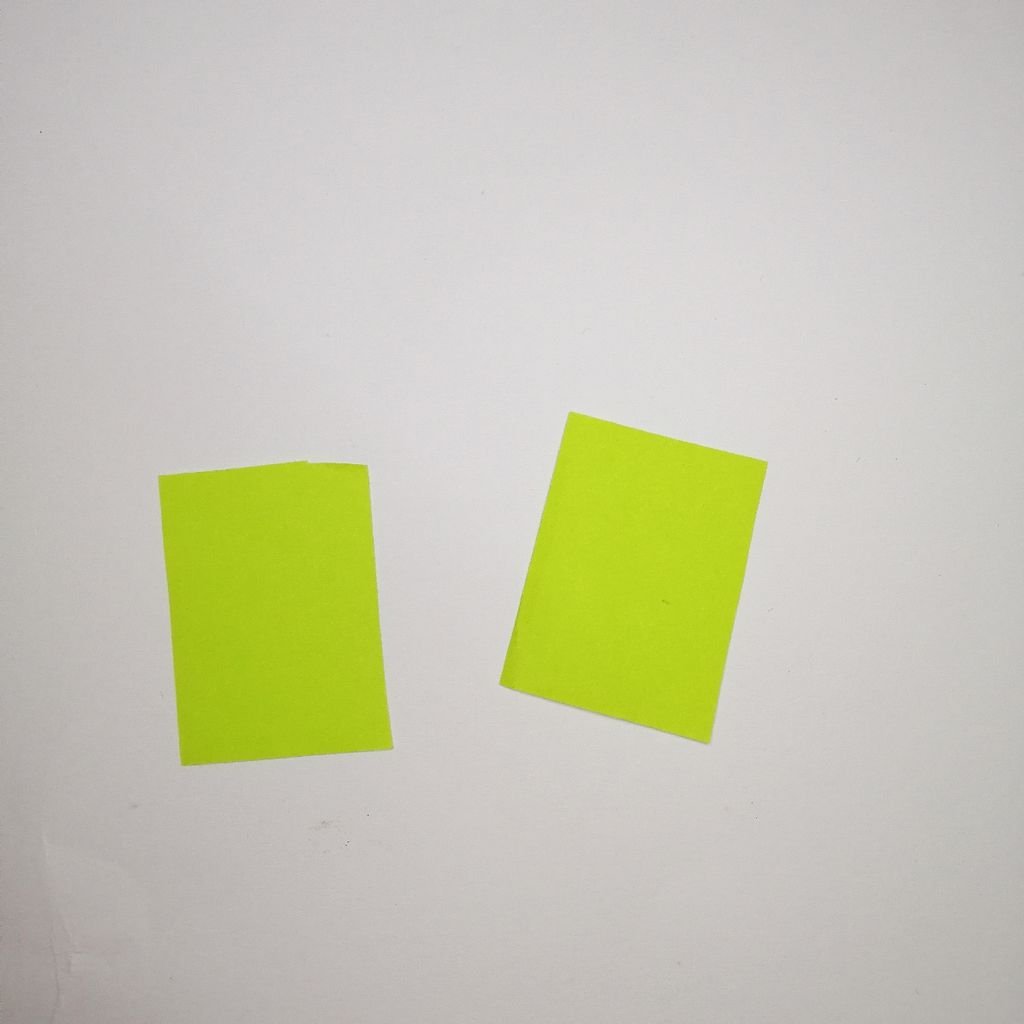
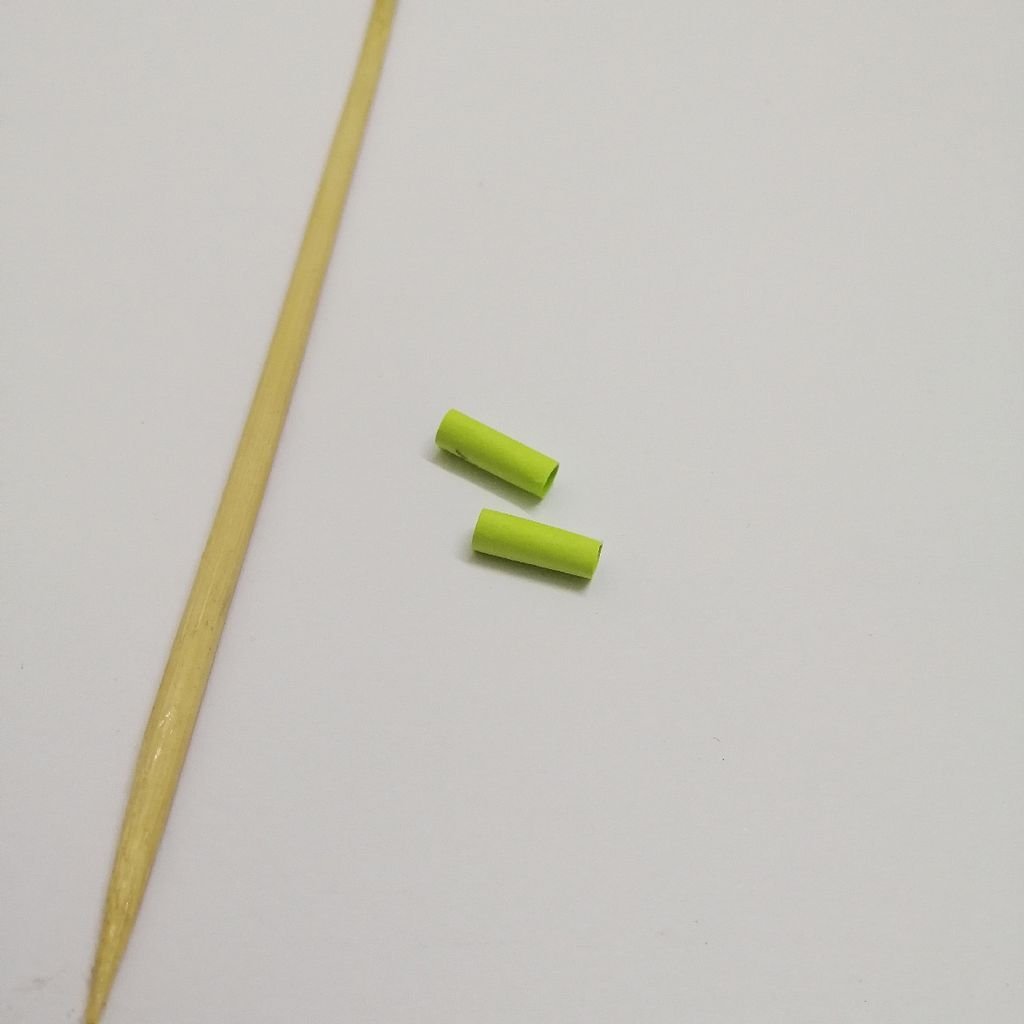
To make the second type of bushes, you just need to cut small pieces of paper strips of different colors and sizes. And glue those in a 3mm quilling strips.
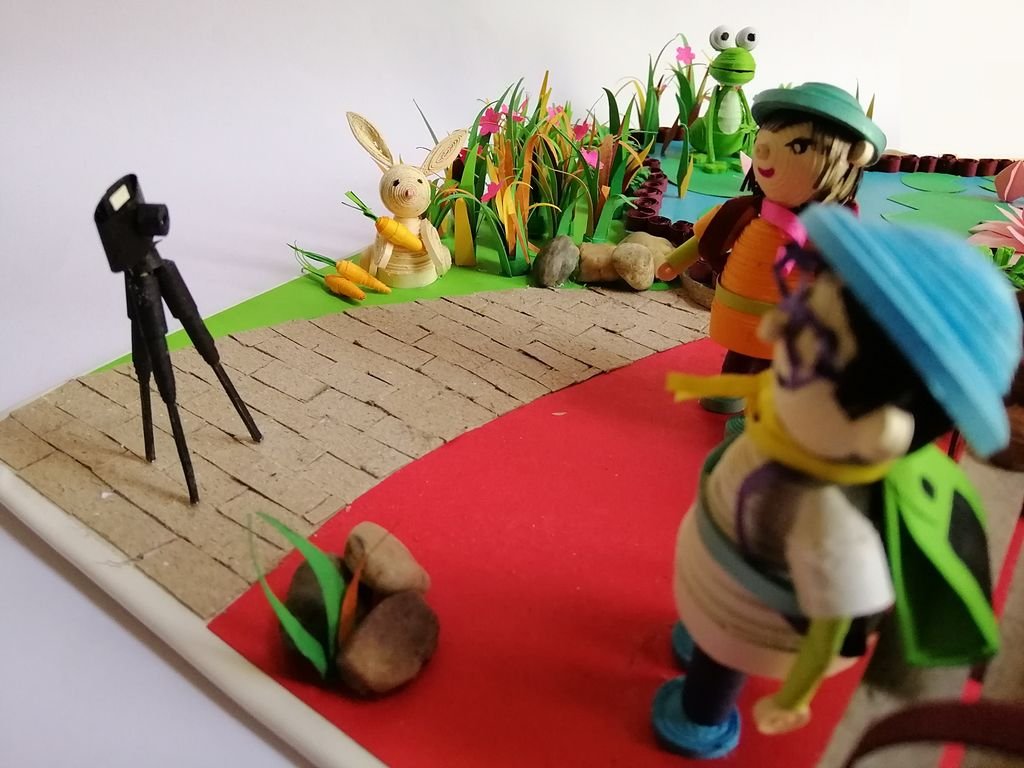
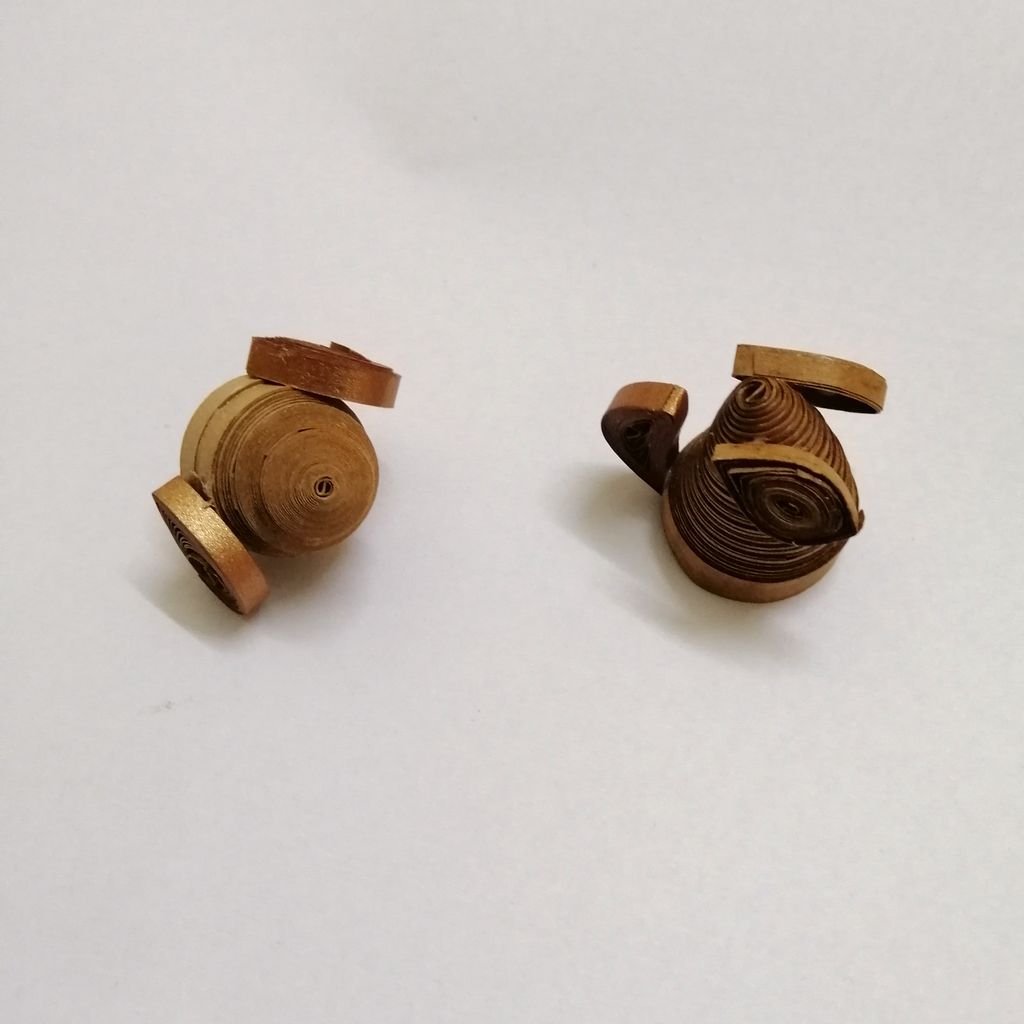
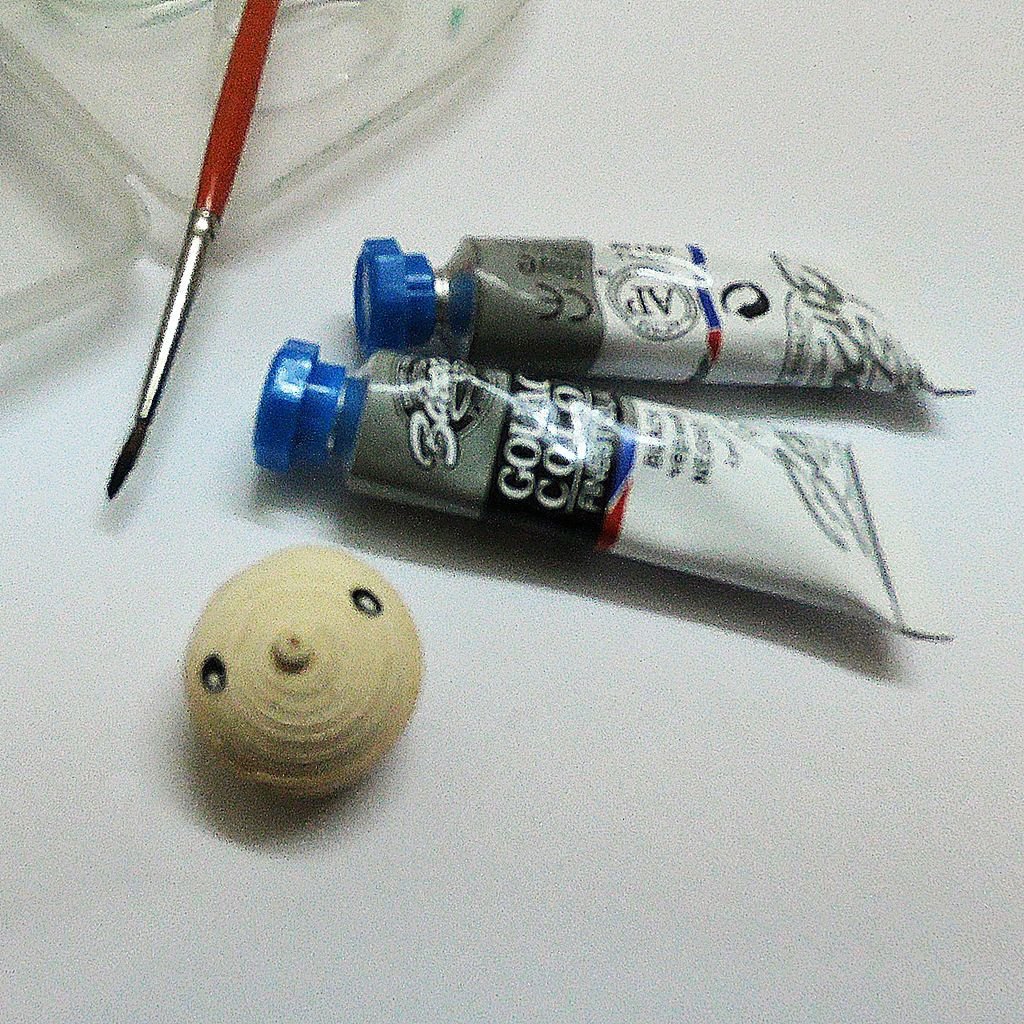
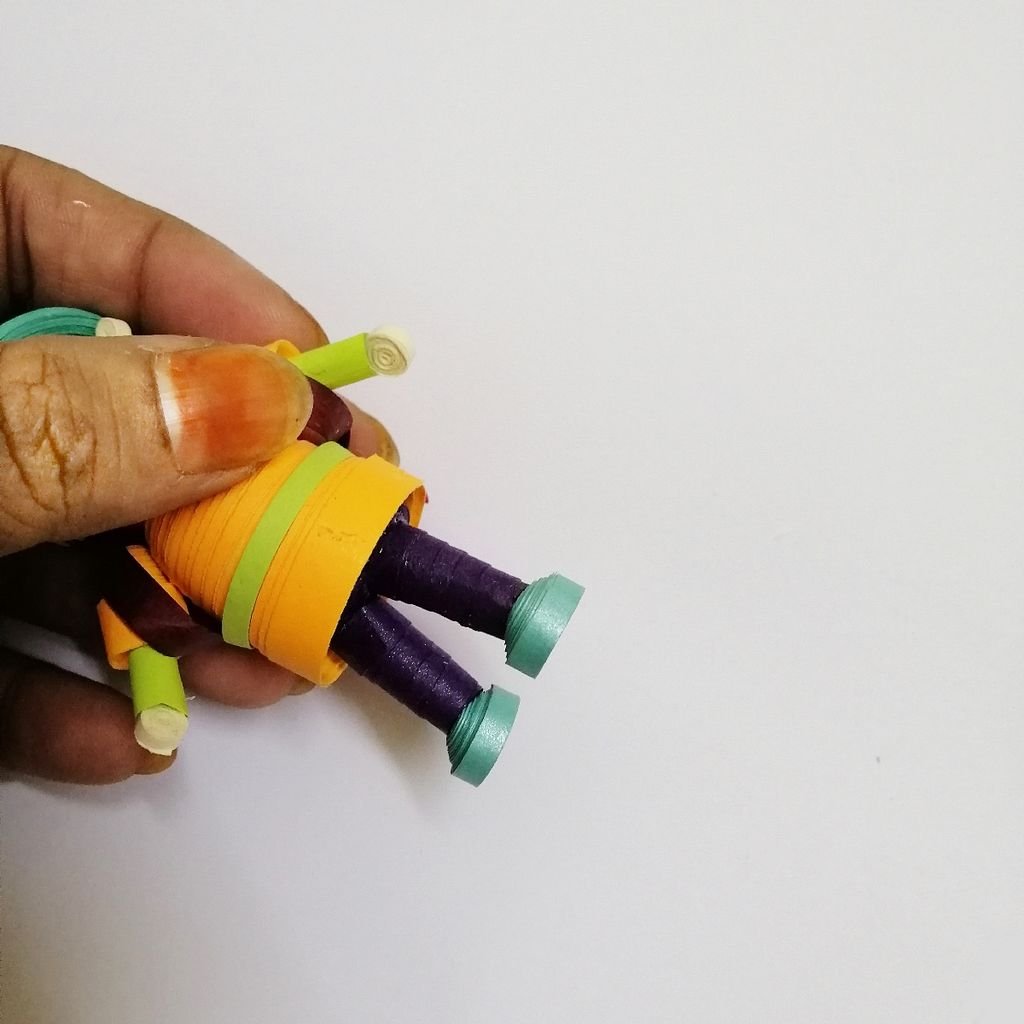
Step 2: Making of Camera & Tripod
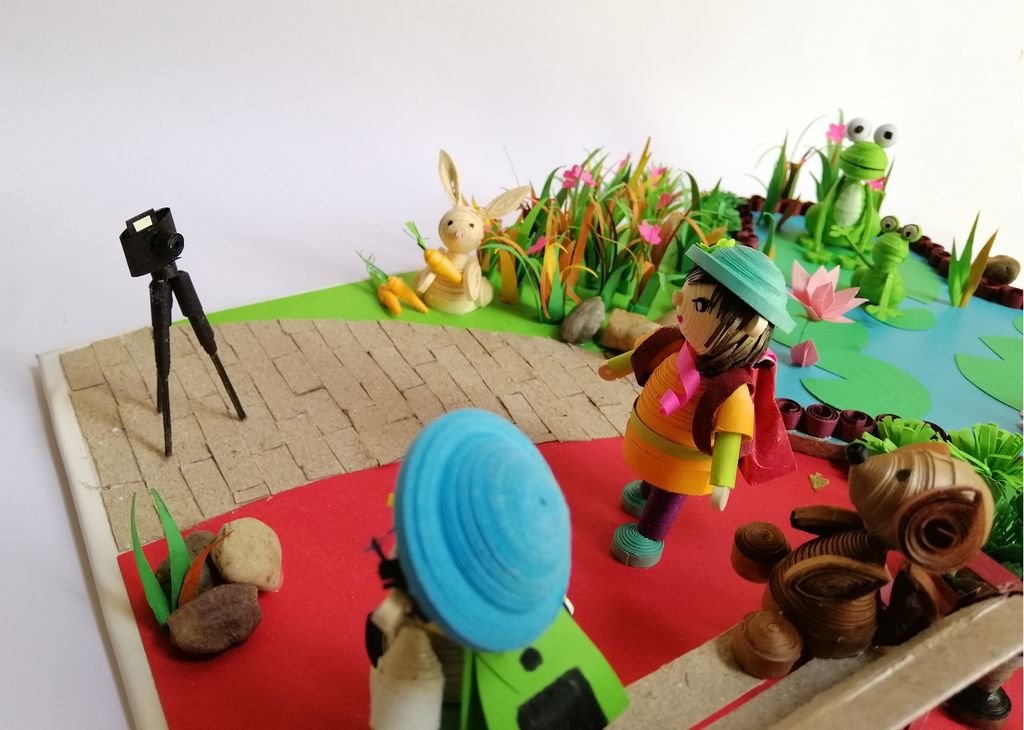


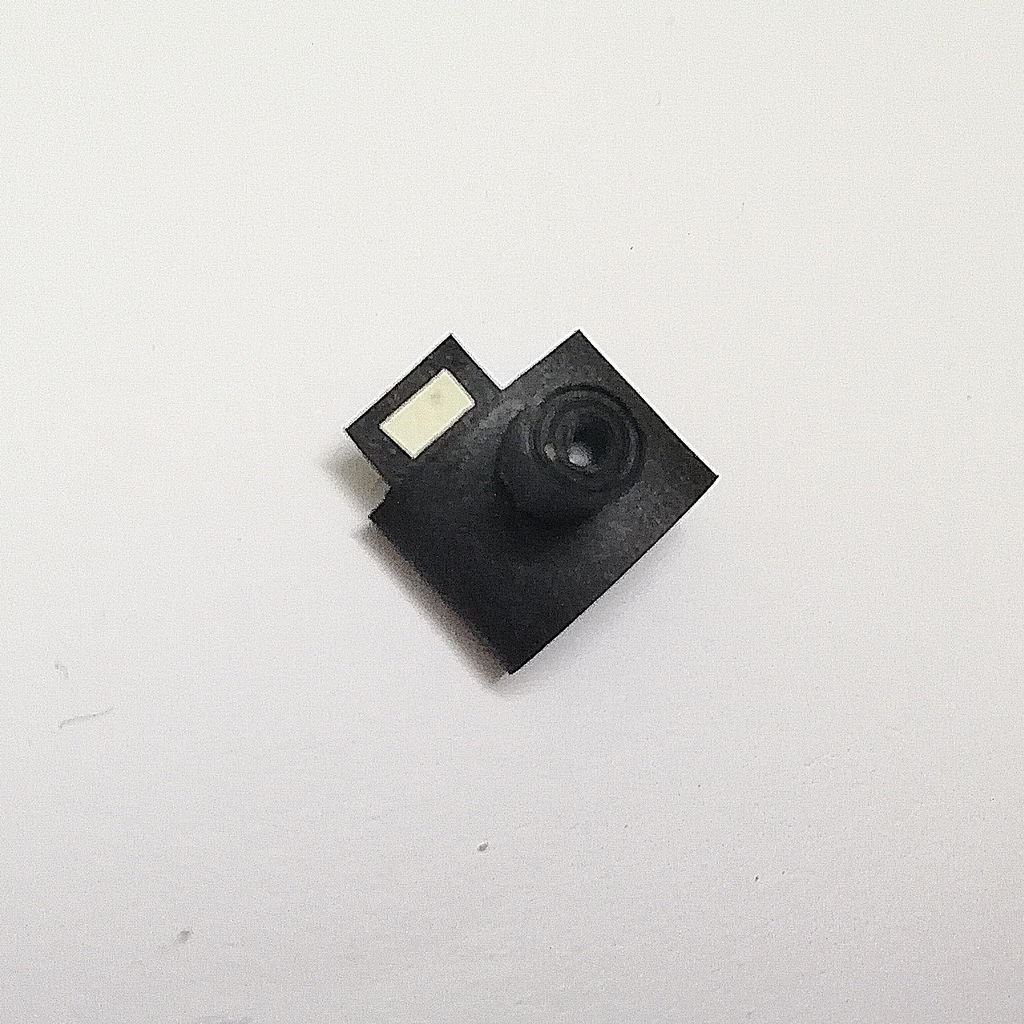
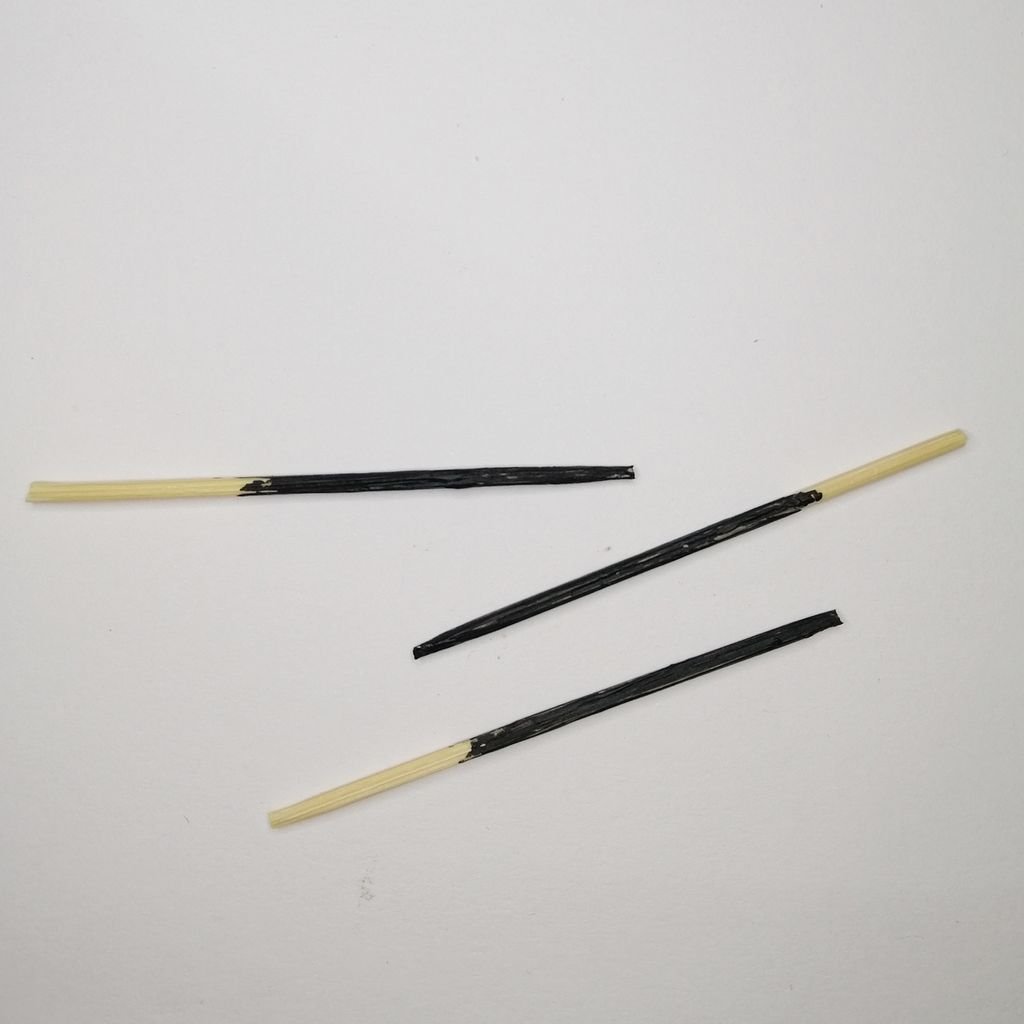
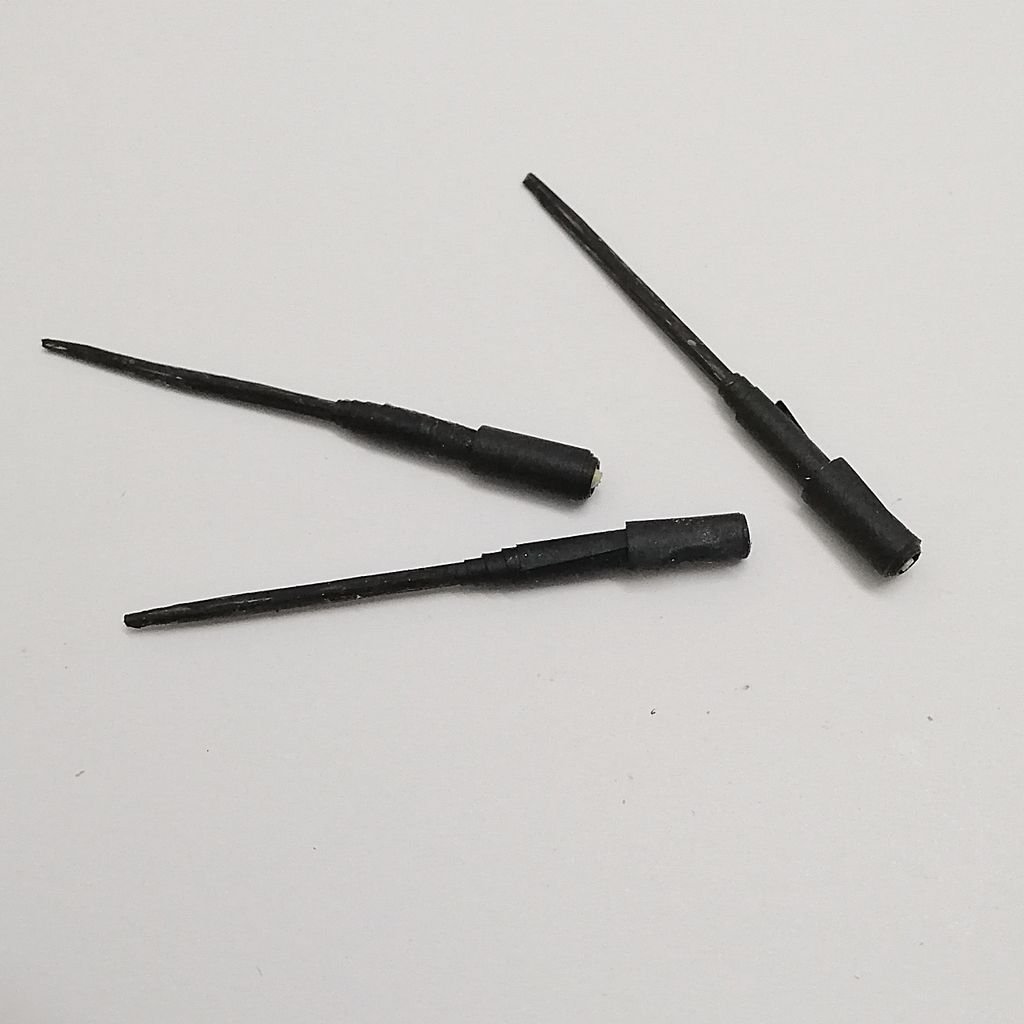
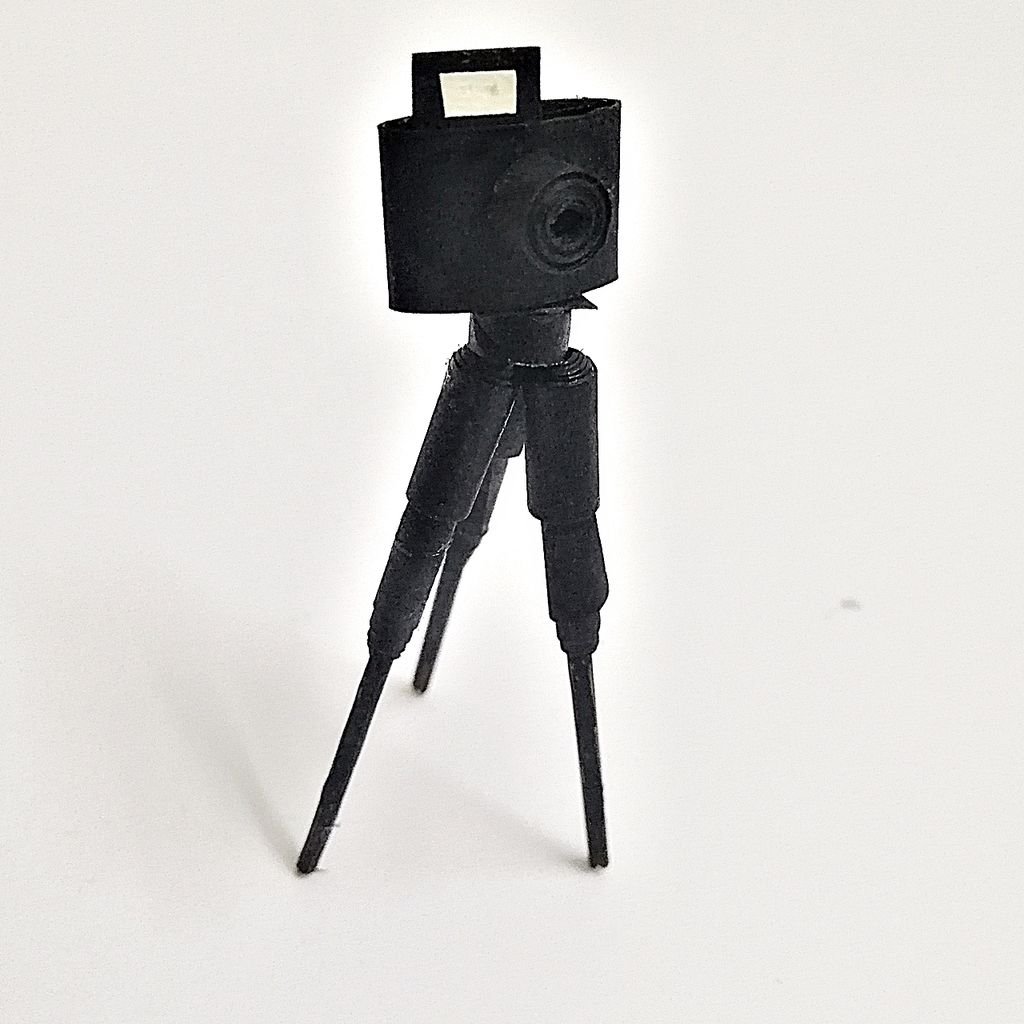
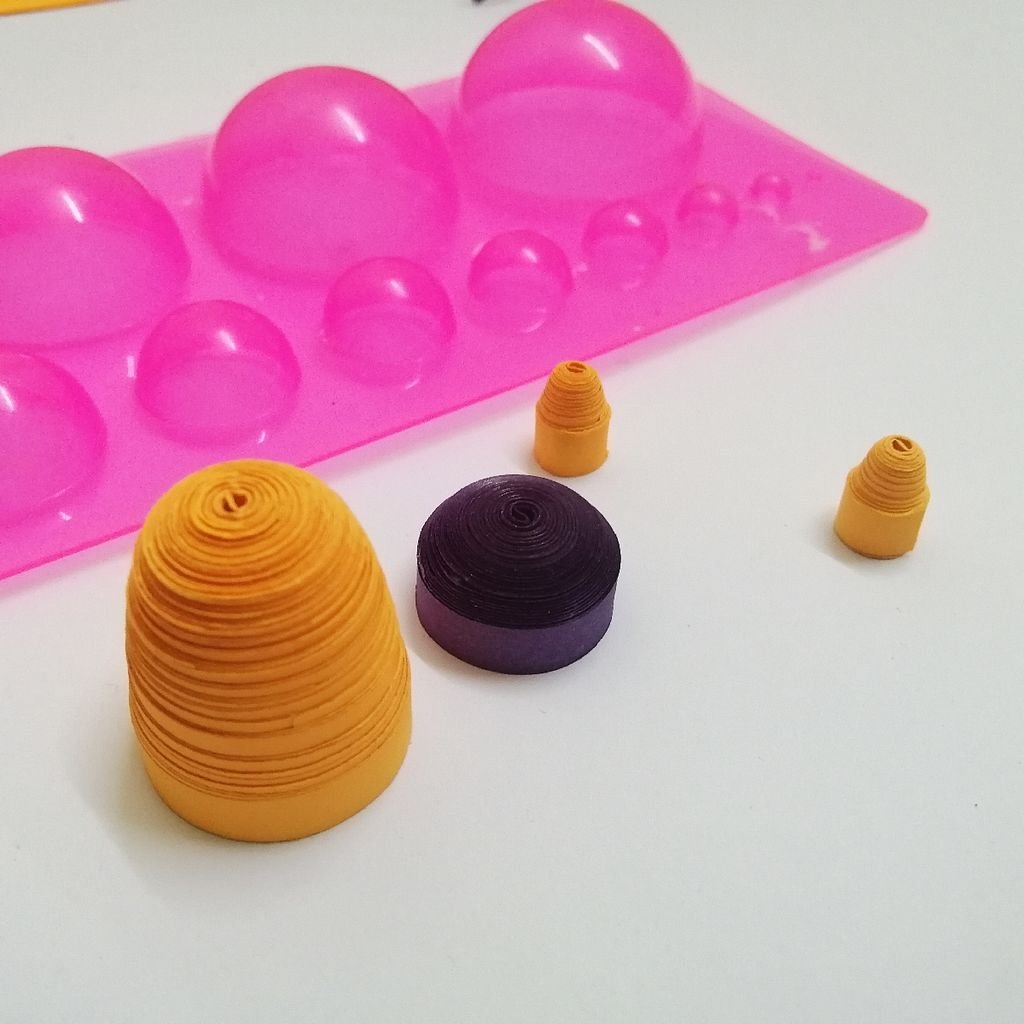
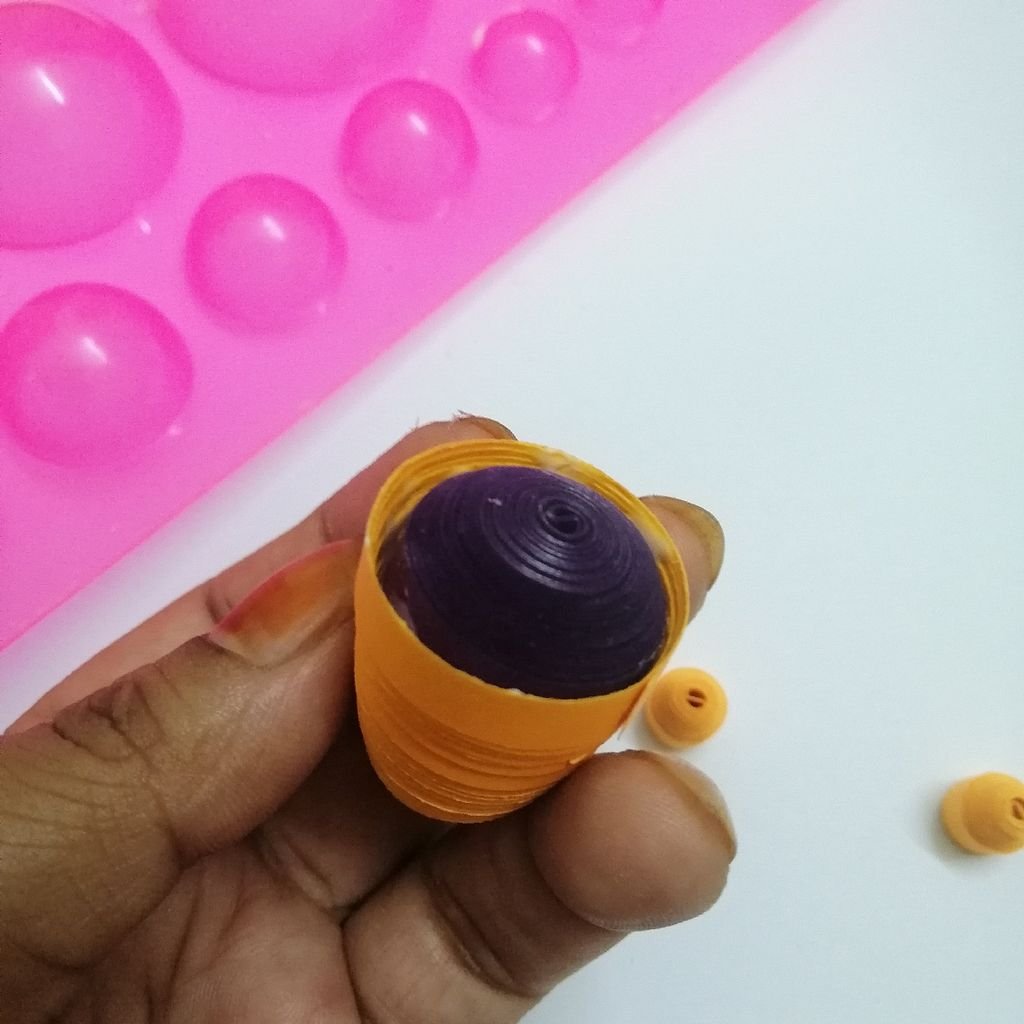
To make the camera you’ll need black 5mm, 1.5 mm quilling strips, toothpick, and black acrylic/watercolor.
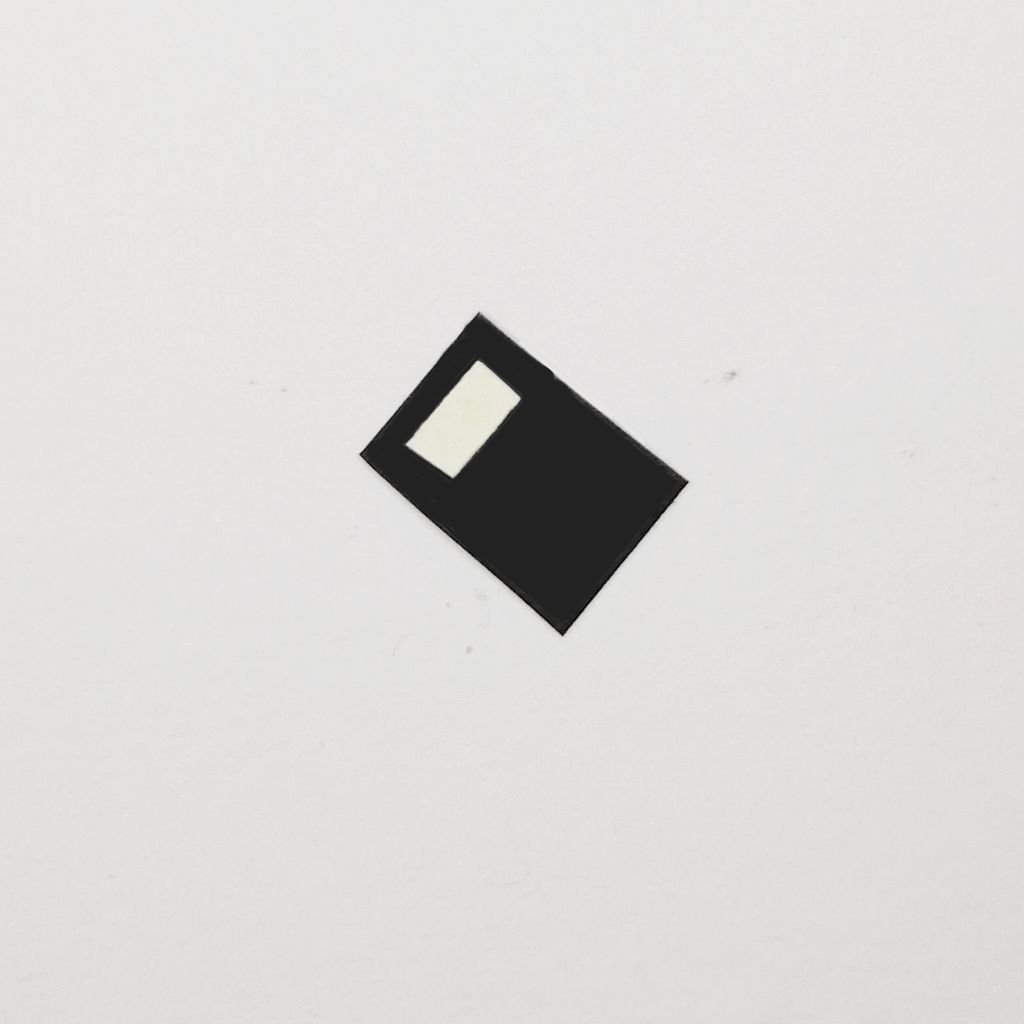
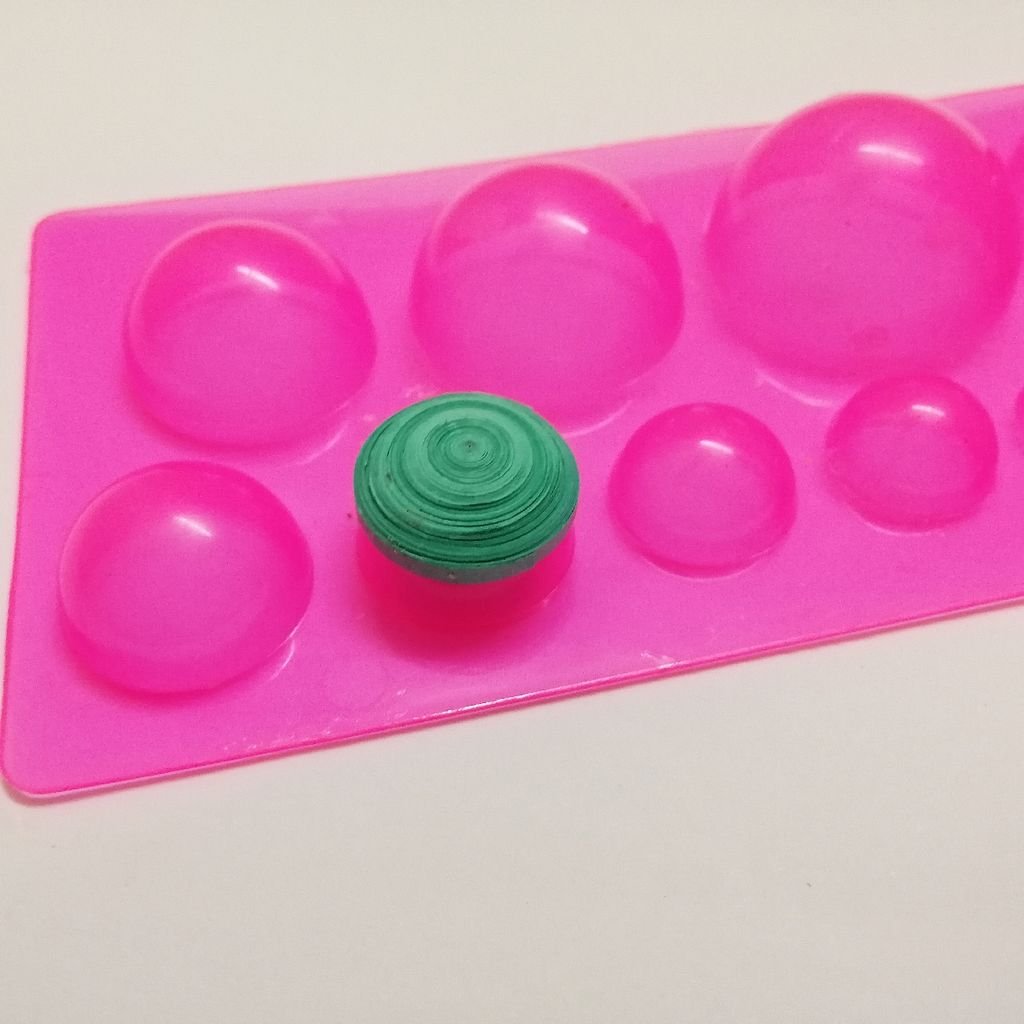
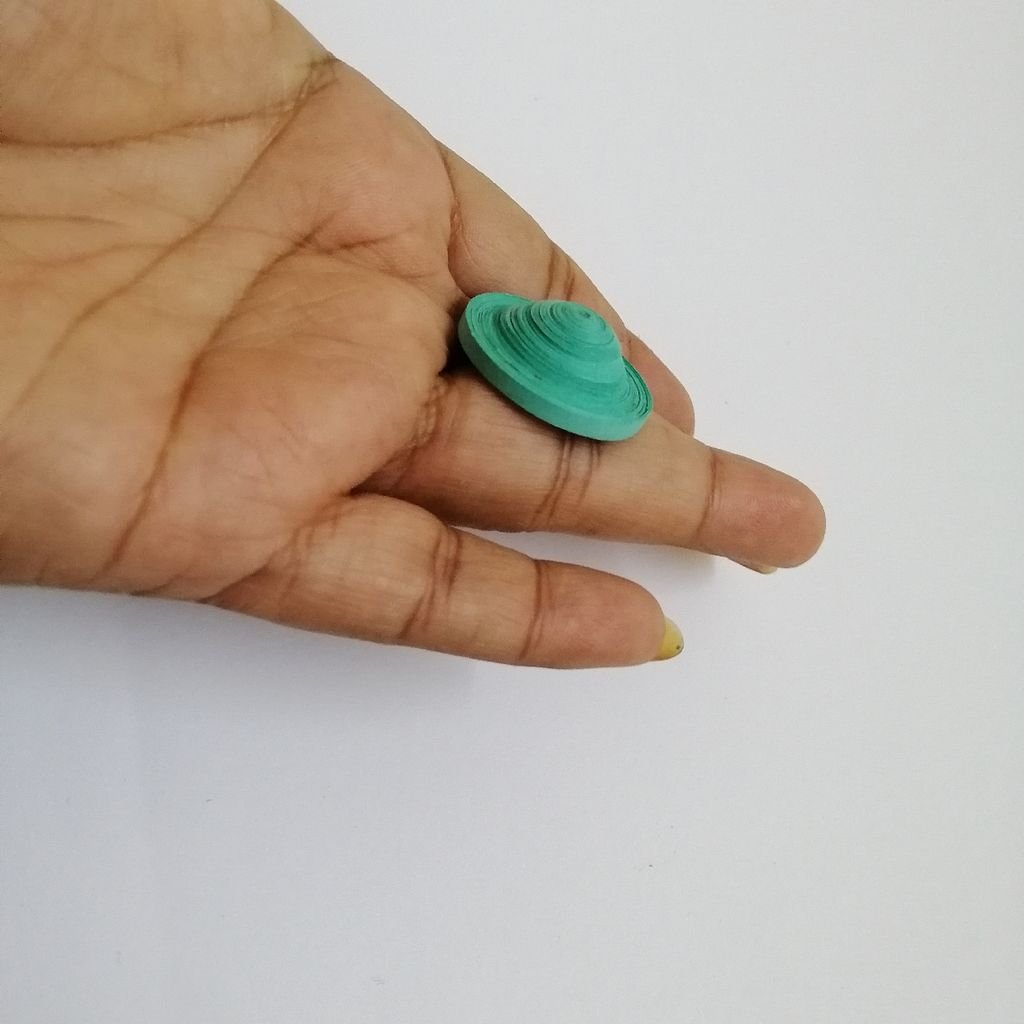
Take a 6cm long, 5mm black paper strip and roll it (15mm diameter), then press the paper roll down to make it flat. it’s the base of the camera. Now take 5cm long, 1.5 mm strip and make a coil of 3mm diameter. Glue it on the base. Now Cut out a small piece from of 5mm strips & glue a tiny white piece as shown in the picture, it’s the flash of the camera. Glue it inside of the base like the picture. Now take 3 pieces of toothpicks and color 2/3 of those. Let those dry properly. Now roll paper strips on the remaing side. Now glue those with the base carefully. You mini camera is ready.
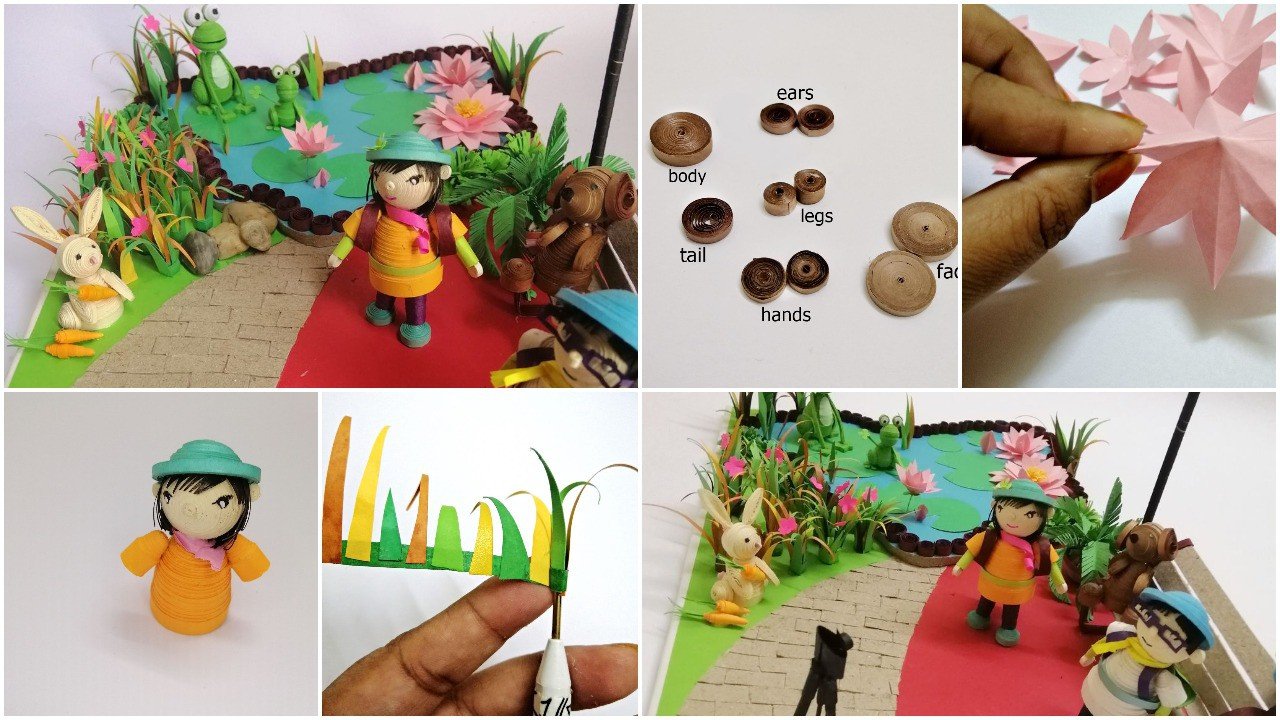
Step 3: 3D Quilled Dog
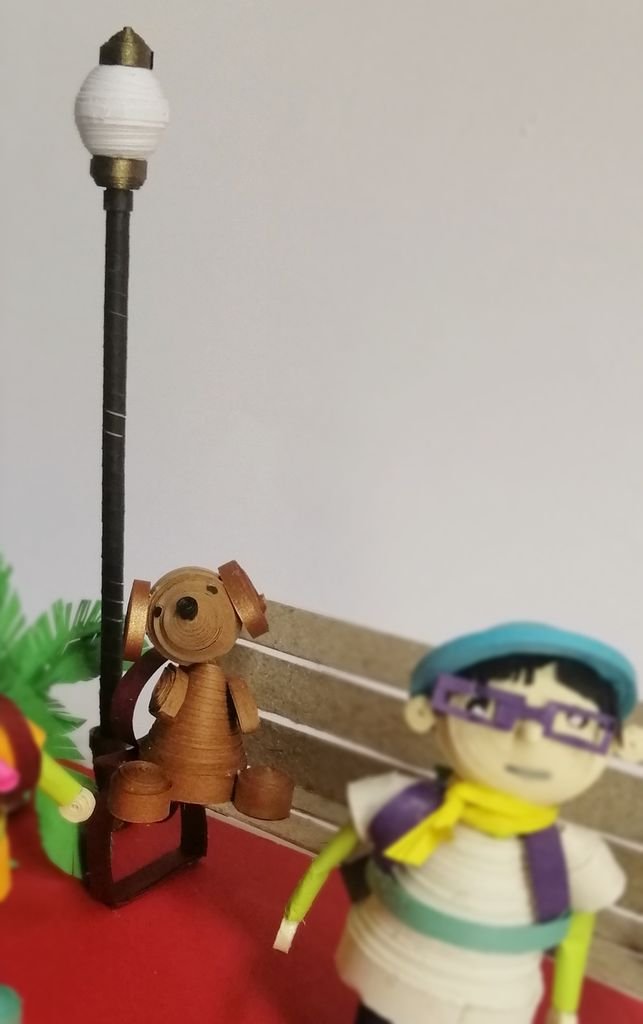
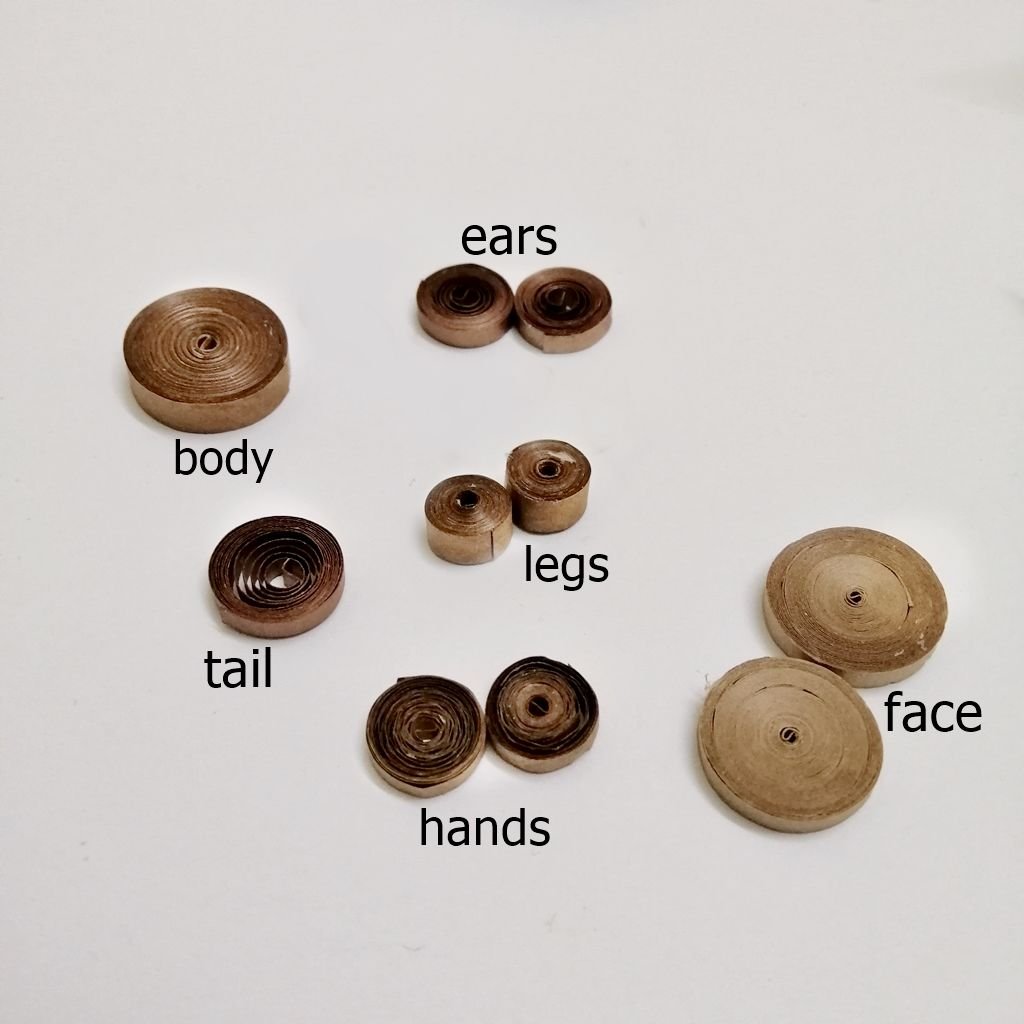
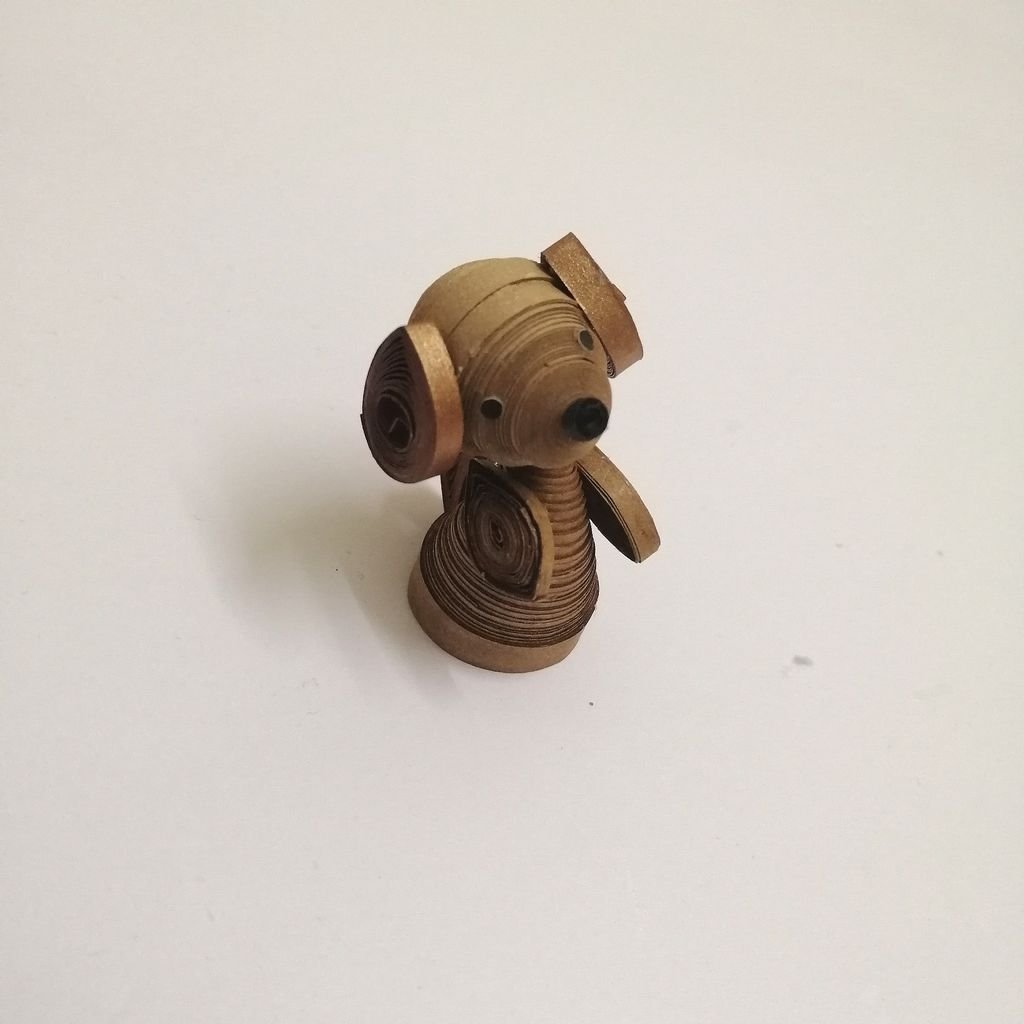
The head of the dog is made of 2 tight coils (approx. 10m diameter) of 3mm paper strips. Make a cubic cone approx 1.5cm tall using one coil and a dome shape with another coil. Glue them together to make the head.
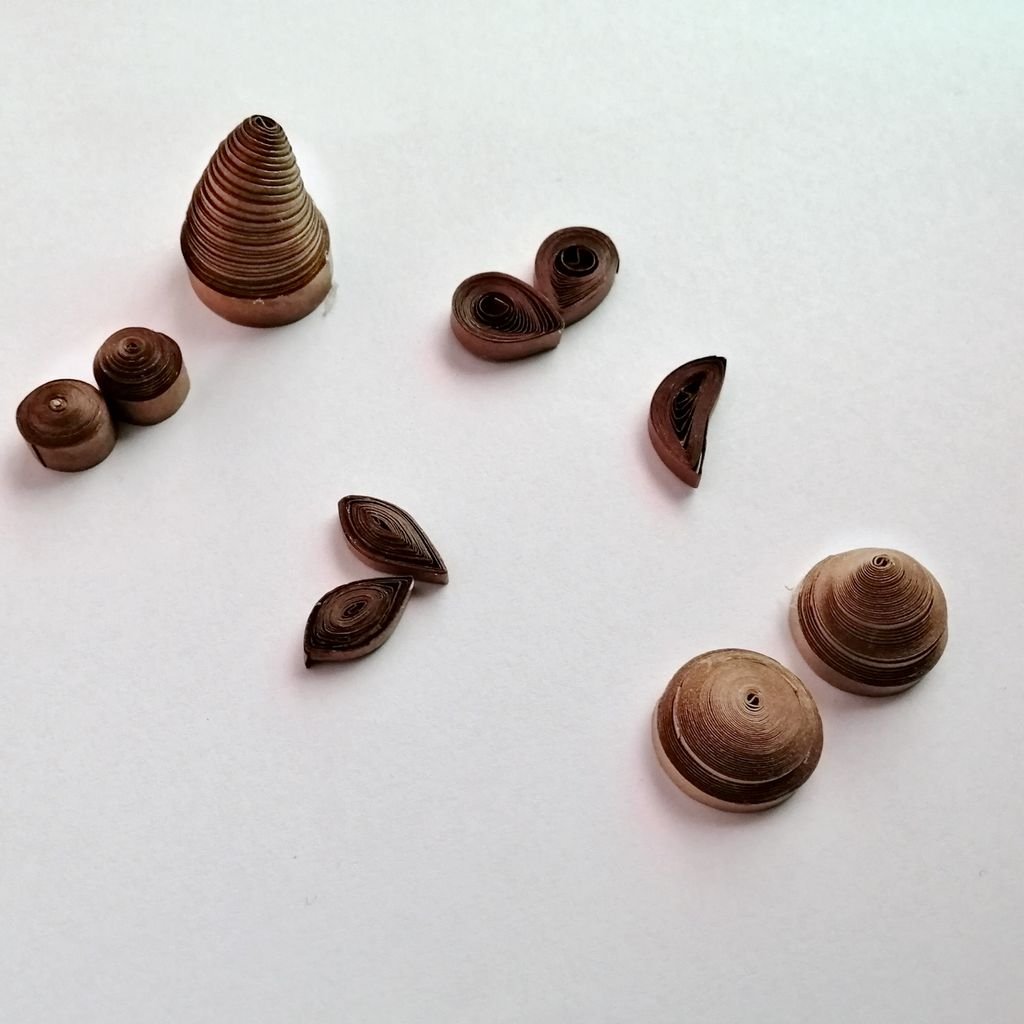
For the body, I used 4mm strips. Roll some strips until you get a 1.5 diameter tight coil. Then make a cubic cone approx 3 cm tall. For hands, ears & tail — 1.5mm wide strips. Make a loose coil of 1cm diameter and shape in teardrop using fingers. For legs, I used 3mm wide & 15cm long strips to make tight coils.
Glue tail, hands and legs on the body and ears on the head. Draw eyes and nose with black color.
Glue the head with body and let it dry. The 3D dog is ready!
You can make other 3D animal figures in the same process. I made a rabbit by the same process on this project. Just need to use other colors and change the shapes of ears and tail.
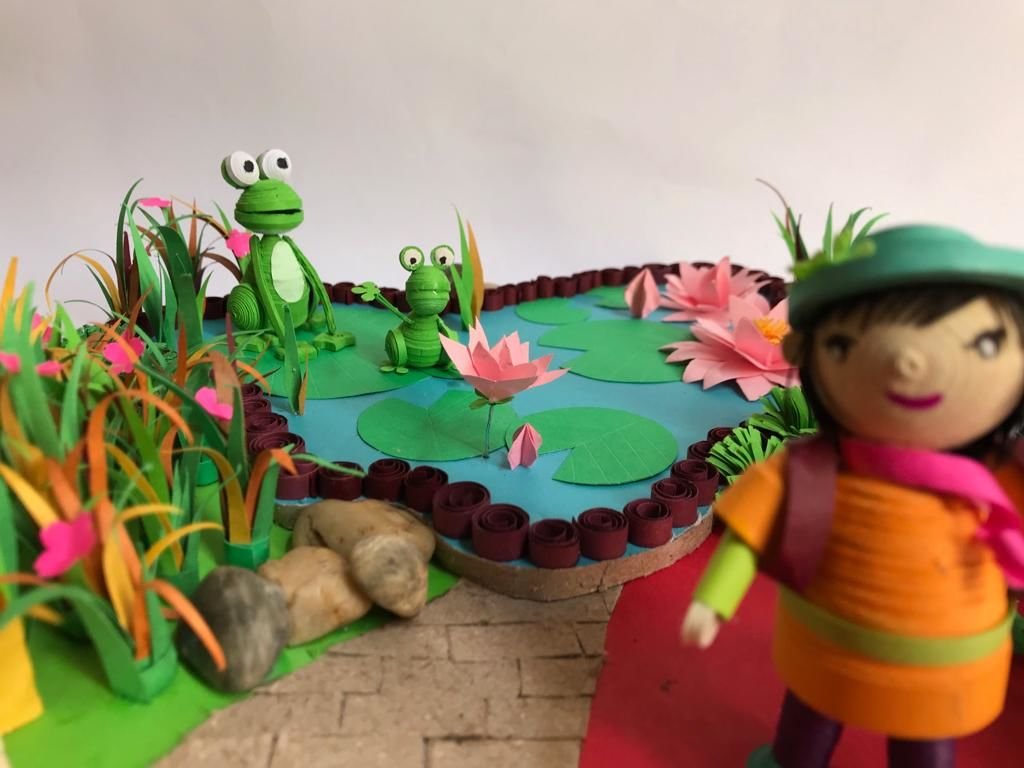
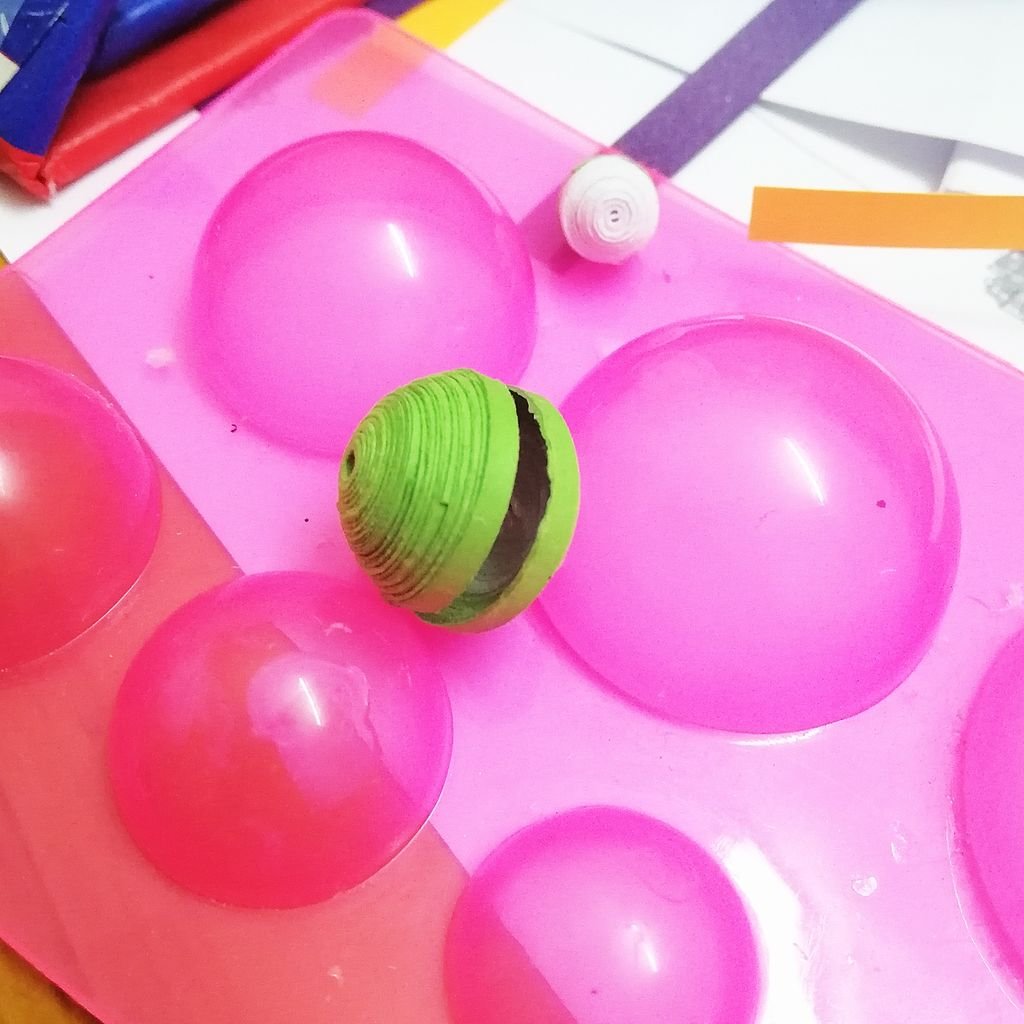
Step 4: 3D Quilled Frog


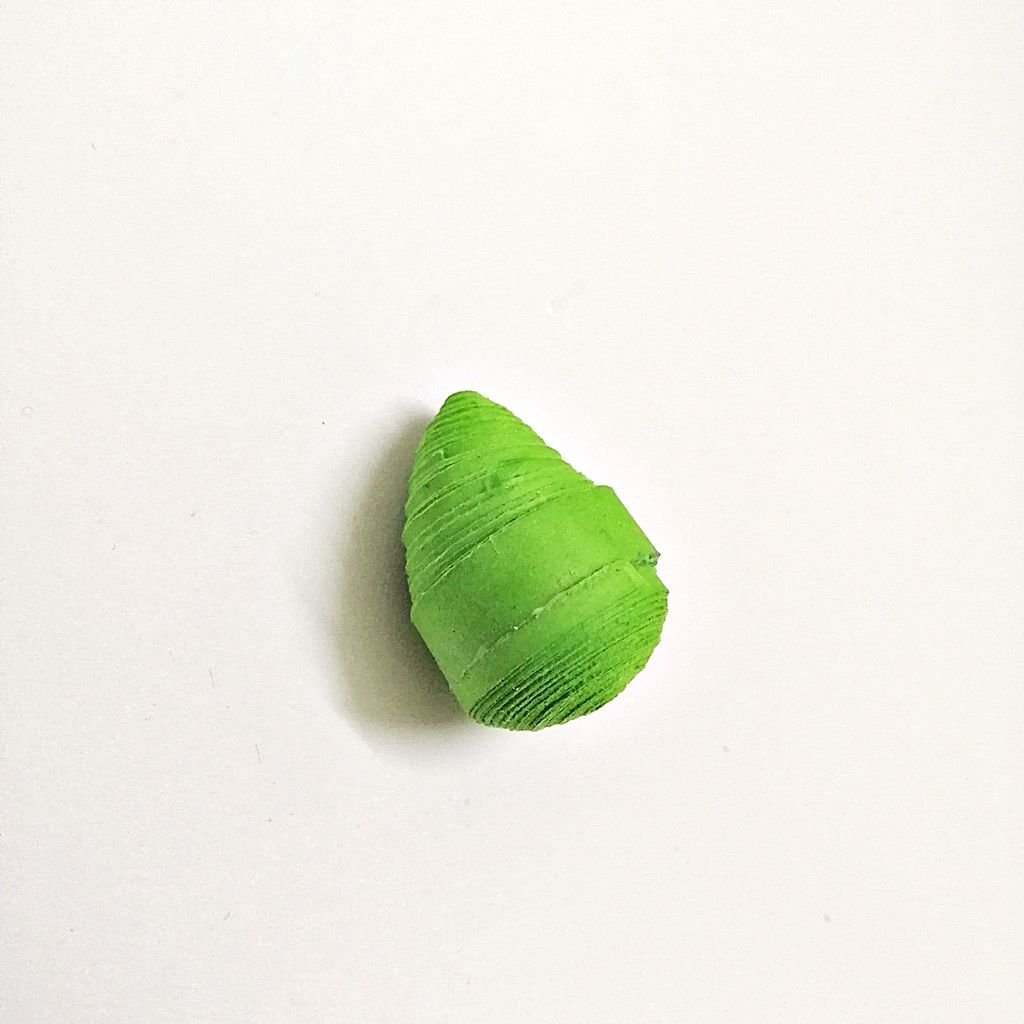


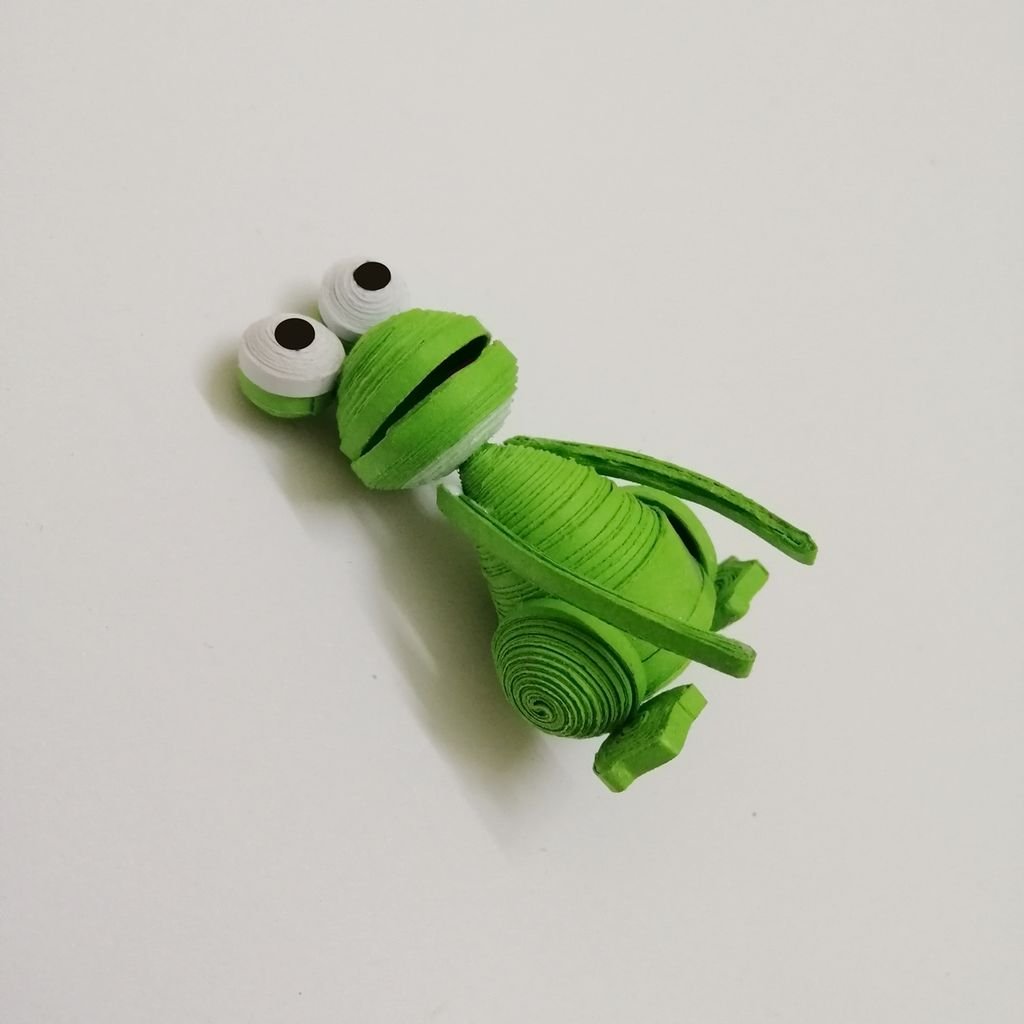

1. For making a body, take about 12 green strips of 3mm width and roll up a conic coil of 4,5 cm high. Take more 8 green strips of 10 mm width and roll up a dome-shaped coil. Glue them together & leave them to dry.
2. For making ahead take 8 pieces of green 1.5mm strips and roll up a dense coil. Go on adding the strips by one till the diameter of the coil is 2.25 cm if needed. Make two such coils. In one coil add light Stick them together so that a mouth should be a bit open. Put a little glue on the external edge of the upper coil and on the eternal edge, wait a bit and join the coils.
3. For making eyes, take 3 pieces of green strips of 1.5mm width and roll up a tight coil. Make 2 green & 2 white coils of the same diameter. Now make a dome shape and glue them together. let them dry & after drying, draw eyes with black color paint.
4. For making arms, take one piece of green strips of 1.5mm width. Fold it in half, again fold in half. Again fold in half & all glue together. To make hands follow the picture step by step.
5. For making legs, take 7 pieces of green strips of 1.5mm width and roll up a tight coil. Make such two coils, Now make a dome shape and add glue inside to hold the shape.
Now glue head, body, hands & legs together to make the cutee Mrs. Froggy & her kid.
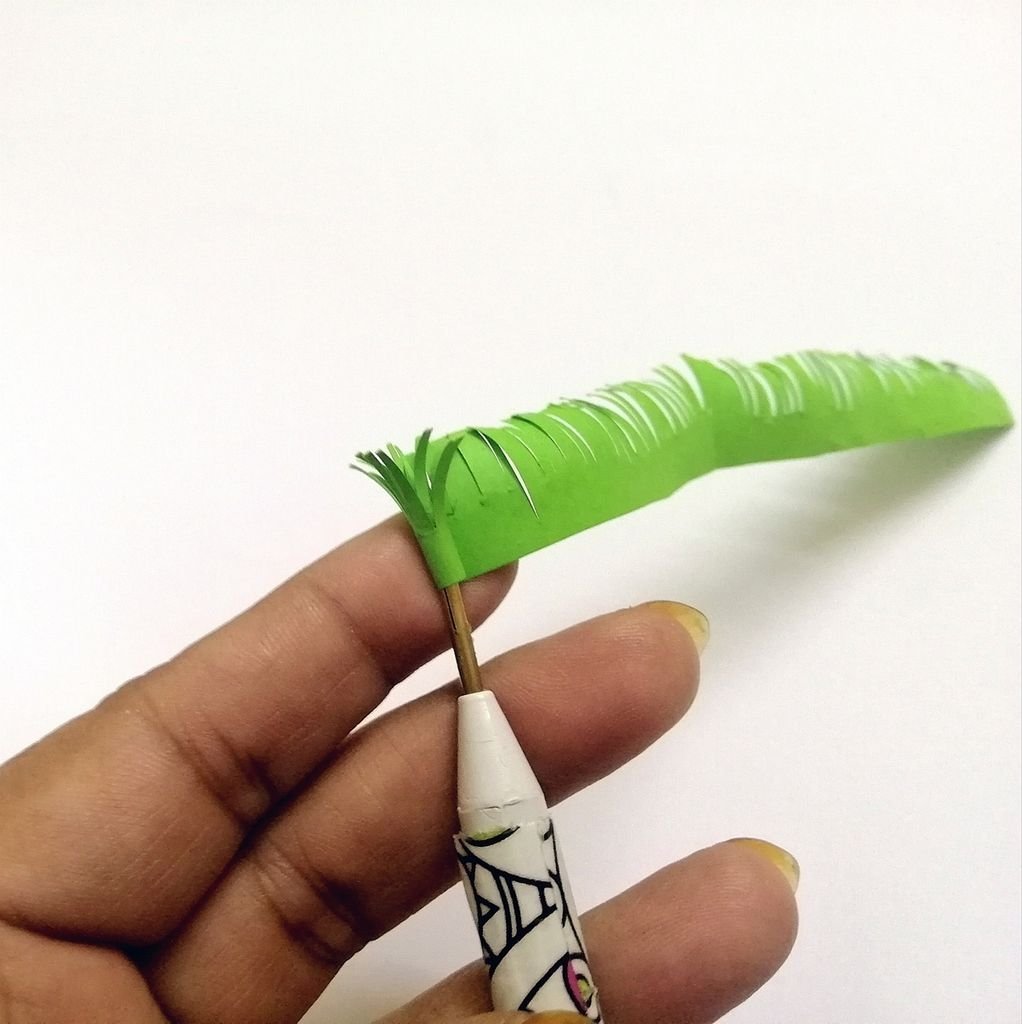
Step 5: 3D Tree

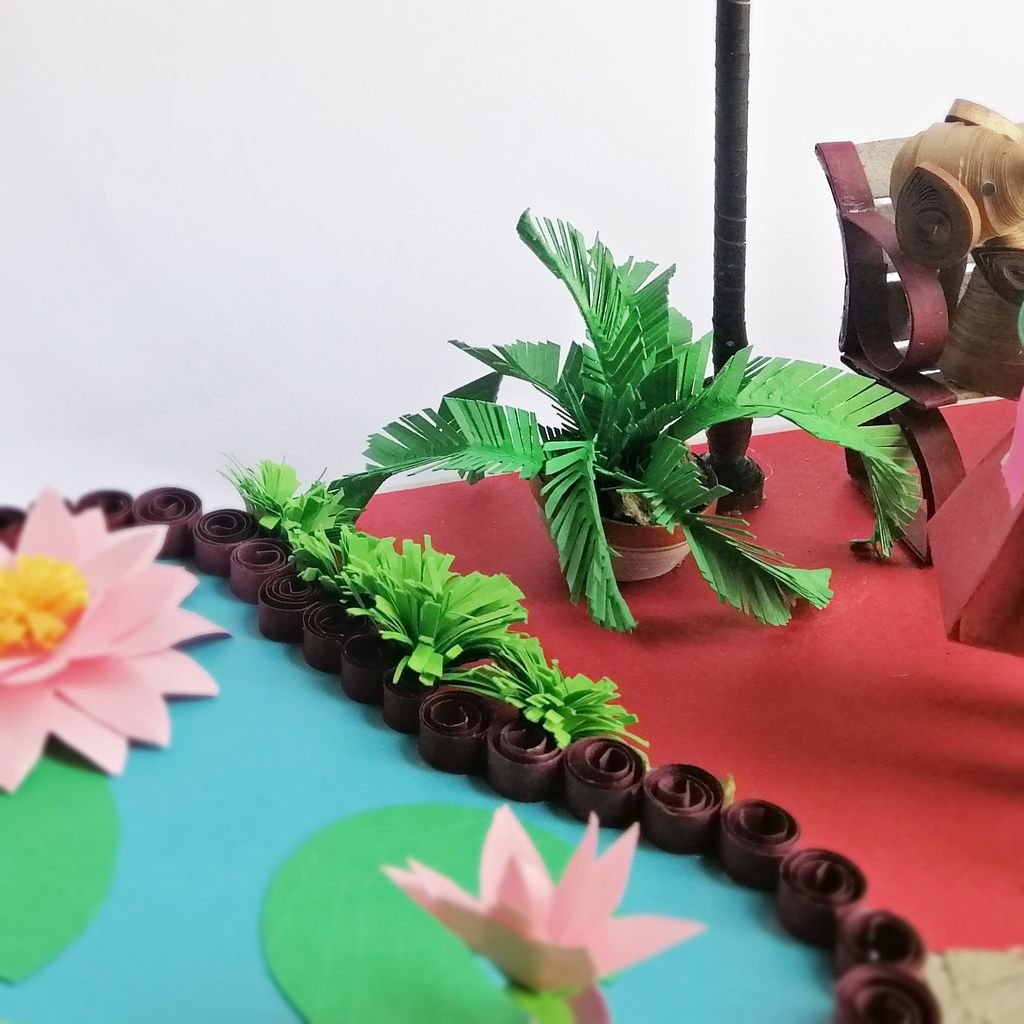
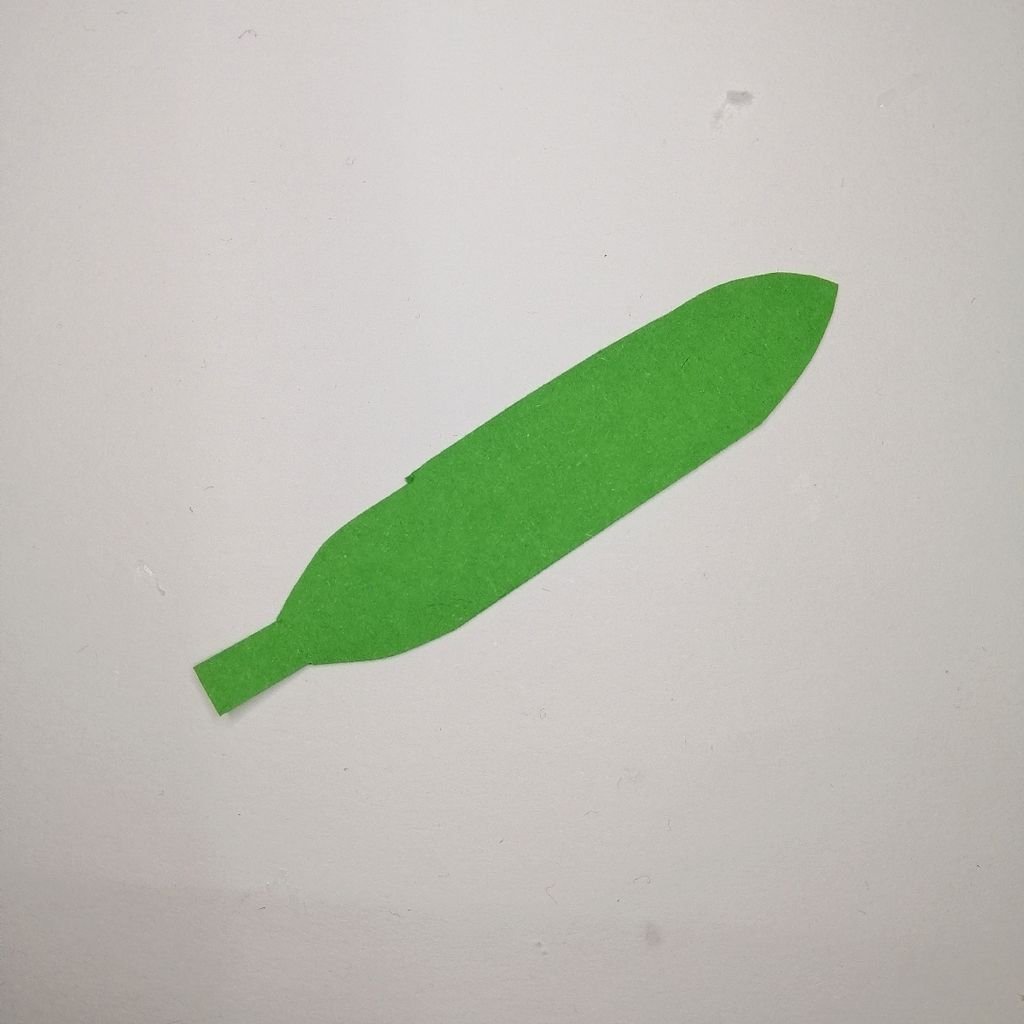
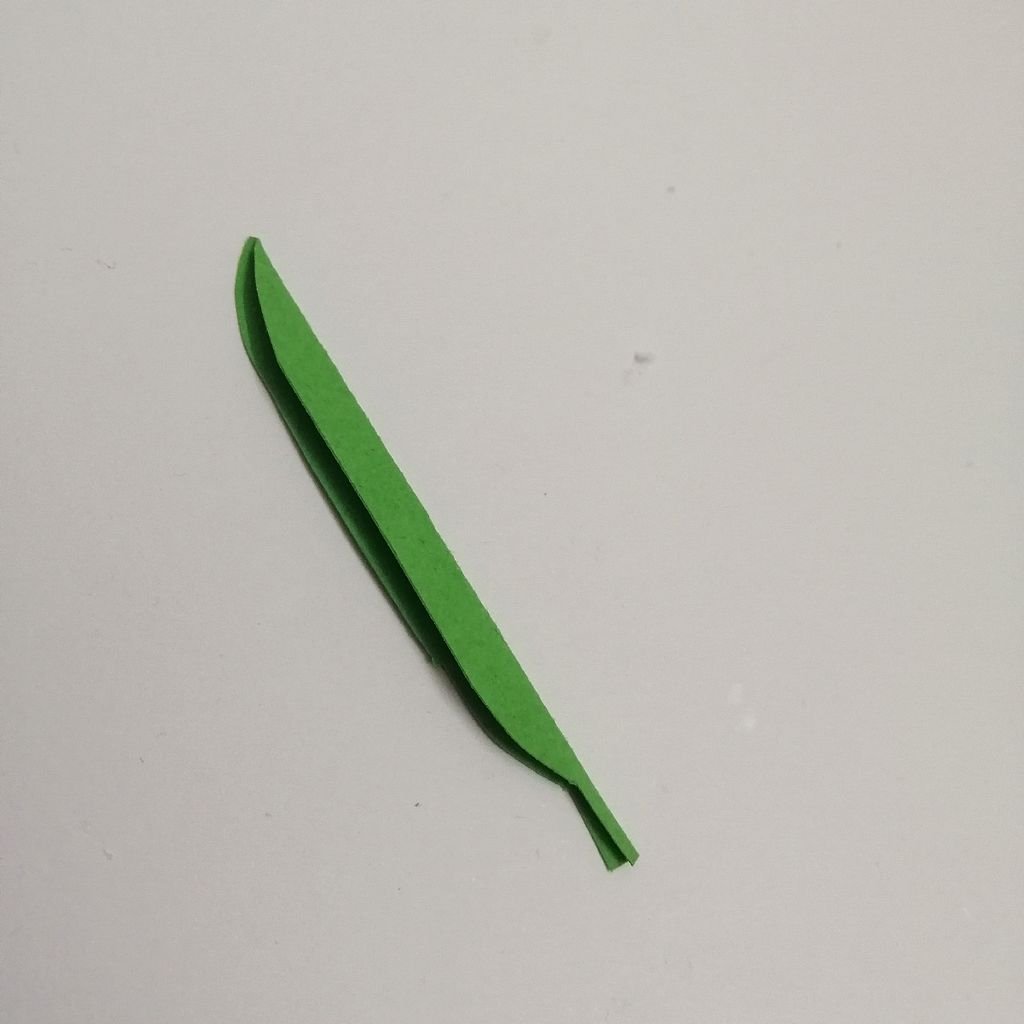
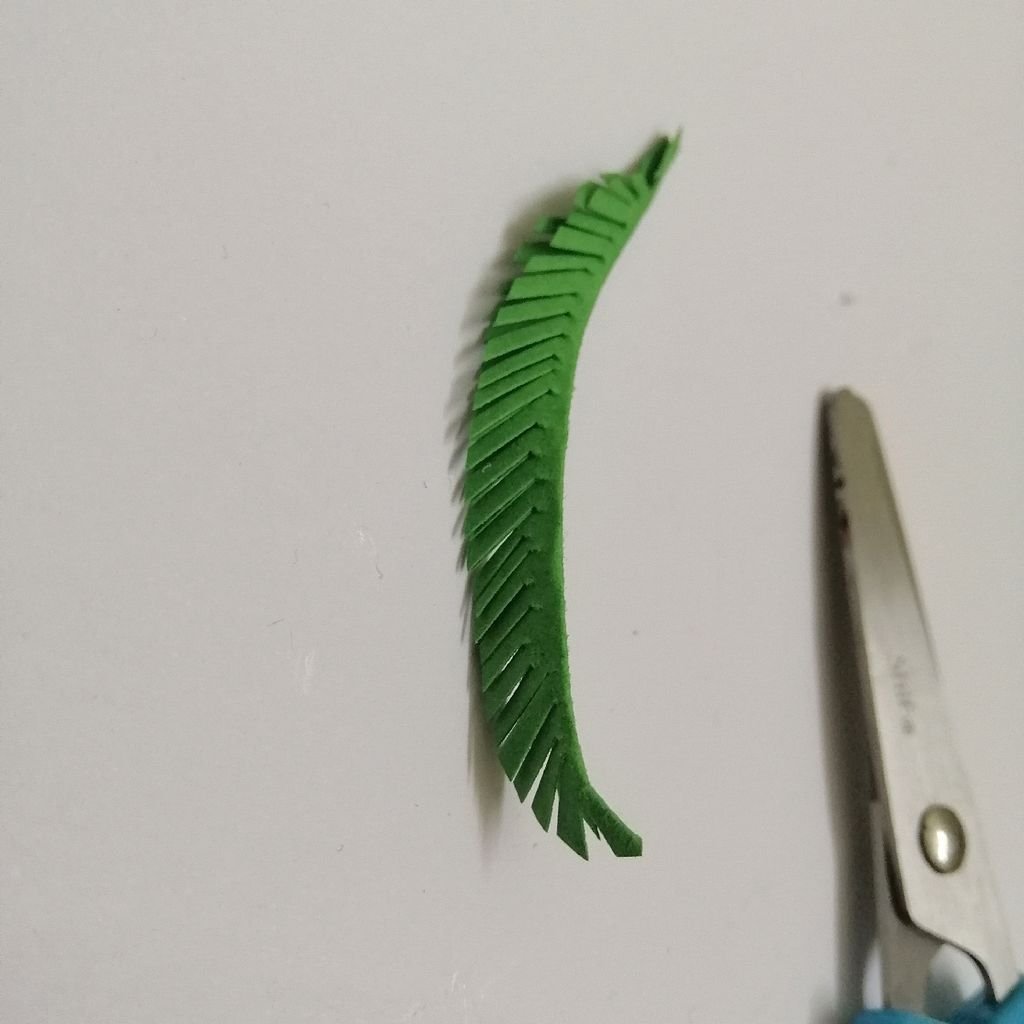
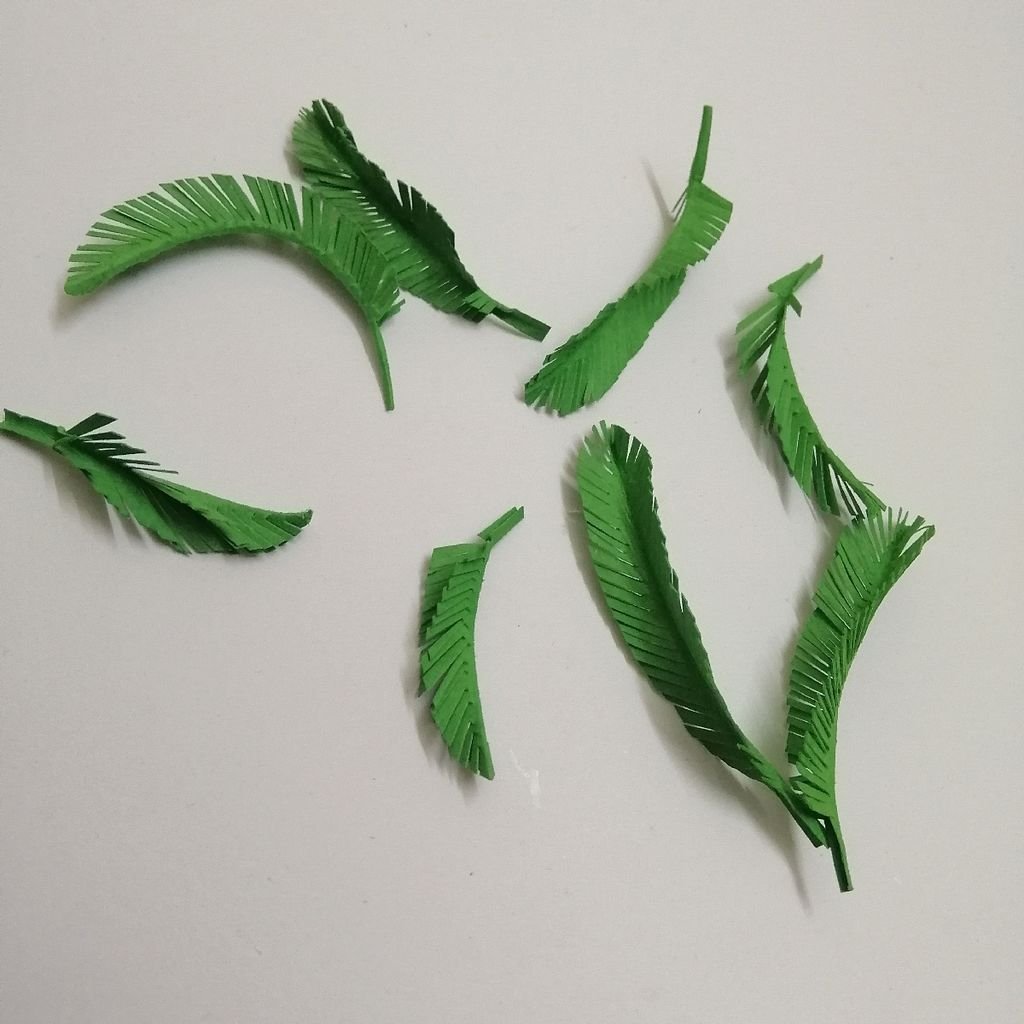

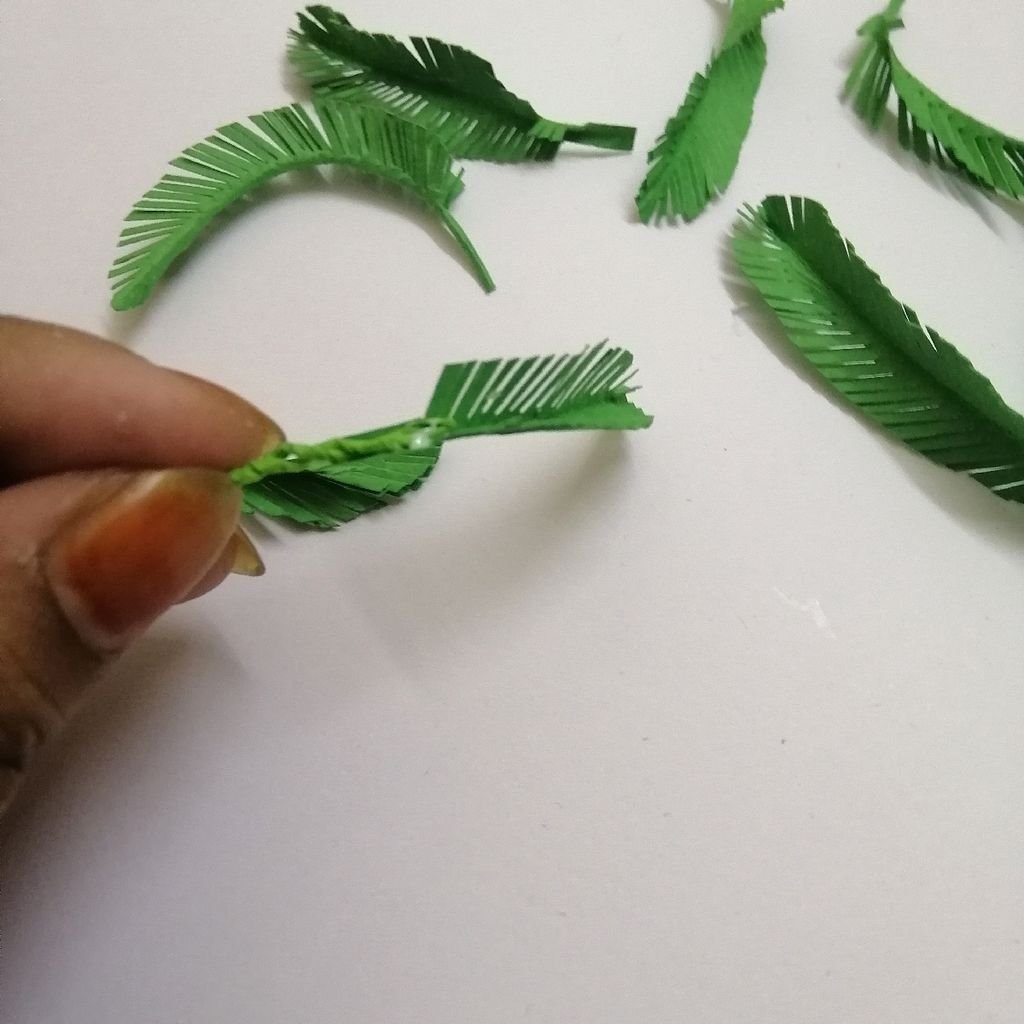
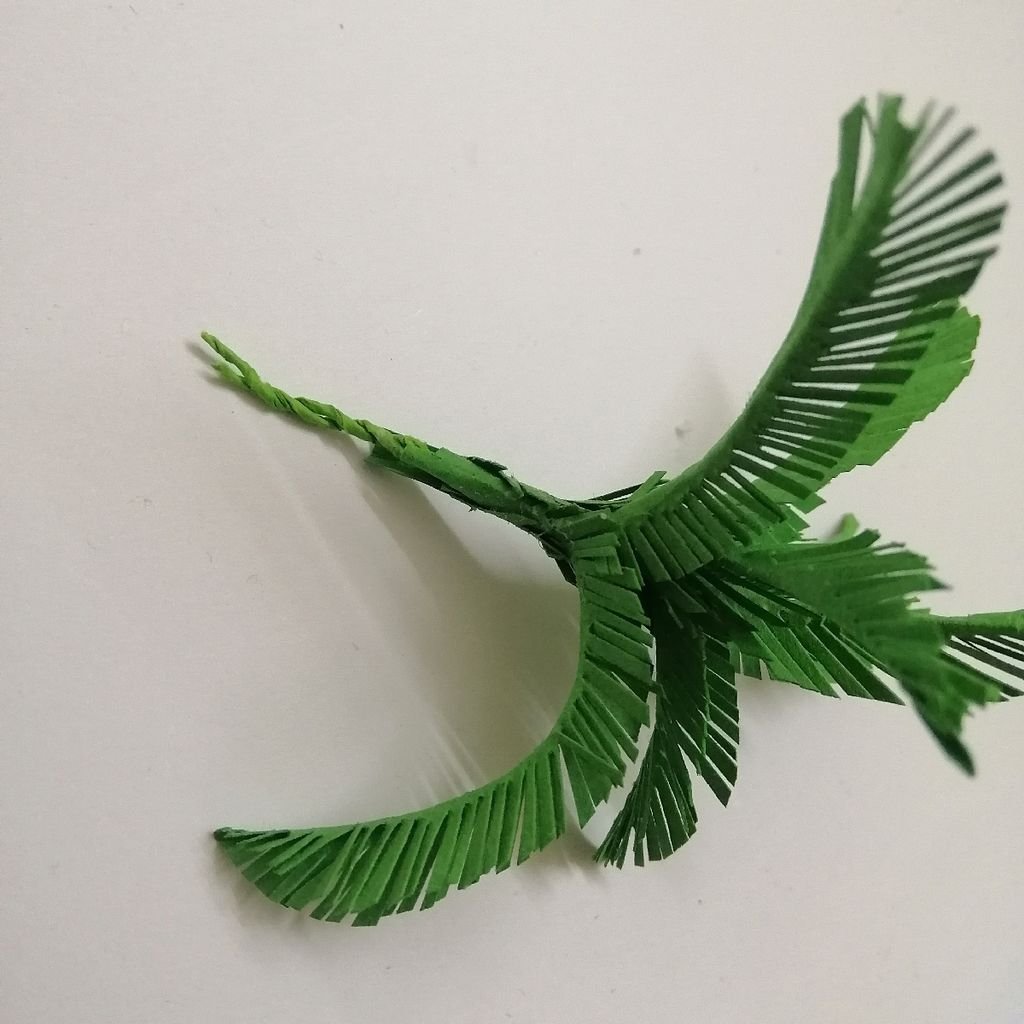
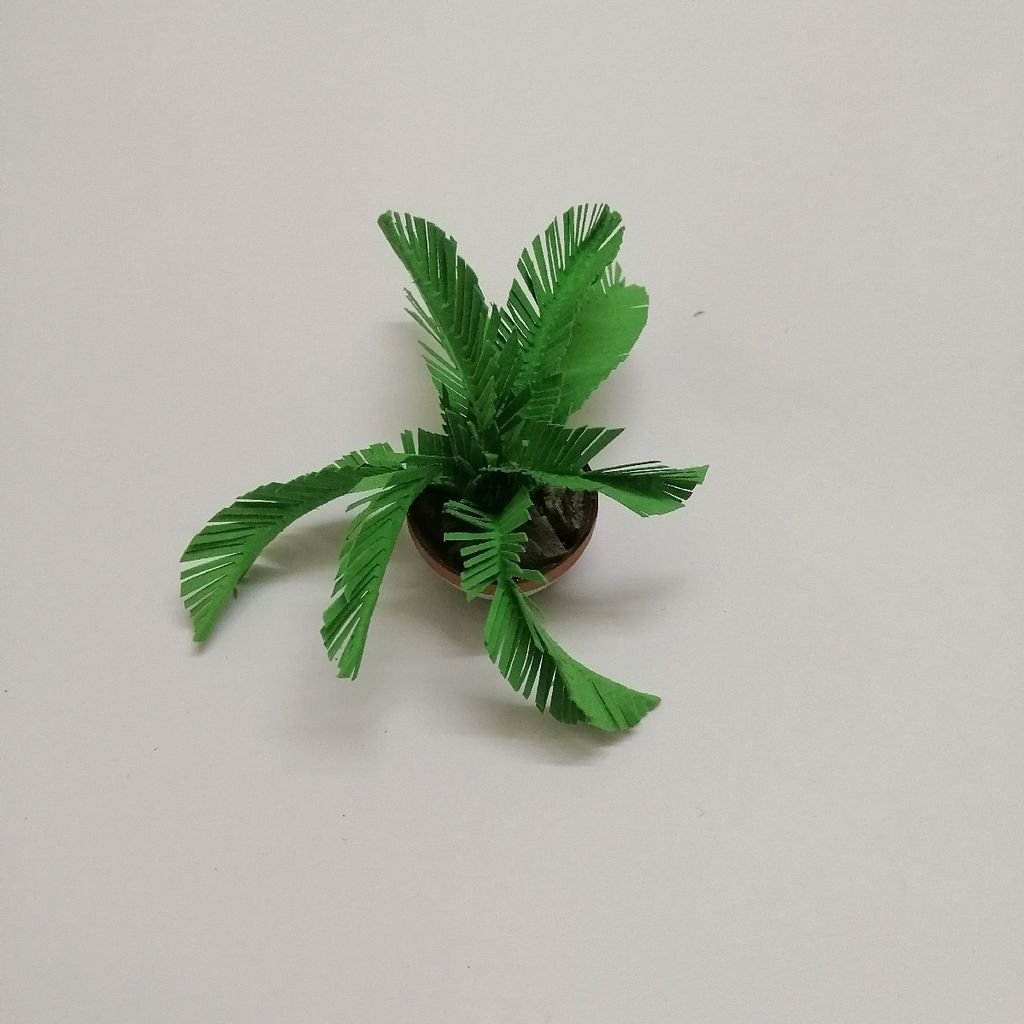
To make palm tree from paper, cut roughly leaf shapes with a slight point on one end as shown in the photo. Cut it into a basic fine fringe, from the outside edge into the center. Keep the width of the cuts as equal as possible, and angle them slightly as you go around the end to cut those fringes back towards the center as well. When you have at least five to seven fronds for your palm tree, gather the fronds together so that the bases of all the fronds are lined up together. When you have all the fronds lined up, glue them together at the base of the fringed leaves, as shown.
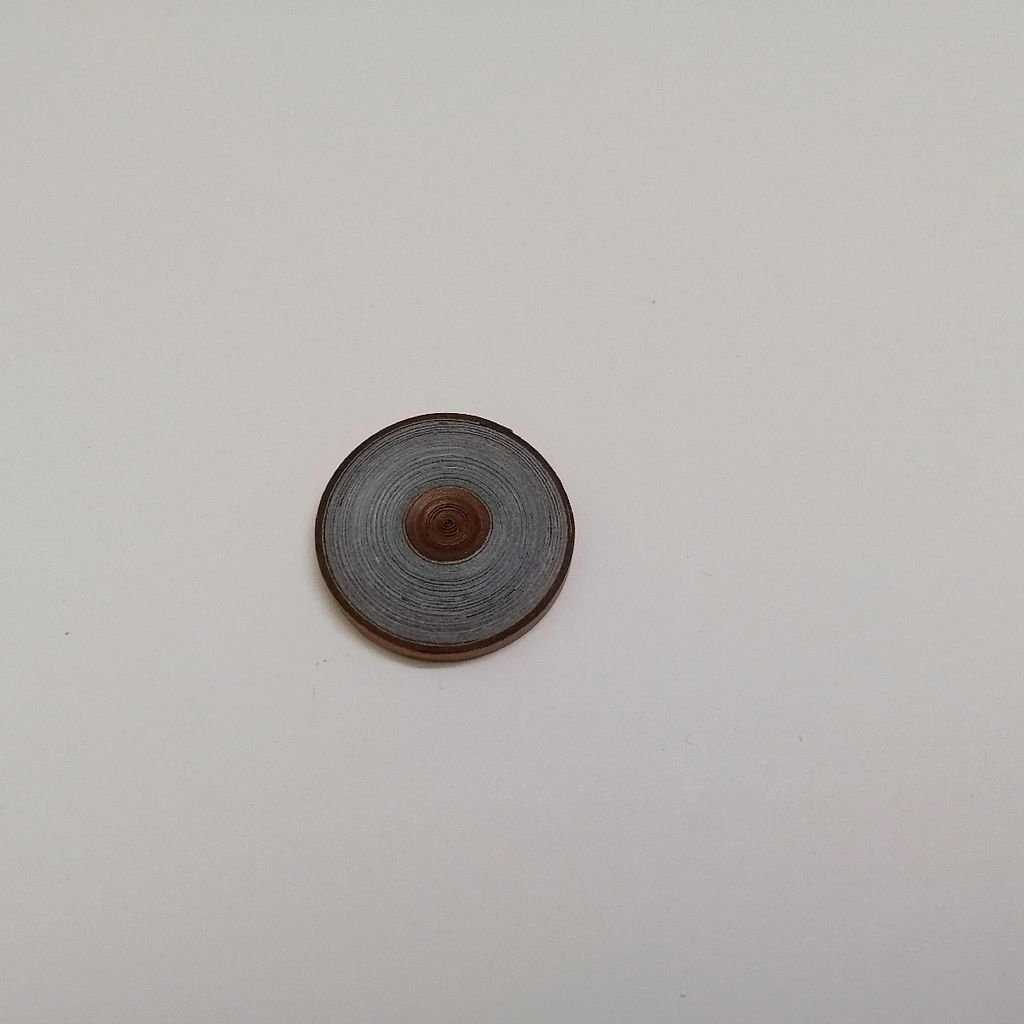
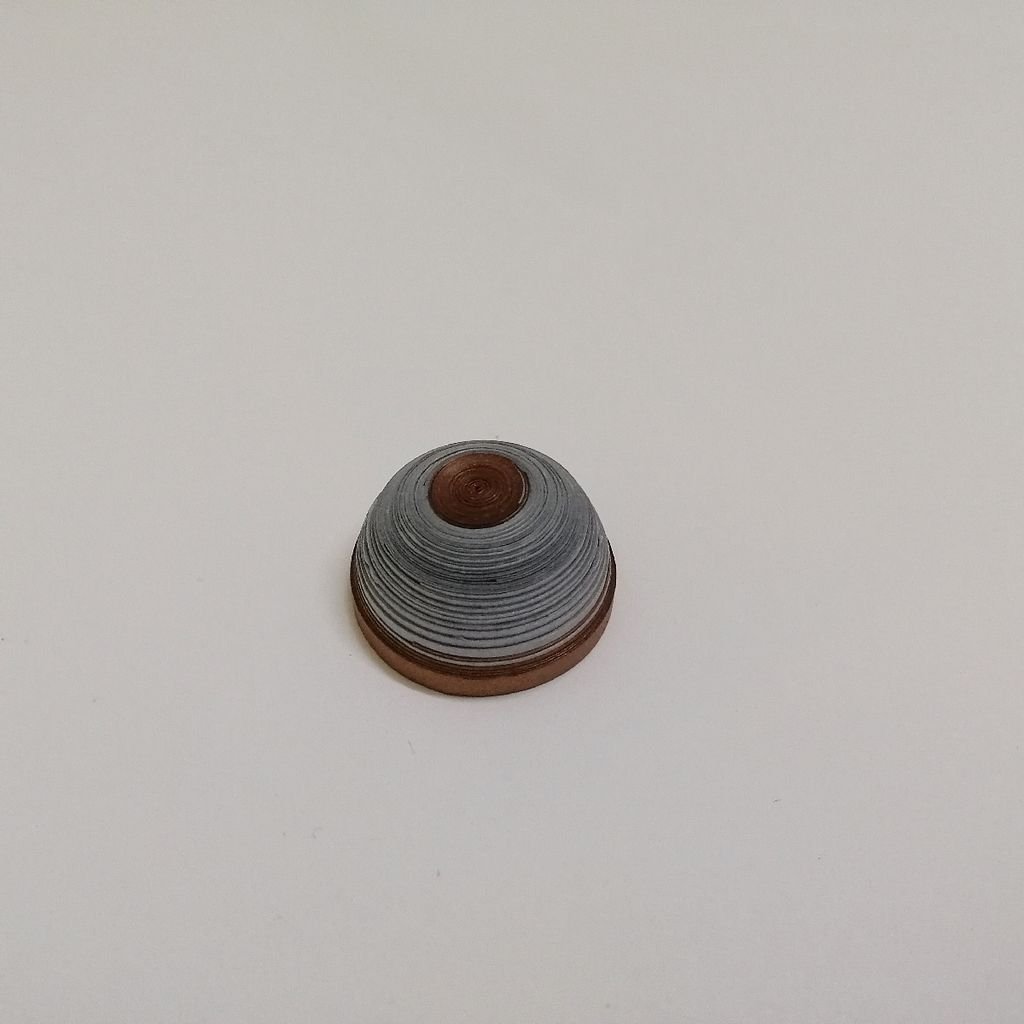
To make the pot I used 15 quilling strips to roll them in a tight coil. Then make a dome and give it a pot shape using your fingers. Now glue the tree in the middle of the pot. Here I used ground egg cartoon as soil. Other things can be used as well.
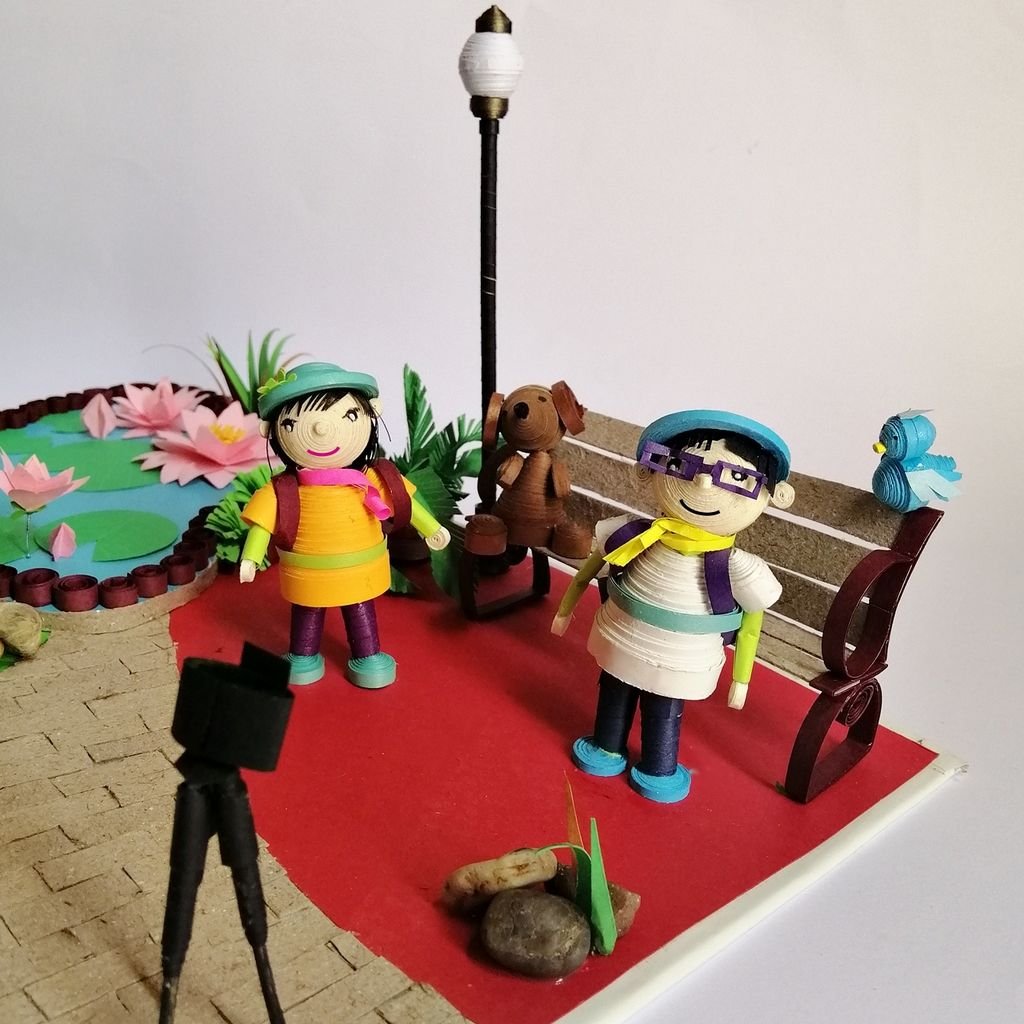
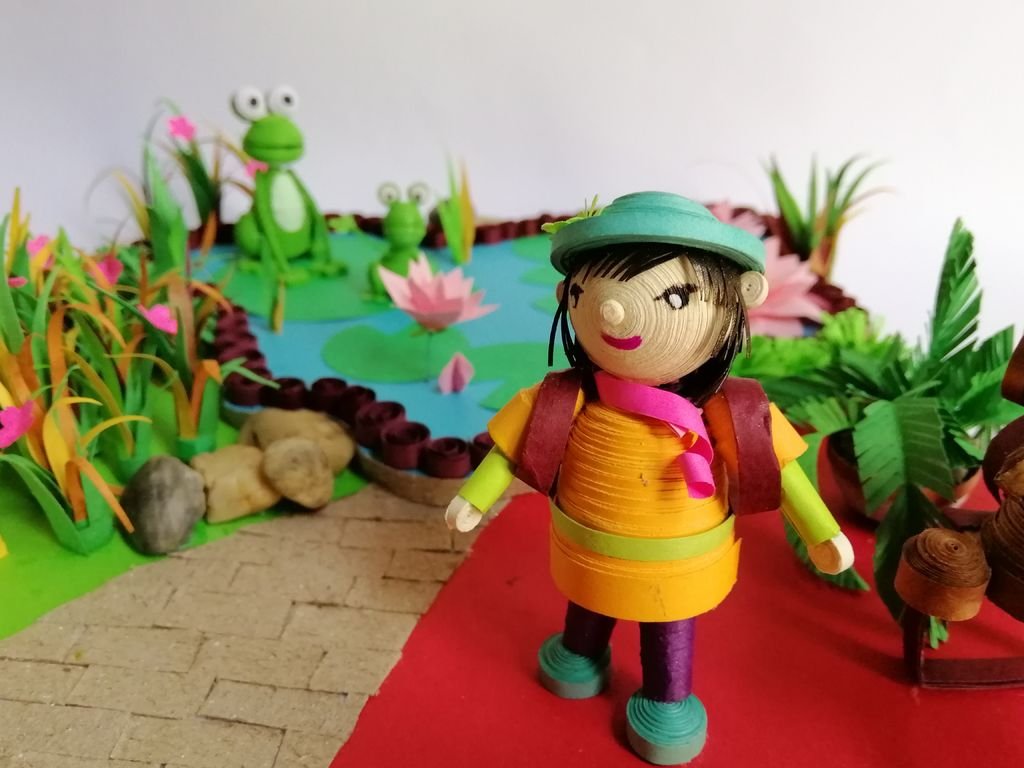
Step 6: 3D Quilling Doll With Hat’

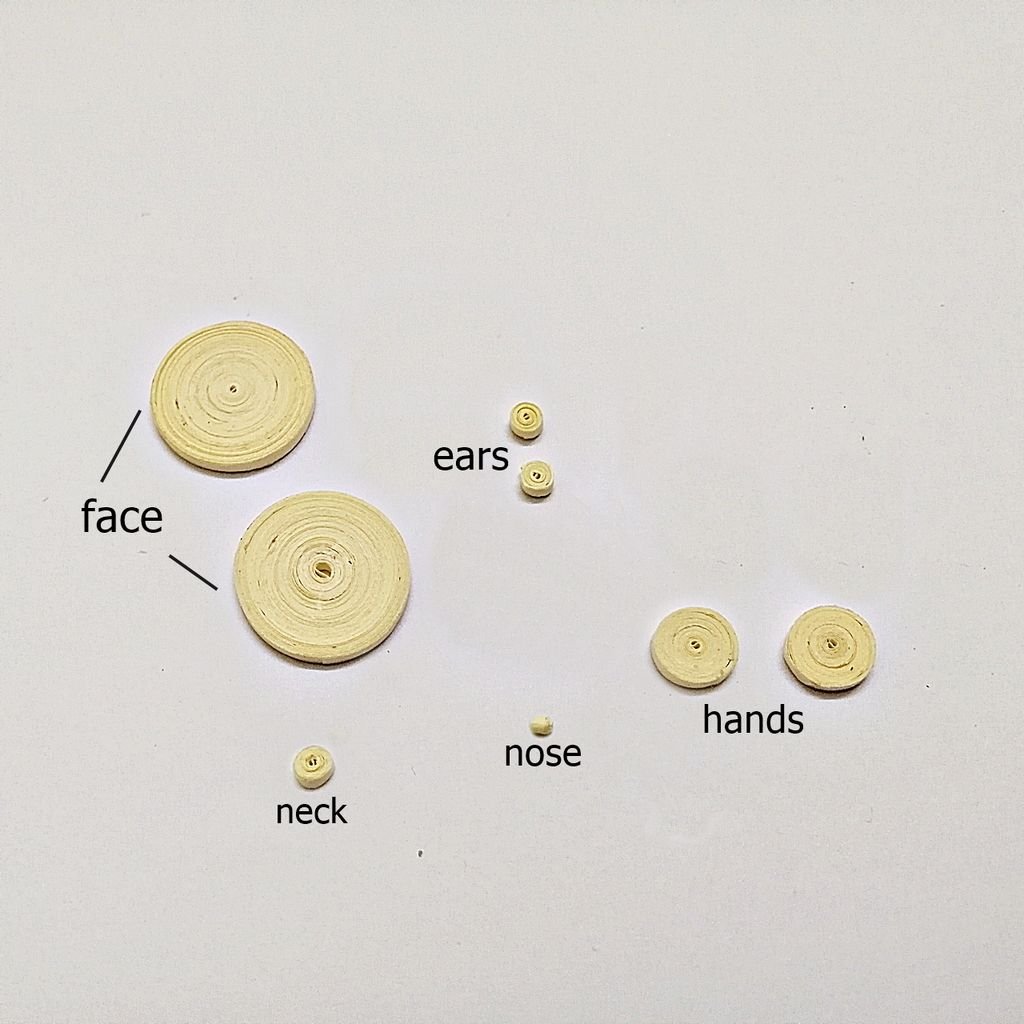
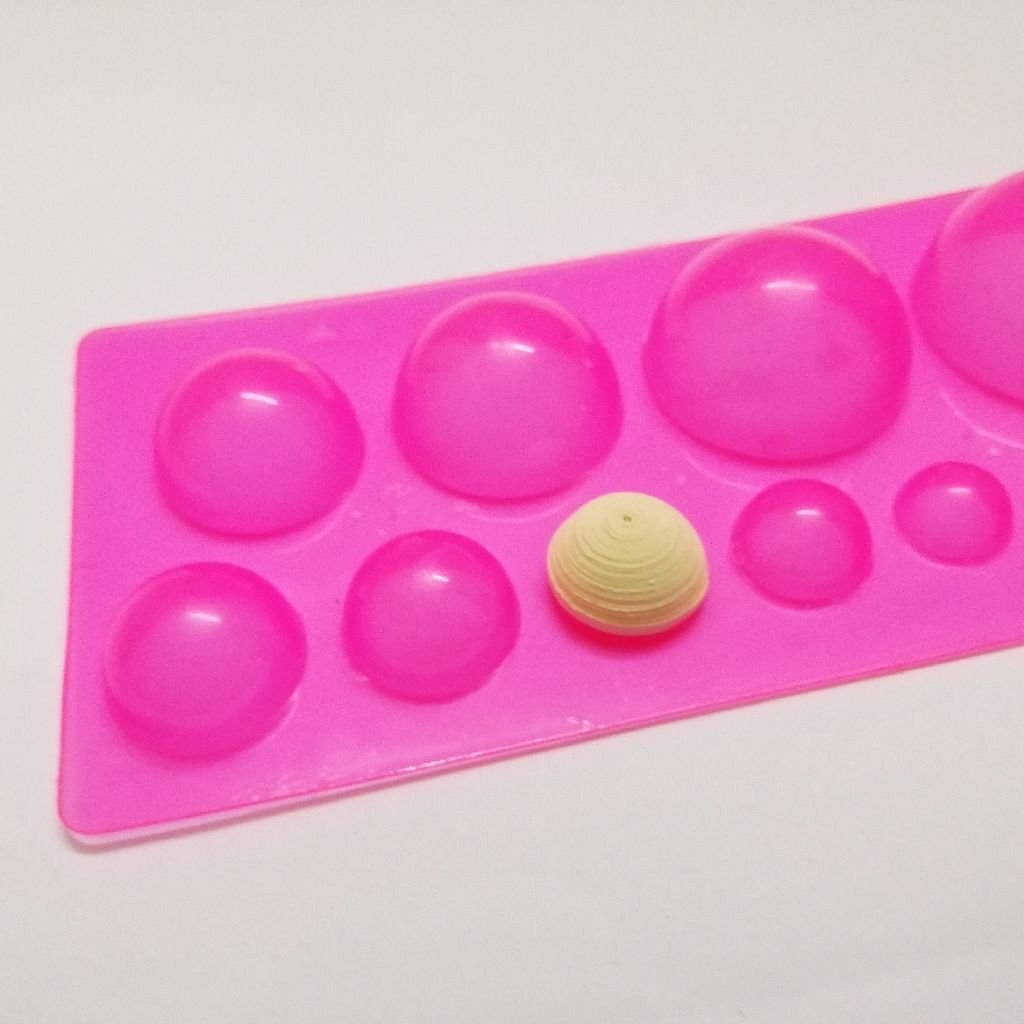
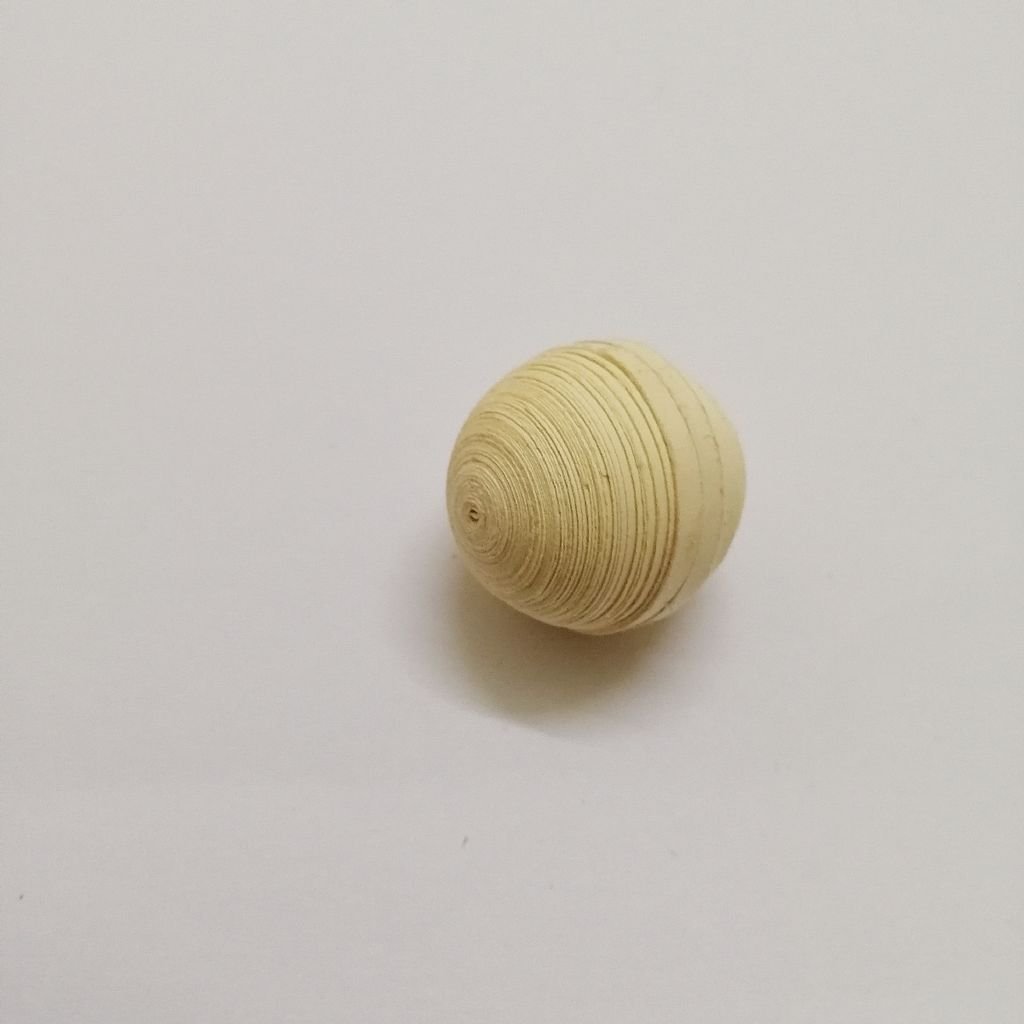

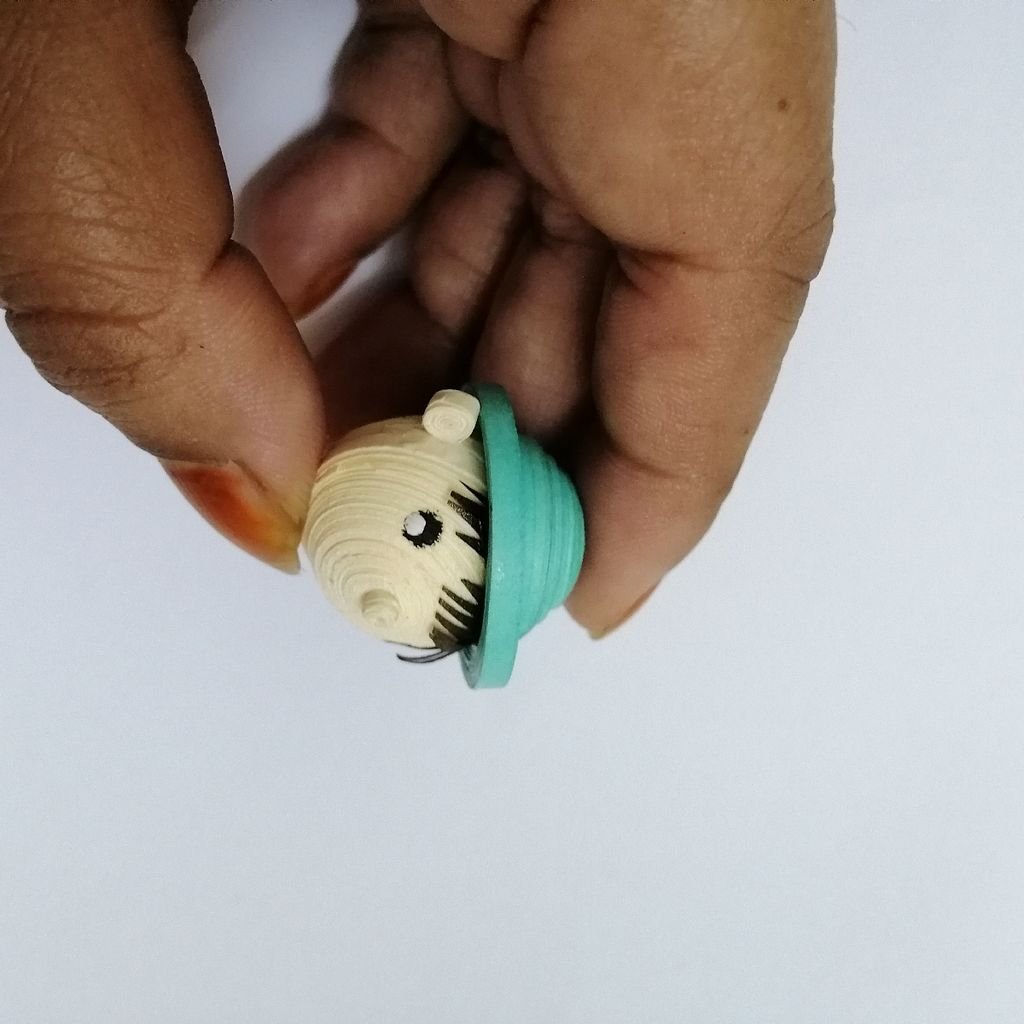


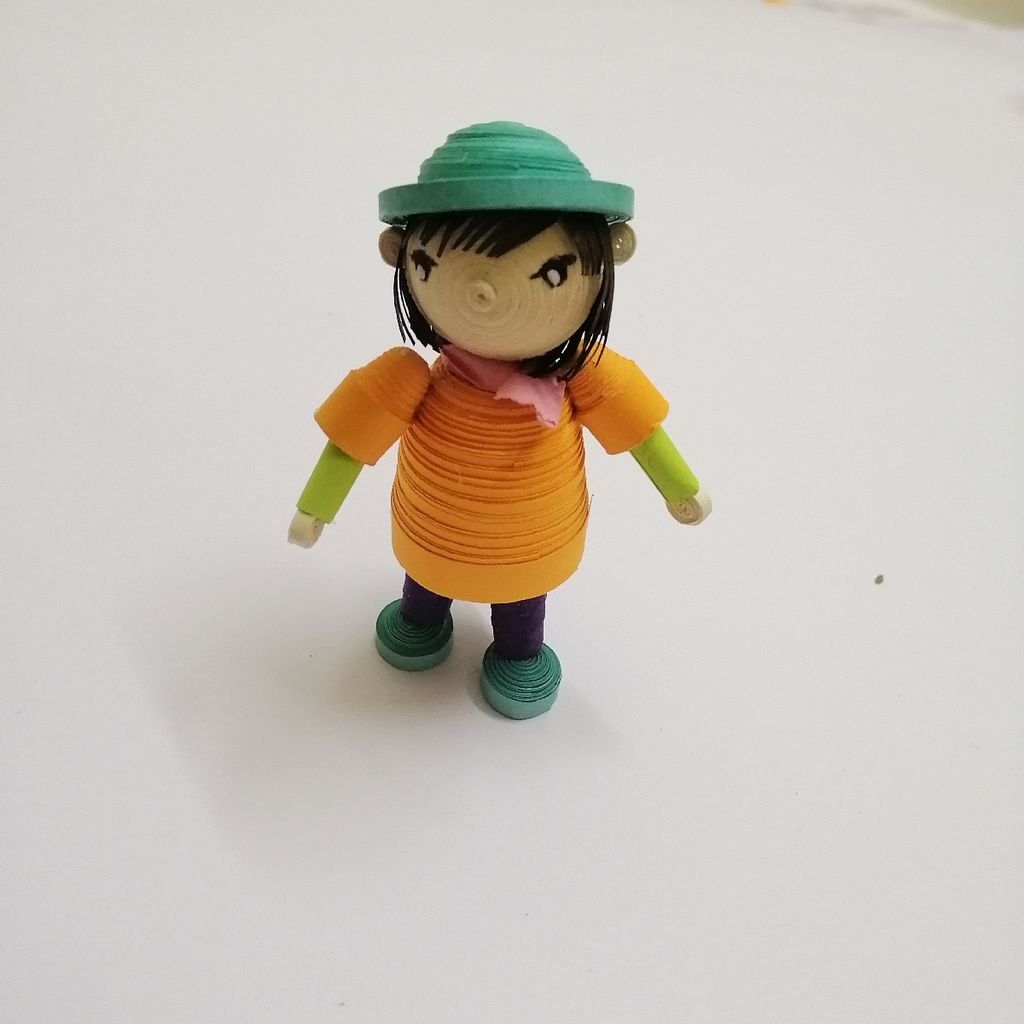
1. For making head, make two tight coils using 10 x 3mm strips. Make a dome using the mold. You can pinch one side to make a chin if you want. the glue them together. For the nose, I used 1.5mm x 2cm tight coil. Then glue it in the middle point f the face. Draw eyes.
For the hat, roll 10 x 1.5mm feroza colored strips and make a dome. Take another quilling strip and roll it around the dome-shaped to get the round size. Take the strip out of the domb and glue the edge and start rolling the strip. Roll the strips as many as you want to get the desired shape. Now attach it on the head.
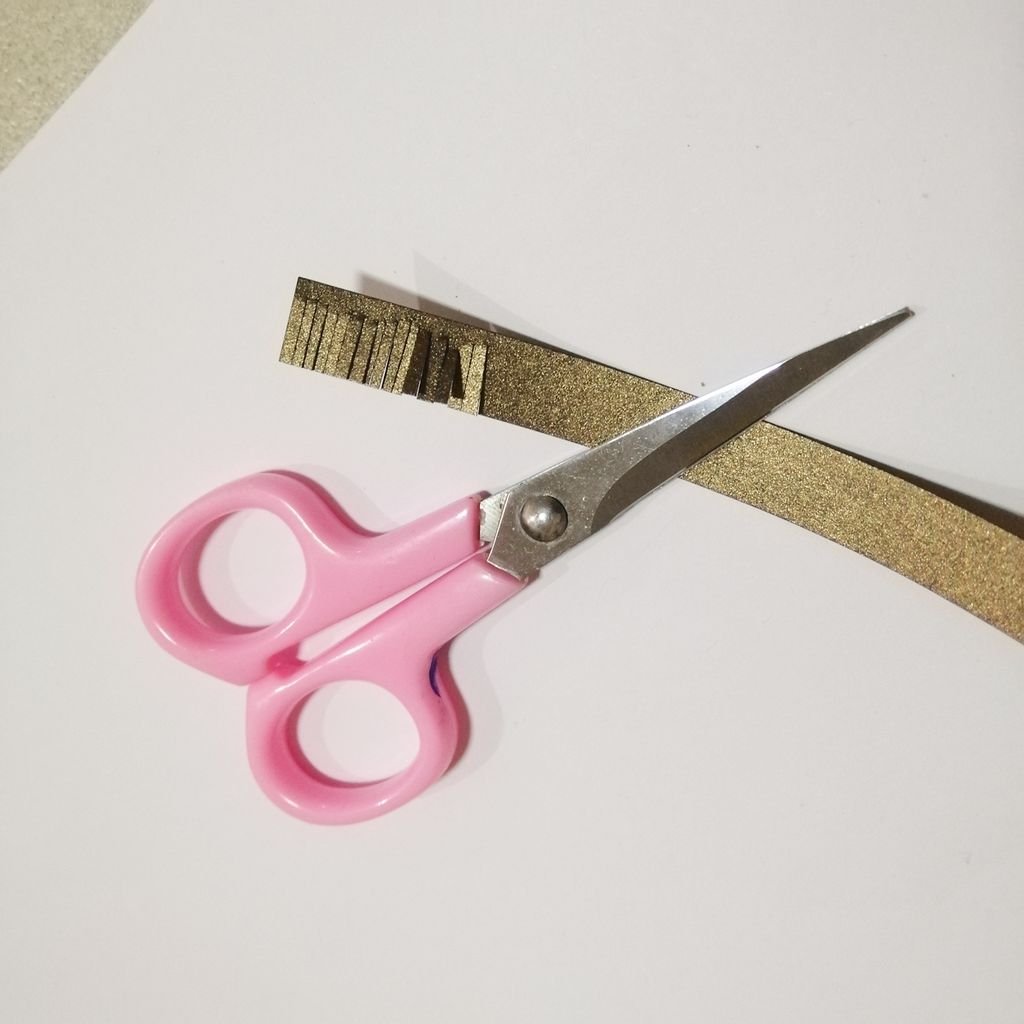
To make hair I used dark brown metallic 5mm strips. Make on it & cut into small pieces. Now glue it inside the hat and backside of the head.
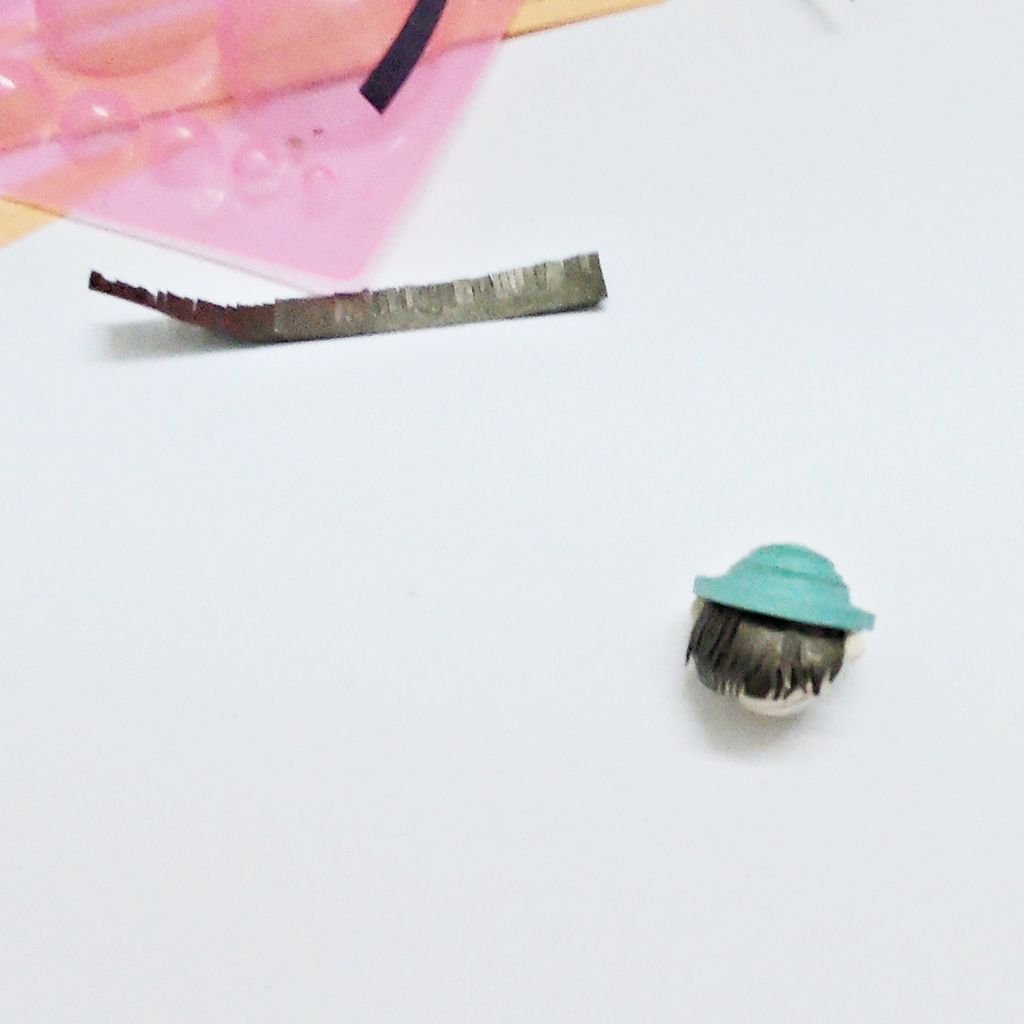
2. For ear, used 1.5mm x 5cm (make 2) tight coil then flattened on one side. Glue to head.
3. Add a 1.5mm tight roll to make the neck. Glue head onto neck- Balance!
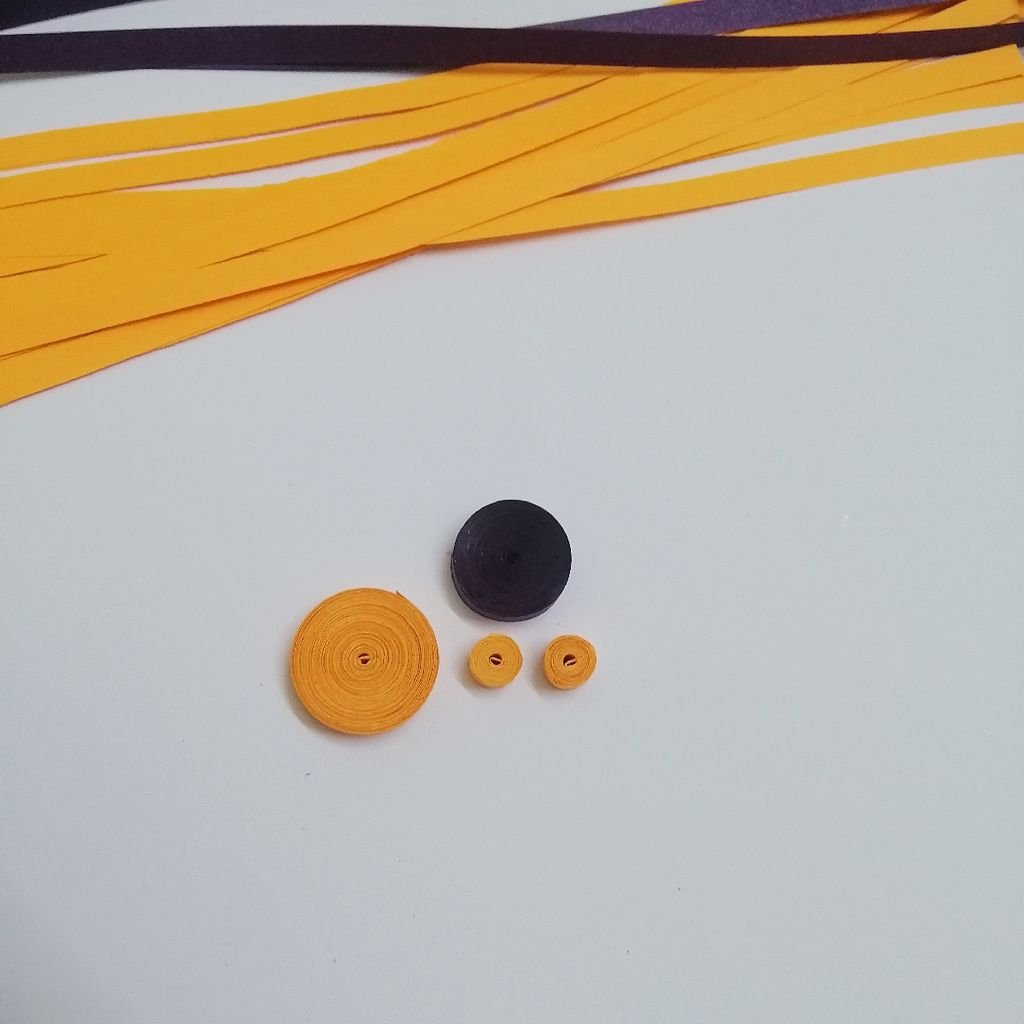
4. For making the body, I used 18 pieces, 29cm long & 4mm with orange paper strips. Roll up all the strips into a tight coil. Push out the coil to form a cone. You can use the quilling mold/marble for this- or your pinky finger. Coat the inside with glue with your toothpick. For the lower base, I used 6 x 3mm violet color metallic strips to roll the coil. Coat the coil in glue ( push a little). Glue it with the orange base as shown.
Arm caps: 3mm strips x 7cm long (make 2), Make tight coils and push out slightly. Glue and put aside to dry. Attach the arm caps with the body.
For arms, I used light green colored 1cm wide strip x 5cm long (make 2). For hands, I used 3mm x 5cm strips (make 2). Squeeze one side to flatten the coil. Attach the hands to the arms. Glue the arms into the arm caps.
5. For legs, I used 5mm strips x 7cm long (make 2), roll it with a skewer to make legs as shown in the picture.
For shoes, I used one 3mm strip for each shoe. Create small dome shape Squeeze into a heel (teardrop shape). Pop out one side of the dome to make the toes. Glue inside to hold the shape. Glue the leg onto the shoe. Attach the legs with the body- making sure it stands up by itself. Hold till dry.
Now attach the head with the body & let it dry properly.
Your 3D quilling doll is ready. Make another boy doll in the same process.
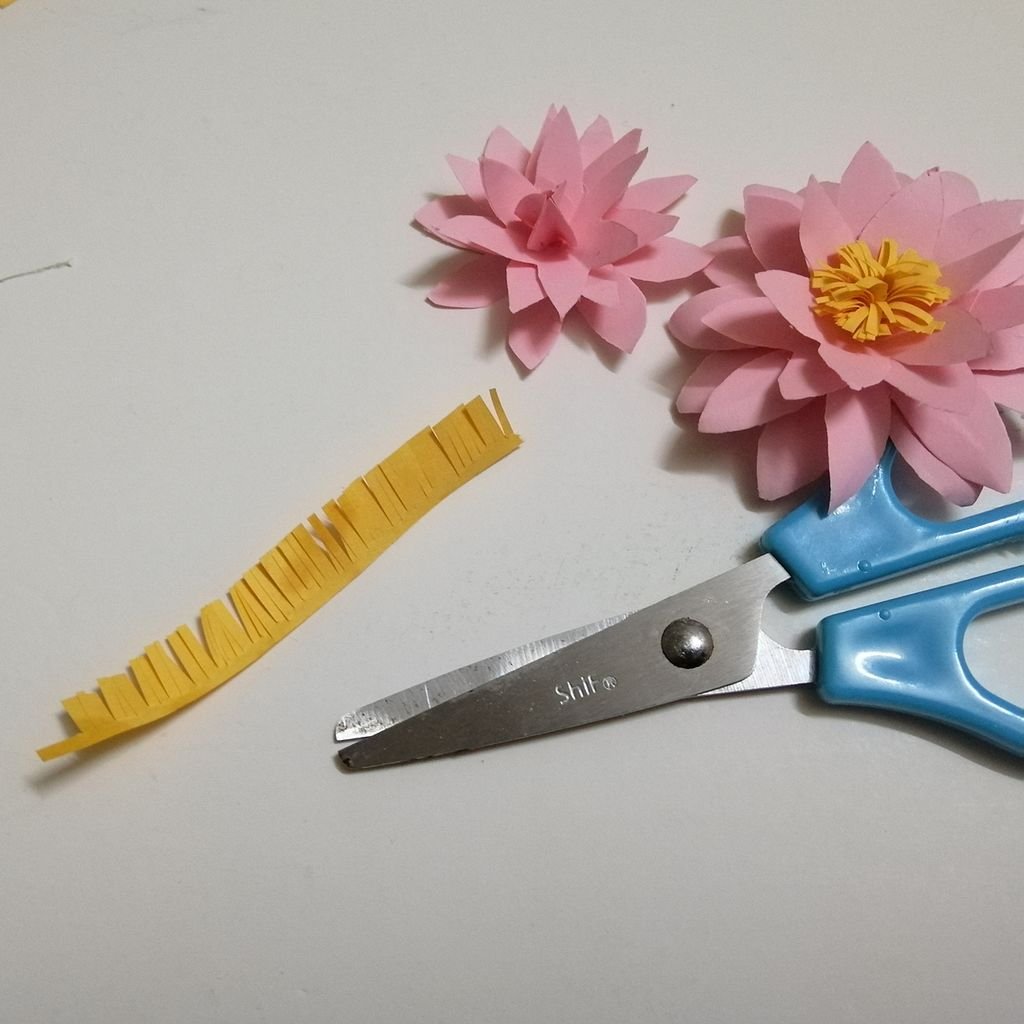
Step 7: Making of Water Lily
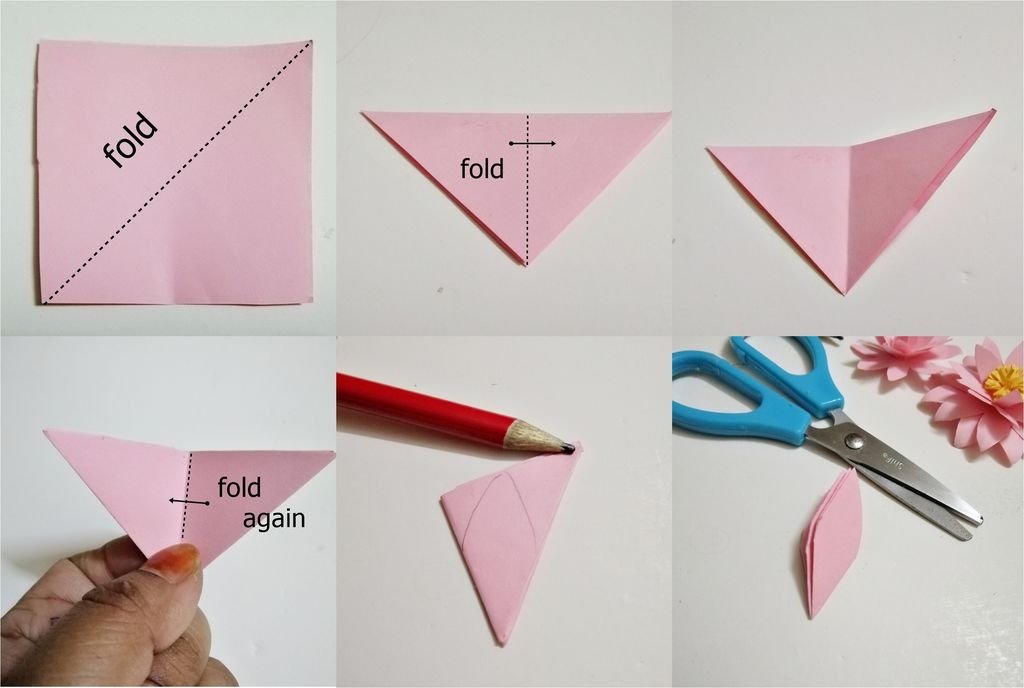


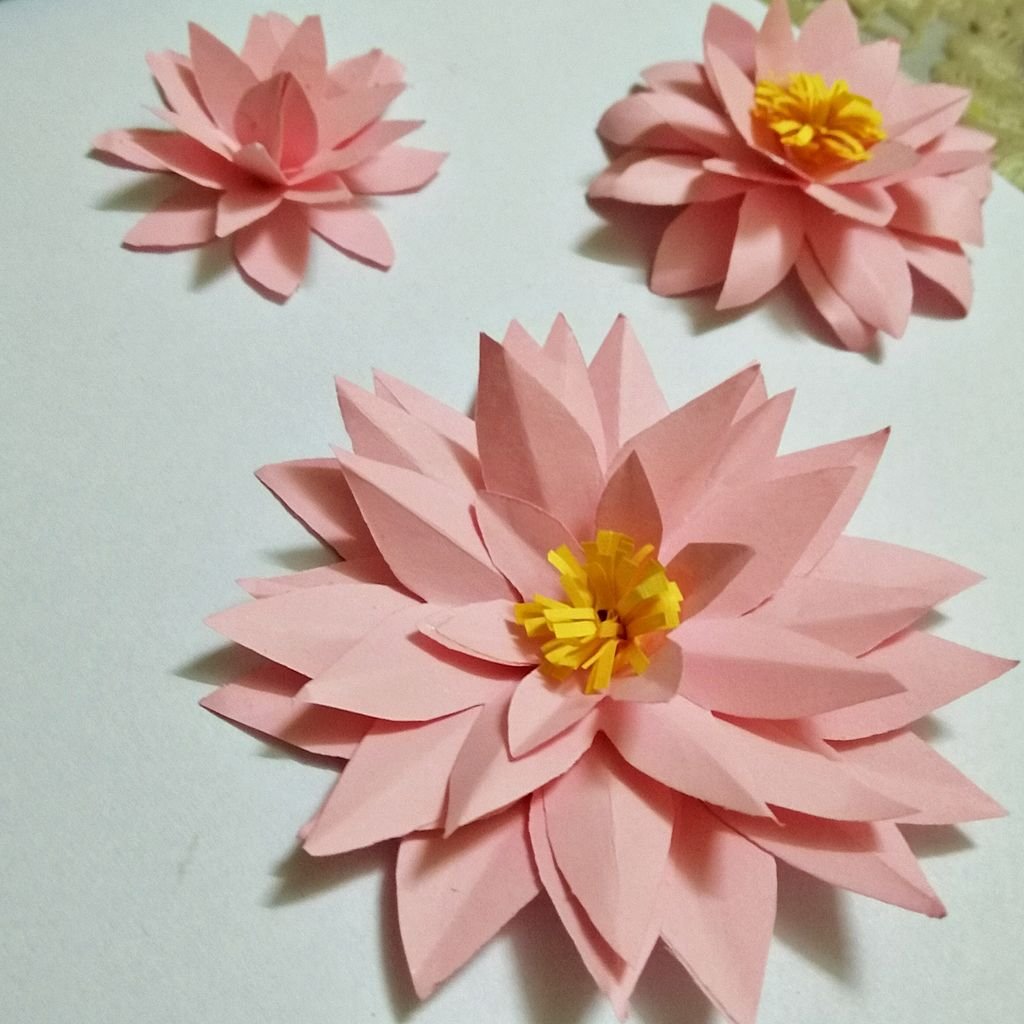
To make the flower, take 5 pieces of pink craft paper. 3pieces of 6X6 cm square paper & 2pieces of 4X4 cm.
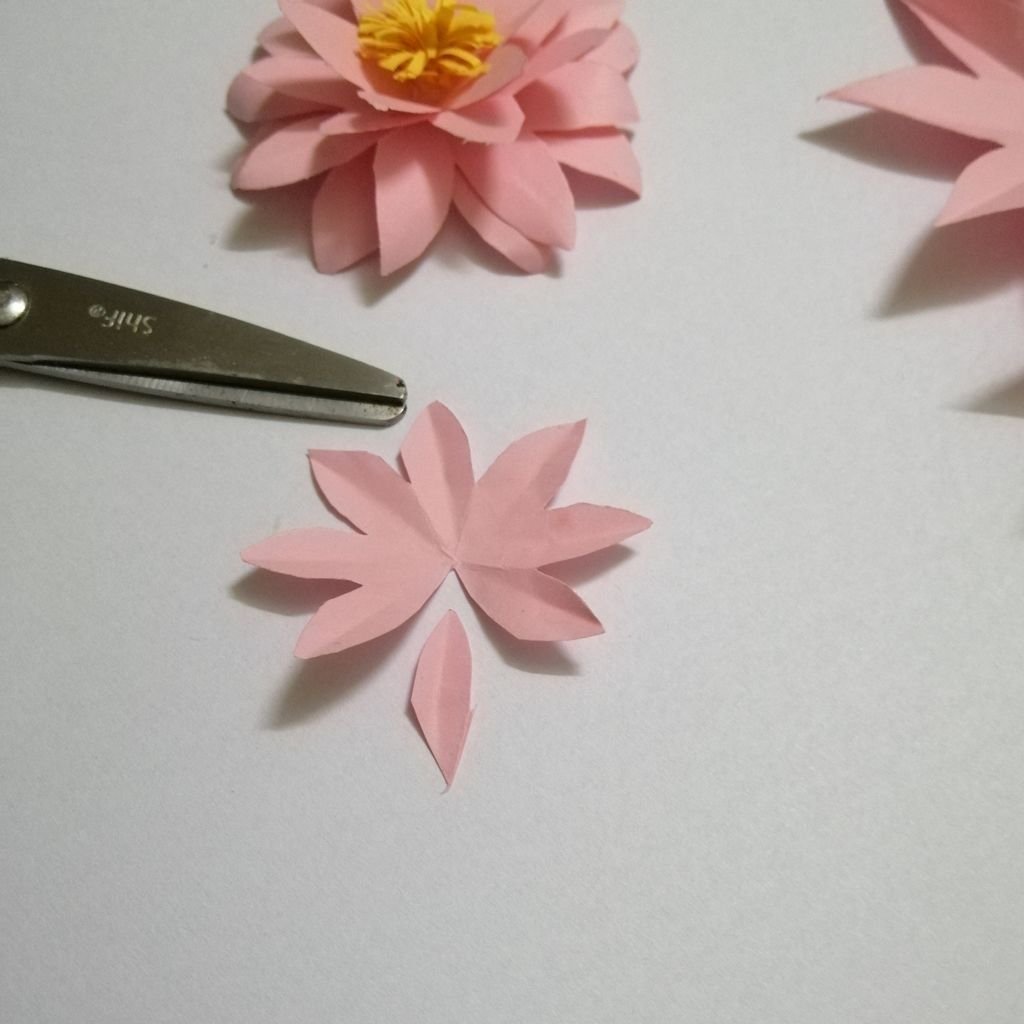
Now take one paper and fold it in half. it’ll form a triangle shape. fold it again & one more time. Noe draw a petal on it like picture. Cut it carefully. Do same for the rest. Now take one the small & cut out one petal as shown in picture. Apply glue on one side of the petaled paper and join it with the other side. Start gluing the pieces (petaled papers), one on the top of the other one. Try to arrange them nicely to create a beautiful pattern.
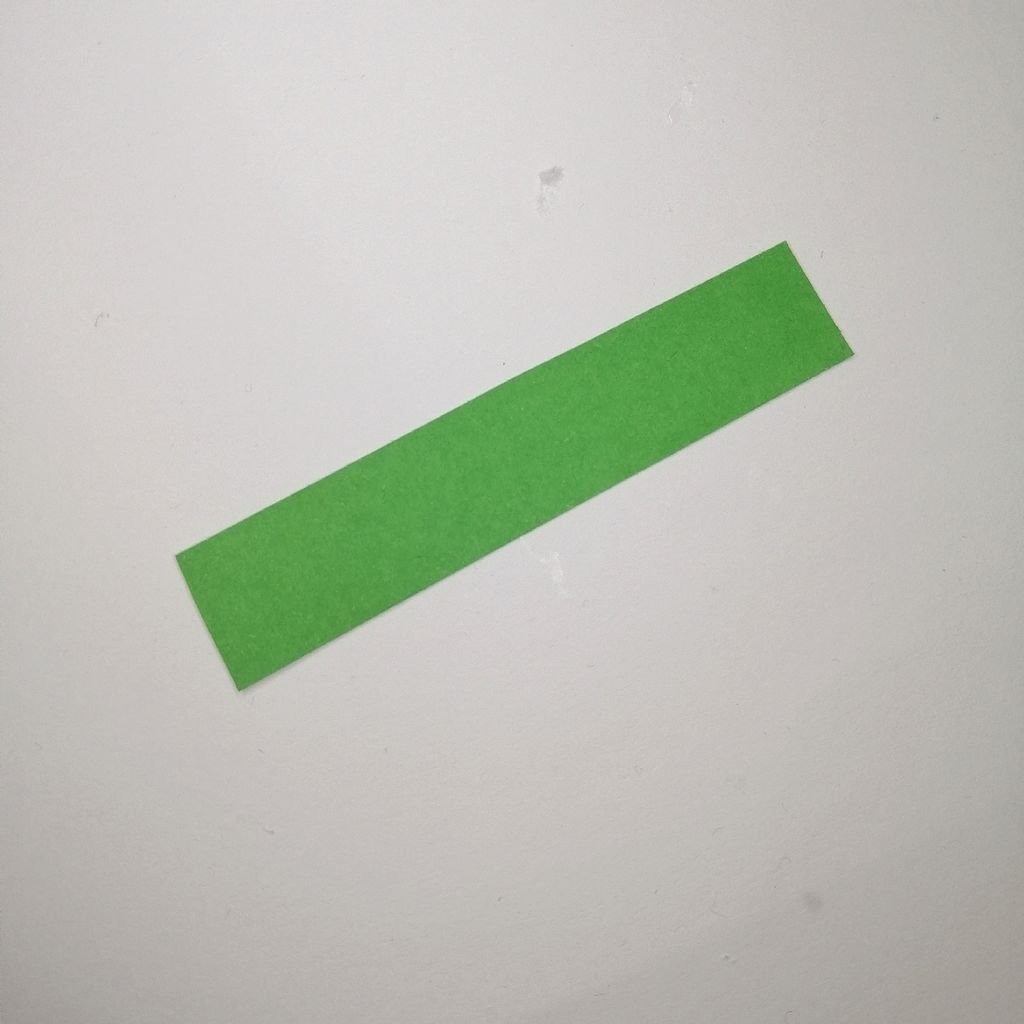
To make the center for the flower, you will need a strip of paper, approximately 2 cm wide and 6 cm tall.
Carefully create a fringe with the strip of paper by making cuts 3/4 of the way through.. Using your fingers, slightly curl the fringe away from yourself. Then begin rolling the strip of paper up, so that the fringe is on top. Add a little bit of glue to the intact bottom as you go. Spread the fringes apart to create a fuller center, and then glue it to your flower.
Now take a step back and admire your work!
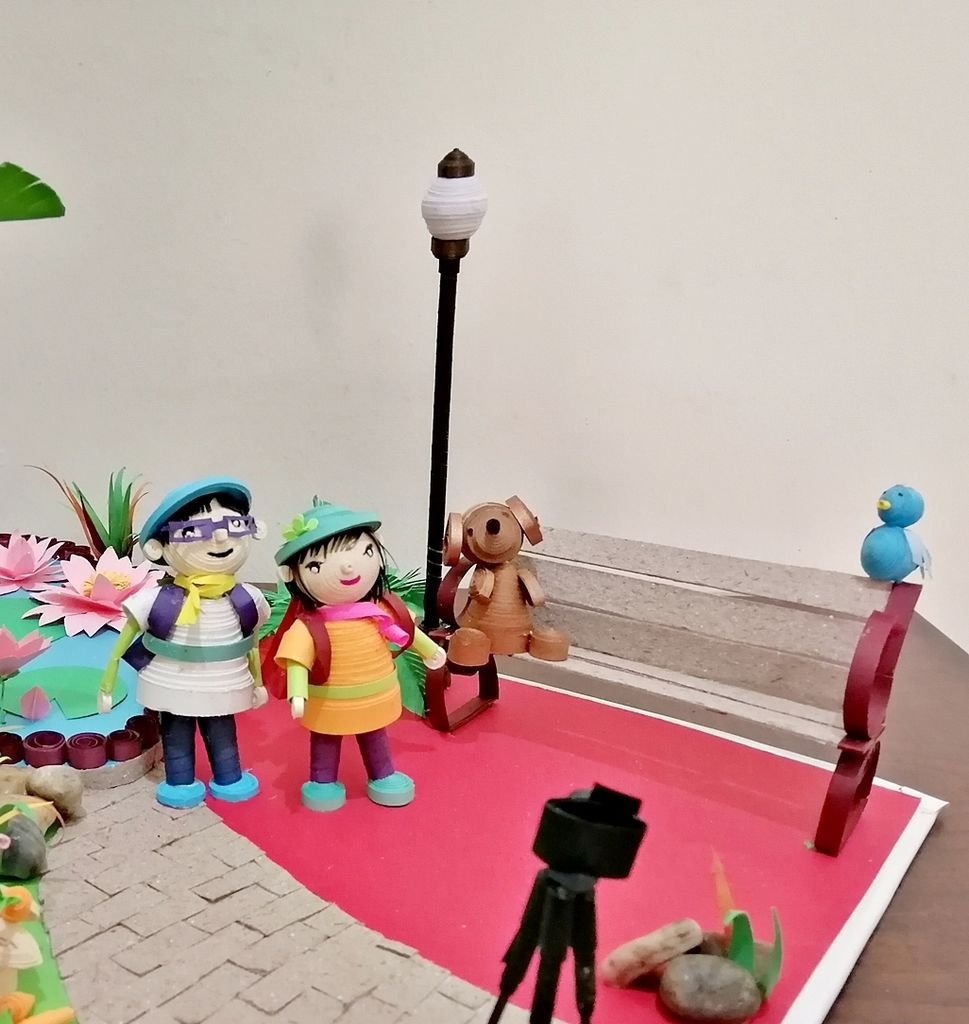
Step 8: Making of Bench & Street Light


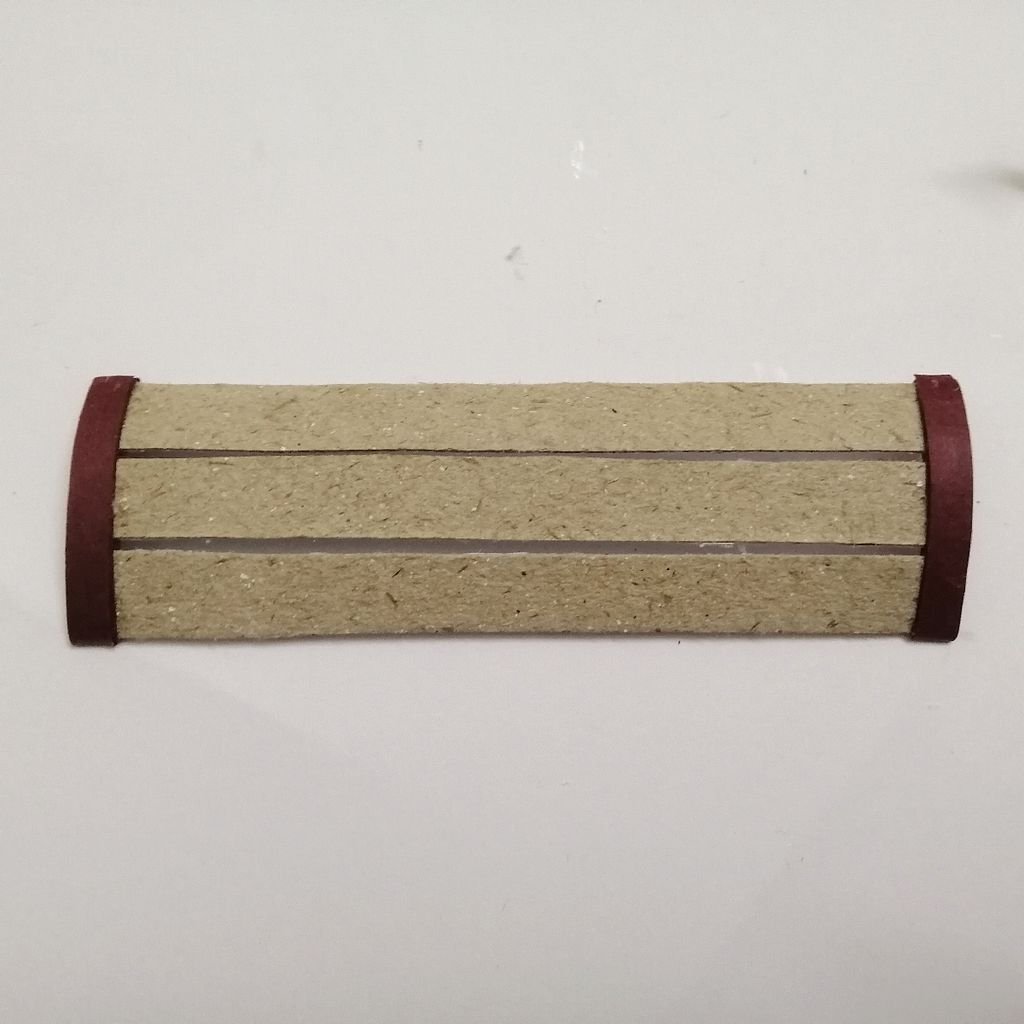
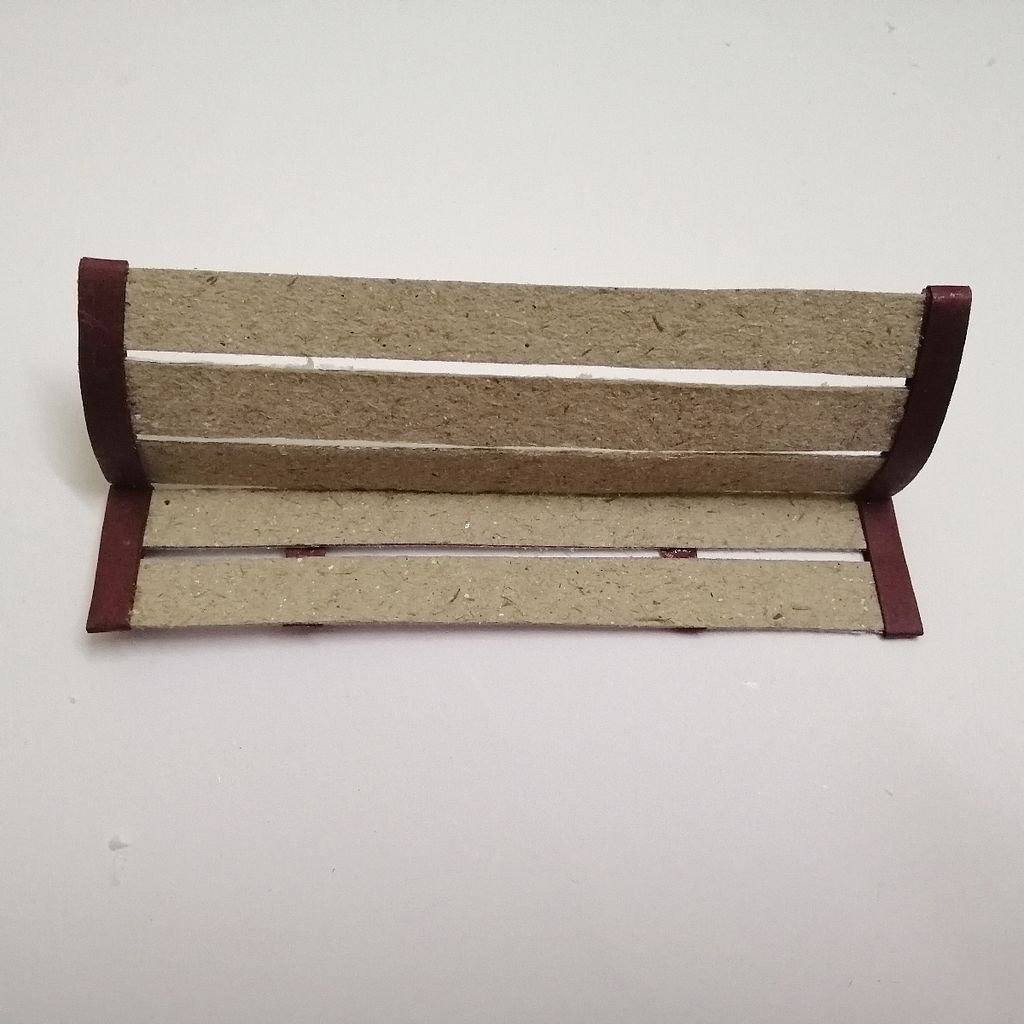


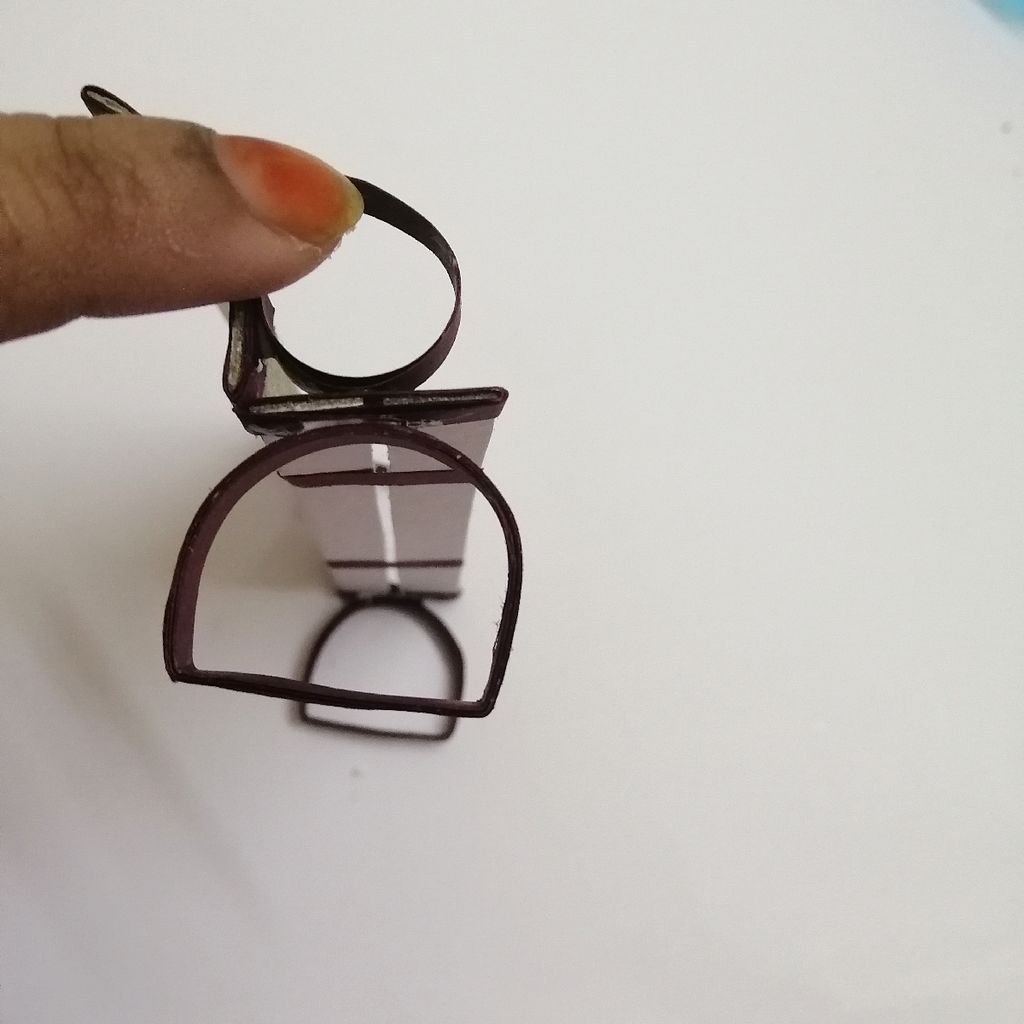


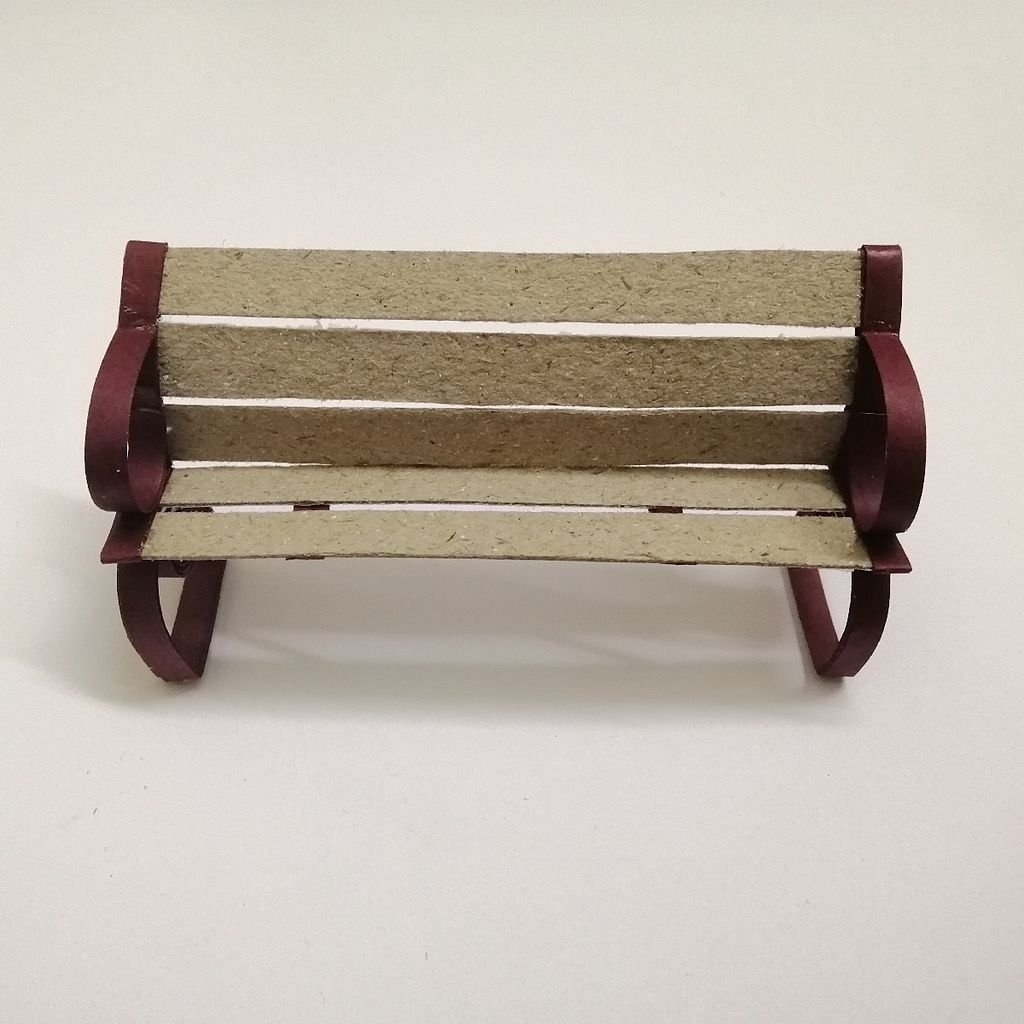
To make the bench cut out 5 pieces 1 cm wide & 8cm long strips from a packaging box. Take 3 strips and glue 4mm maroon quilling strip in both edges. Bend it slightly befor drying the glue. Take 2 more strips and glue maroon quilling strip in both edges. Now glue them together. To make the legs roll a 29cm long strip and bend to form half circles. Make hands with another strip. You can make your own design by using different quilling shapes. Glue the hands and legs with the bench.
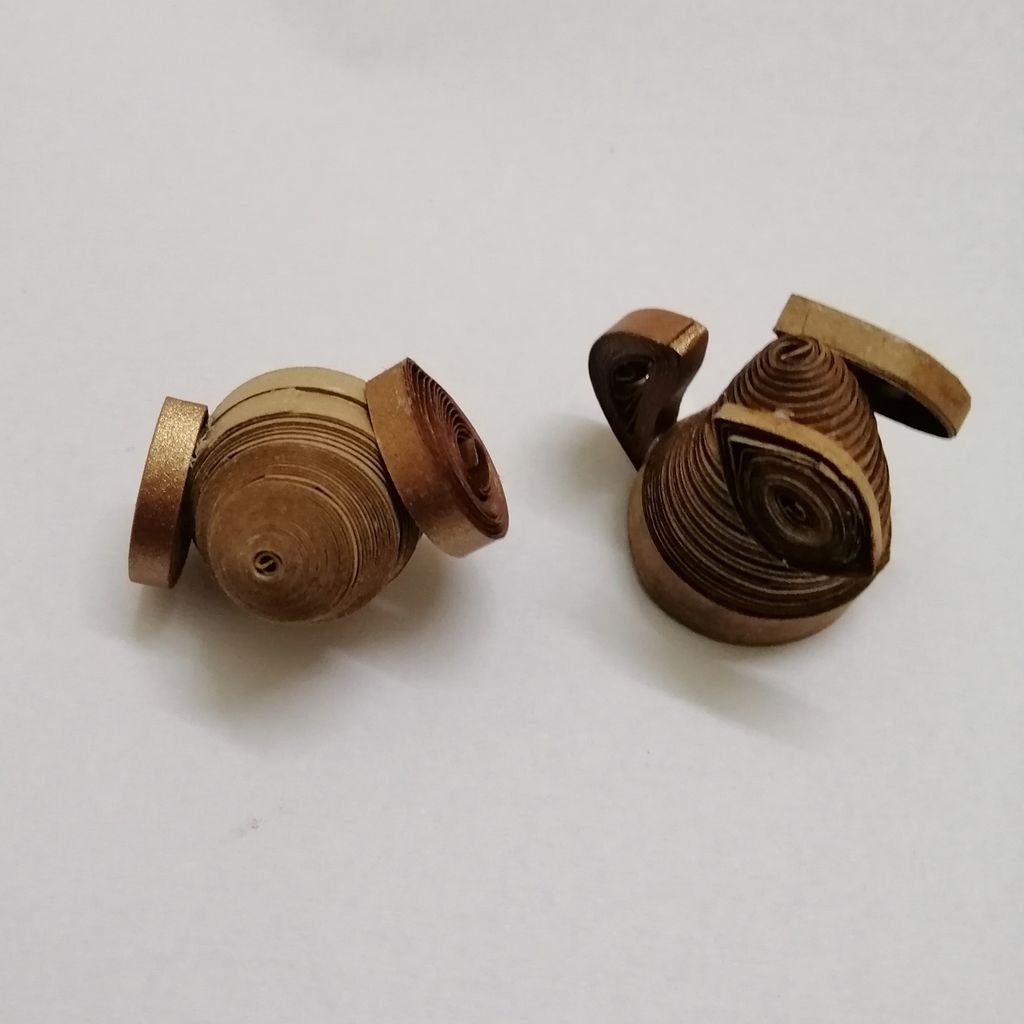
To make light take a Skewer and roll a black strips on it. Make two white tigh coils and form dome shape. Glue them together. Make two tight coils by black shiny metalic strips. Glue those with the skewer & white ball as shown in picture. Make 2 more tight coils by black shiny metalic strips. Form a cubic cone with one of them and glue it with another one. Now glue the skewer inside the cone. the light is ready to dacorate the garden
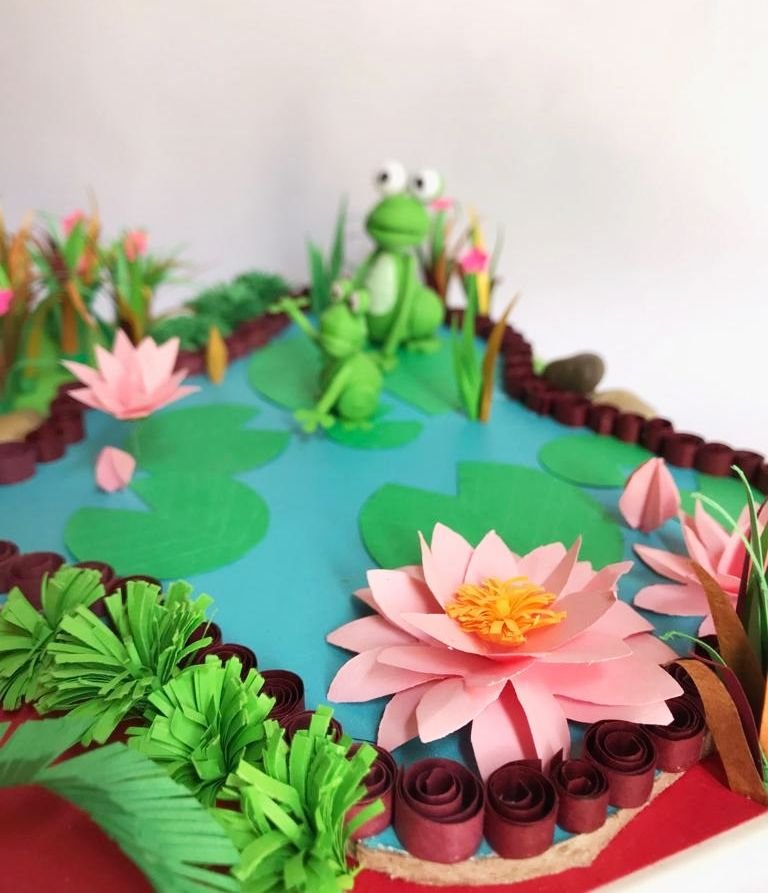
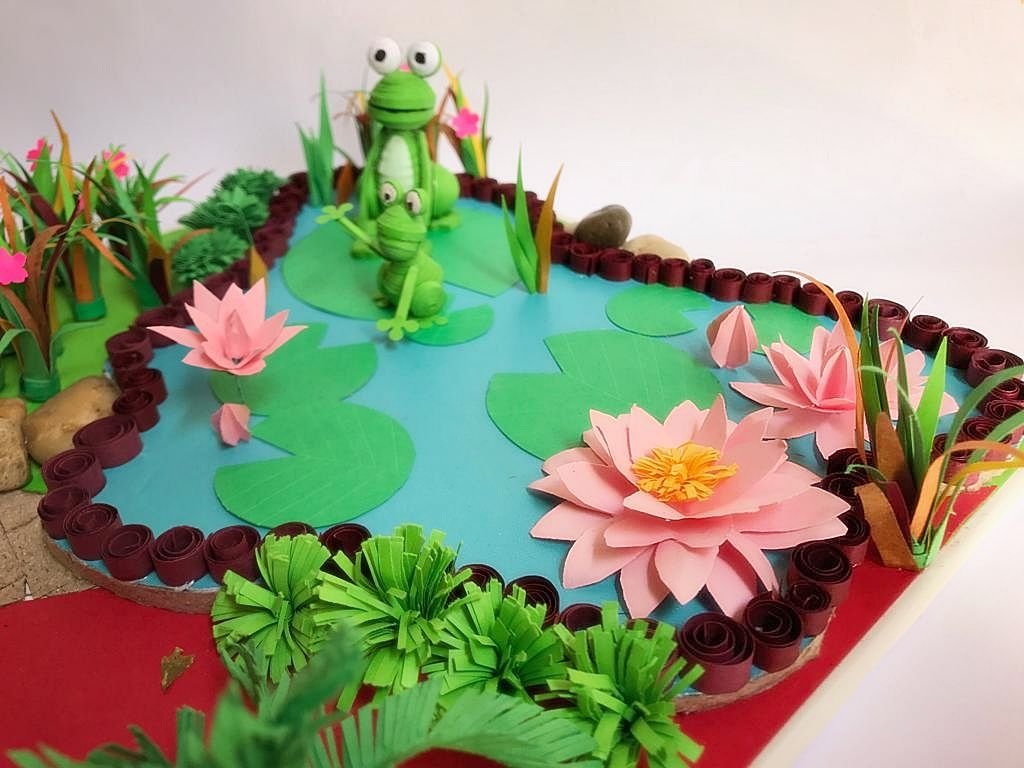
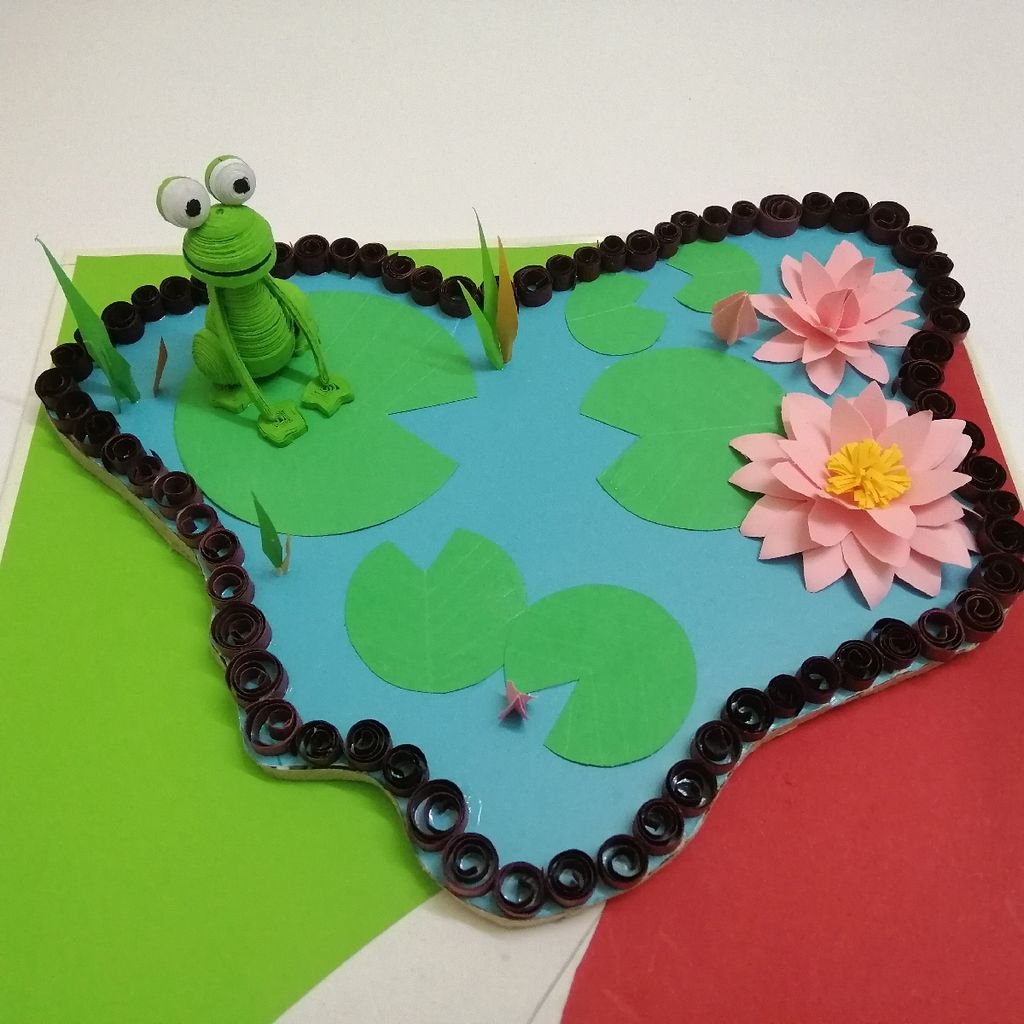
Step 9: Assemble the Pond

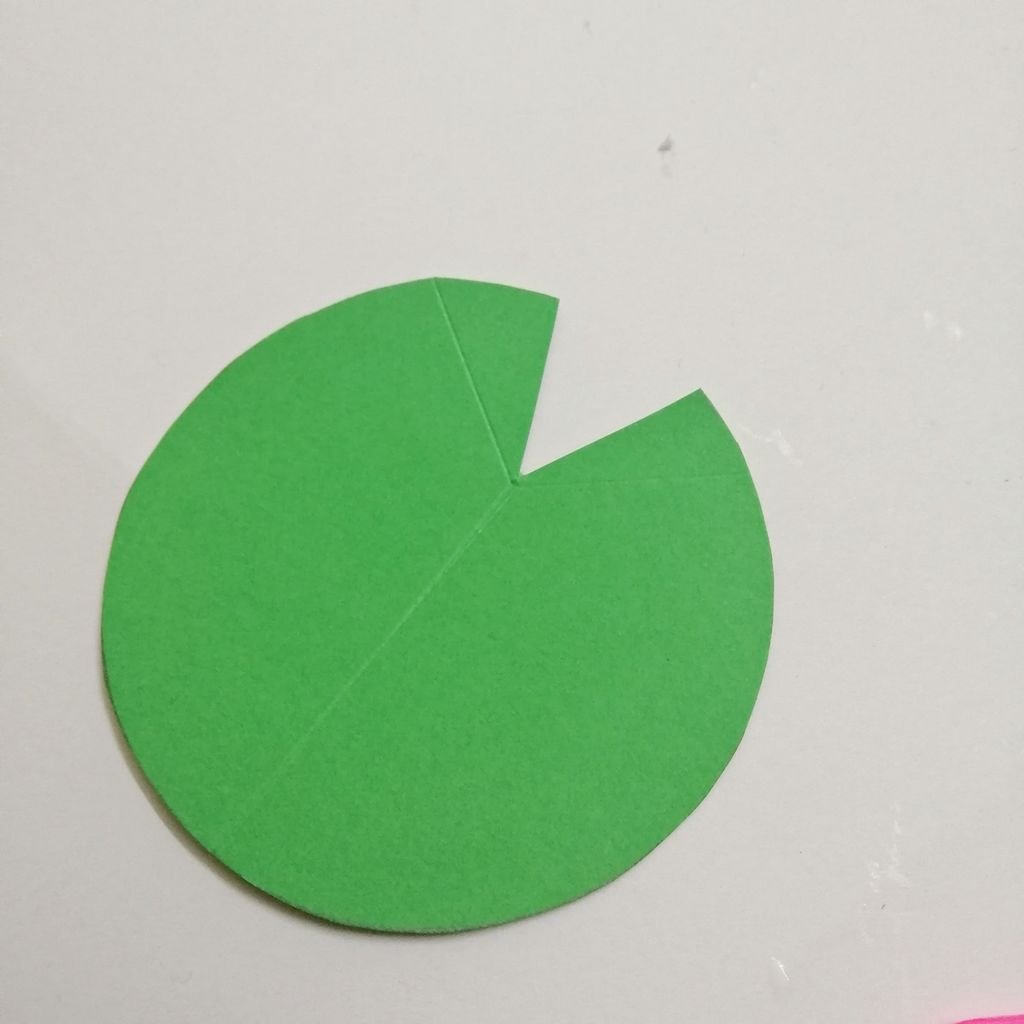
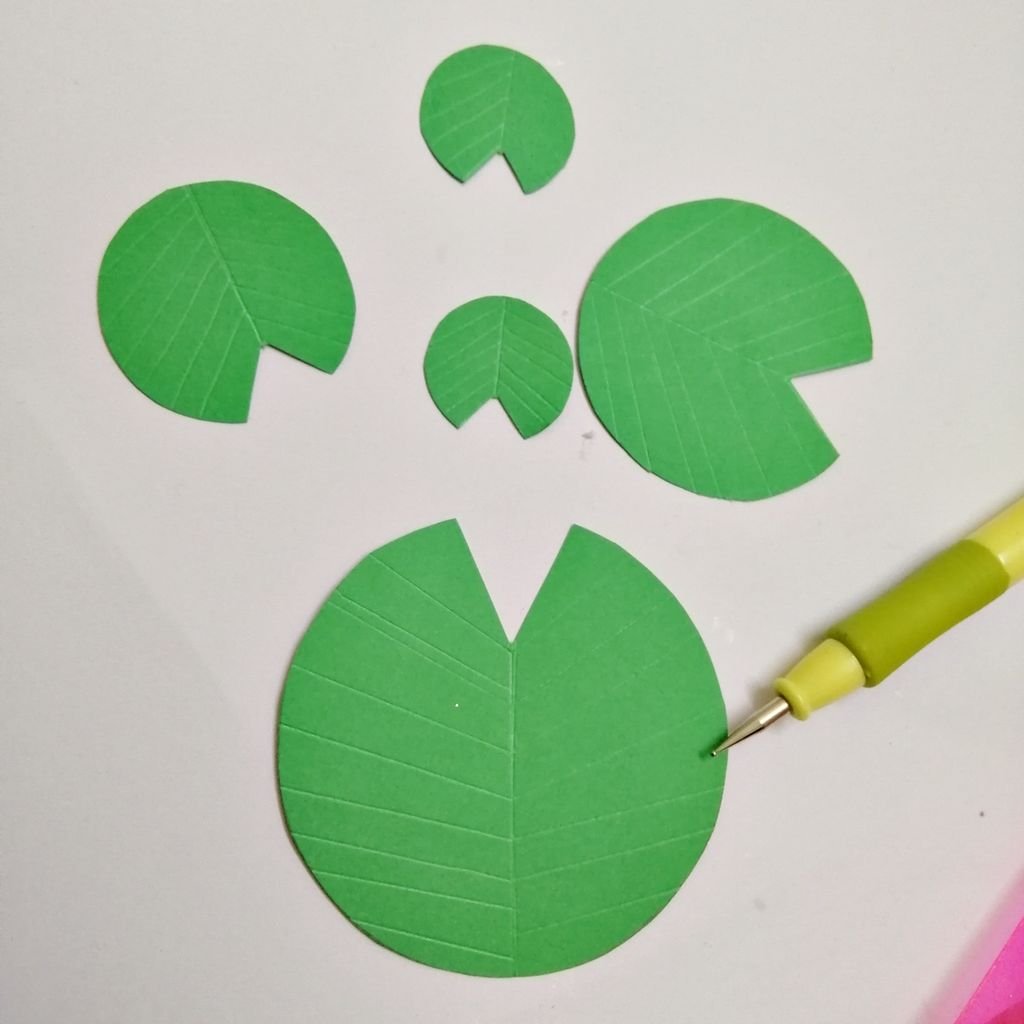


For making Leaves, cut out 6/7 leaves from green paper according to the lotus leaf pattern. Here the largest one is of 5cm diameter. Now score each leaf down the center and sides.
For making pond, I used here a blue foam sheet. You can cut your own desired shape.
Now assemble leaves, water lilies and 3D frogs on the pond.
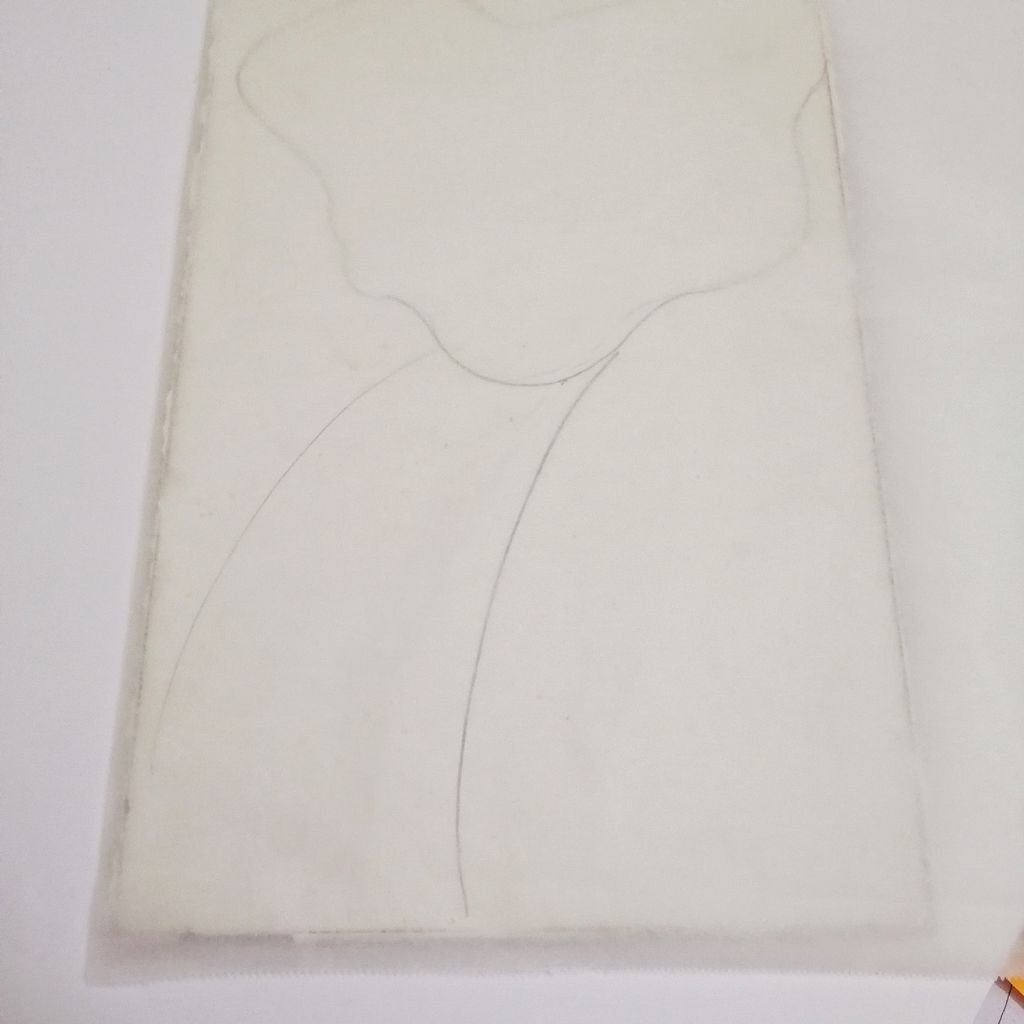
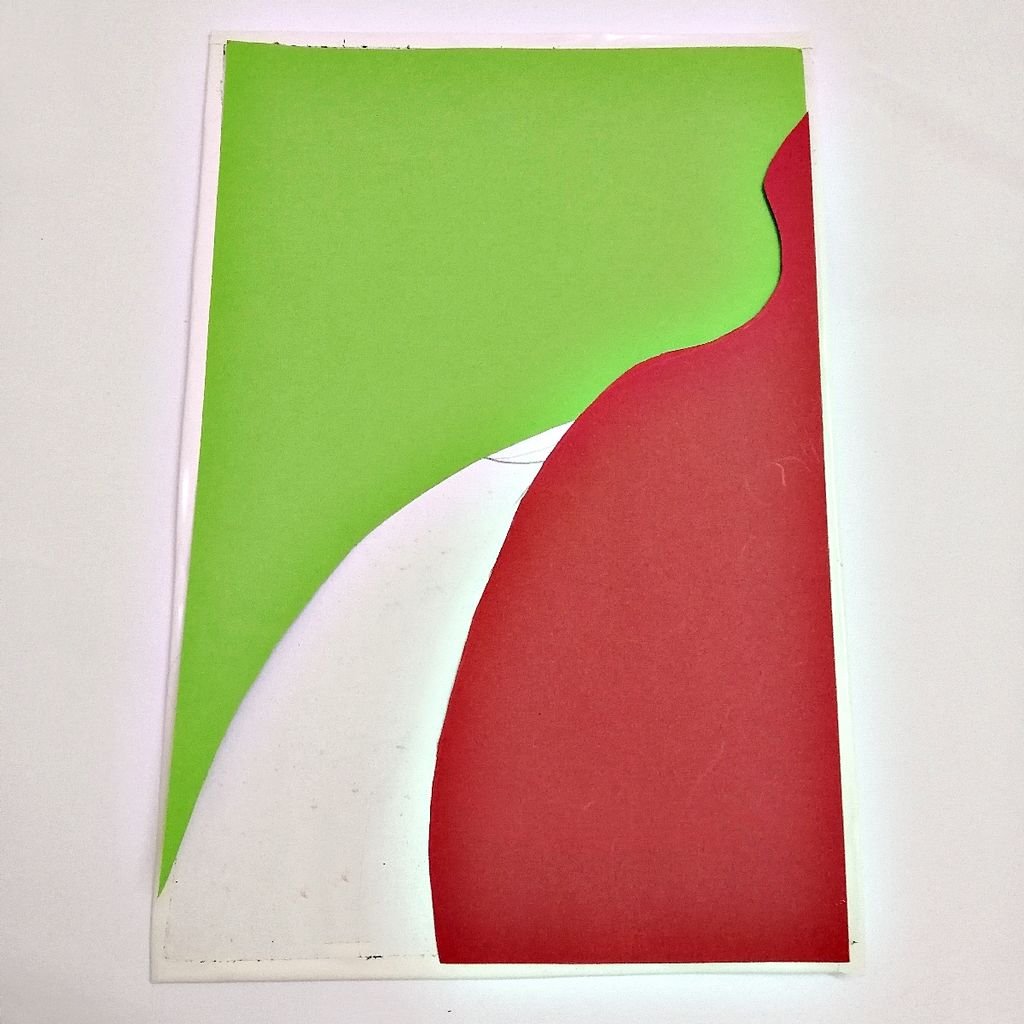
Step 10: Garden Base and Road


Step 11: Final Touch!
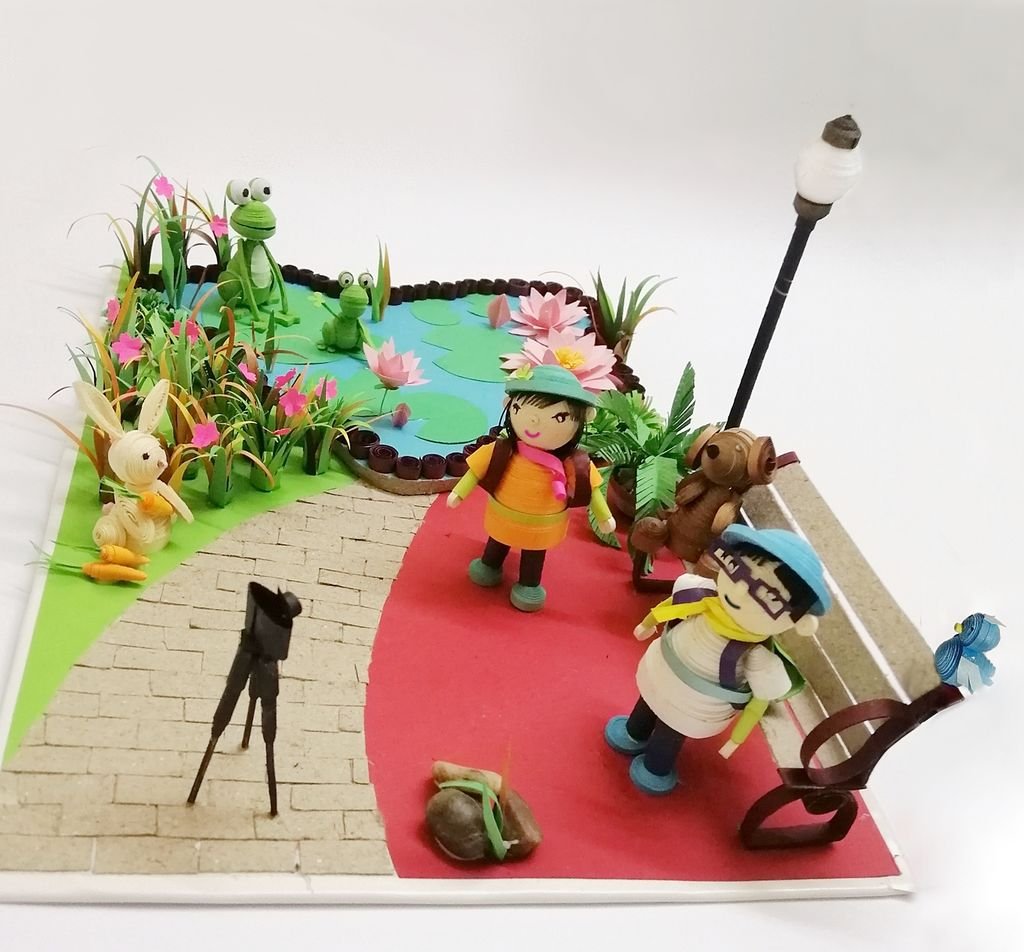

Now assemble all bushes, trees, animal & human figures, light, bench according suitable place. Spray sealent to seal your project. Or you can secure it with a glass box.
Enrich the beauty of your home with this super cute Mini Garden !!
Share your thought and suggestions!! These will be highly appreciated.
Thank you for stopping by.
courtesy: instructables