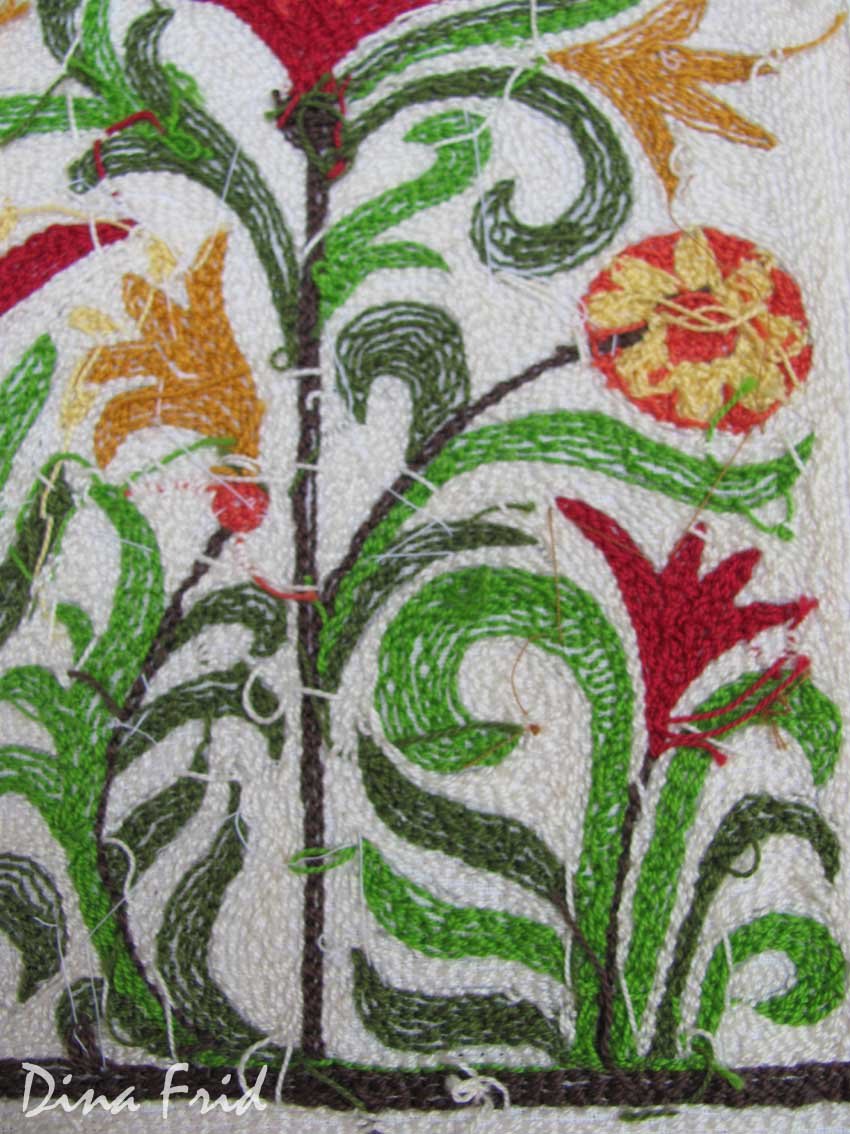
Punch needle embroidery rug
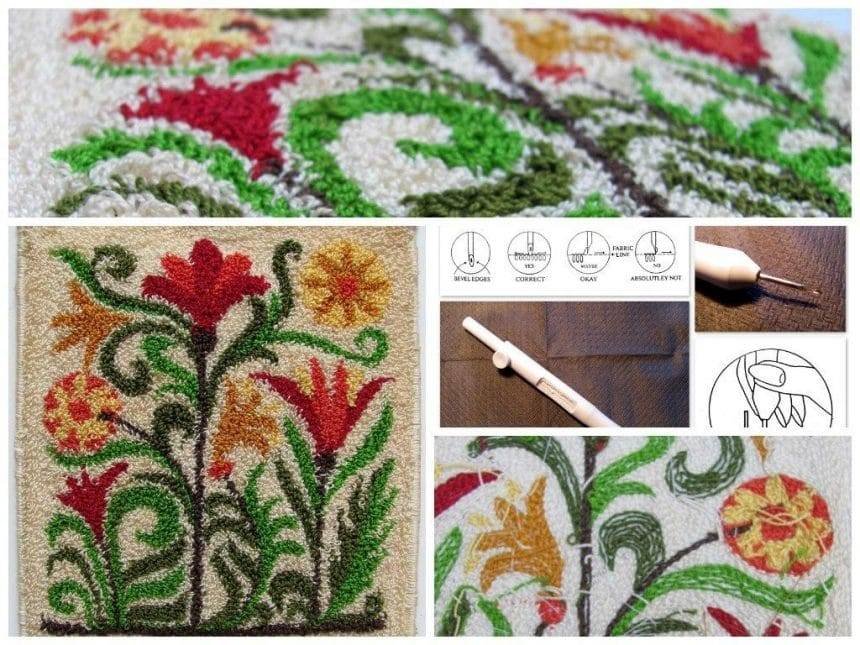
Small panels (20×30 cm) performing clowns needle, also known as punch-needle Punch Needle (from the English “to punch, pierce”). This technique is ideal for embroidery panels, rugs and pillows, it is possible to decorate children’s clothing, bags and toy making.

As a basis for the rug fit any dense fabric, such as linen. It is recommended to pull the hoop or frame corresponding to the size of the drawing. The fabric should be stretched as much as possible, you can not drag an embroidered section. Threads suit all their thickness depends on the thickness of the needle. It is desirable that they were in the coil or coil – in this technique thread moves continuously in the sewing machine and cut off at the end of embroidery fragment.

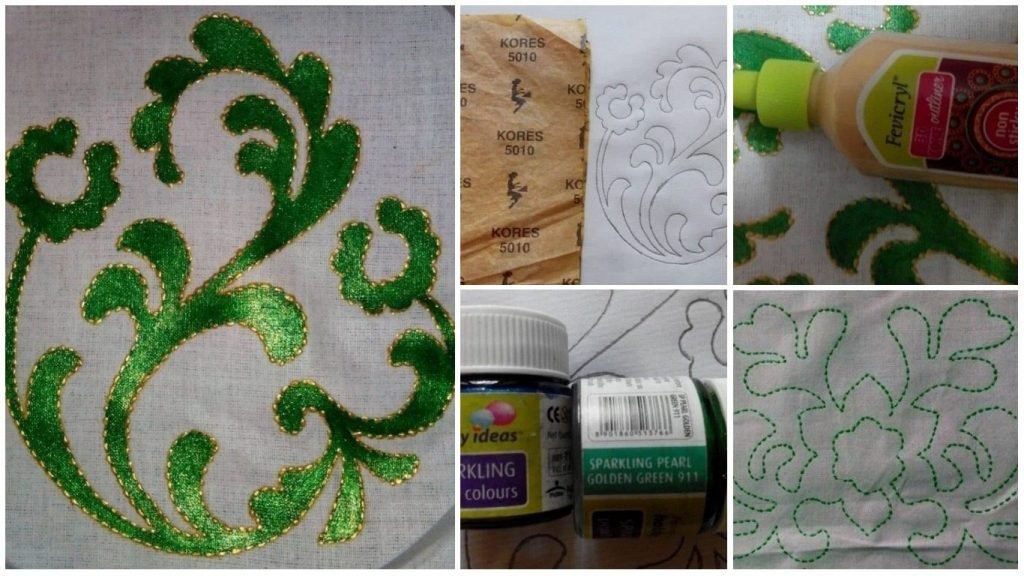
Figure out how and when the embroidery stitch, applied a pencil directly on the fabric (or translated by carbon paper). Process clowns embroidery needle comes from the wrong side. The needle pierces the fabric forming a loop on the front side. The smaller stitches, the denser the loops
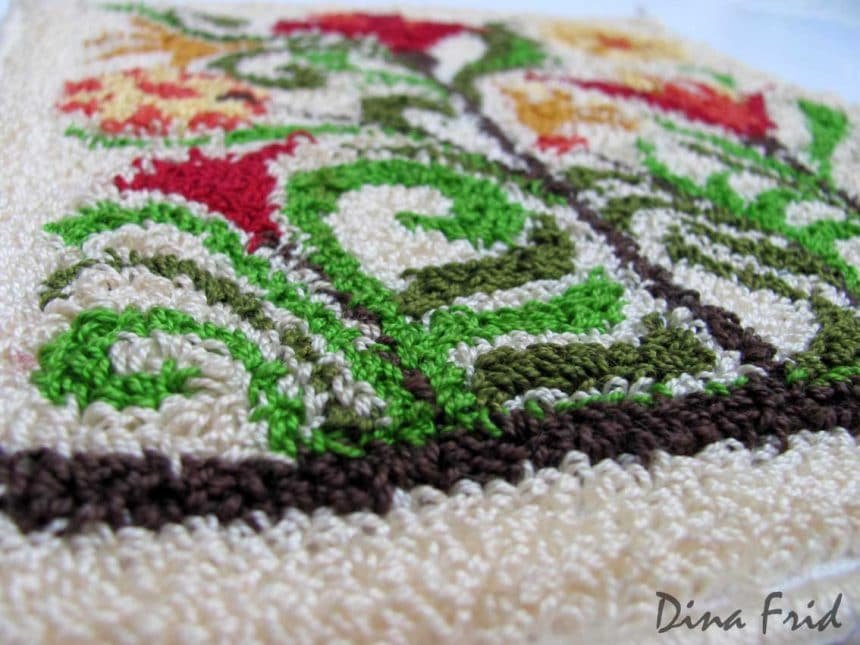
On the handle of the needle has a scroll wheel, adjusting their length. The product looks beautiful once both sides: the front is looped carpet, and from the inside – Embroidery. If the loop is short cut, you get a velvet surface.
The reverse side of the rug made similar tools from the hollow metal tube or a large medical needle, and as a constraint loop size served eraser. Friendly advice: loops easily dissolved enough pull one of them. Therefore, if you decide to decorate the children’s things like embroidery or a cushion, I recommend to “handle” the reverse side of covering it with a thin layer of rubber cement or pasted interlining.
Courtesy: stranamam.ru