
Ribbon Chain Necklace

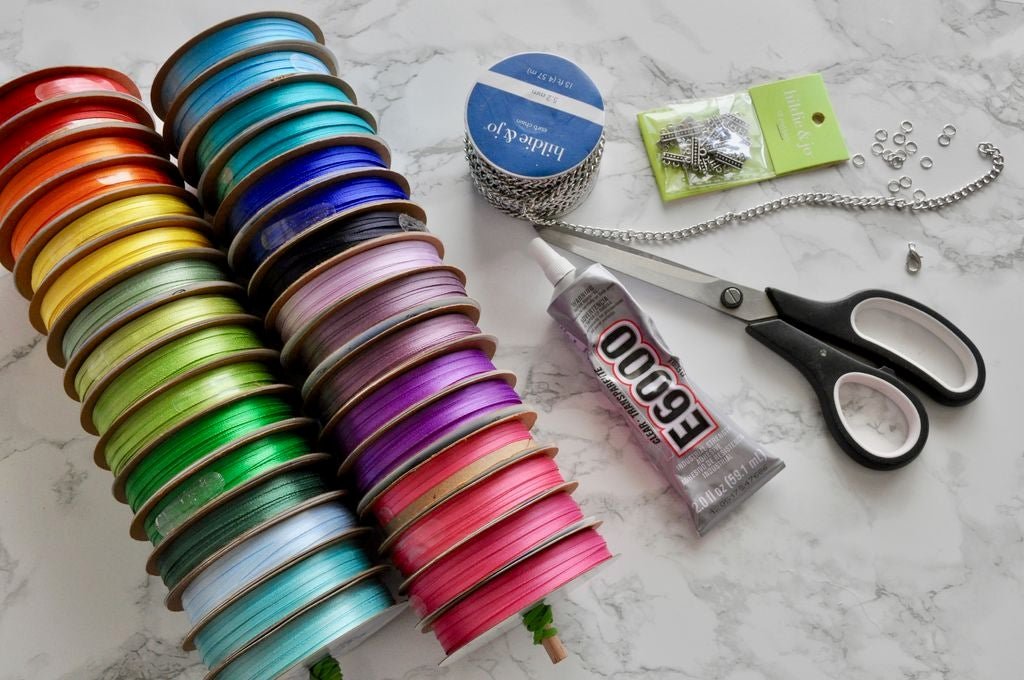
Step 1: Supplies
As I said, this will vary with the type of necklace you want.
Supplies and Tools:
1/8″ Ribbon in Red, Orange, Yellow, Green, Blue, Purple, and Pink
Chain- AT LEAST 113″ which is 7 chains at 16″ each
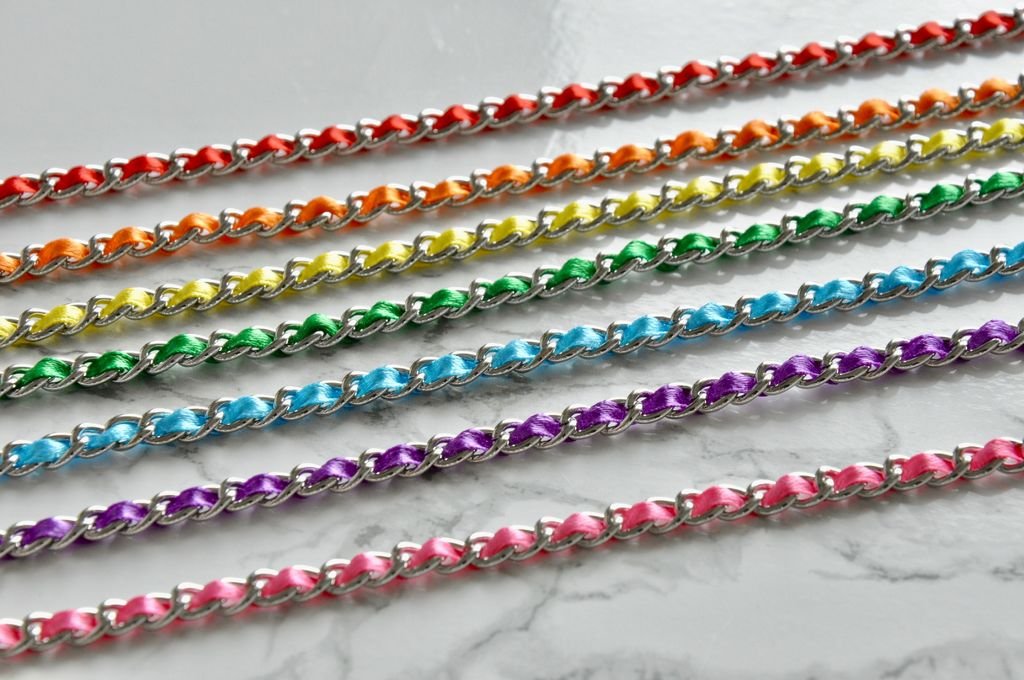
In order to work with my design and ribbon size, my chain had to be big enough to weave the ribbon flat. The roll says 5.2mm (when I measure it they appear to be about 5.2mm wide and 4.5ishmm tall, so they are ovals).
Also, you want the chain to lay flat which means it can’t be made up of perfect circles. They have to be bent around each other. I believe this is called a Cuban Style Chain or Cuban Link Chain or Curb Link.
Glue – I was originally going to use E6000 which I know would work but wanted to not fiddle with it so I ended up using hot glue, either will work, one will just take longer to dry.
Scissors
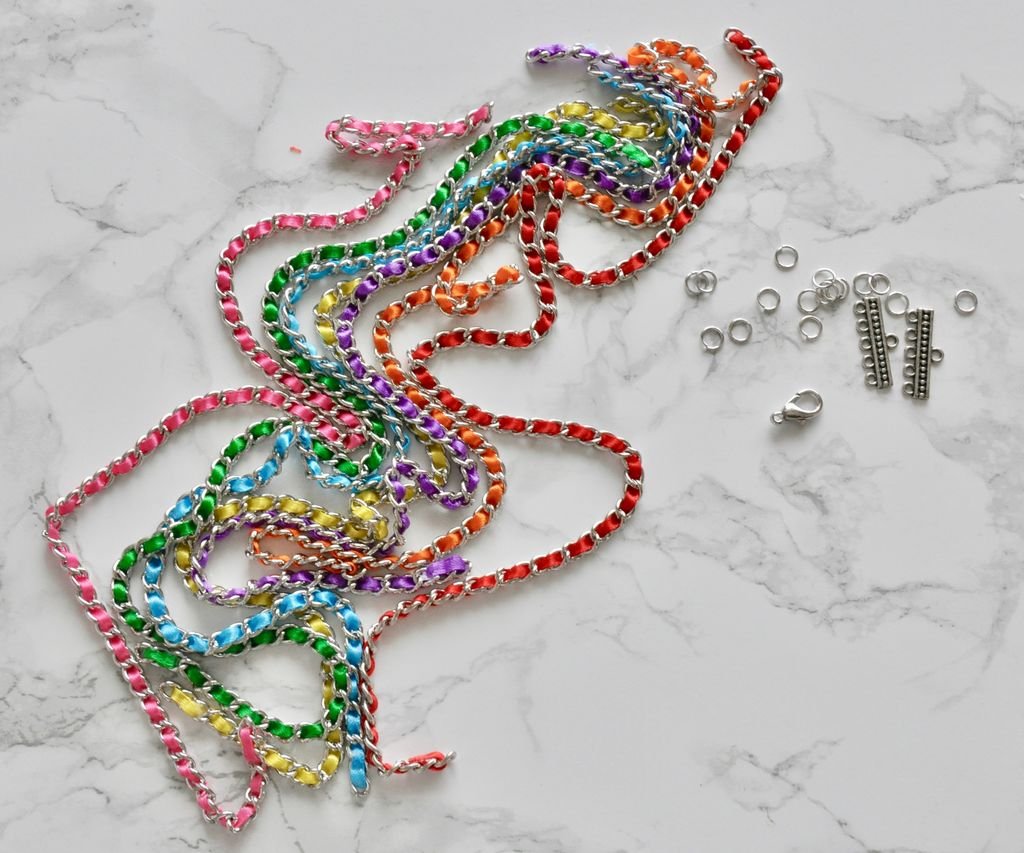
16 5.5mm Jump Rings – I’ve been making my own a lot more lately
Clasp
End Bars (optional) – you need something to gather all the chains together. I was originally going to use just a large jump ring but I saw these end bars at the store and thought, why not.
Jewelry Pliers – I find it easier if you have two but one will suffice
Painters Tape – this just helped with odds and ends but wasn’t 100% necessary depending on how easy you want this to be.
Step 2: Chains
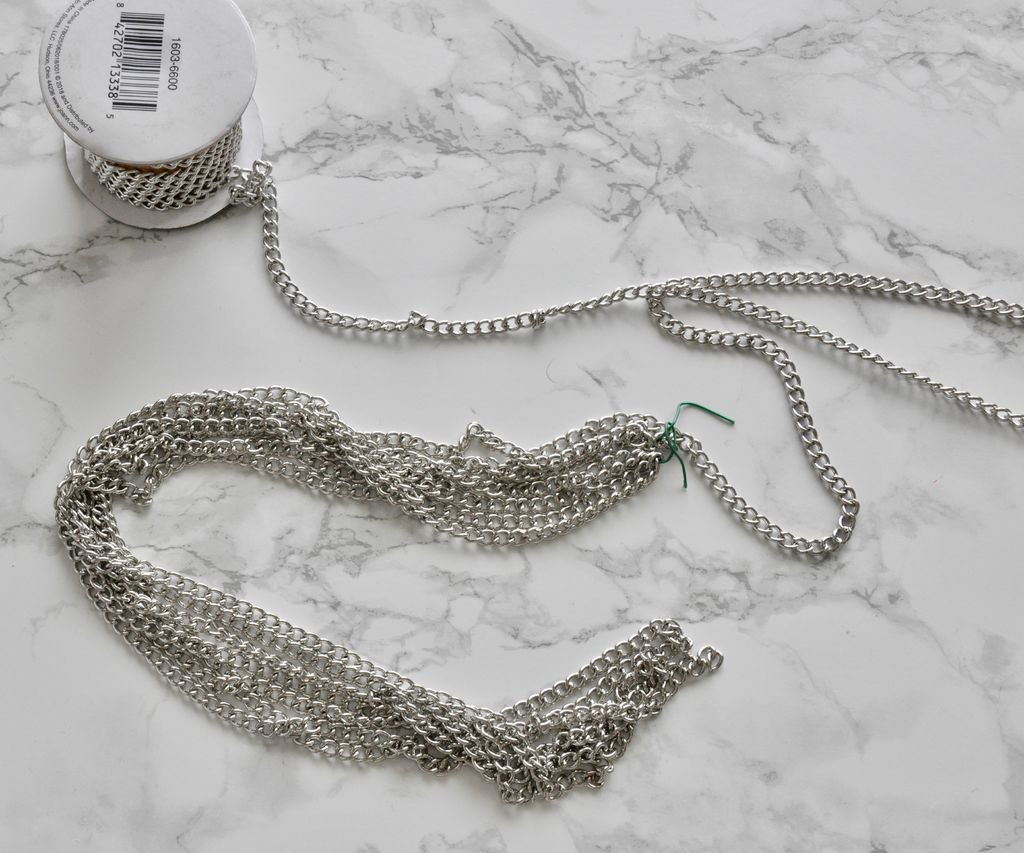

To start, you need to get your lengths of chain to size. I just kind of winged it and figured I didn’t care if they were the same length, but in the end, I did. So I recommend trying to cut them down the exact length you want right away.
You should either go for having the chains all the same length or have them strategically get longer, as the top chain is the shortest, the next is a little longer, the next a little longer than that, etc so they hang nicely. I really recommend this if you put them on an end bar like me. If you just loop them all on a jump ring after it MIGHT not make as much of a difference.
So, for my necklace, all the chains are the exact same length which is about 16 1/8″ long from tip to tip. With the chains, end bars, and clasp the necklace is about 17.5″ long.
Step 3: Weave Ribbon


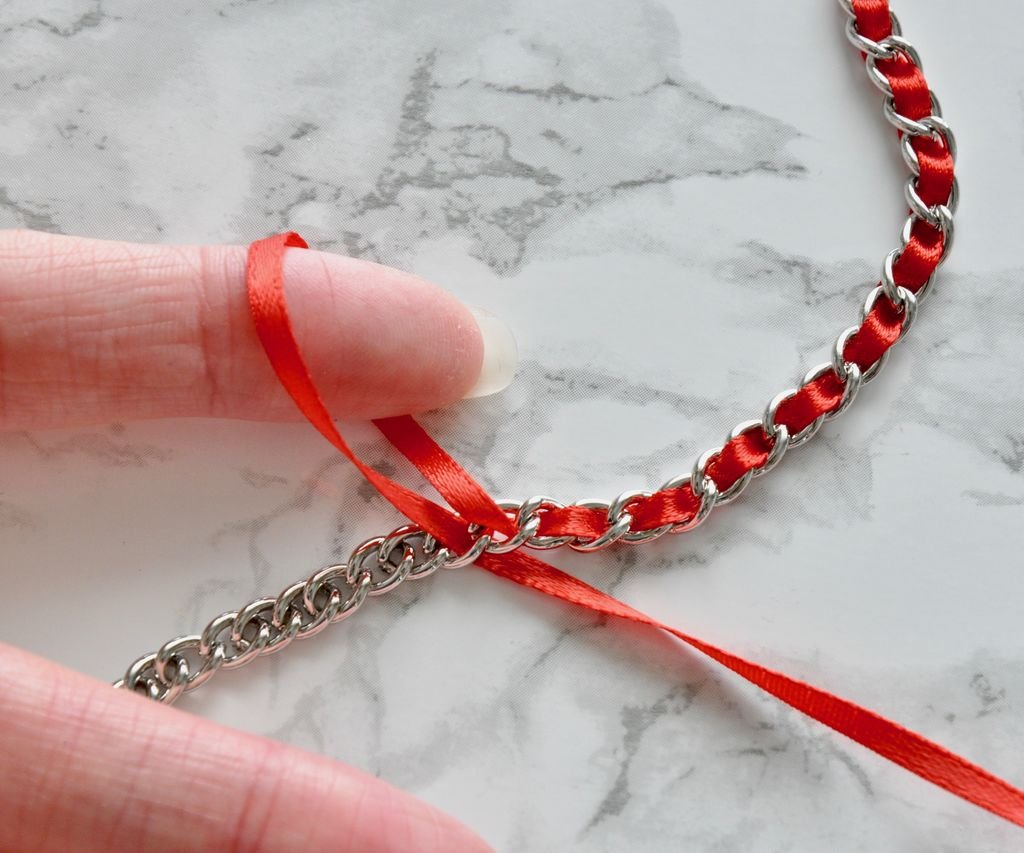


This is the most time-consuming part. Unlike with my crochet ribbon choker, I couldn’t find an easy way to do this quickly. I also tried to use a metal yarn needle but that made things more difficult.
Start by cutting off some ribbon. I recommend cutting a few inches more than the length of the chain. I used about 20″ for a 16″ chain and had an inch or two extra. (Not for the red, the red was shorter and almost didn’t make it because it was the end of the ribbon roll.)
To start, add a little tape to one end of the ribbon. This will be the end and you don’t want it to fray and you don’t want to accidentally pull it back through.
Take some more tape and tape the other end while trying to cut it into a point/arrow (kind of like you are making your own needle). This is the end you will weave through the chain.
My best recommendation is, try to keep the ribbon as flat as you can and put a finger in the ribbon so that you can straighten it out before you pull it all the way through.
I also found it helped to tape down the chain while I worked to hold it in place and hold it flat. I threaded the ribbon through about an inch or so and then tapped it down.
If you get a twist it will be a HUGE pain to fix after the fact so I recommend being careful and getting it right the first time or possibly accepting defeat later if you find a twist. I found twists in a few chains and went through the pain of fixing them.
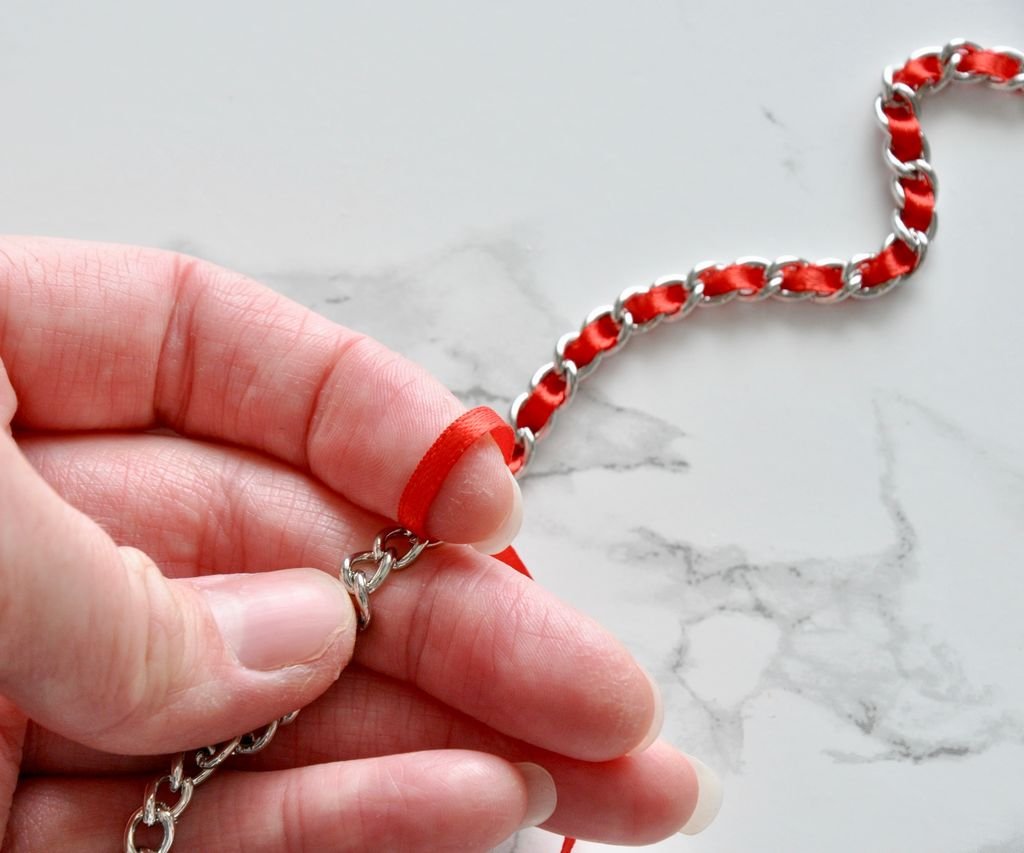
Lastly, I made sure that the ribbons came out the same side of the chain so I could glue both ends on the back. This required a lot of removing and adding chains in the end, but I’m happy with how it came out.
There is a good chance that despite all this work the ribbon might twist down the line just from normal wear and tear. I figure I don’t care, but I want them right from the beginning and I’ll just see what happens from there. So far they’ve stayed pretty flat. The biggest issue is when the individual chains twist and that kind of messes up the ribbon.
Step 4: Finished Chains


Just a look at all those chains woven with ribbon. That took me a couple of hours, though I could probably get it done a bit faster now that I’ve done it.
Step 5: Glue Ends


Time to glue down the ends. You can do this however you want, but I decided to make this easy on myself and used hot glue.
Fold over the ribbon and see how much you need. Cut off the excess. For this, your ribbon should go through the last link on the chain, but should not go around the end of the chain. You want to leave that last link exposed so you can connect to it later. Check out image 3 above.
Dab some glue on the ribbon and glue it down. I tried to only glue the ribbons together with the best I could. So not glue the ribbon to the chain.
Do this for all the chains.
Step 6: Making the Necklace


Time to make the necklace.
To make it easier on myself, I attached a 5.5mm jump ring to each of the ends.
Now, I attached these jump rings to my End Bar pieces. I had 7 chains and the bars only had 5 loops. So I attached one chain (red) to the top loop, 2 (orange and yellow) to the second loop, 1 (green) to the third loop, 2 (blue and purple) to the forth loop, and 1 (pink) to the fifth and final loop.
Once that was done I attached a clasp to one end and a large 5.5mm jump ring to the other.

Step 7: Finished Necklace

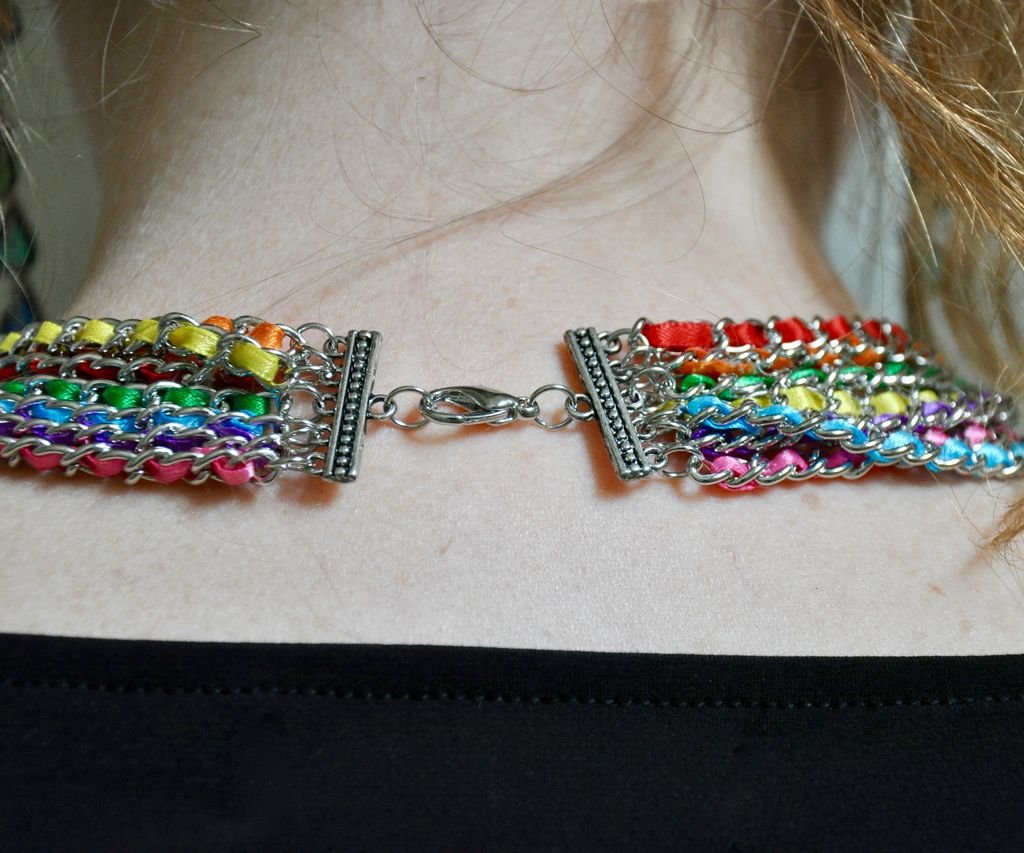


Here is a look at the finished necklace and a look at how it is clasped at the back of my neck.
Remember this is a heavy necklace.
courtesy: instructables