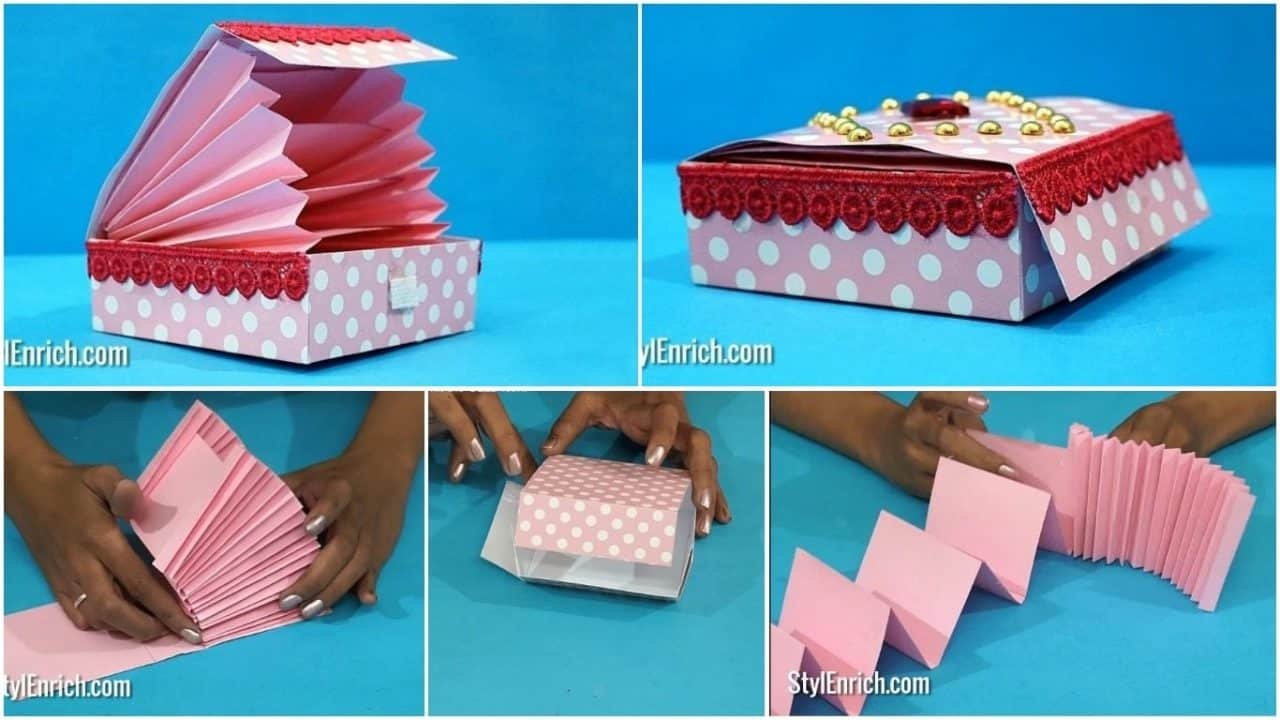
There are never too many drawers!
I made this chest of drawers for a specific person – a wonderful woman who loves to do scrapbooking, but she had a problem with storing paper, so I got the idea to make her happy and give her such a handmade chest of drawers.
I photographed the whole process, and now I will try to explain how and what I did, although to be honest, I invented a lot on the go …
To make a chest of drawers, I needed:
– 1.5 sheets of binding cardboard, measuring 1 m by 70 cm;
– 1 meter of linen, with a width of 150 cm;
– glue Moment Joiner, PVA glue, Crystal glue, super glue gel;
– craft paper, watercolor paper A3 format – 4 sheets;
– beer cardboard;
– twisted cord;
– fittings: handles for boxes 2 pcs., wooden legs 4 pcs. etc.
So let’s start my story:
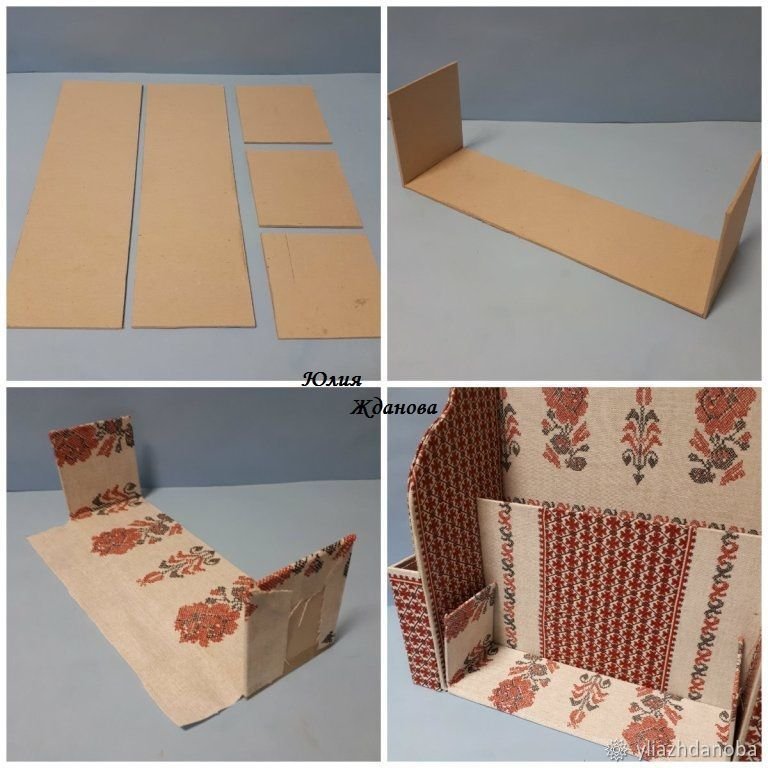
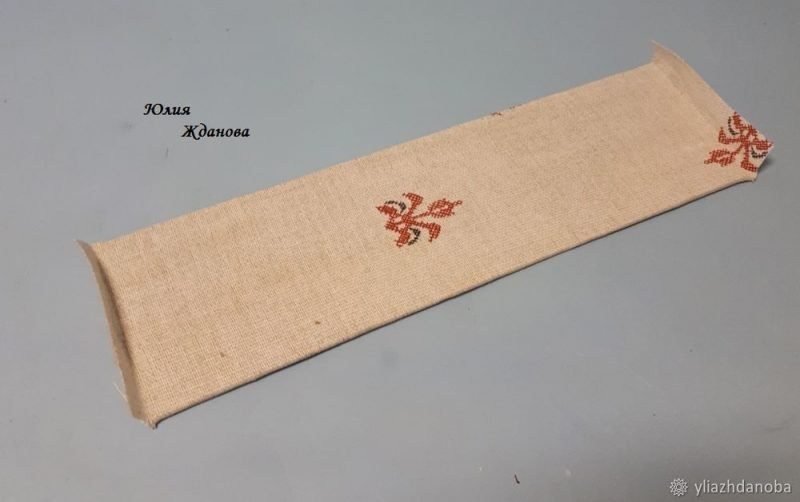
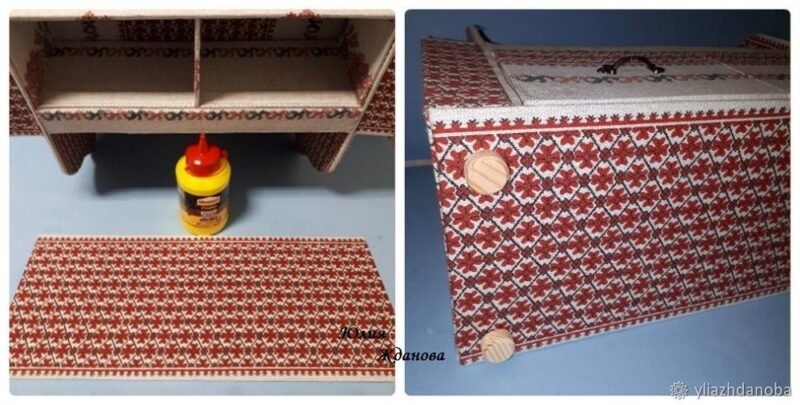
To begin with, I cut strips of 3 cm wide from craft paper, then folded them in half, ran them through, they will go to strengthen the sides of the chest of drawers.
First of all, I glued the bottom and the back wall, then stepped back from the back wall 6 cm and made a markup for the middle bar, glued a craft strip along the markup and already a bar to it.
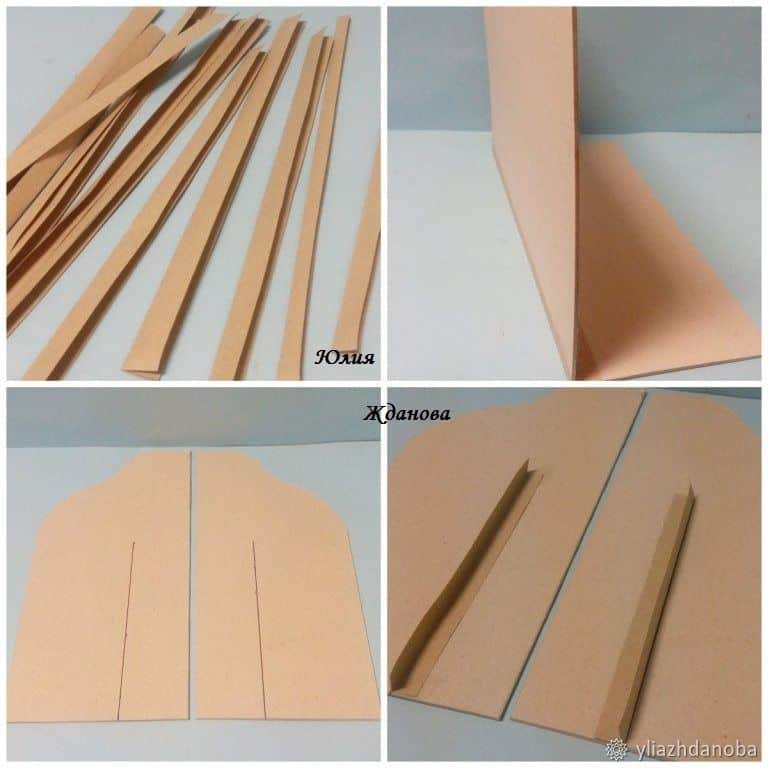
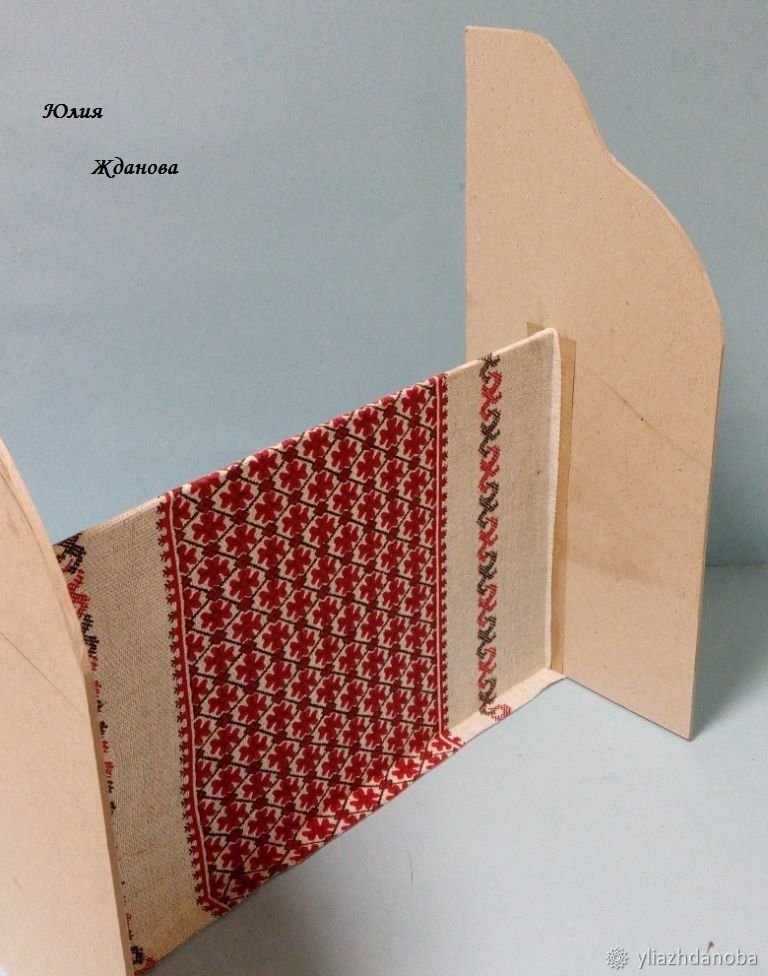
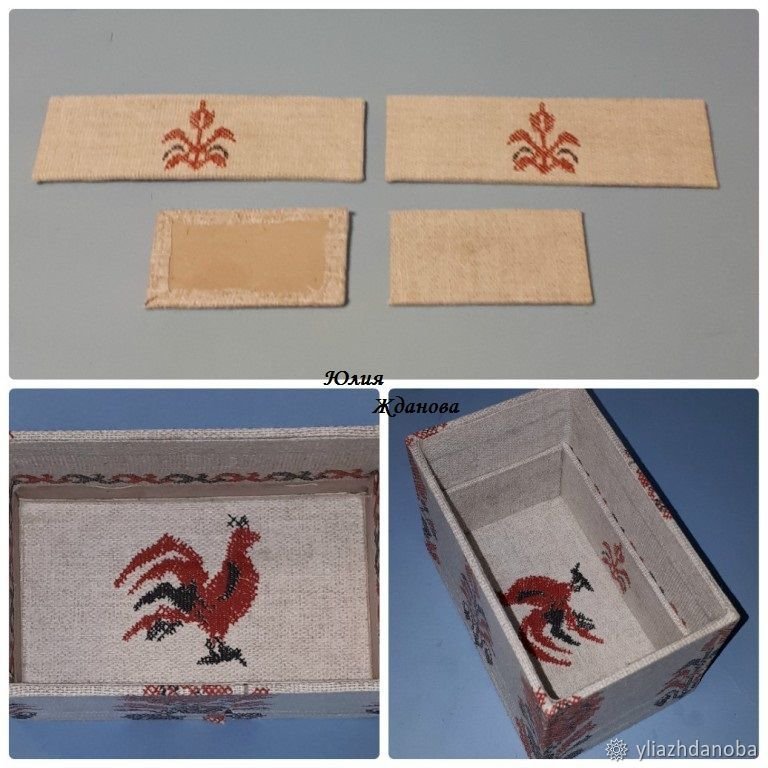
I immediately cover the middle compartment with linen, for this I coat the entire area of the cardboard with PVA glue and gently smooth the linen with my hands, expelling all air bubbles, first one side, then the other, leaving an allowance of about 2 cm on the bottom.
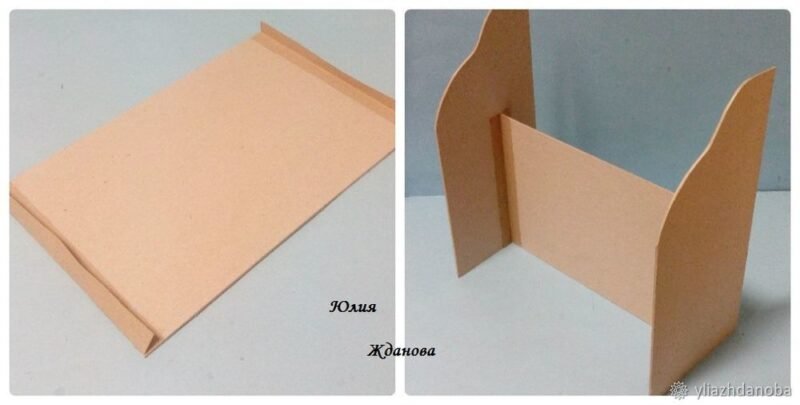
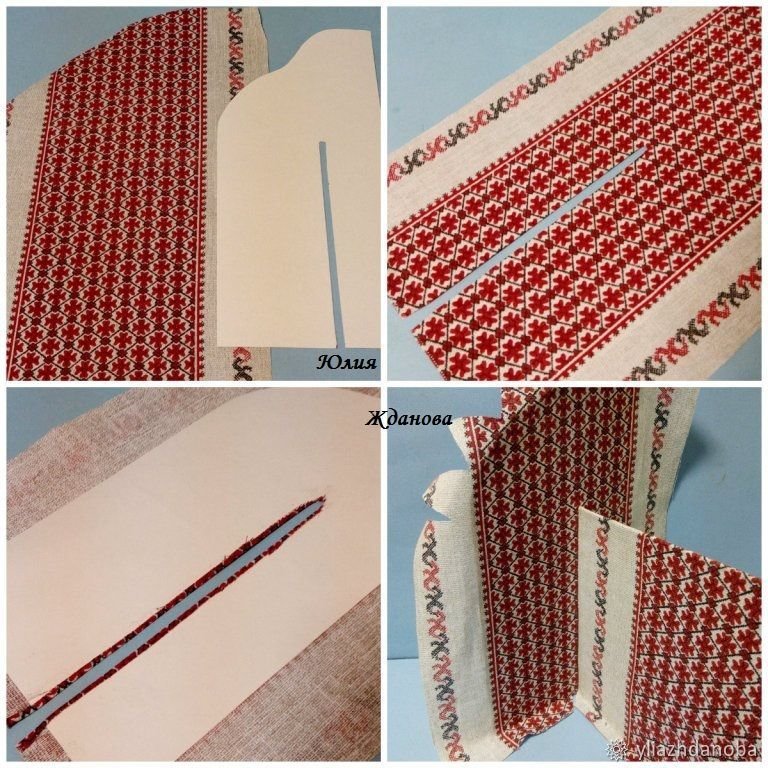
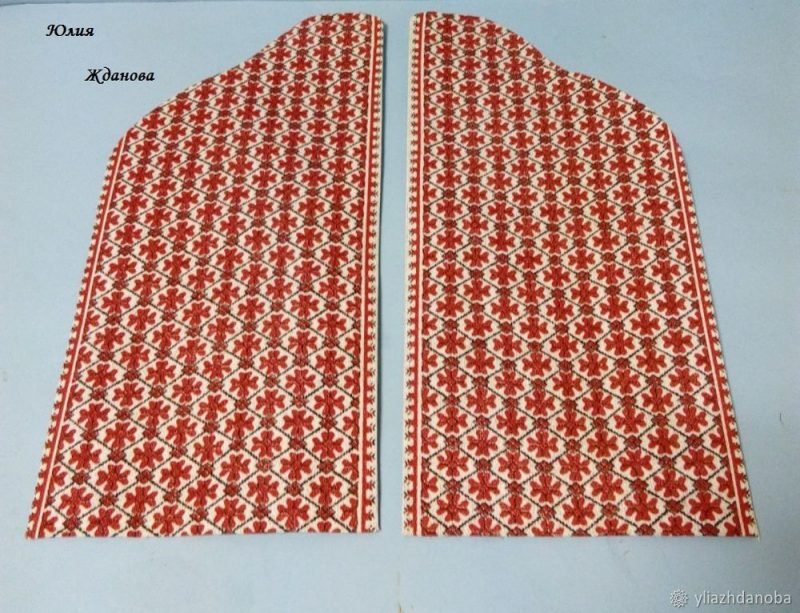
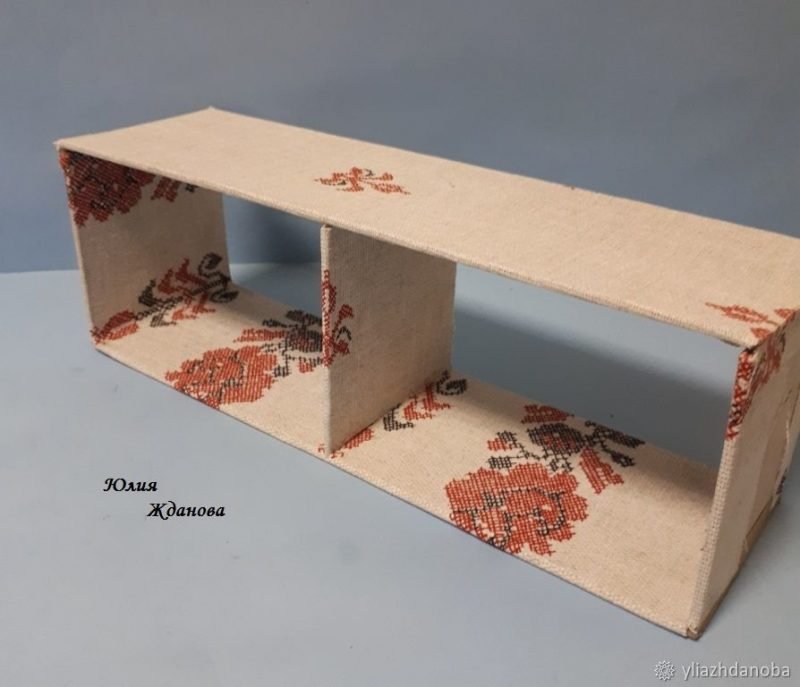
Linen is a loose material, and so that different threads do not stick out and the work looks neat, I cut out the side wall of the chest of drawers from watercolor paper, I will have 4 such blanks, I fit them with linen, and on 2 inner blanks I make a slot to hide the place fastening of the middle compartment. I first glue the inner side walls, leave at least 2 cm along the edges and then wrap them, pasting the edge of the side wall.
When the glue dries, I connect the side walls to the back panel using Moment Crystal glue. I almost missed an important point – the back wall is already covered with linen.
It was the turn of the side pockets, for a start I glued the cardboard blanks, then linen comes, I bend the linen inward at the top, leave an allowance of 2 cm along the edges and bottom. I cut out the inner part from the scrap paper and glue it, having previously punched the fold.

Then, with Moment Crystal glue, I glue the linen allowance on the outside of the side part. When turning, the pocket detail should completely wrap around the bottom of the chest of drawers; allowances along the bottom until I glue it.
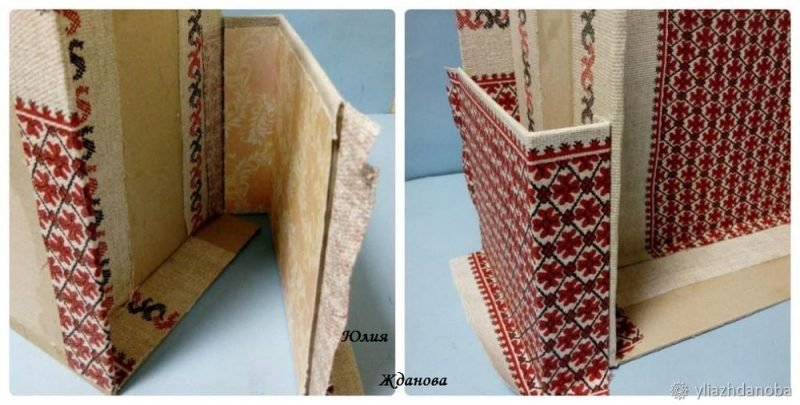
Before closing the pocket, it is necessary to ennoble the outer side of the side wall and at the same time fix the pocket, for this I take the remaining blanks from watercolor paper, cover them with linen and glue them to the outside.
Before closing the pocket, it is necessary to ennoble the outer side of the side wall and at the same time fix the pocket, for this I take the remaining blanks from watercolor paper, cover them with linen and glue them to the outside.

Well, something interesting is already starting to emerge, you should probably go have a cup of tea, otherwise I tired you with gluing, gluing, gluing, etc., in the same spirit 🙂

Have a rest? Great, then with renewed vigor – continue!
Now the next block with boxes.
To do this, I glue the base (where the boxes will be inserted).
I try it on – everything fits, I glue the bottom allowance, leading it to the bottom of the chest of drawers.
The upper bar is slightly larger than the lower one, it should go on the sidewalls, and glue the remaining allowances on the side walls.

We insert the block into the chest of drawers and fix it with glue until it dries completely.
We insert the block into the chest of drawers and fix it with glue until it dries completely.

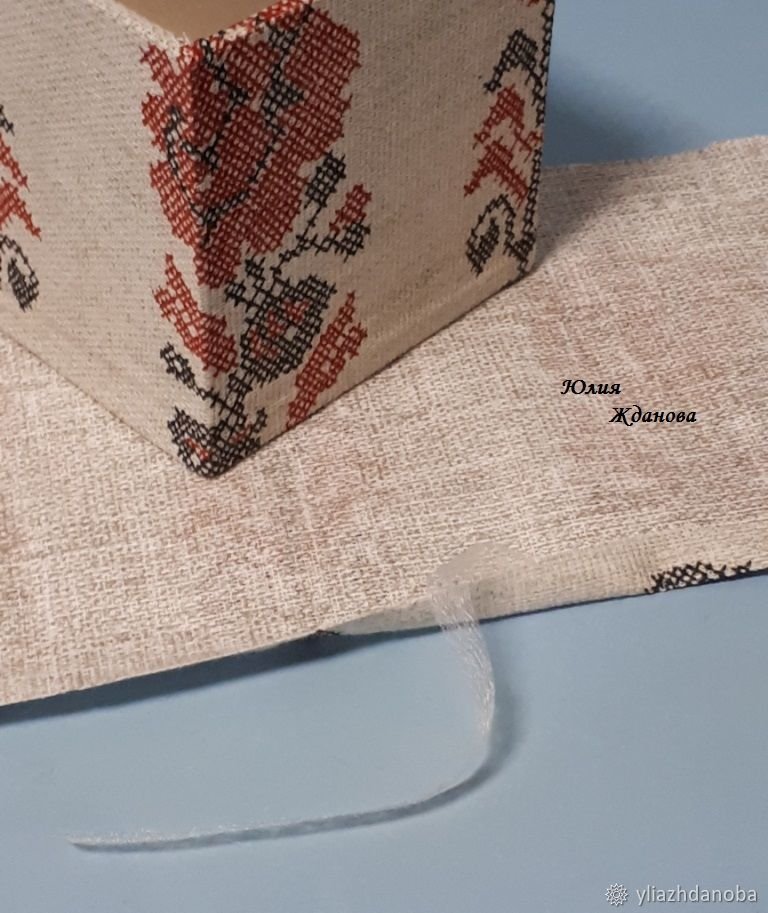
To tighten the side of the box, I take a strip of linen and, so that the edge does not break, I bend it inward along with a strip of glue gossamer, iron it – the edge is securely fixed – and then I glue it on the box.
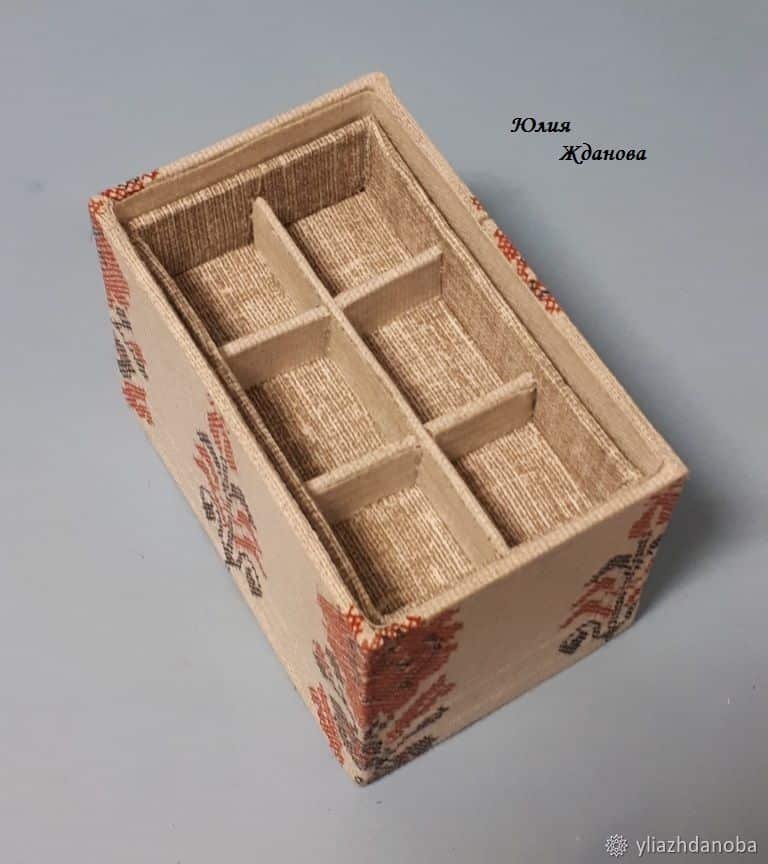
One of the boxes will be with a double compartment, like a nesting doll – for this, inside the box, dividing it in half, I paste cardboard tabs, already covered with linen.
Now I’m making a box, smaller in size, it will be inserted inside the box. For the cells, I took cardboard 2 cm wide, divided it in half and made slots 1 cm wide, covered them with linen and made notches in place of the slots, then inserted the cells into each other, after lubricating them with glue.

How to glue a regular box
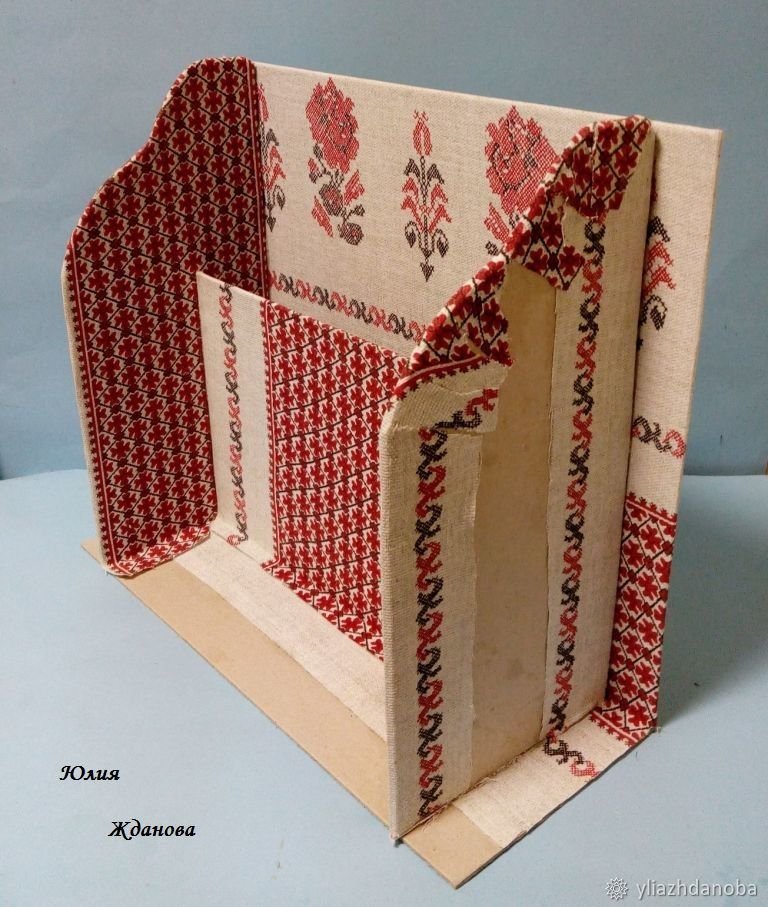
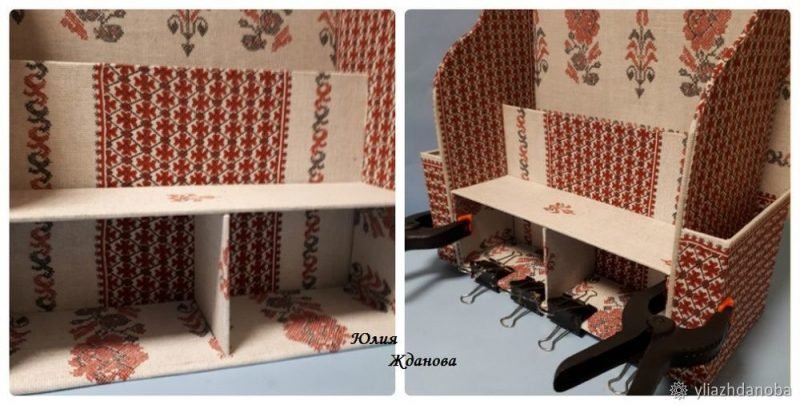
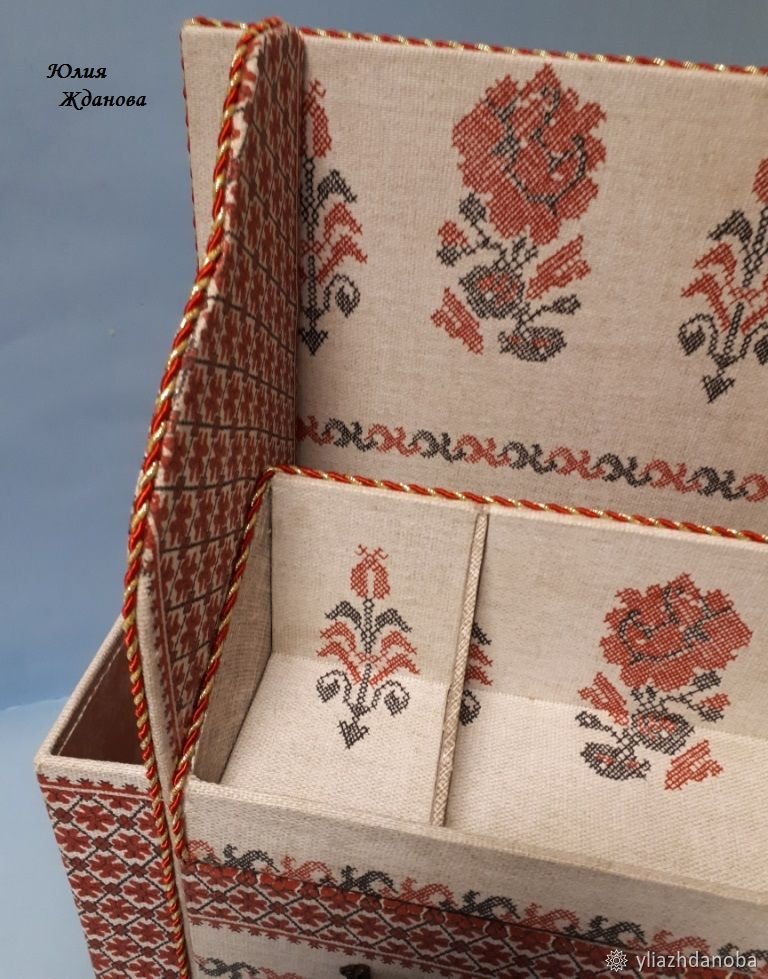
The lower block is ready – it is the turn of the upper block with compartments.
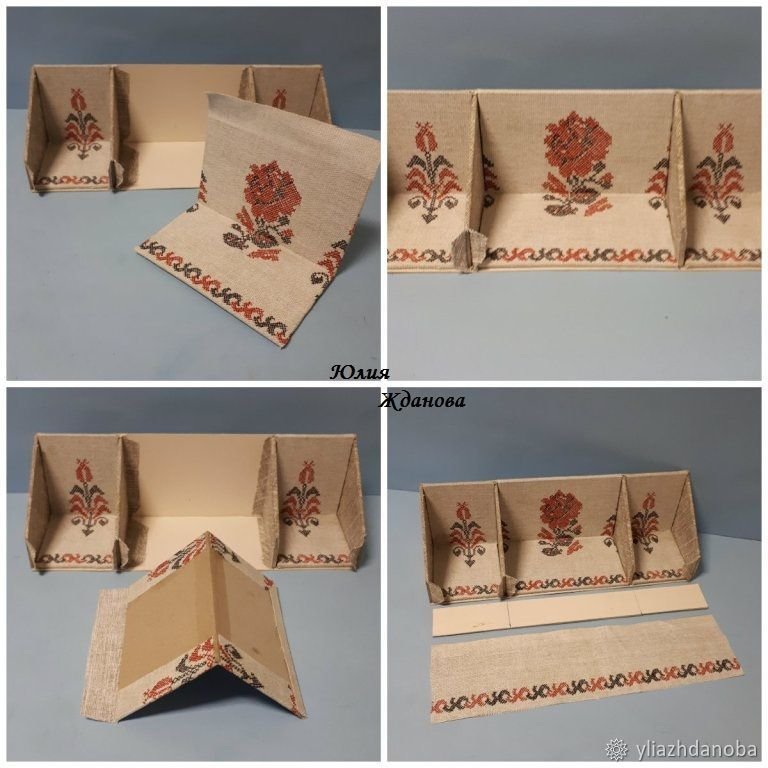
For the base, I take beer cardboard, apply markings – the outer pockets will be narrower than the middle one.
I cut out the side partitions of the compartments from the binding cardboard and glue them diagonally, because. I need the edge to be covered, I leave 1.5-2 cm allowances from each edge, they will hold the partition in place.

I glue them on the markup.

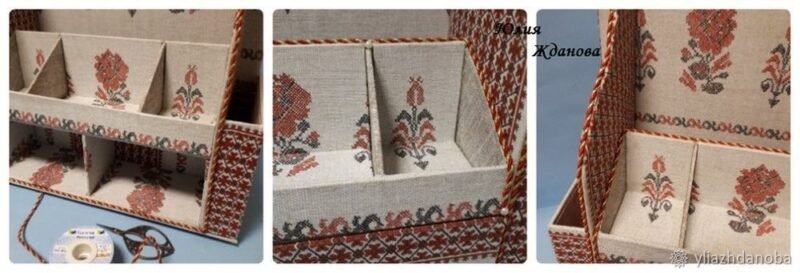
When the partitions dry out, I paste a finishing part inside (binding cardboard covered with linen)

The final touch is the front partition, I cut it out of cardboard, then, having made an allowance along the bottom edge of 2 cm, I glue linen on the front part, the bottom allowance on the bottom of the block, and I cut the top allowance of 3.5 cm and glue it inward, closing the allowances of the partitions .
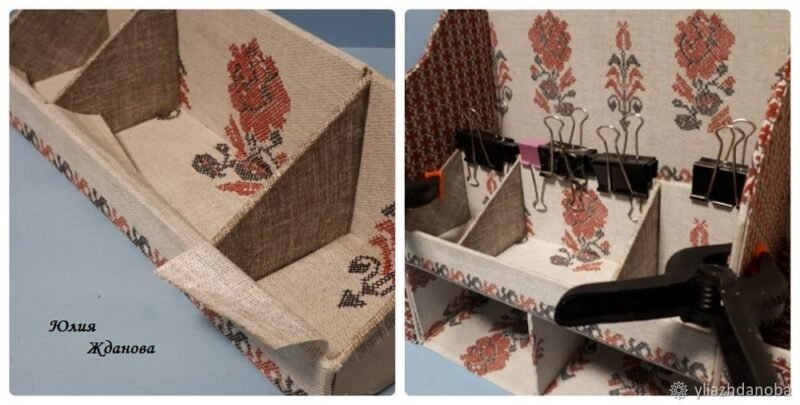
I put the block in place.
While it dries, I glue the front part on the boxes and fasten the handles.

It remains a little – to glue the bottom and back wall
To hide the joints of the parts, I took a twisted cord and decorated the chest of drawers with Moment Crystal glue.
The cord does not stand out much, but at the same time gives some elegance to the chest of drawers.
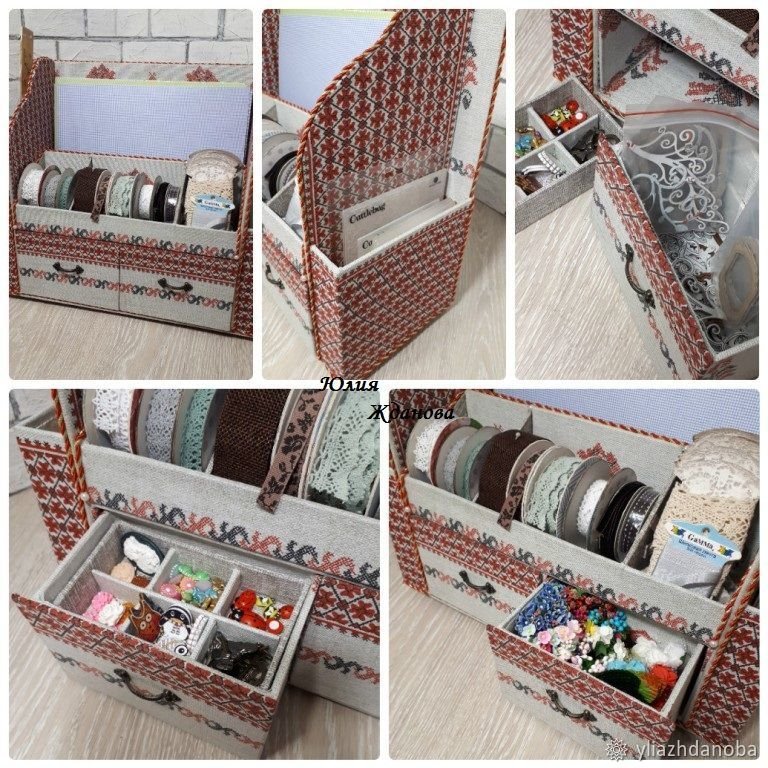
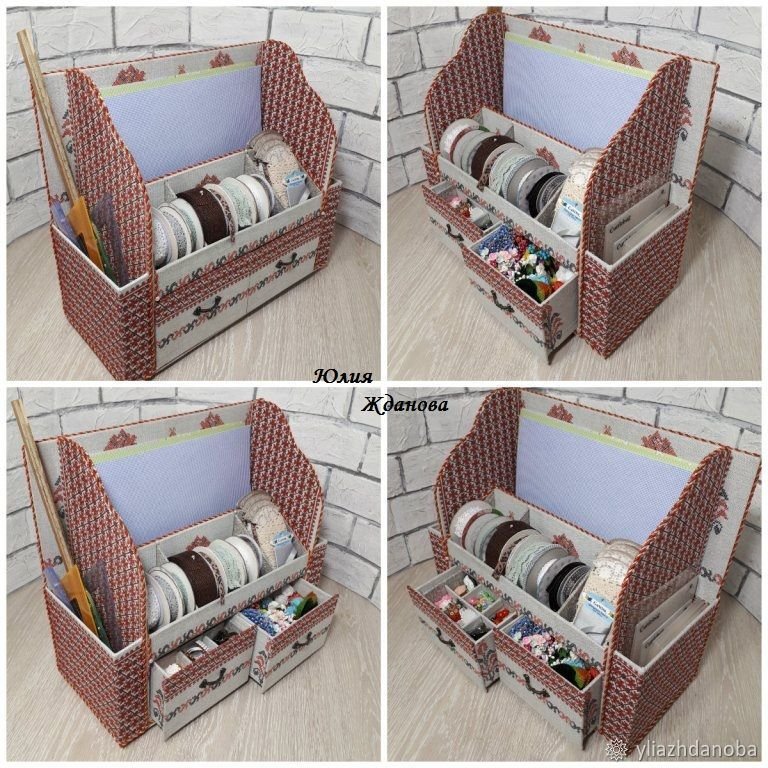
And now you need to fill the chest of drawers! According to my calculations, about 150 sheets of paper will fit, in the side pockets you can put paper scraps, tools, rulers, knives, glue, etc., various small things will be stored in the drawers …
courtesy: livemaster
Add a comment