I am a person who always wants to change the ambiance of my own little home. And as I am a DIY lover girl, I used to decorate my room with my handmade stuff, which really gives me an inner pleasure and satisfaction.

This was a holiday when I wanted to redecorate my room, I found two new cushion covers which perfectly matched with my cotton (as I always want my cotton on the light shade, which makes me feel peace) but I could not place because I didn’t have a bedspread with that combination.
But the traditional Gujarati cushion covers (Gujarati derived from the place in India called Gujarat) made me think over this as I desperately wanted in my new bedroom makeover. Then I thought about why I shouldn’t do this job with my own hand. And I started searching an old dark shade bed sheet in my cupboard. I was fortunate enough that I got a new one.
I entered my craft room with my colors and did this floral bed sheet within 6 days only. (It needed 2 days to paint the bed sheet and 4days to dried up completely)
So I must say, it’s the easiest fabric painting which will give pleasure to your eyes and satisfaction to your heart.
I started to write this Intractable because I wanted to share that, don’t worry if you don’t have a matching cushion, cotton or bed sheet. Take your old collection, put your fabric colors and create a new ambiance.
Step 1: Materials and Tool Used
1. Single colored Bed Sheet
2. Fabric Colour
3. Acrylic Colour
4. Paint Brush
5. Color Mixing Tray
6. Pencil
7. Carbon Paper
8. A4 Size Paper
9. Iron
Step 2: Prepare Your Bed Sheet

Here I have taken a black colored bed sheet. I choose this dark color only because to make a match with my cushion covers. You can choose according to your own taste.
If you are using your old bedsheet, then make sure one thing that you removed all starch first. It’s the mandatory thing to do before using the old one. Then let it dry and iron it properly.
And if you are using a new one, you can wash it once and iron it too. (for a better result)
TIPS:
It’s better to iron the entire bed sheet. But I should suggest, keeping the iron near your craft table so that you can give a steam iron to the selected small area which you are going to color next.
It’s just because, cotton fabric has a nature of getting folded very easily which will make your work lengthy and messy.
You can alternatively use an embroidery hoop to avoid ironing again and again. (Here the demerit is that you have to wait for the colors to dry if the previous paint comes under the periphery of the hoop when you want to paint the next and adjacent one)
Step 3: Make Stencils

I wanted to change the decoration so quickly, so I managed to find a way which gave me a simple way to work over this project.
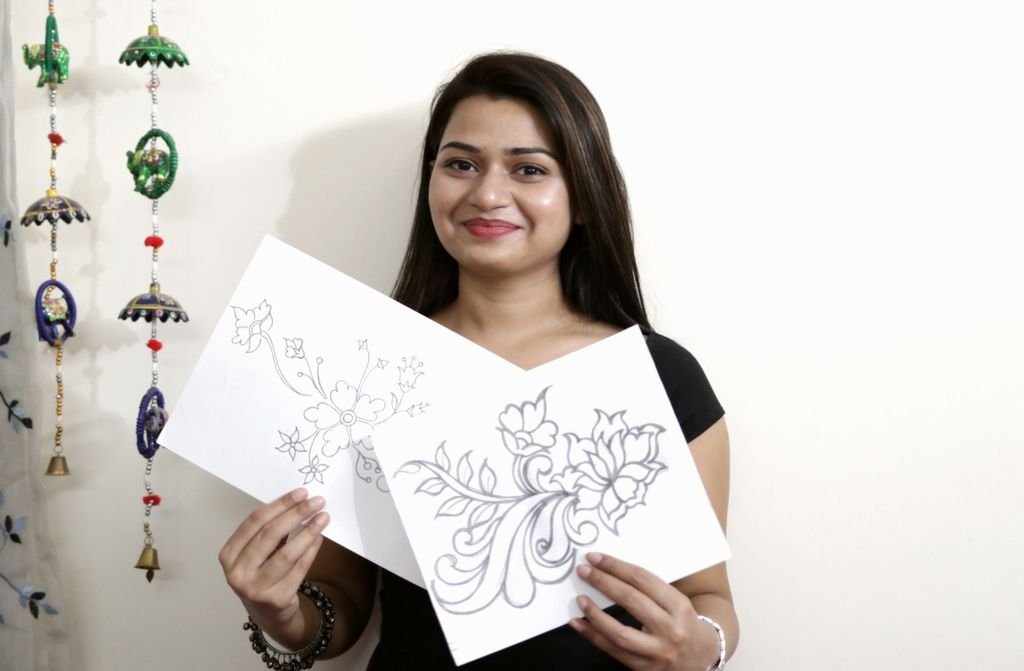
I plan to make a rectangular shaded border, which I have thought not to put in extreme ends. So before I started the project, I did spread over my single bed and put the cushions the way I wanted to put it. Then by using chalk, I marked the rectangular area, which will prominently be featured over the bedsheet, and no cushions will come over the design pattern. By doing this, I could manage to save time.
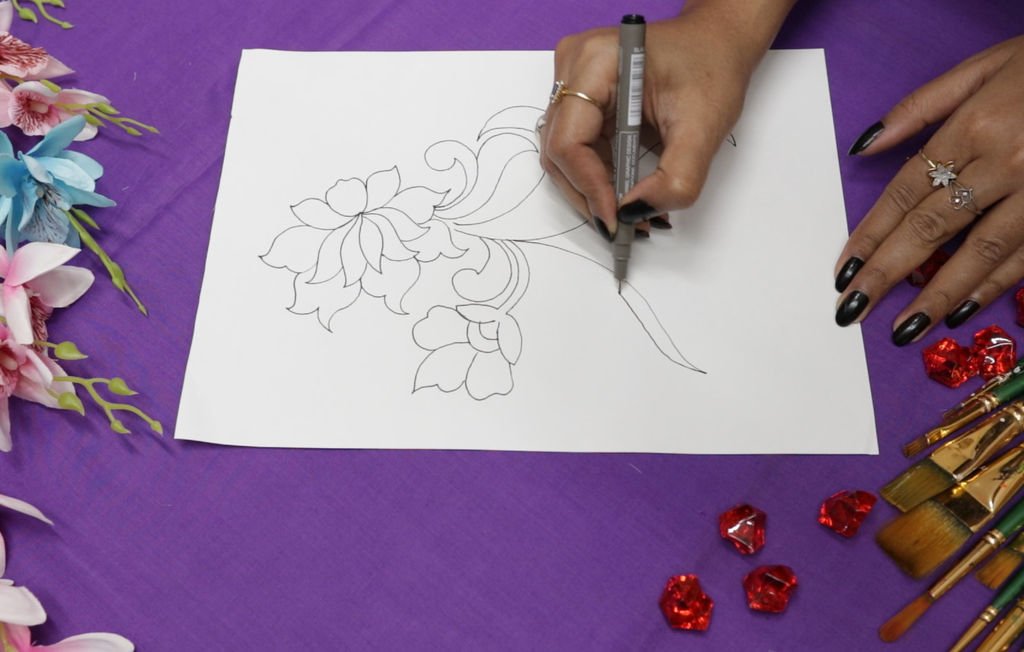
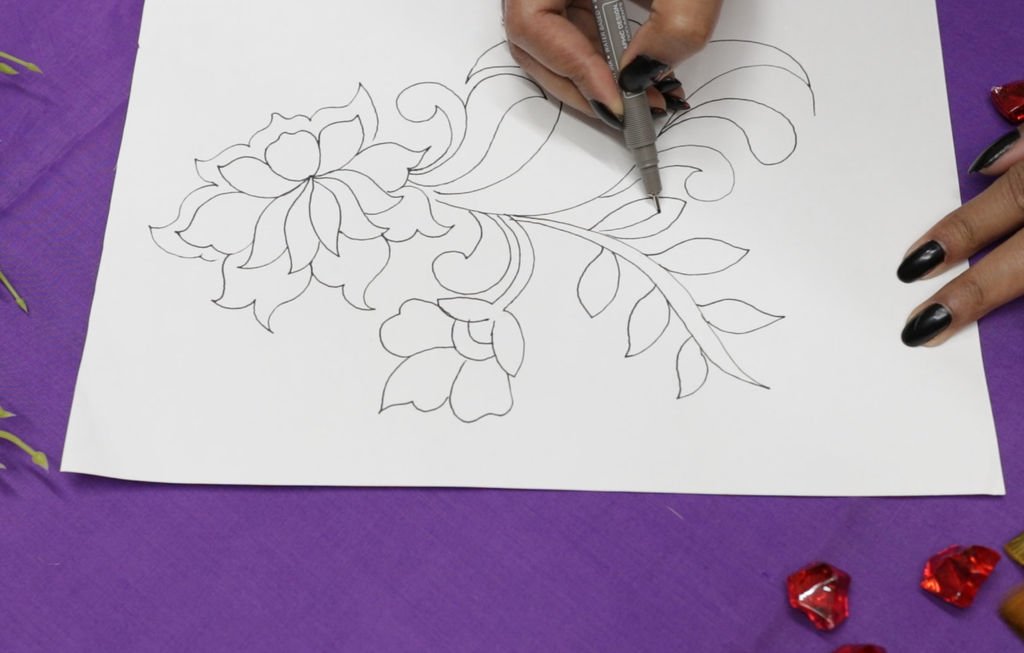
Then I kept my floral pattern very simple. For that, I have taken an A4 size Xerox paper and did the design of my own. If you are a little good at drawing you can do this. If you are not, then don’t worry, you can download the floral stencils from the internet or from my website.
TIPS:
Be sure the rectangle you have drawn over the fabric is perfectly in the center. So better, before you paint, measure the length and breadth of the fabric and leave an equal measurement from both the ends of length side and equal length from both the ends of breath sides.
Step 4: Transfer Pattern
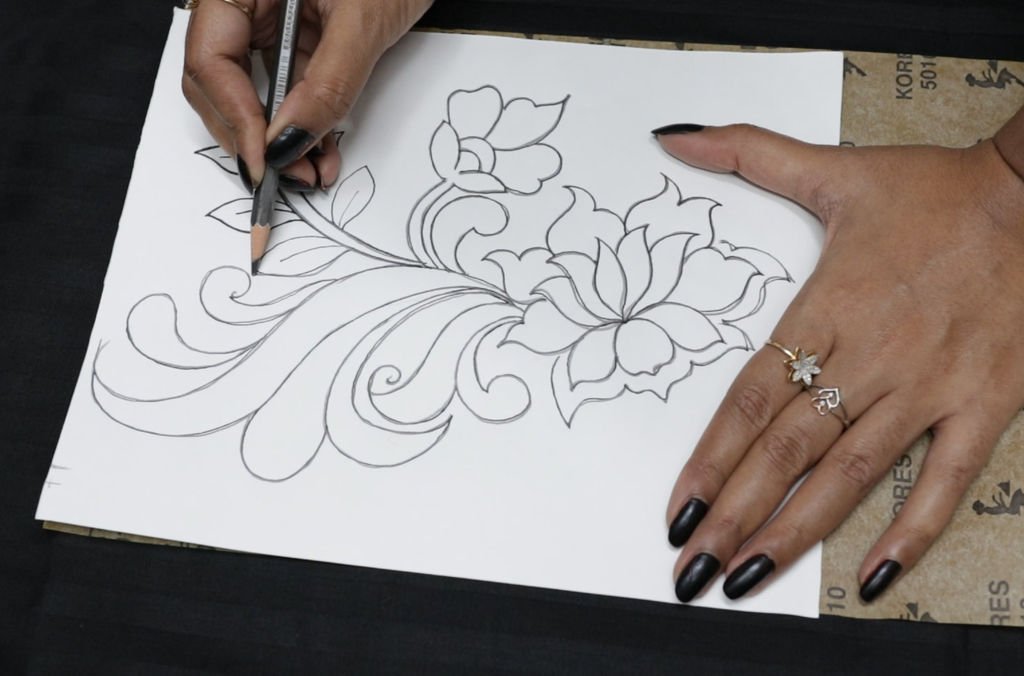
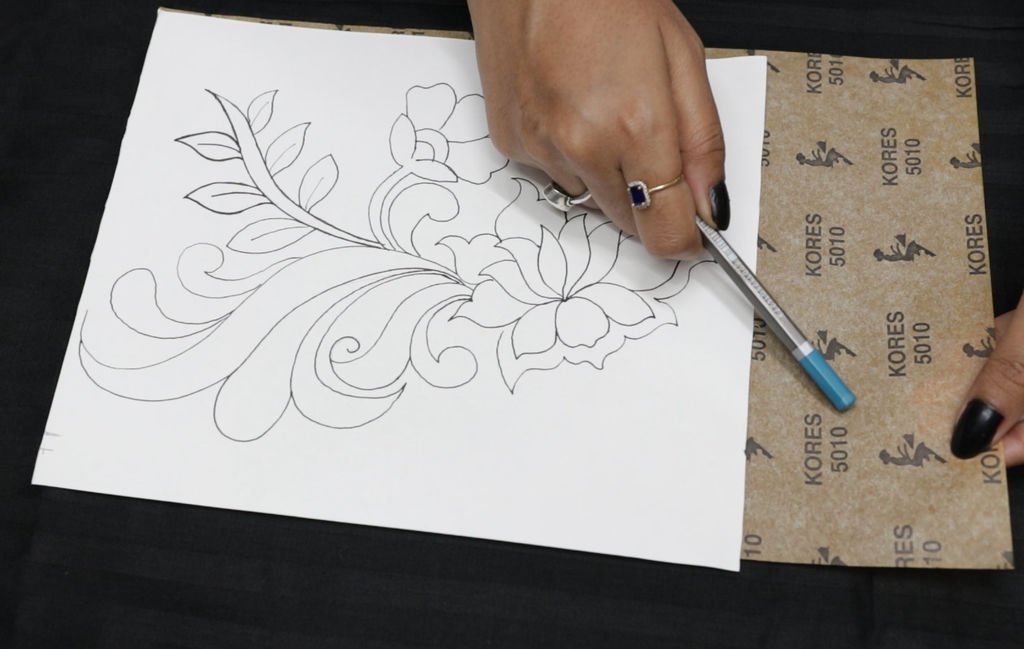
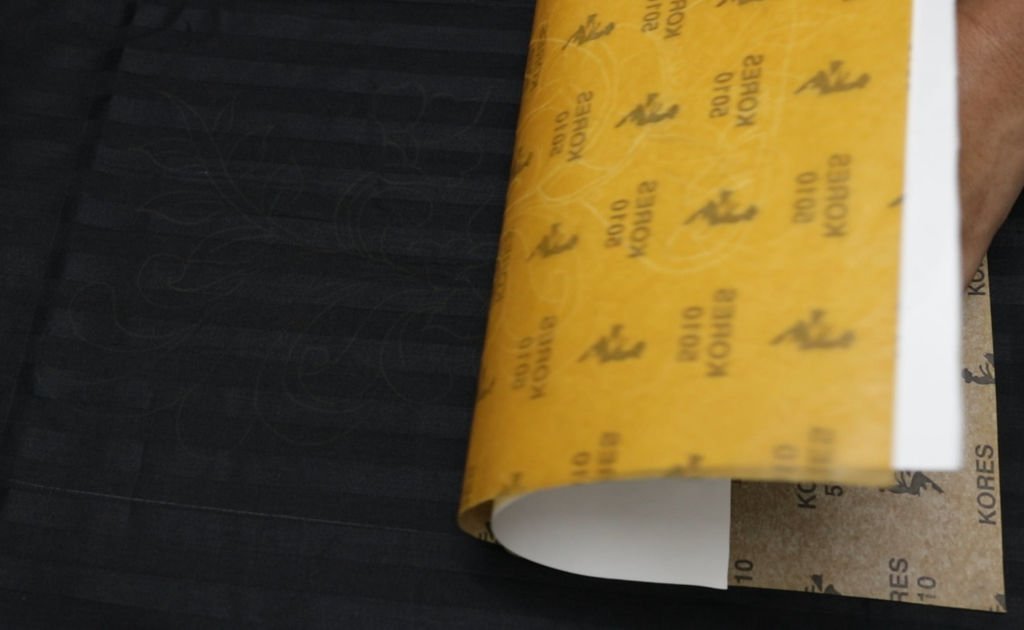
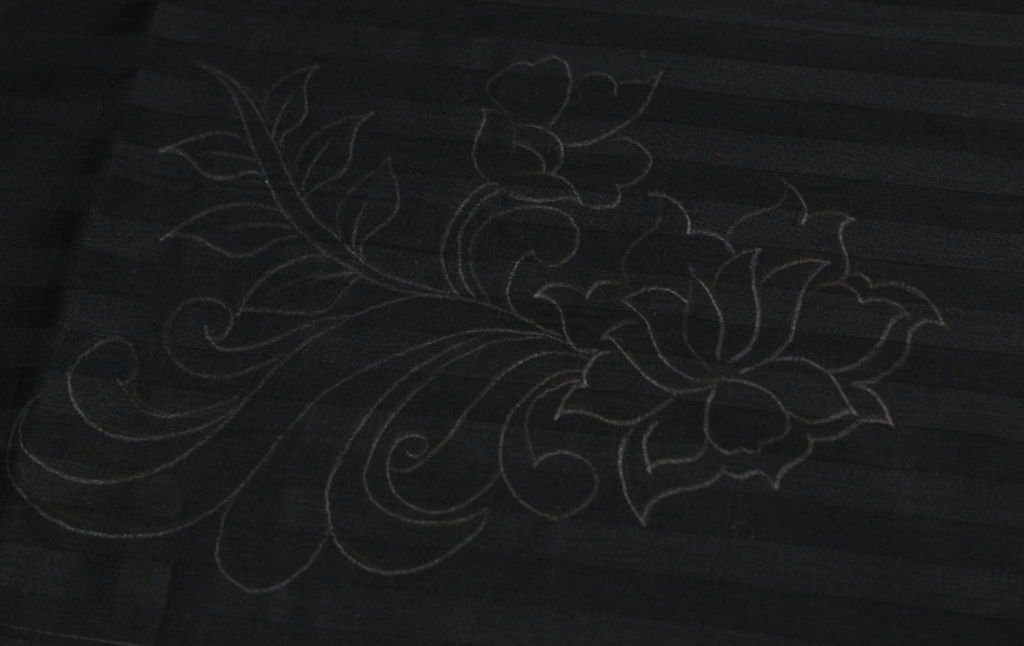
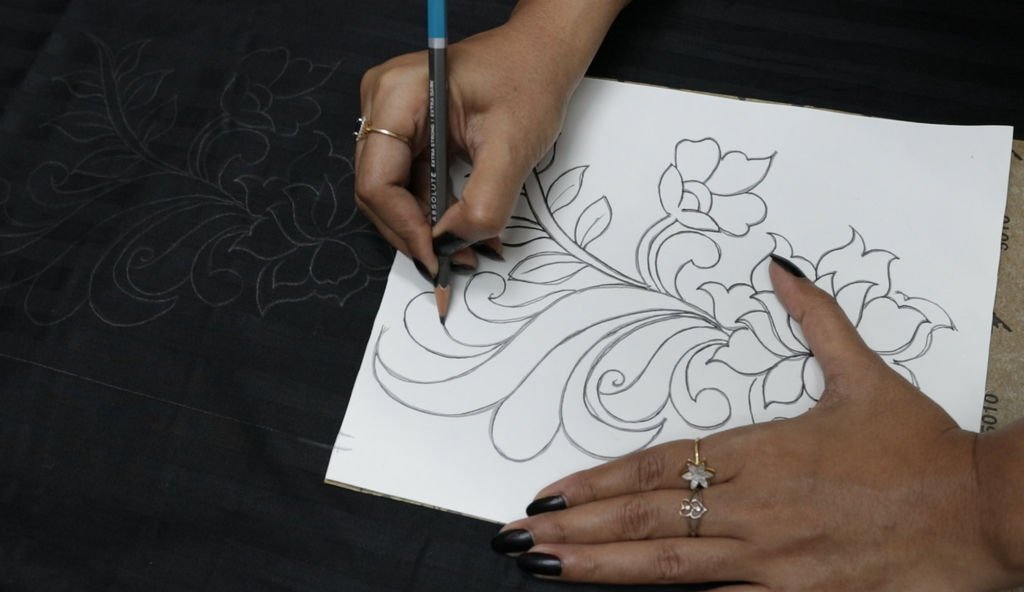
Now it’s time to transfer the pattern to the fabric. For that, you need to take a carbon paper and then you have to place it under the A4 size paper. By using a pencil you can easily transfer the pattern over the fabric.
As I have planned to make it simple yet colorful. So I did repeat to transfer the pattern again and again along the outline of the rectangle.
TIPS:
1. When you are working over a dark shade fabric, you should use a white or yellow carbon paper.
2. When you are working with a long-running fabric, better you should spread over a large area.
3. To avoid the messiness of the colors over the work area, you should keep big polythene over the table or the place where you are working.
4. During transferring the stencils, keep in mind that you should not use a sharp pencil. Otherwise, it will tear the paper easily.
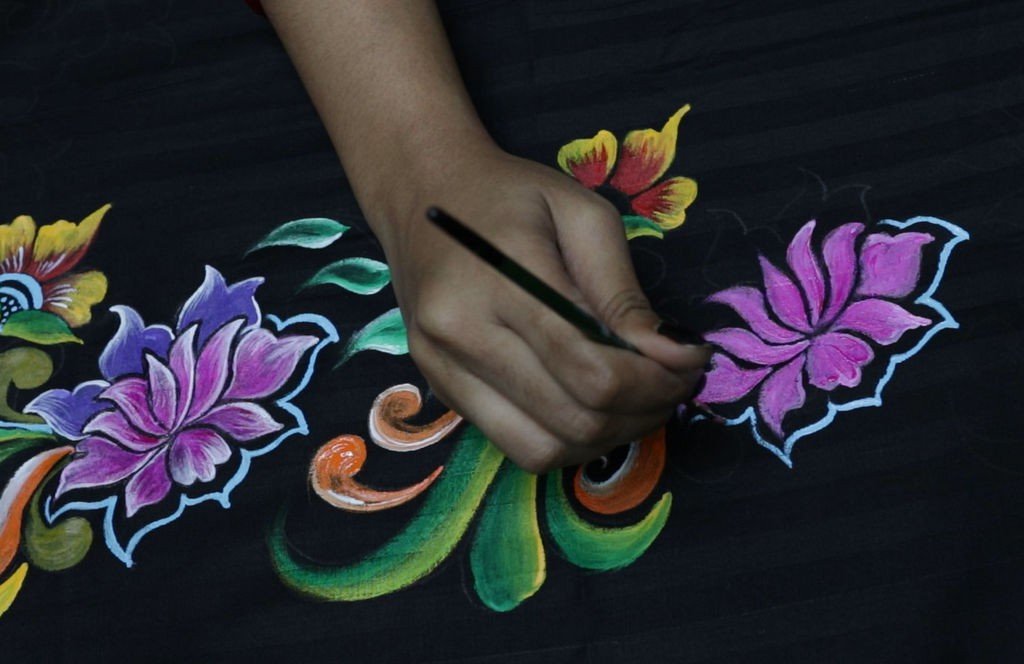
Step 5: Colouring the Pattern

First I did experiment with a single design, that which colors will go good. So by the time I was doing the second flower, I have taken some photos.
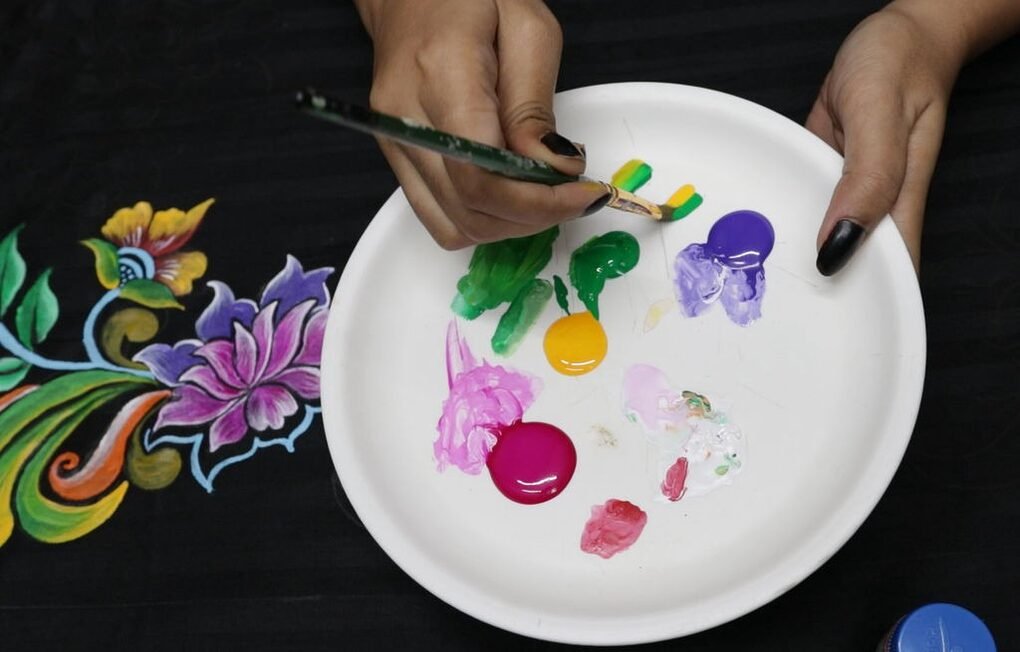
Here for the flower, I have used shade Golden Yellow 209 (fabric color). First I did the outline (the part which I wanted to play with yellow color particularly) with 0 number point brush and then gave some very smooth strokes from outwards to inwards.
Then by using the same theory, I also did the lower part of the flower with the same size brush and shade Crimson 204 (fabric color).
TIPS:
1. You can highly give the fabric double coats, not more than that. Because more than double or triple coats will make your fabric so hard.
2. Make sure you are using Fabric colors only. It will give you a smooth finished outcome than the acrylic colors.
3. If you wish, you can put a very thin layer of white color over the fabric first, to get a prominent color shade within single or double coats. (Its when you are choosing a dark shade fabric, otherwise it ok to apply directly over light shade fabric).
Step 6: Make Leaves With One Stroke Method
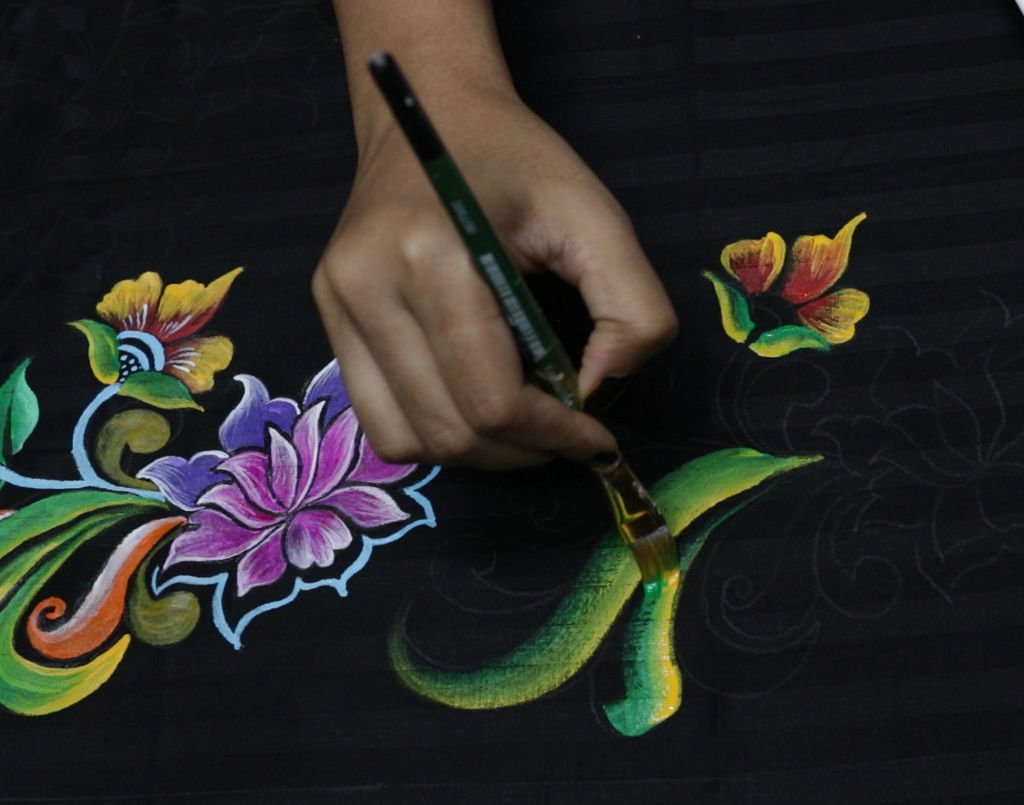
Now its time to make the leaves. To manage the time, also appropriate color mixed look, I choose to make this with one stroke painting method.
For that, I have chosen two contrast shades i.e. Light green212 and Golden Yellow209.
Then I took a flat brush of * size. Took a little amount of Green shade with one side and a little amount of Yellow in another side of the brush and swipe continuously to make the colors mix in the middle portion of the brush.
Now the brush is ready with one end Green color, one end with Yellow color and middle portion with the mixed shade of the both.
Step 7: Fill Colours on Floral Design


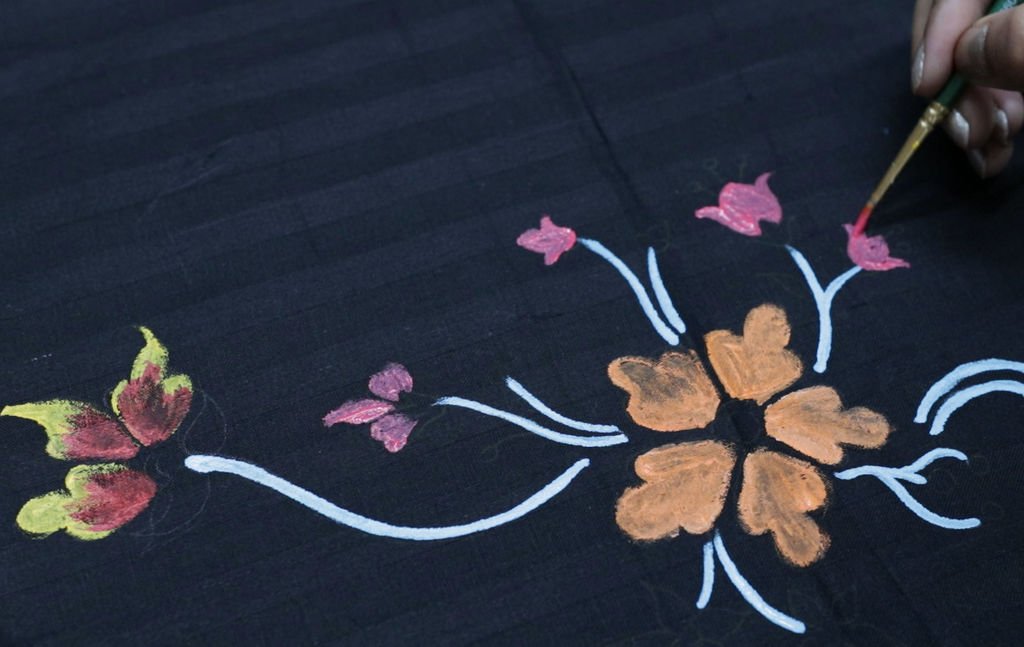
Then I moved forward to make some other designs. You can follow the one stroke technique, but if your hand needs some extra practice over that technique, then you can go with simple too.
You can put a single color shade first and then another shade, after that blend well the transition portion of both the colors. I have used Orange217 and White227.
Mine intends to show both the techniques that, you can find your comfortable one.
Then I have done some leaves adopting the same technique as I have shown before. Here the color shades are Light Green212 and White227.
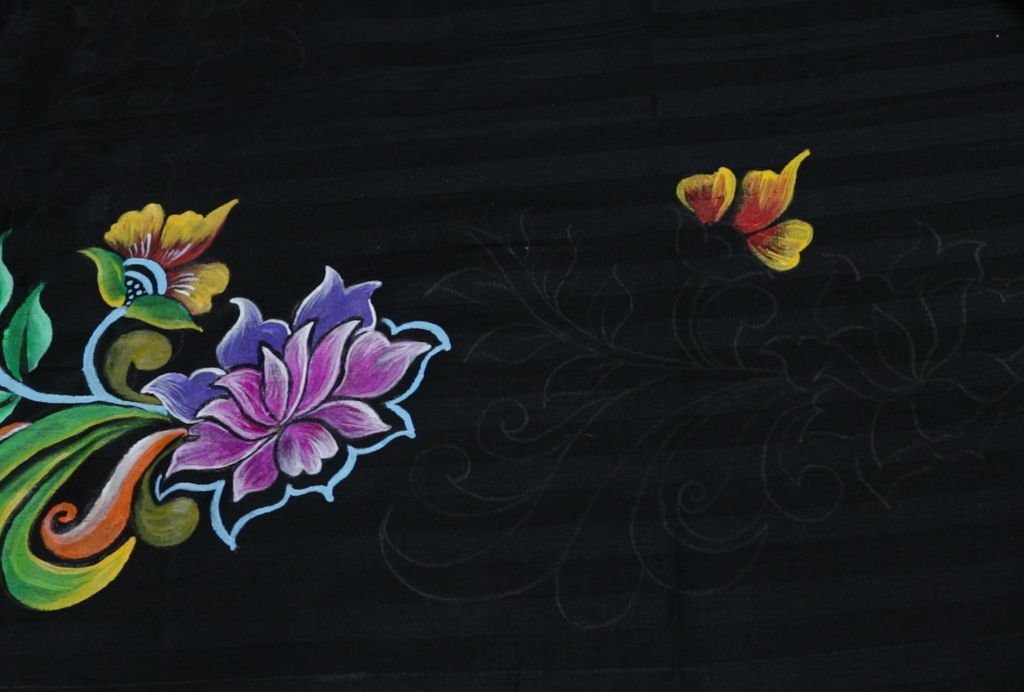
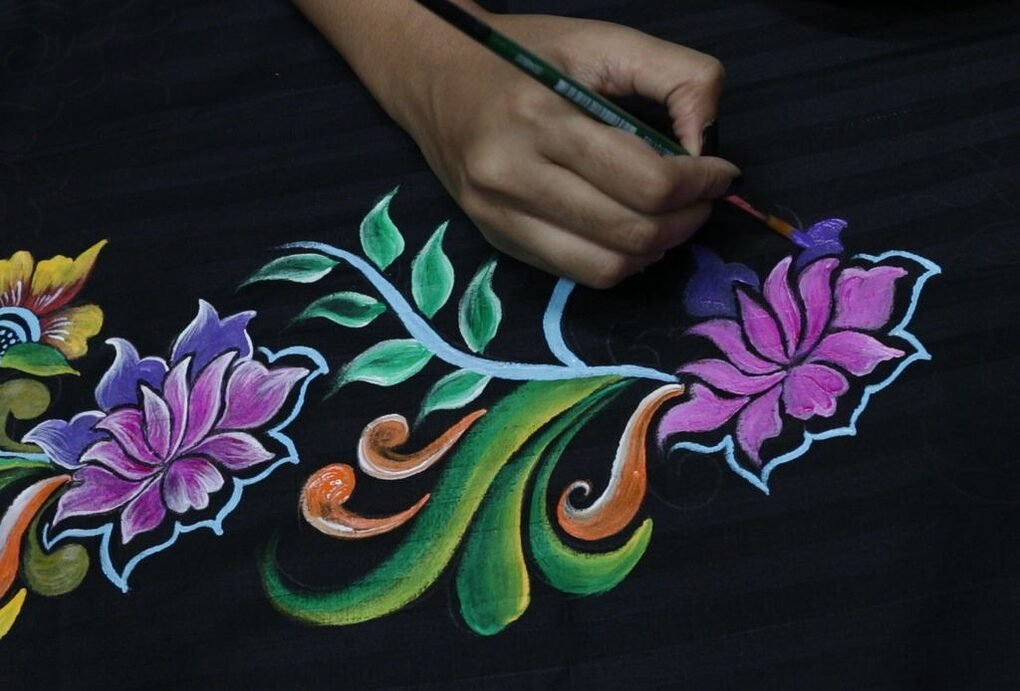
Step 8: Making the Lotus and Stem
Now its time to paint the Lotus. For that, I have chosen the shade Deep Brill Purple264.
For a better result, mix this shade with a tiny amount of white color and paint over the fabric with a thin coat, then apply the natural shade directly from the lower end towards the upper end of each petal of Lotus.
I have put Sky-Blue264 to paint the stem and to make an outline which I have drawn just near to the flower.
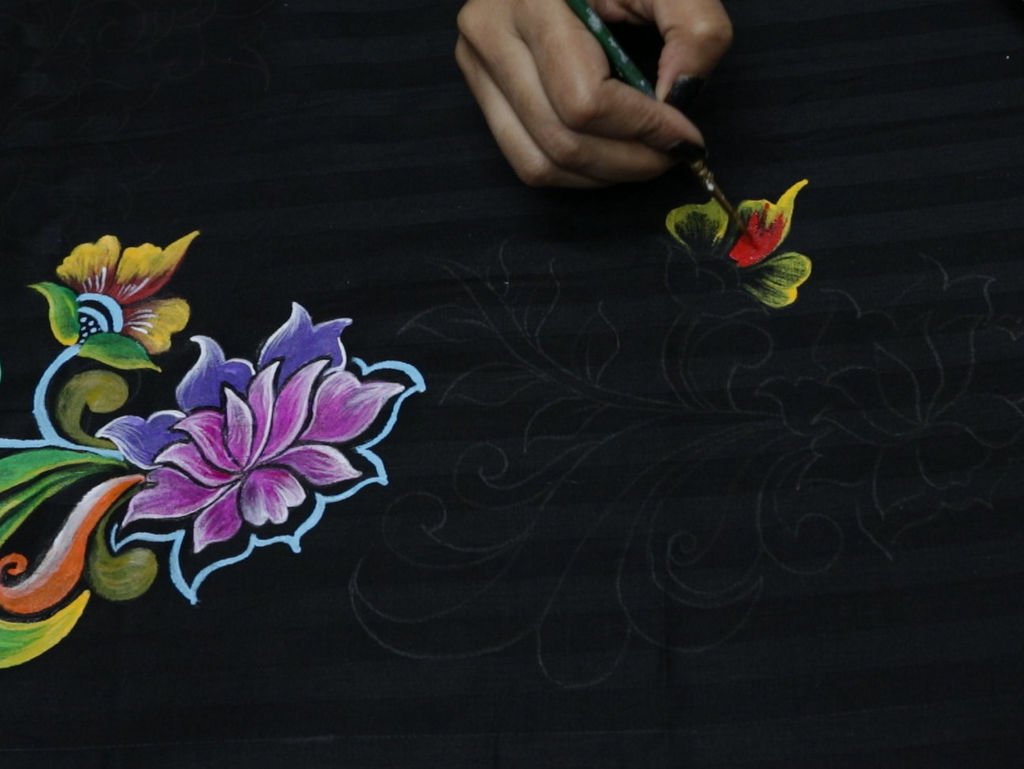
Step 9: Highlight the Design

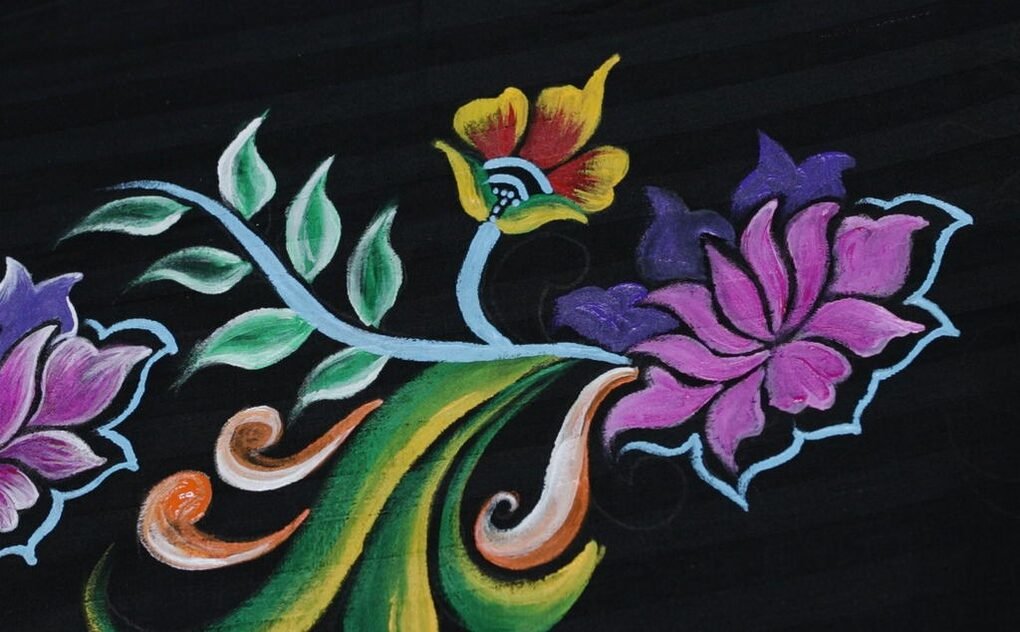
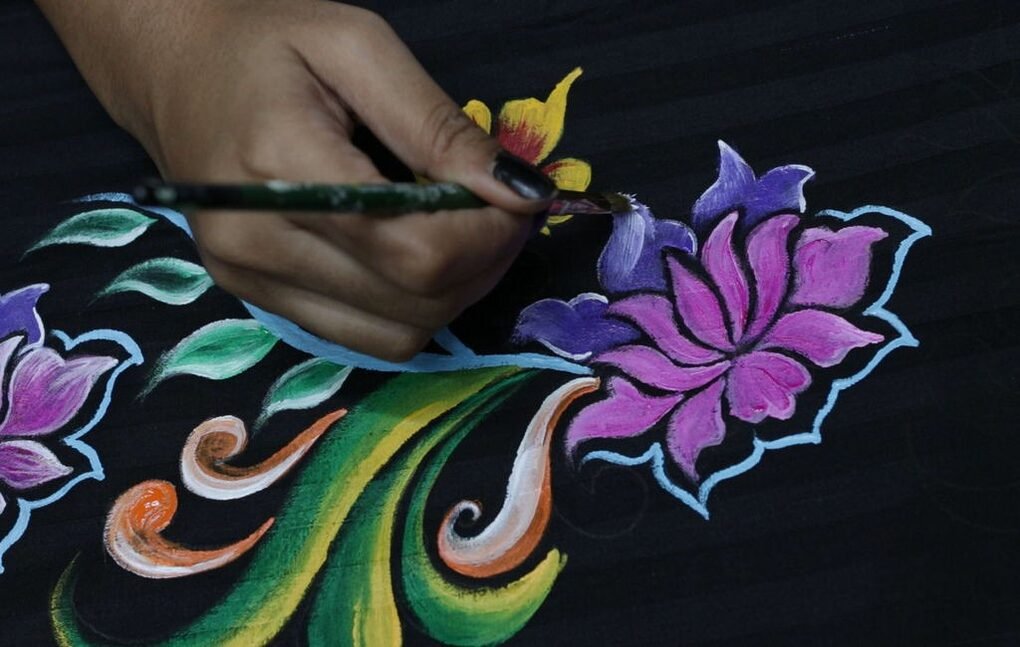
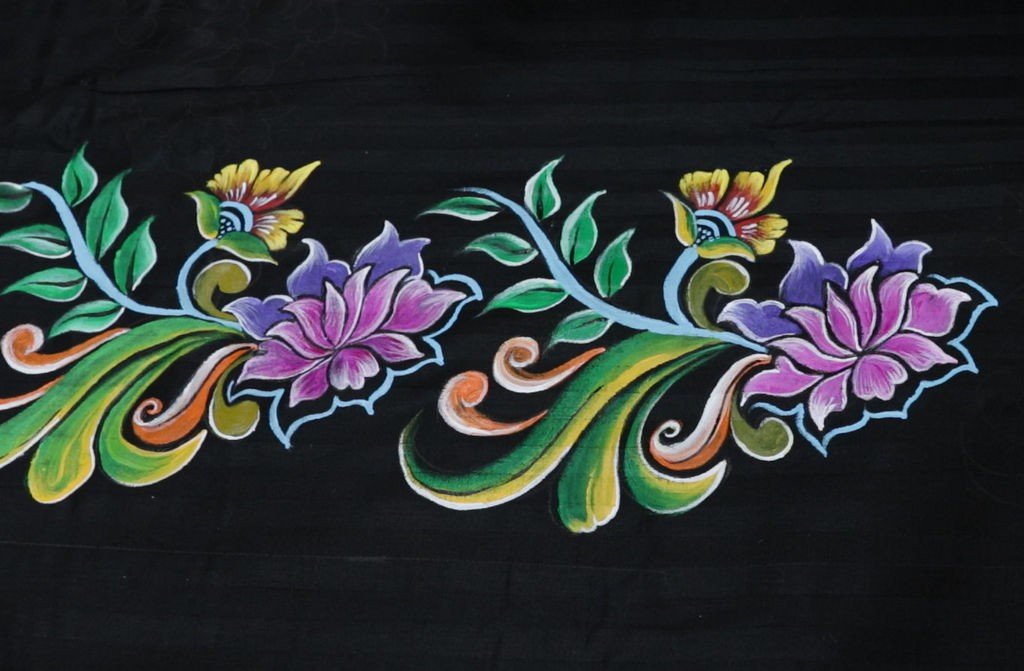
Now as I wanted to create some of the petals with a contrast color, therefore I choose Violet225 to make the petals which are drawn on the upper part of the Lotus.
Then to highlight each petal of the Lotus and as I have chosen a Black colored fabric, so I took White color to highlight.
First I have managed to paint the outlines of each petal and then gave inwards stokes.
TIPS:
1. If you are working over a large area, you can use a less numbered flat brush, but its always better to it make with 0 number or 00 number pointed brush.
2. Start the highlighted part, when you have the fabric which is completely dried up, otherwise, your previous colors (Deep brill purple and Violet) will peel off with the brush and give the fabric a messy look.
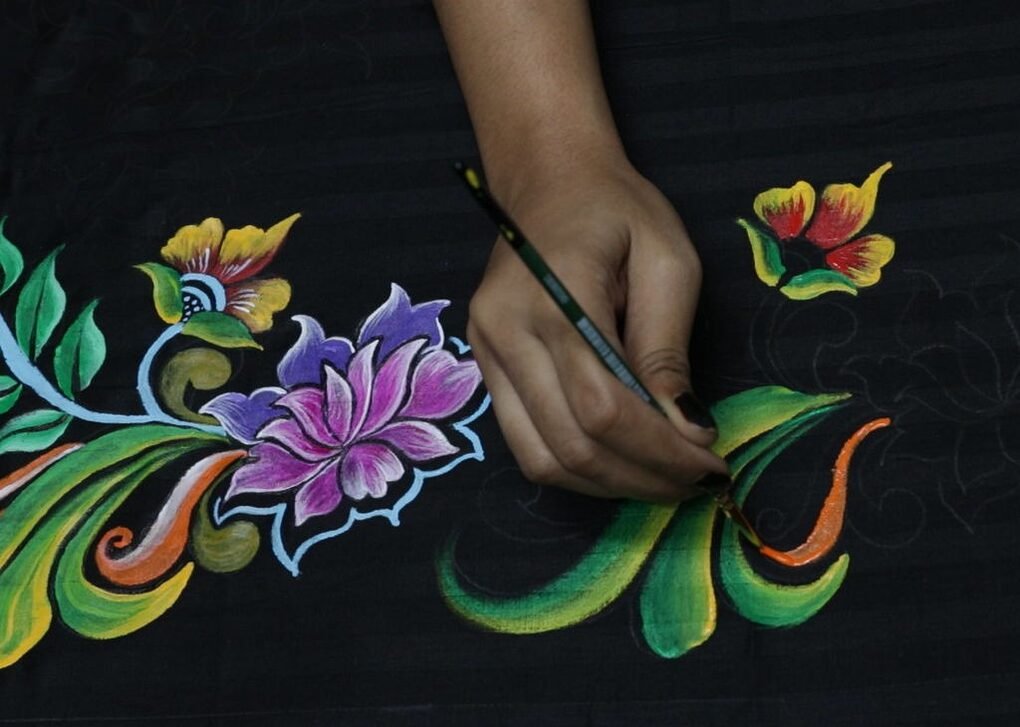
Step 10: Fill Colour on Other Floral Design


Now to paint some other floral parts, I have used Yellow Orch226 which I think looked good with all my previously selected shades. You can find the color shades with your taste and own choice because the choice of colors varies from person to person and it’s completely normal.
Then as I have taken black fabric, I have chosen the same color to make cuts over the leaves and I do so by using 00 number brush.
Now moving towards the last part of the project.
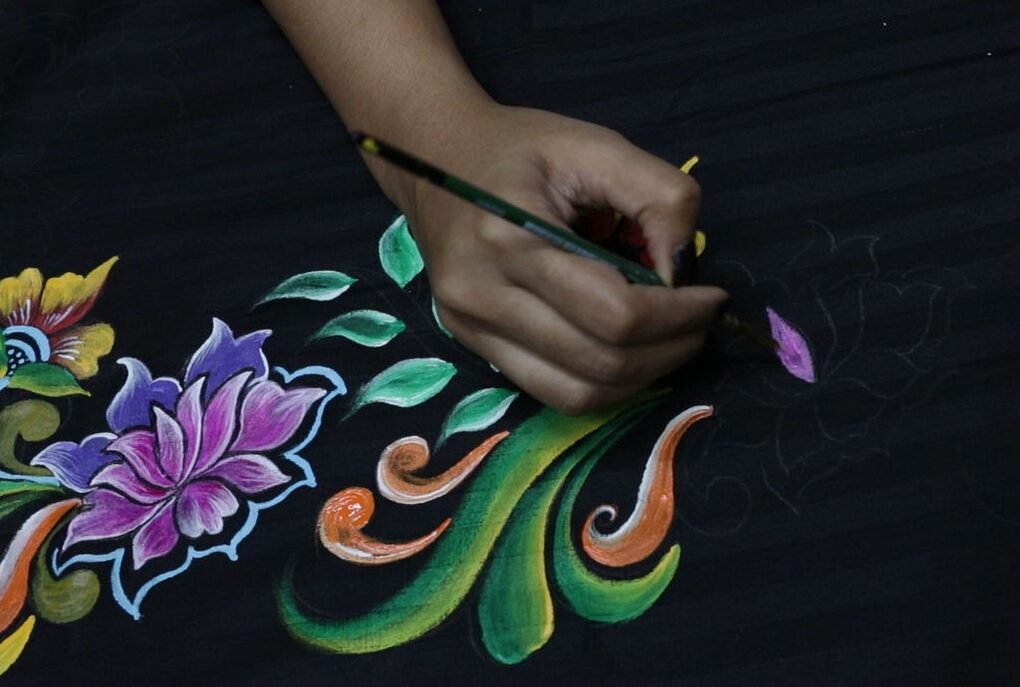
Step 11: Stencil for Center Portion


It is the step which exactly the same as before.
I have drawn a floral design of my own and then transferred the patterns to the fabric by using carbon paper (use Yellow or White carbon paper only).
As I wanted to keep it as simple as possible, I have drawn a very simple pattern.
Then I started to fill colors in the pattern.
TIPS:
1. As you are making this pattern in exactly at the center, so you can do around Mandala design too.
2. Don’t use sharp cut pencil while transferring the patterns to the fabric.
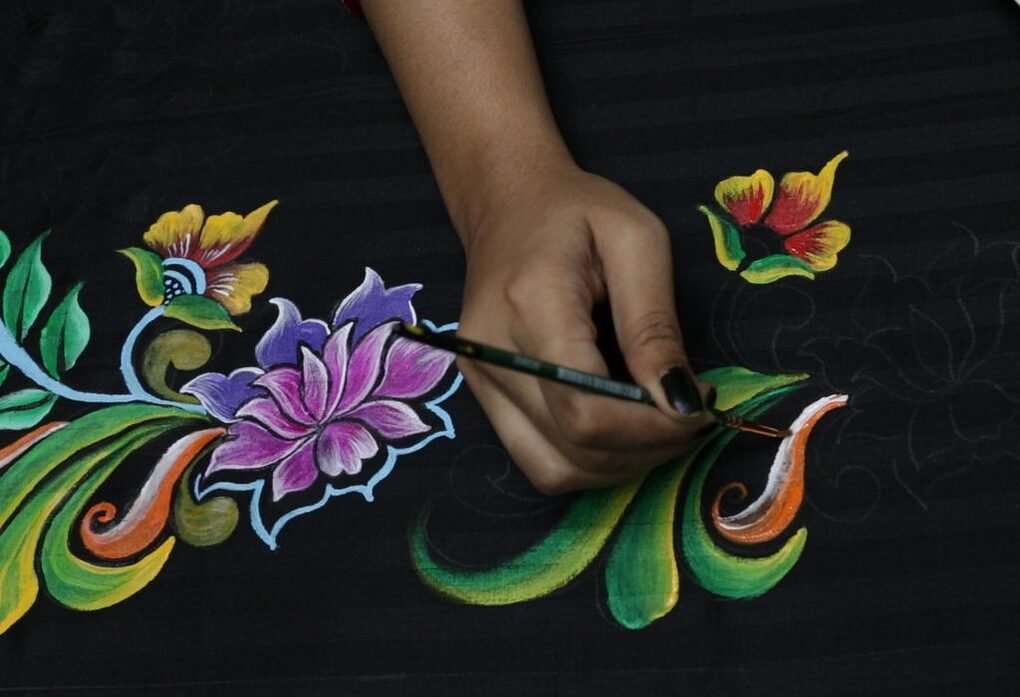
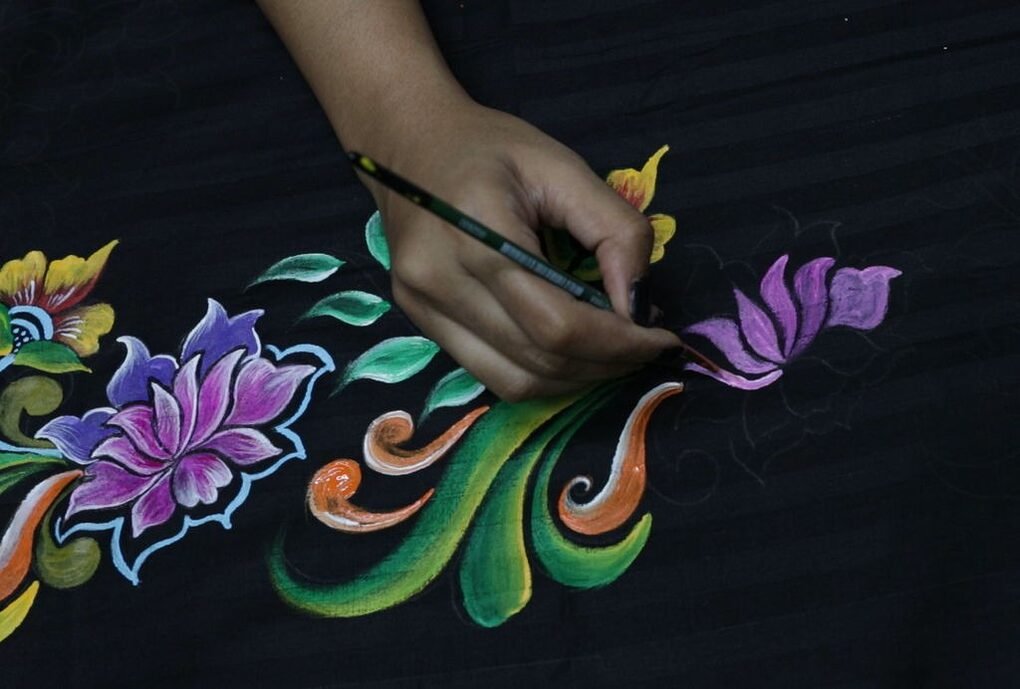
Step 12: Fill Colours on Pattern


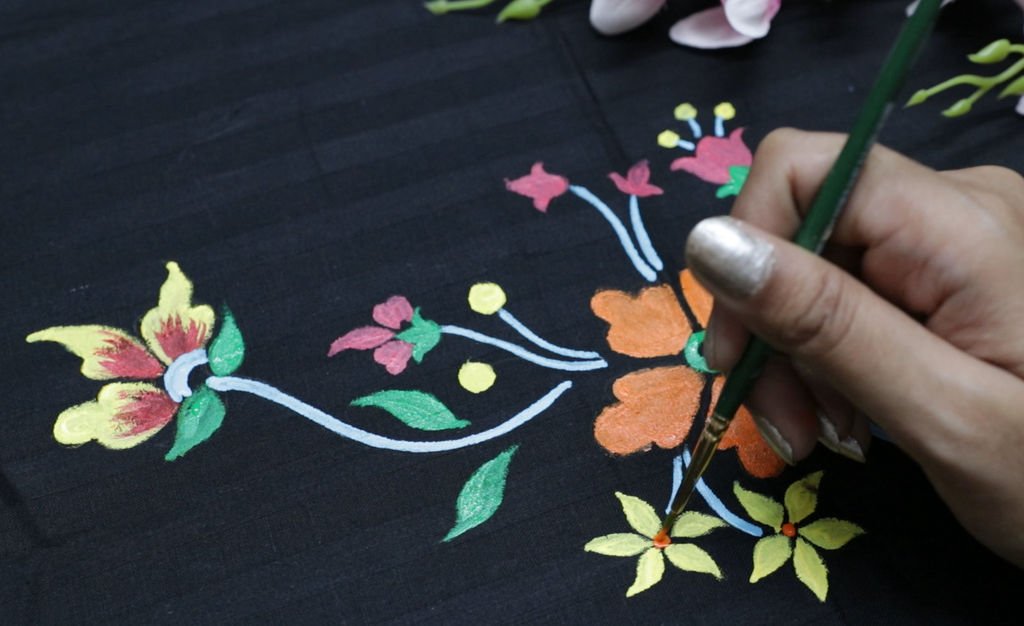
To paint the color over the fabric, I have taken a 0 number brush to make the outlines and then by the help of 1 number brush, I did fill the inner portion of the flower petals and all.
For the main middle flower I have used Orange217 and for the flowers which are just nearer to the middle one was painted with *, Crimson204, and Golden Yellow209.
For leaves, I have chosen Light Green212 and for the stem part, I have chosen Sky Blue263.
Now let the bedspread to dry completely.
It will take maximum 4 to 5 days to dry not more than that (If you were using fabric colors only).
Then wash the fabric with cold water and let it dry. Now your bed sheet is ready to use.
TIPS:
If you are using Fabric color, you can use it directly after wash, there is no need to give it an iron.
But if you are using Acrylic colors, then first let it dry for at least 10 to 15 days and take it to wash with cold water. After that give it an iron from the back side of the fabric.
Remember while ironing from the backside of the fabric, you should take care of the heat you provide, because sometimes if the iron is too hot then it will stick with the fabric color. Therefore it is better to spread a thin cotton fabric over the backside (where you need to give the Iron) then press it properly, It will prevent easily to make a contact of hot iron with the fabric.
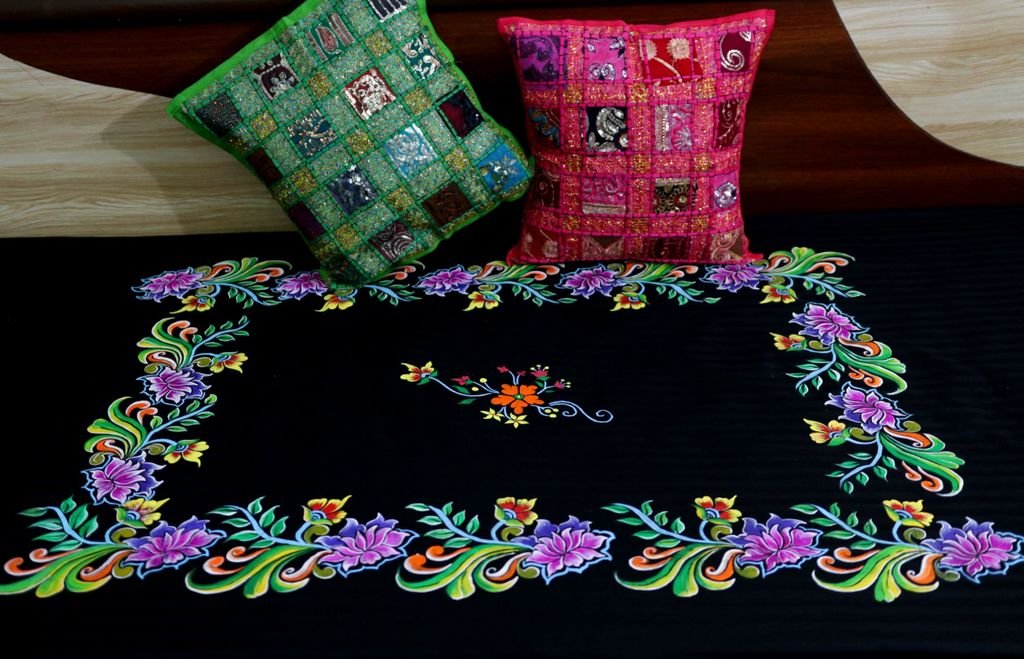
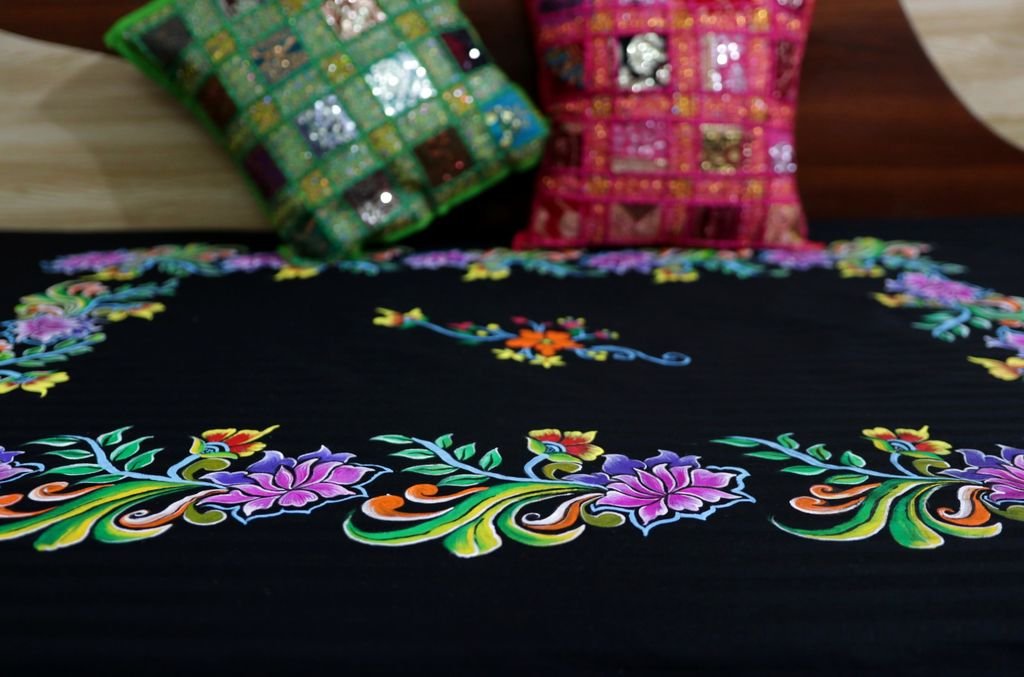
Step 13: Final Out Come
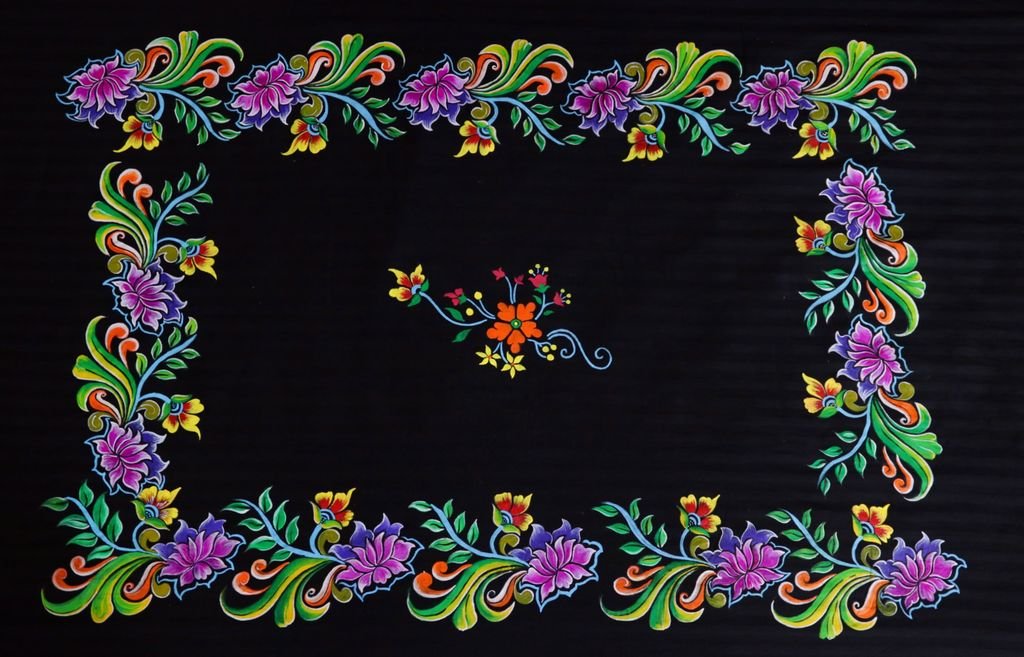


Here your bed sheet is ready to use, Likewise, you can do manage to change your ambiance easily with a certain and regular interval with low minimum cost and time.
As it is always difficult to find all the matching things together then why not we will create ourself. No doubt the products you create with your hands on it will give much more pleasure and satisfaction than the stuff you get from the market.
You can place it to decorate your bedroom or You can spread it on your drawing room to decorate a Diwan Set.
By following the same rule you can create a matching stole ( Dupatta) for your kurta. Or you can create a matching kurta which will go good with your jeans Or you can do the screens for your windows too.
So keep experimenting and keep creating.
courtesy: instructables