Let’s make a rug!
Rag rugs are a simple way to make use of a lot of fabric scraps.
You’ll need a lot of fabric to complete a decent size rug. This is where raiding Goodwill or secondhand stores for old sheets can come in handy! Sheets are an excellent alternative to fresh cut fabric, but only if you find the sheets cheap enough (Grandmas linen closet, anyone?)! Don’t forget to use coupons if you shop at fabric stores to save yourself some money! Check clearance aisles for cheaper fabric!
This project does not require a sewing machine!
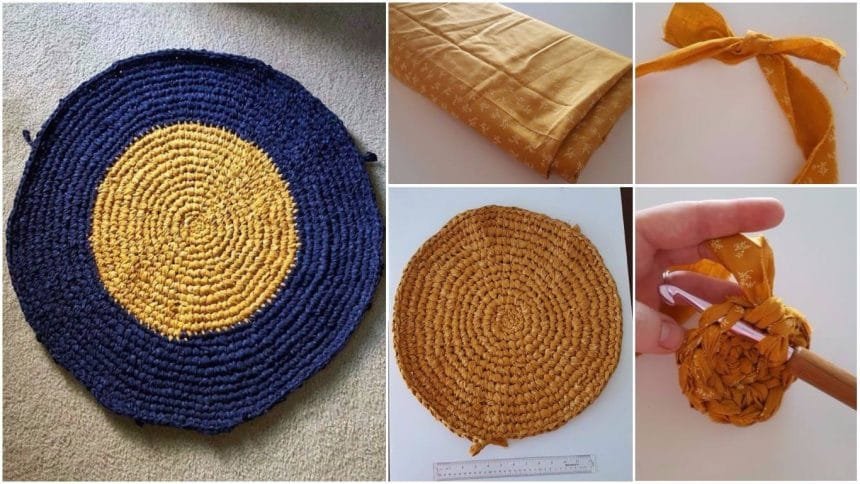
Customizing this rug is super easy. Would you like a rug all in one color? Want your rug to be a rainbow of colors all mismatched? Do you want your rug to appear to have concentric circles in varying colors? Your answer will determine how much fabric you’ll need for your rug and what colors to buy!
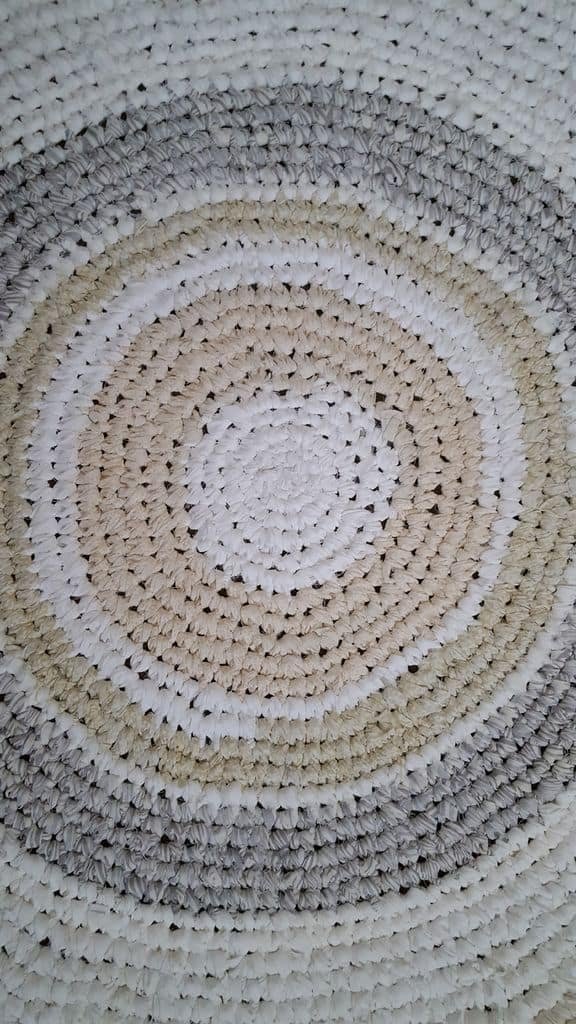
The white, beige, and gray rug I have pictured is another rug I completed a few months ago. This one I created with a half-hearted concentric circle method, as you can see. If you’d like yours to be more precise, just be sure you change colors right when you complete a full rotation of crocheting around your rug!
You’ll also notice the difference in tightness in the white, beige, and gray rug. Draw your attention to the very center. See how tight it looks and how there seems to be no gaps or holes? This is from pulling tighter loops when you crochet. As I made my way out of the rug I loosened my loops and achieved a looser look.


Step 1: Materials You’ll Need


Fabric: To make a decent sized rug, I’ll estimate between 10 and 15 yards of fabric. In this tutorial, I used 15 yards of total fabric (5yds yellow and 10yards deep blue) and my rug turned out to be 32 inches in diameter.
-Use old sheets!
-If you choose to buy extremely cheap fabric, beware that the fabric may be harder to work with because of the lower quality weave of the fabric and how stiff it is. Pre-washing may help but not much.
-Experiment with fabric types! A snuggly flannel fabric will be thicker but may yield a softer rug!
-If you’re wanting a rug of one specific fabric, purchase a large quantity of that fabric or be ready to go back to purchase more if you run out of fabric before your rug is big enough for your liking.
-If you’re wanting a rug with concentric circles in varying colors, buying fabric may be a bit harder here, as each circle around the center will get bigger and it can be hard to determine how much you’ll need. I would experiment with how much you’ll need. You may need to buy as you go and as you figure out how much you’ll need. Not optimal, but it may need to be what happens to achieve the concentric circle look.
-If you’re wanting a jumble of lots of colors and fabrics, just mix up the colors and fabrics you weave. Shopping clearance racks or scrap aisles is a good idea for this quilt or if you have just a lot of fabric you want to get rid of and use.
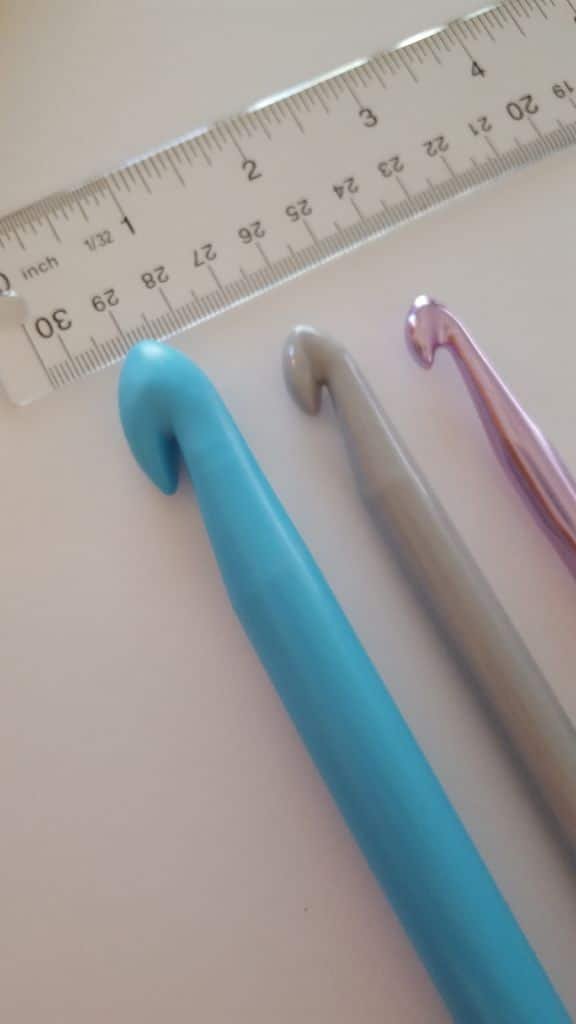
Crochet Hook: Crochet hooks come in many sizes. For our purposes, I am using a size M hook. Pictured I have a P and Q hook just to show you the difference in size as well as the style of hook. I prefer my wood handled hook for comfort as opposed to holding the plastic hooks. All in personal choice! Joanns and Hobby Lobby have great selections of hooks in a wide range of prices and ergonomic comfort.
A flat (ish) surface on which to work: I personally prefer to hook on a table or sitting on the couch with a flat pillow on my lap. I prefer flat areas because I can easily keep an eye on whether my rug is puckering, cupping, or needing any extra attention.
Step 2: Preparing Your Fabric for the Rug! (15minutes)


You’ve got your fabric! YAY! Time to prep it for crocheting!
You’ve got a few different options here:
-Cut the fabric using a rotary cutter and cutting mat
-Cut the fabric using scissors
-Rip the fabric with your super human strength


Reminds me of a choose your own adventure book!
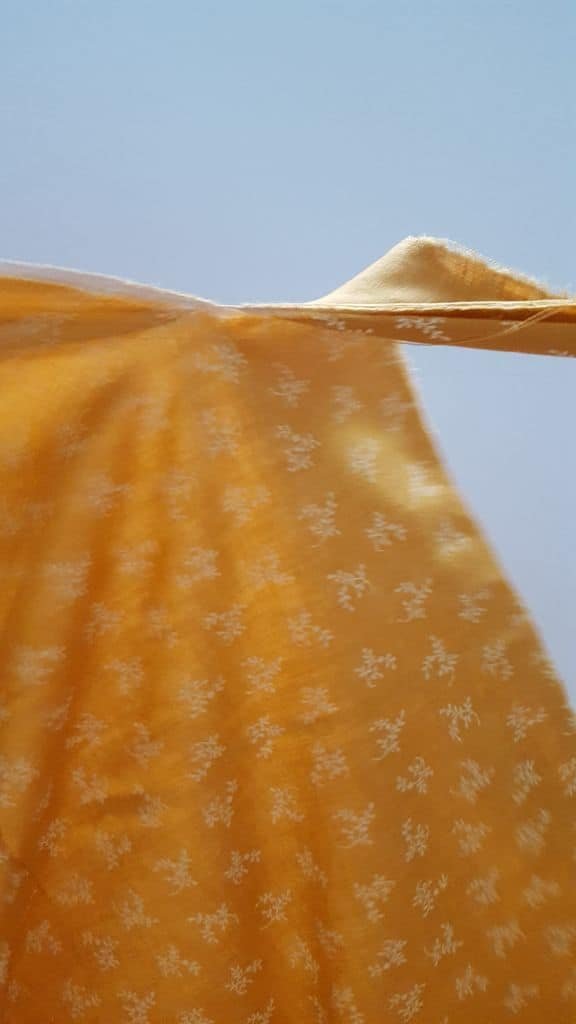
No way is wrong. I found that ripping my fabric took less time than cutting it. You don’t need to be precise as you’ll be weaving the fabric together and you won’t ever notice if the fabric is crooked or anything like that.
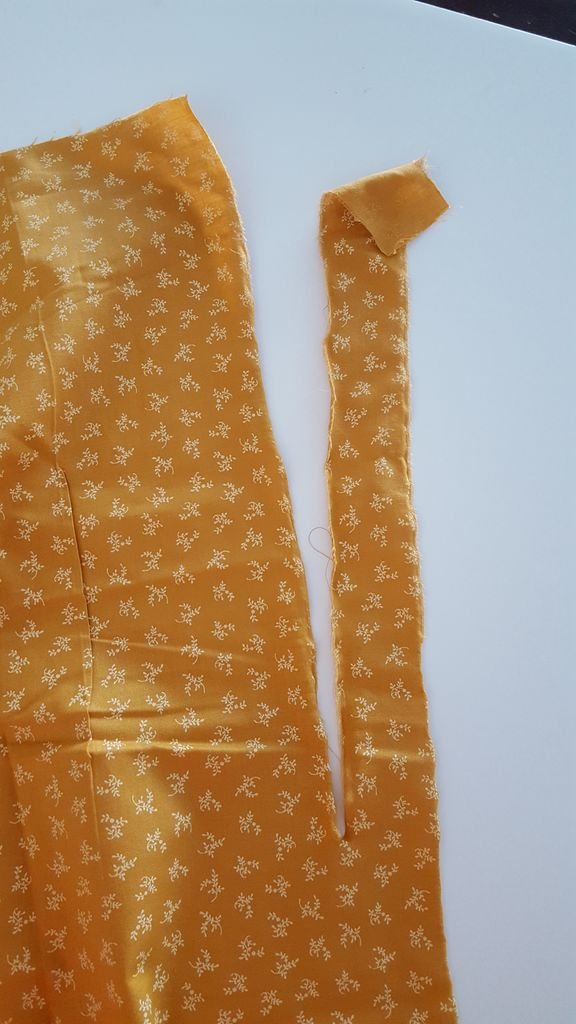
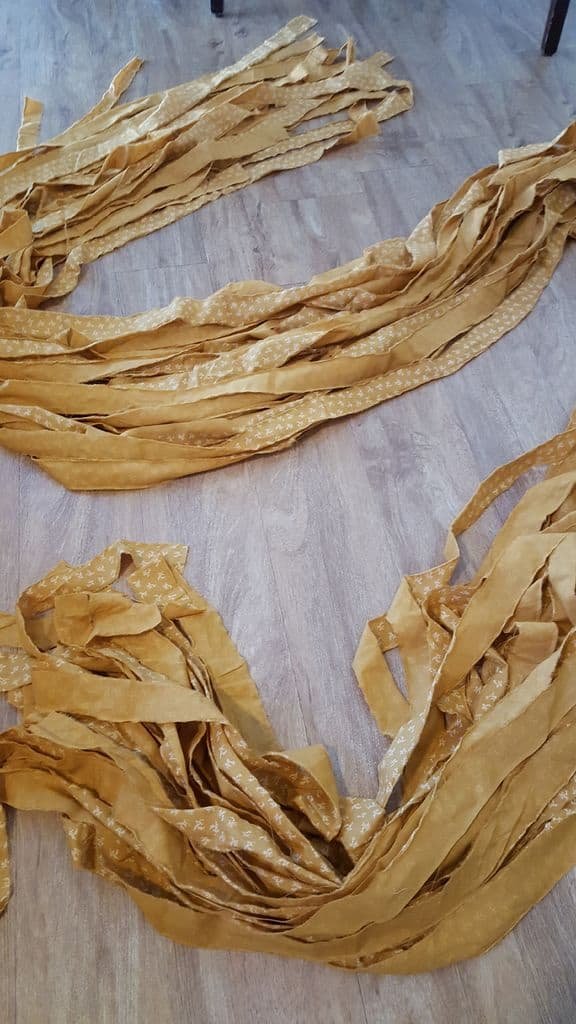
For this tutorial, I rip my fabric. No matter what method you choose to get your strips, you’ll want strips that are around 2 inches wide and as LONG as you can manage.
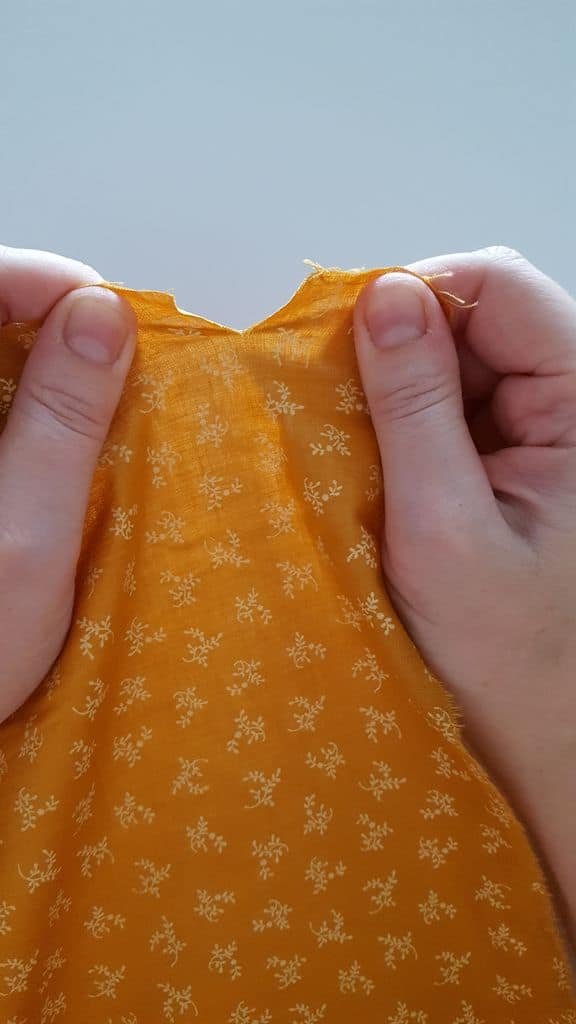
-Cut a slit at the fabric end about 2 inches from the side. You want to save yourself from more work later on, so make sure you’re ripping the fabric into as long of strips as you can.
-Rip the fabric. You may notice some extra strings as you rip. Cut them away or rip them off as you go so they don’t tangle you up as you separate the strips later on.
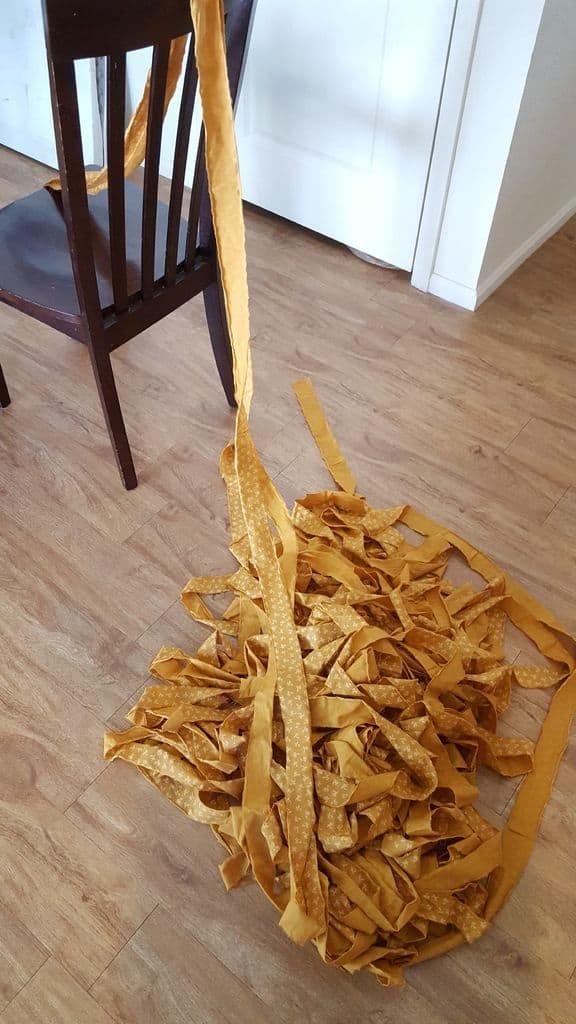
-Save yourself some heartache and when you’ve ripped one, lay it cleanly on the floor or over a chair so you won’t have to untangle a huge pile of strips. Our next step is to knot them together, so keep that in mind.
Fun facts:
-I started with 5 yards of fabric. I stripped it down to 2-inch strips and ended up with 26 total strips of fabric.How many more times can I say strip? One more. Strip.
-So, my original 5 yards of fabric yielded a total length of 130 yards of 2-inch strips with which to work.
– Apparently, 130 yards of striped fabric will only yield an 18in diameter circle rug. Mind blowing, right? As I said, you’ll need a lot of fabric to create a decent sized rug.


EDITED TO ADD:
-I went out and bought 10 yards of deep blue in hopes that it would be enough to finish the rug to a bigger size. It only added 14 inches to the width.
-Therefore, about 15 yards of fabric, stripped to around 2 inches, will yield a 32-inch wide rug with a medium loose crochet.
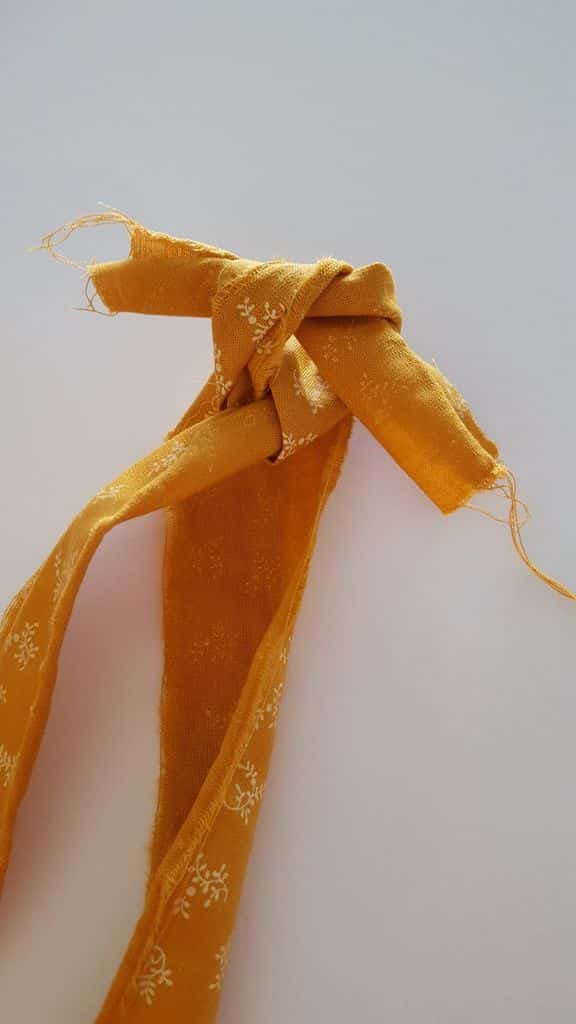
Step 3: Knot Your Strips of Fabric Together! (30minutes)


Time to attach all of those strips!
I will say this is optional at this time, meaning, you can begin your rug at this point without having attached all of your scraps. I personally prefer to connect all my strips so that once I begin to crochet I won’t have to stop to knot or attach another strip. It makes the crocheting process a bit easier for me.
If you are creating a rug with concentric circles or multicolored random scraps, you may want to hold off on attaching too many together, as you can’t be sure how much you’ll need once you begin creating your rows of color. You can always attach all your strips of one fabric together and then when you find you are done with your concentric circle or want to move on to a different fabric, you can cut the fabric.
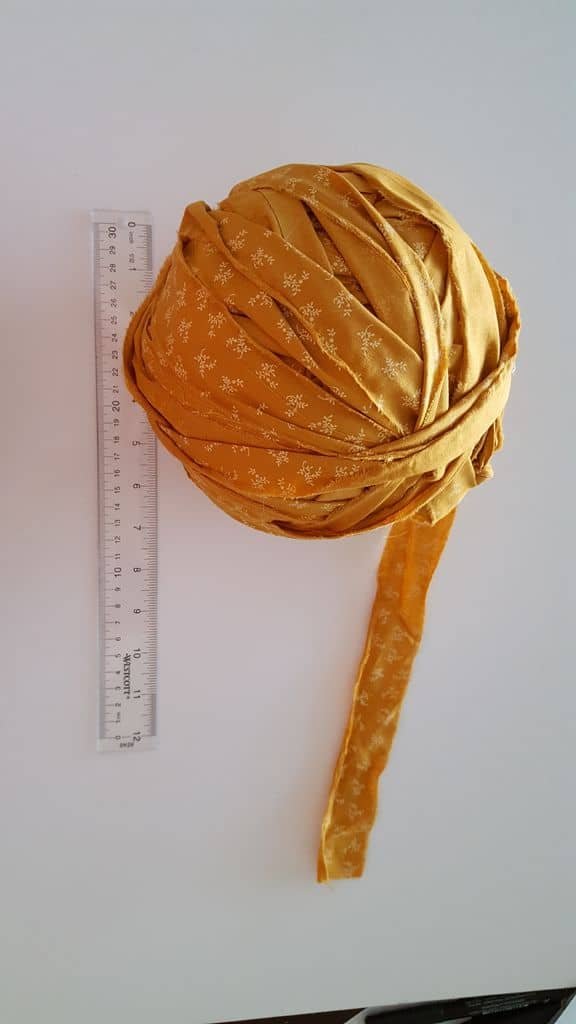
-Knot your strips together! Create a nice tight knot and keep attaching fabric ends to each other until you are done. I chose to create a ball of fabric with the ones I had attached so that I could keep track of the strips and not get it tangled.
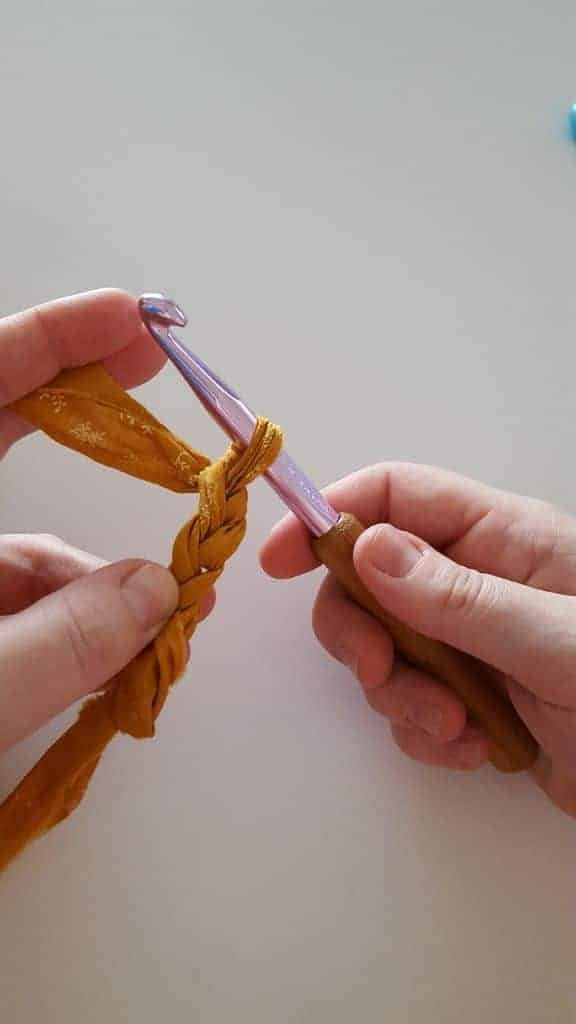
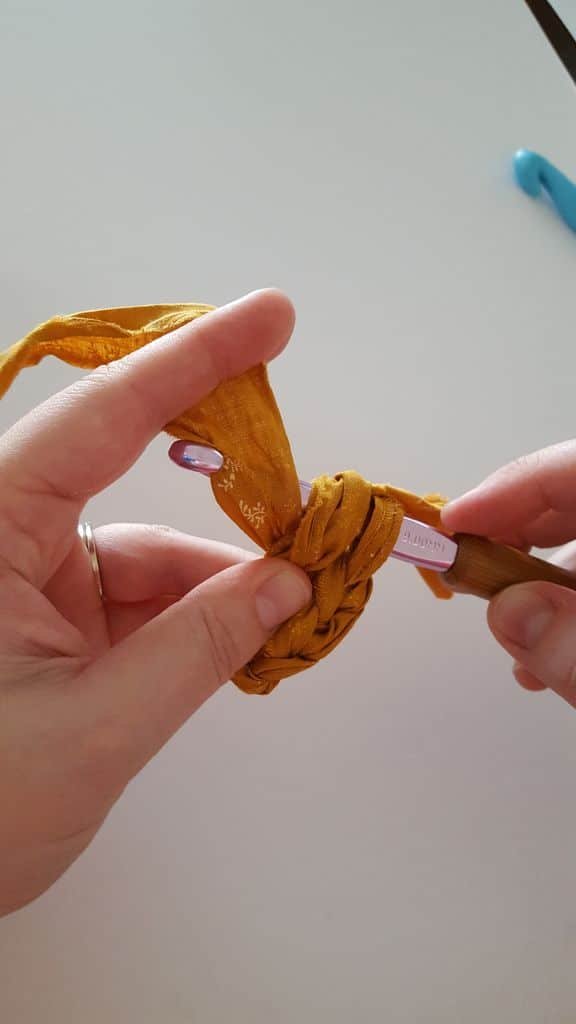
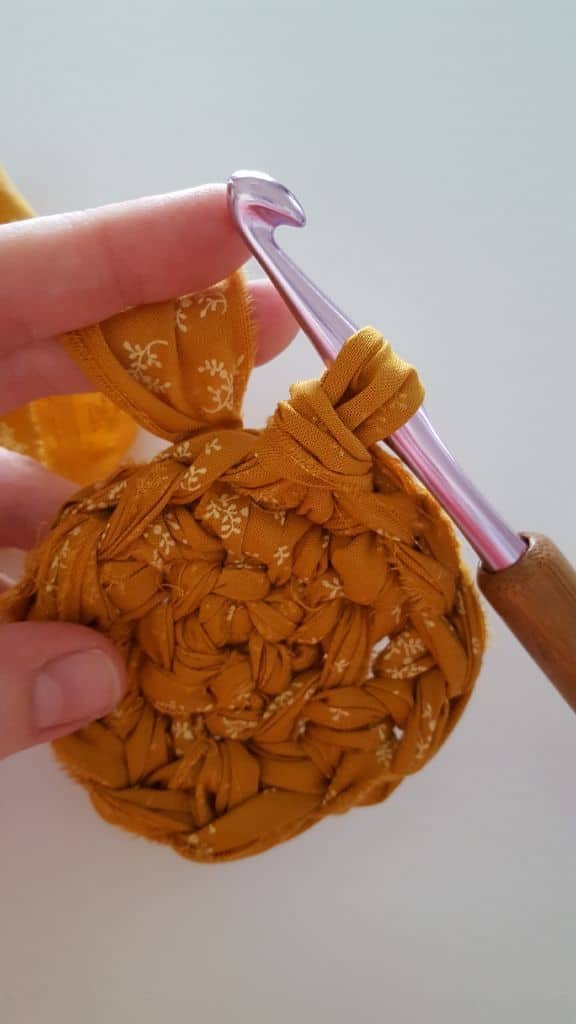
Step 4: How to Start Your Rug! (5minutes)
Basic steps are:
Create a loose knot
Pull fabric through the loop
Repeat 5 times (6 total loops)
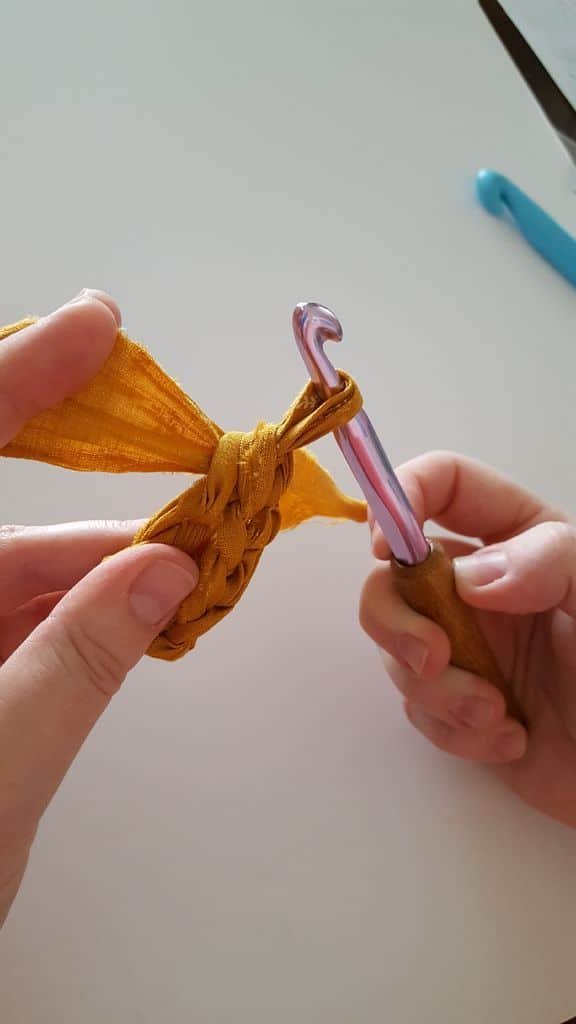
Turn your chain of loops so that the last loop meets with the original/1st loop
Push your hook through the first loop while the 6th loop is still on the hook
Pull fabric through
Turn the fabric in your hand clockwise and look for the next available loop
With the loop still on the hook, push your hook through the next loop
Pull fabric through
This is how you crochet!
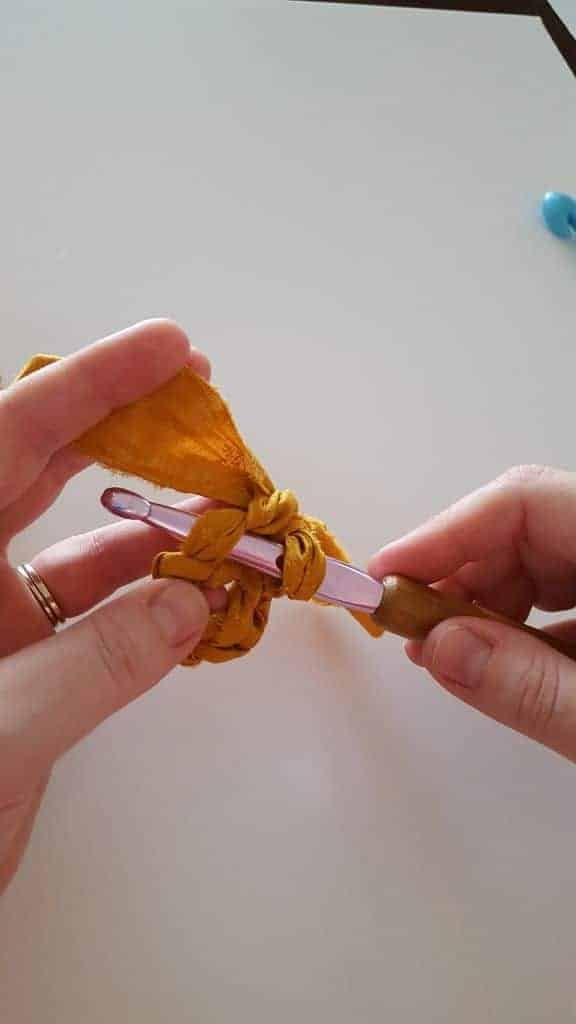
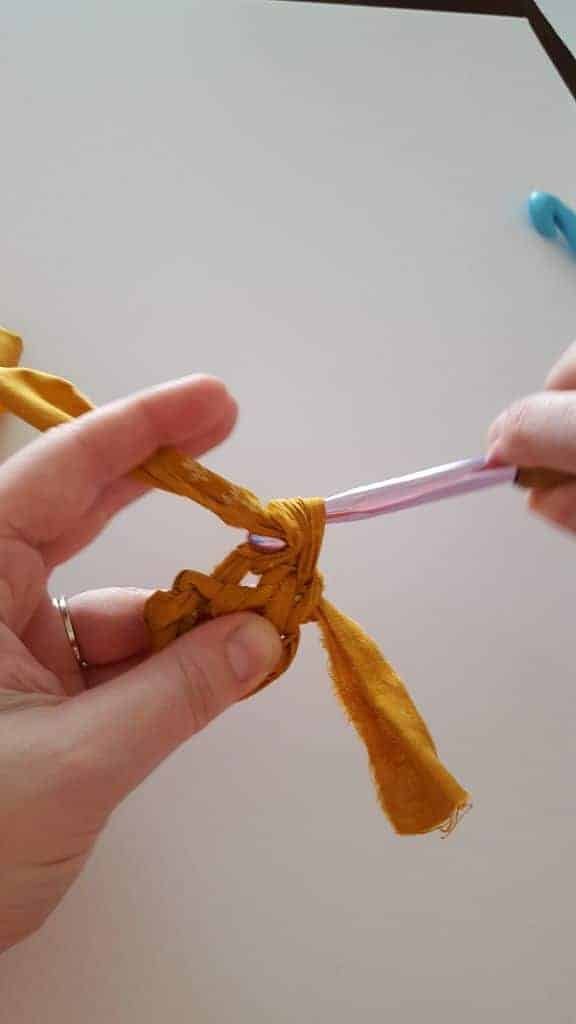
Step 5: Crochet Your Rug! (2 Hours +)


Here is where the work comes in.
You’ll be passing your hook through loops from here on out to create your circular fabric rug. Just keep rotating your rug clockwise and finding the next loop!
TROUBLESHOOTING:
You’ll notice at times that your rug will either cup up the sides (see picture above) or will pucker/wave. Here’s how to fix both problems:
Cupping: This means that you need to create more loops to make the rug bigger. This makes sense when you think about it, as you wouldn’t have a rug if you kept only 10 loops in play the whole time. You’d end up making a tube rather than a flat object!
To fix the cupping issue, you will want to pass your hook through the same hole twice about every 3rd to 5th knot. I refer to crocheting once through each hole as a single loop. To create a double loop, just repeat the same hole again after you pass through it once and then move on to the next knot. I’ve found that when I see it cupping, I’ll double my loop, then create 3 single loops, then double loop, then 3 more single. If you find it is still cupping, increase your double looping.
courtesy: instructables