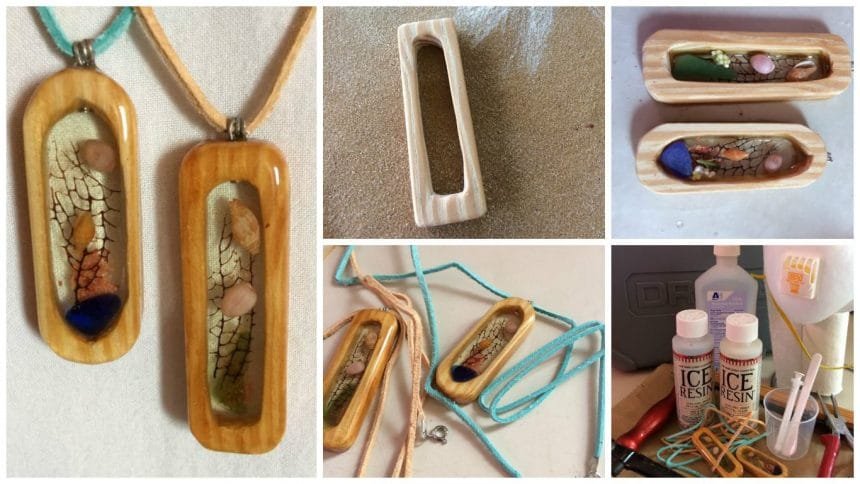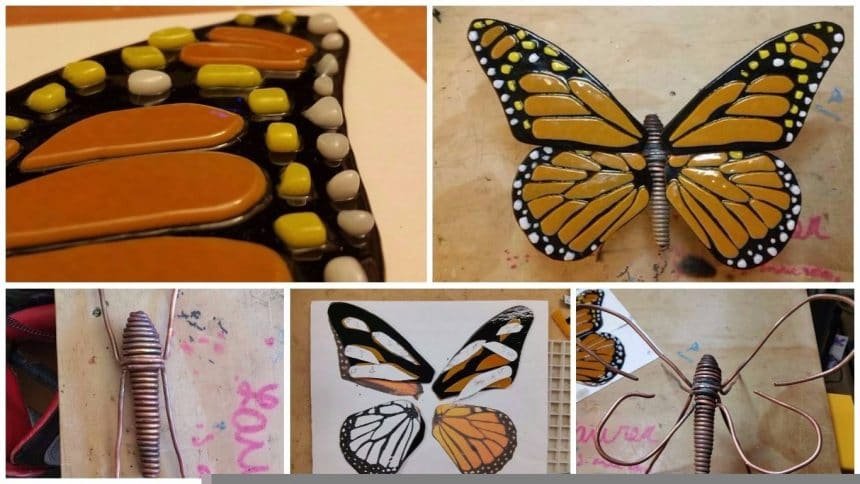
After learning a variety of techniques and working on numerous homogeneous projects, I thought I’d start to try to meld the two mediums together. The Copper Wire and Fused Glass Butterfly was my first attempt at doing this.
The primary goal was to learn how the two materials can be brought together both physically and aesthetically. I wasn’t even sure if I could get the two materials to attach to each other without compromising the design.
Working with the #10 copper wire was probably the hardest part of this project. I had to hand coil the butterfly body shaping the thorax ever so carefully. Since copper work hardens fairly quickly, I had to anneal the wire many times so that I could control by hand the diameters of the coils.

Step 1: Supplies and Tools
Supplies
fusing glass: I used what the glass studio keeps in stock, Bullseye fusing glass. Since I had the monarch butterfly in mind, I chose those colors.
coarse frit: Little bits of crushed glass.
fusing glue: Since I worked on the wings over the course of days and weeks between the studio and my home, being able to glue down the pieces was important.
#10 solid copper wire: I picked up 20ft from Home Depot. I don’t know exactly how much I used for the body. I had a lot of waste due to various experiments. I do have about 5ft left.
soldier: I first used standard copper pipe solder I picked up from Home Depot. For some reason, it was difficult to control. So I switched to Stay-Brite solder which the welding class provided.
e6000: The glass studio suggested that I use this glue to attach the glass to the copper wire.
Tools
glass cutter: I used the Toyo pistol grip glass cutter.
Grozer Pliers: Special glass pliers.
glass grinder: Special grinder to smooth out the cut edges of the glass. I used the studios.
fusing glass kiln: A kiln designed to fuse glass. I used the studios.
propane torch: Readily available torch. I used this when working at home.
Or, oxy-acetylene torch: OFW torch. I used this when working in the class.
Needle nose pliers
Toothless pliers
Needle nose vice grips
Wire cutter
1/2″ round metal rod
Step 2: Glass Butterfly Wings


It takes the time to build the wings. The hardest and most time-consuming activities were cutting the design and grinding the glass. Patience is definitely needed.
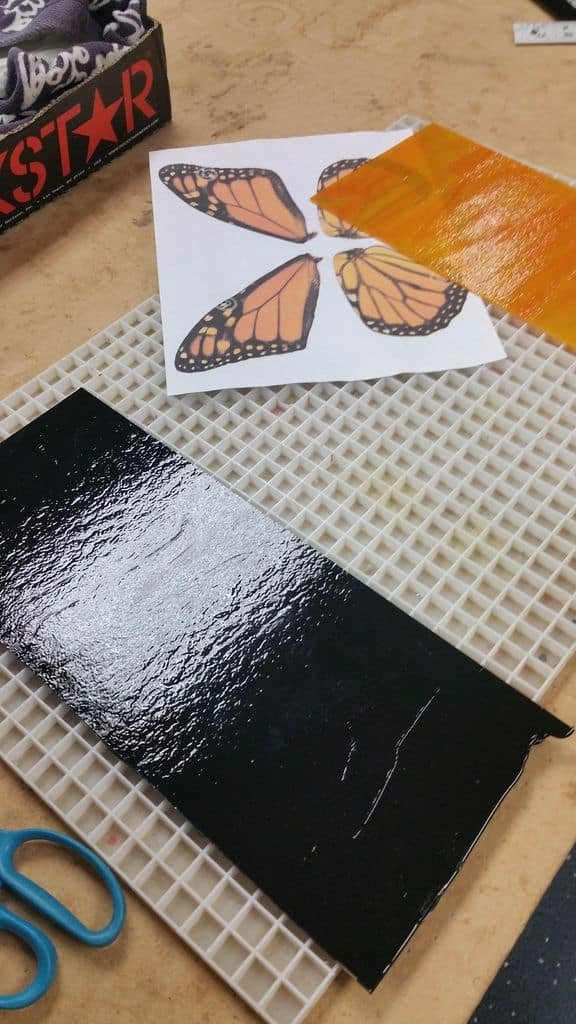
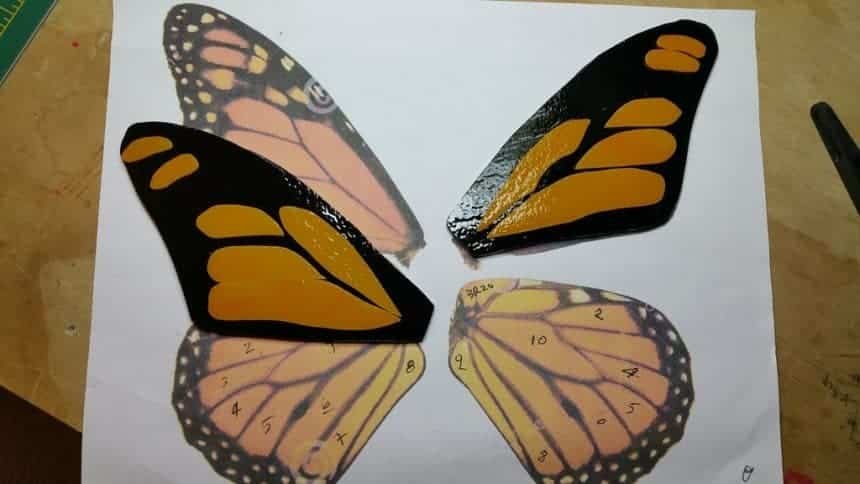
Draw template onto glass
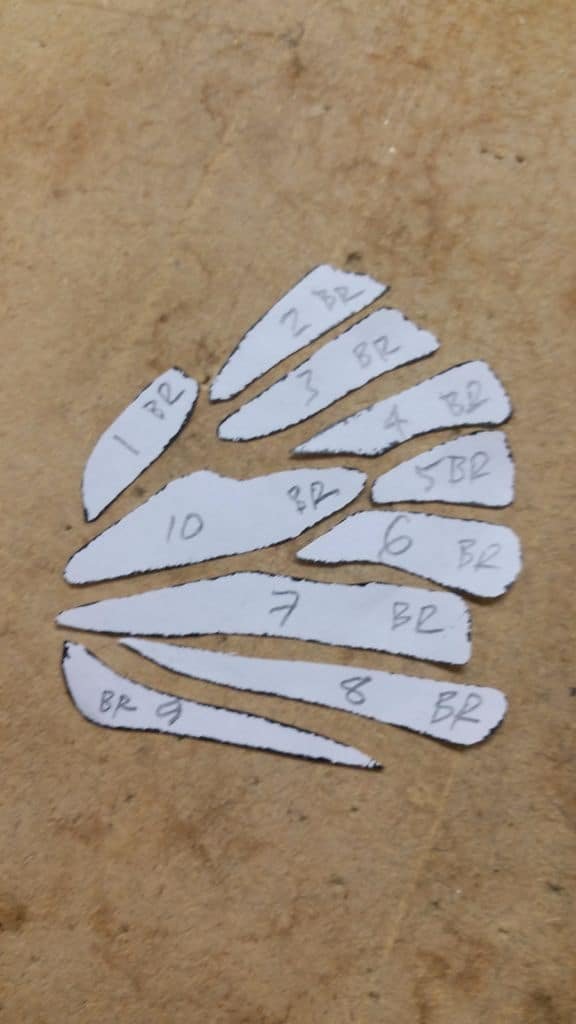
I pulled an image from the Internet, enlarged it as big as I could and used it as my template. The first templates were that of the entire wings. I traced them onto the black glass. Next, I cut out the cells from the template, traced them onto pumpkin glass. Because each cell and its position are unique, I labeled each cell.
Cut glass
Basically, I cut along the template lines with the glass cutter. There are a lot of curves, so I got it wrong a few times. But that just added character to the piece.
Grind and smooth glass
Because I didn’t always cut along the line or cut a nice curve, I had to grind the pieces to smooth out the lines. This took quite a bit of time because there were so many pieces.
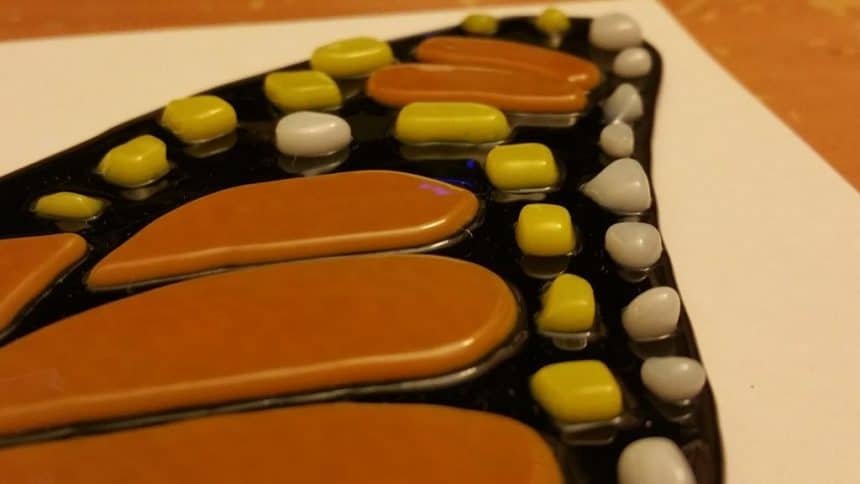
Add coarse frit
Instead of cutting little bits of glass to create the cells in the outer margins, I just used very coarse frit. It seemed to work very well.
Positioning the glass
I didn’t know this at the time, but after the wings are fired everything shrinks just a bit. So it turned out that the cells that were touching before the fire ended up separating a bit. This created nice veins in the wings.
Glue down parts
I glued everything down as well as I could. This made it much easier to transport the wings from home to the studio.
Tack Fuse
I asked the studio to task fuse the wings. I wanted a bit of definition and depth to the wings. And if I didn’t like it, I could have done a 2nd fire to full fuse the wings. But I ended up liking the result of the tack fuse.
Step 3: Copper Wire Butterfly Body


Body
I wanted to be able to shape metal to take on the form of a butterfly’s body. This meant having a bulge for the thorax and a taper for the abdomen. I chose copper wire since I knew I could work with shaping it. I thought of using copper pipe but enlarging and shrinking the pipe seemed too difficult.
I also wanted a head but to form it from the #10 copper wire was too difficult and it was impossible to find a copper sphere the size of a marble. I just opted to go without a head.
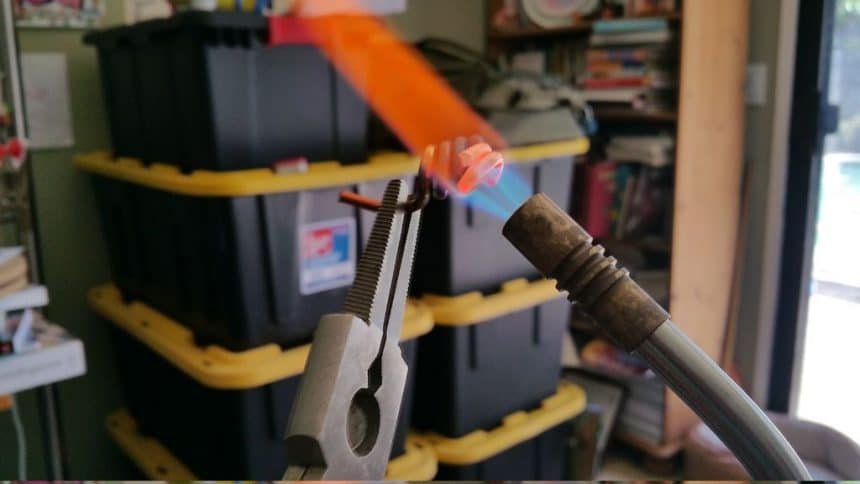
I performed a few experiments with different diameter rods and I settled on one that was 1/2″. I annealed the copper wire, used a vice grip to clamp it to the rod, and then coiled the wire around the rod.
When copper is annealed, it becomes very malleable. It can be worked using just hands. It work hardens fairly fast, so the wire may need to be annealed multiple times. To anneal copper, heat it until it’s cherry red and cool it in water.
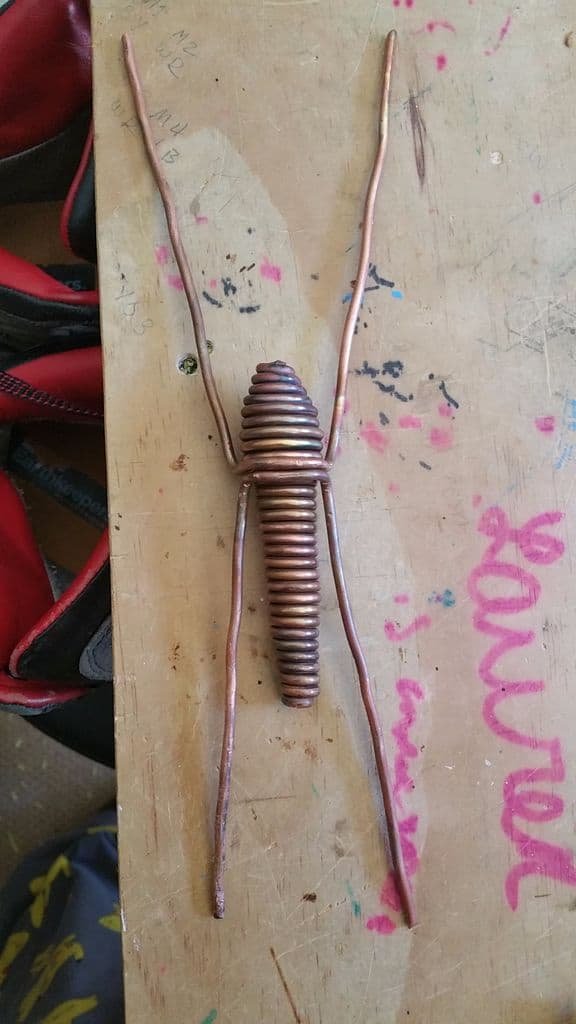
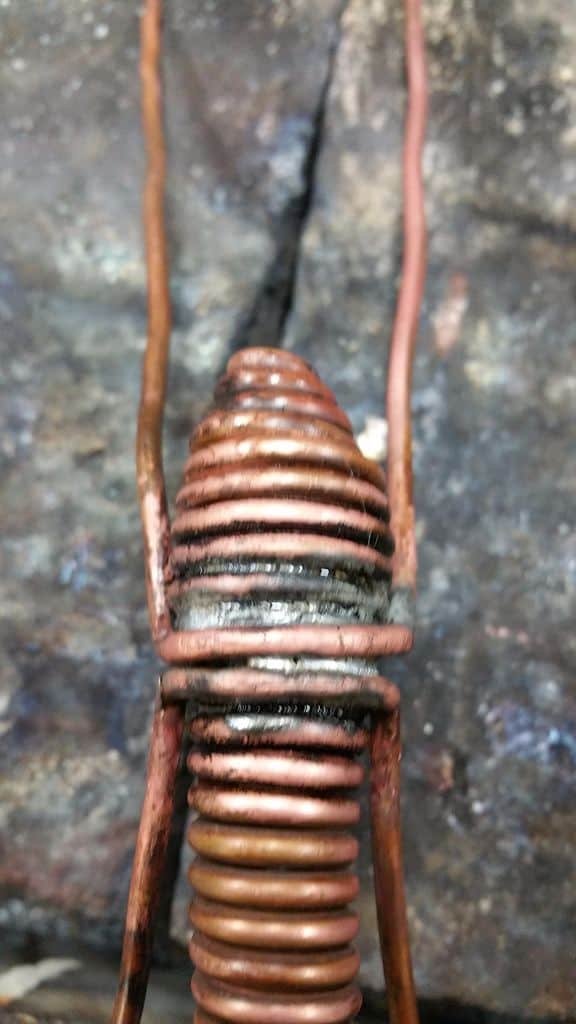
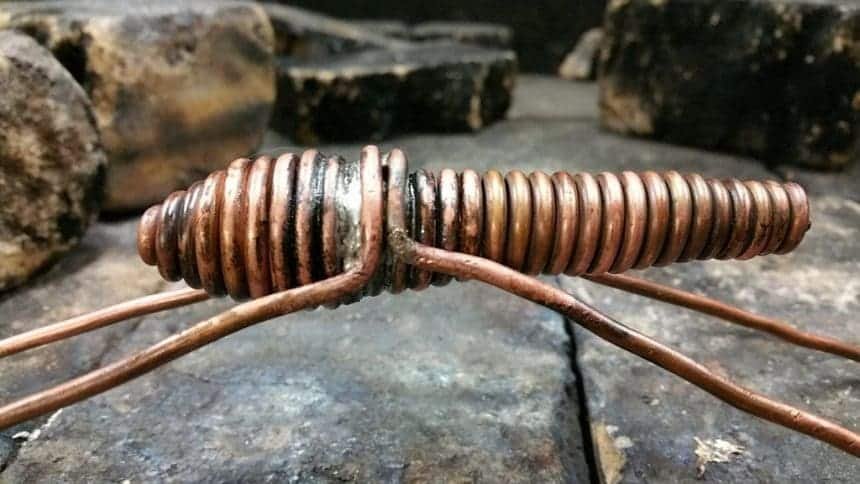
To get the shape of the thorax, I carefully unwound the coil to create a bulge. Surprisingly, this worked out fairly well. To create the abdomen, I did the opposite by creating ever so tighter coils going down to the end. Winding and rewinding the coil tends to change the angle of the winds. Moving very slowly and deliberately seemed to be the best approach.
Legs
For the legs, I just cut two lengths of copper wire and wrapped it perpendicular to the body half way down the body. I tried to create a tight fitting “U” shape around the contour of the body. Once it seemed tight, I soldered the legs onto the body. This took a few tries because the solder would run out from under the legs, not creating a solid bond between the legs and the body. The legs were attached to the topside of the body.
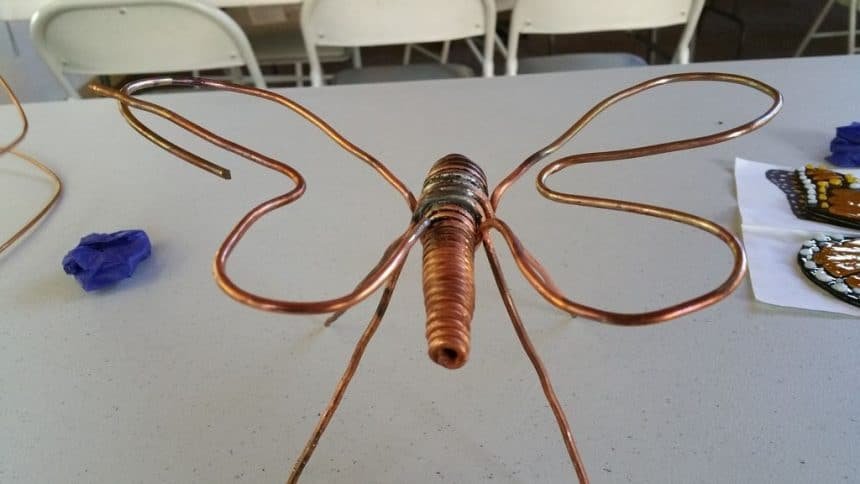
Wing Supports
For the wing supports, I did the same thing for the wings as I did for the legs except that I curved the wire so that the glass wings could rest on the wire. Once I had a proper “U” shape, I soldered them on. The wing supports were attached to the bottom side of the body.
Step 4: Attaching the Wings

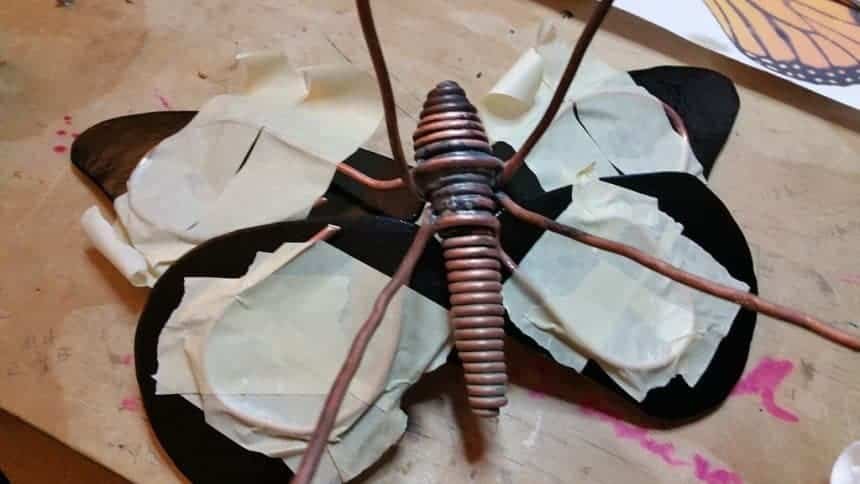
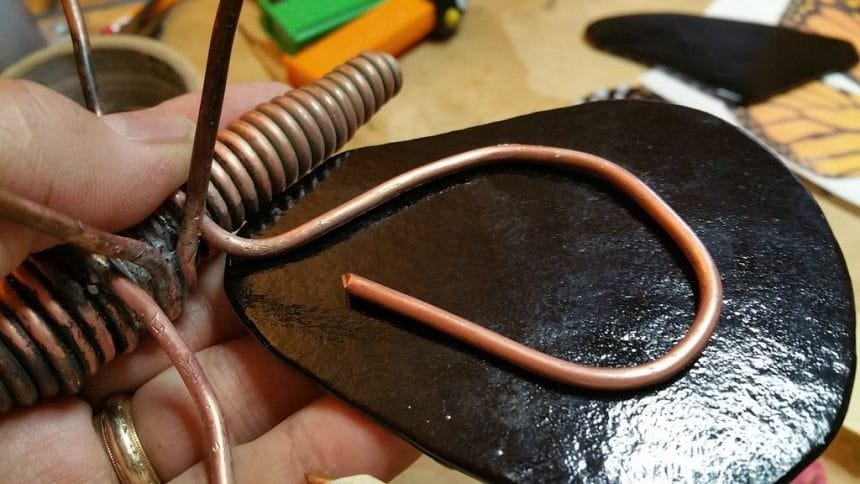

The wing supports were shaped to support the wings and to lay as flat as possible to the underside of the wings. This took a considerable amount of bending. Fortunately, the wire was still malleable from the soldering.
Once I got the shape I wanted, I glued the wire down onto the wing using e6000. I used a liberal amount of glue. I clamped the wire down onto the wing until the glue dried.
Step 5: Final Steps


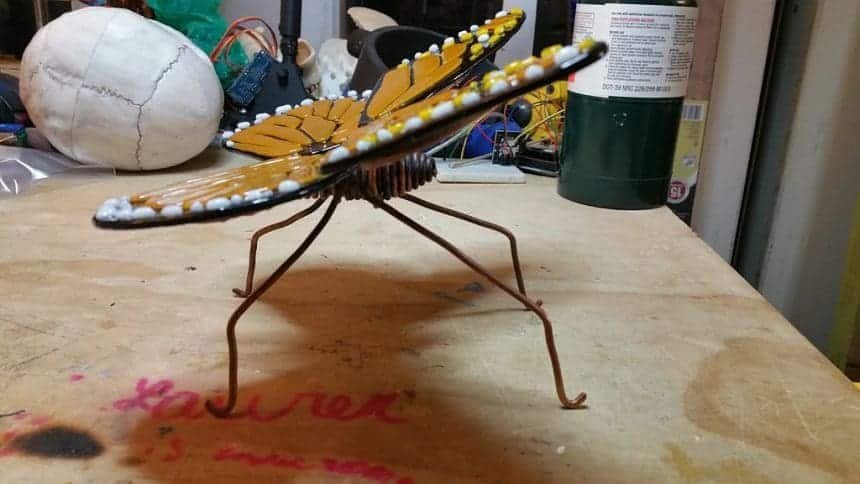
The final steps were just adjusting the wing positions and creating bends in the legs.
courtesy: instructables