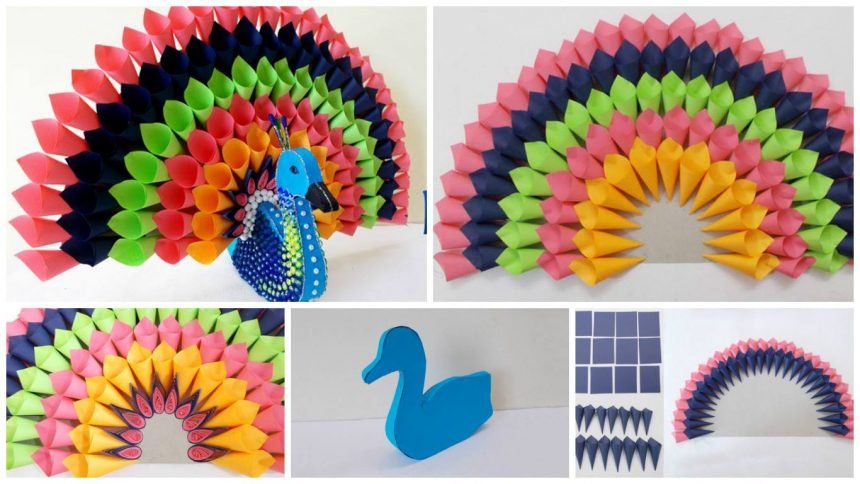
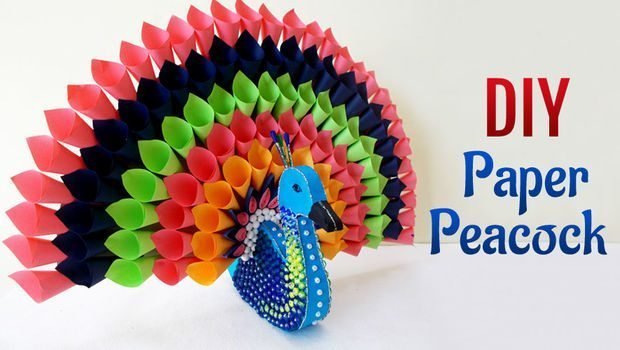
An interesting DIY Paper Craft Project can consist a wide variety of easy Do It Yourself Paper Craft Ideas for you to make at home. This Step by step tutorial with instructions on how to make Multicolored Paper Peacock for Home Decor project is something, that you must watch in order to ensure, you make this wonderful paper craft idea in an easy and systematic way. Peacock design paper craft ideas are always searched for by avid crafters.
Capture the sheer majestic presence of the beautiful peacock by making it as an awesome and easy paper craft idea.Being a fun art and craft activity for kids, you can also make this Multicolored paper peacock for kid’s school projects.Use this amazing Multicolored Paper Peacock as a creative handmade home decoration Idea for your home.
Come! let us learn how to make the pretty Multicolored Paper Peacock.

Step 1: Material Required!


The basic craft supplies that you need to make the multicolored peacock are as follows:
Color papers
Scissors
Cutter
Craft glue
Scale
Quilling Strips
Quilling needle
Pencil
Thick Cardboard
Thin Cardboard
Colors
Black sketch pen
Styrofoam/Thermocol Balls
Earbud
Decorative Stones
Glitter
Step 2: Make the Base!
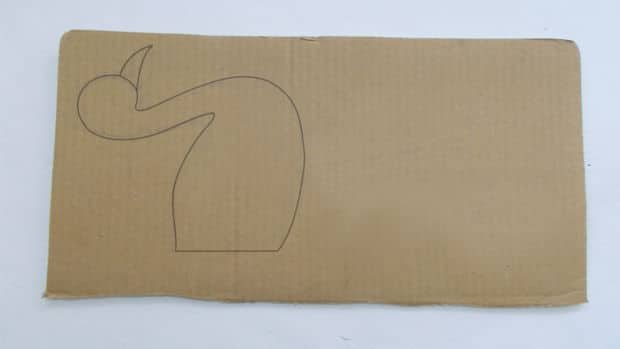

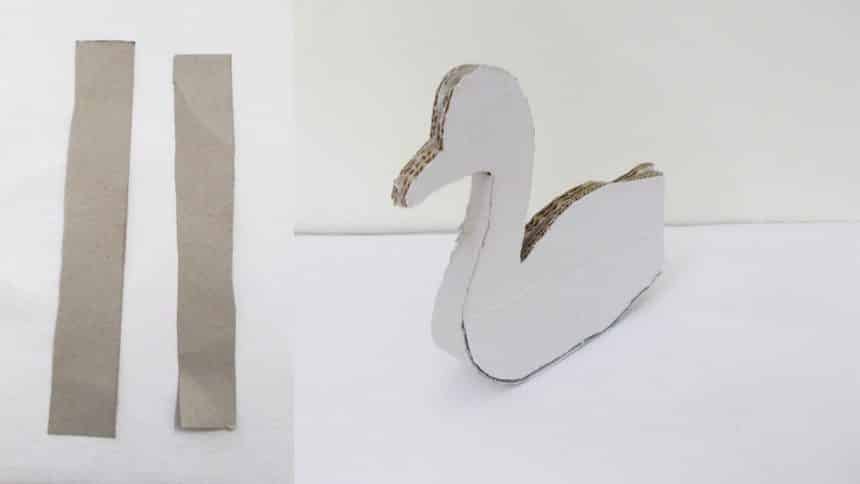
Make the base of the craft by drawing the shape of the body, neck and the beak of the peacock, on a thick cardboard and make two similar cut outs like this.
Paste and join the two cardboard cut out together with glue gun.
Cut thin cardboard strips and cover the gap remaining between the two bodies of the Peacock.
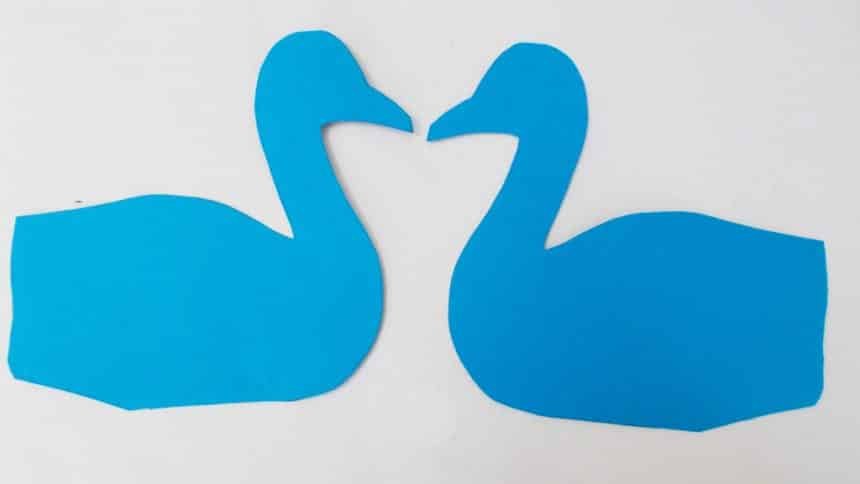
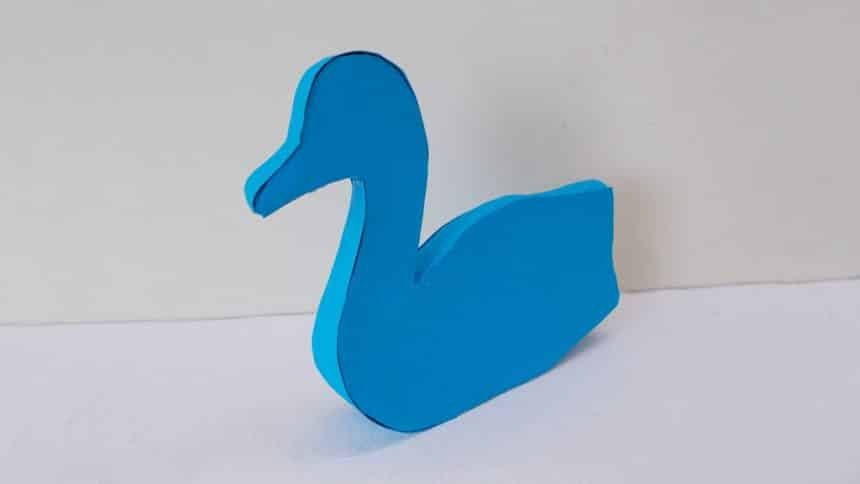
Make 2 blue paper cut outs of the same measurement as that of the cardboard.
Cover the bodies of the peacock with blue color paper.
Step 3: Build Your Craft!
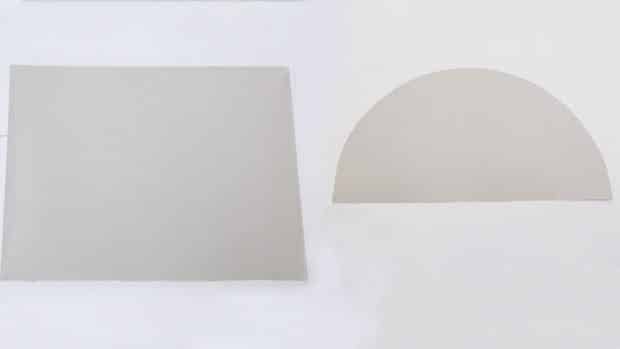

Cut out a semi-circle measuring 28 cm in diameter, from the thin cardboard.
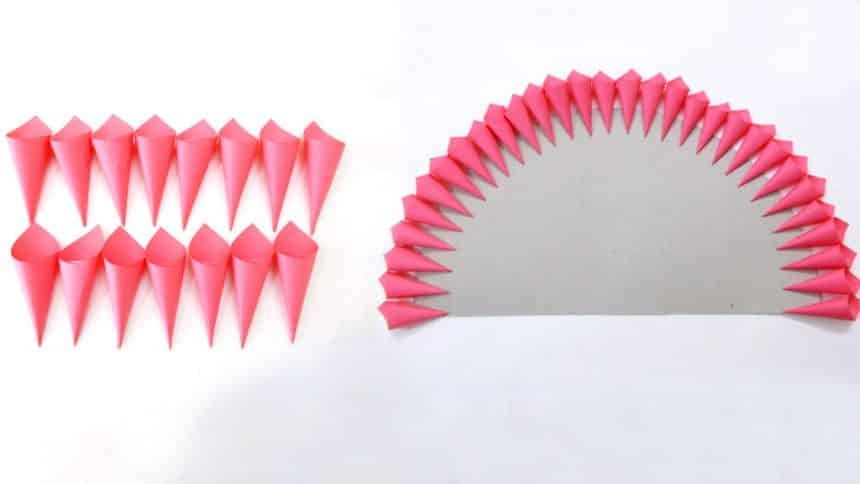
Cut out square shaped pink color papers measuring 5 cm x 5 cm and make multiple cones with them.
Paste them on the edge of the semicircle, with craft glue, to form the first layer of the peacock feathers.
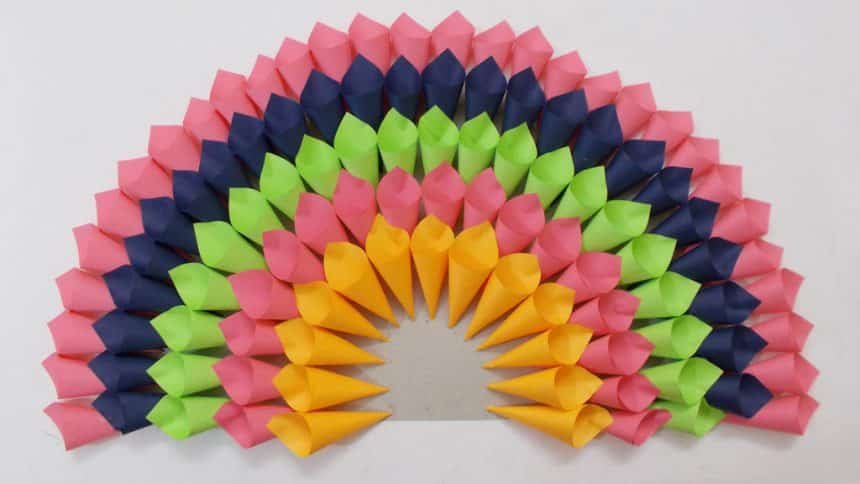
Add a layer of blue paper cones after the pink one in the peacock feathers.
Keep adding different colors of paper cones to brighten up your peacock!
Keep a small space, blank, in the center.
Step 4: Add Creativity to Your Craft!


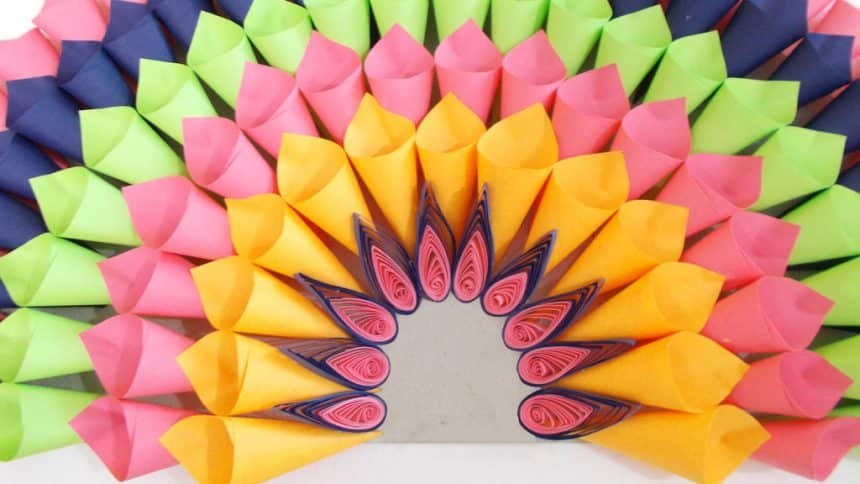
Make paper cones in 5 different colored layers.
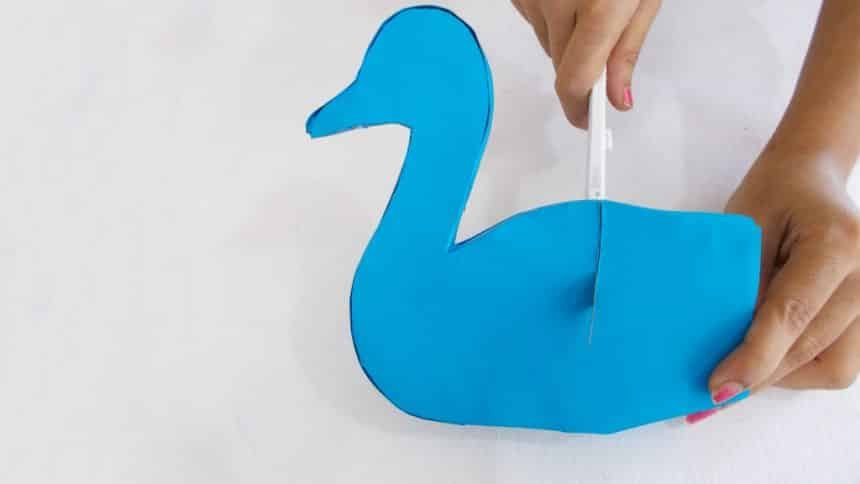
Now take the cardboard body of the peacock and make a slit using the cutter.
Insert the paper cones semi-circle in the slit and ensure it is firmly fixed.
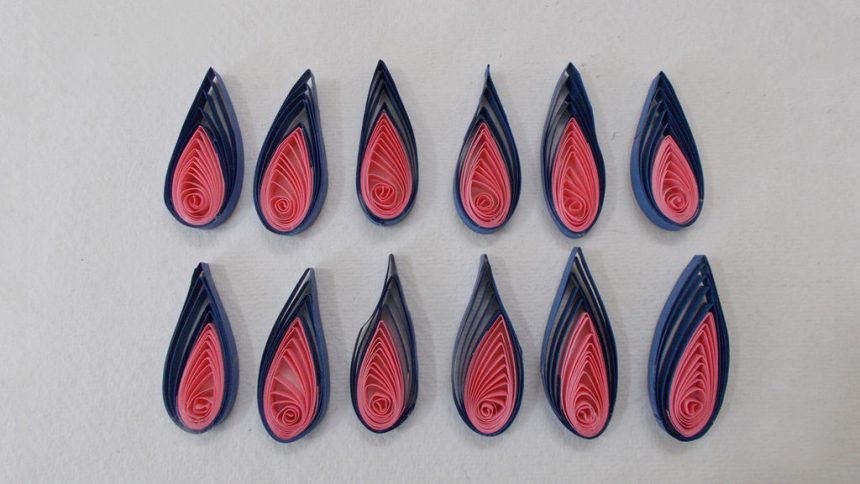
Paste and join two different colored quillings trips and make tear drop shaped coils with them.
Step 5: Decorate Your Craft!
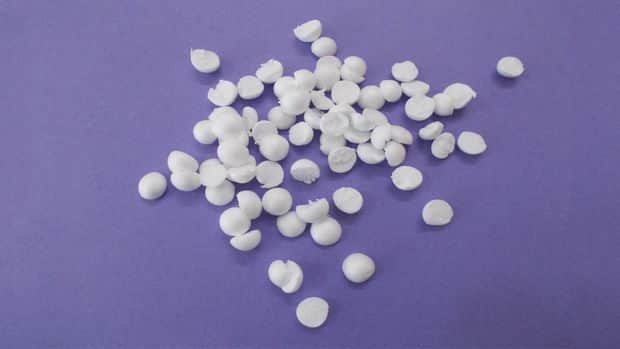
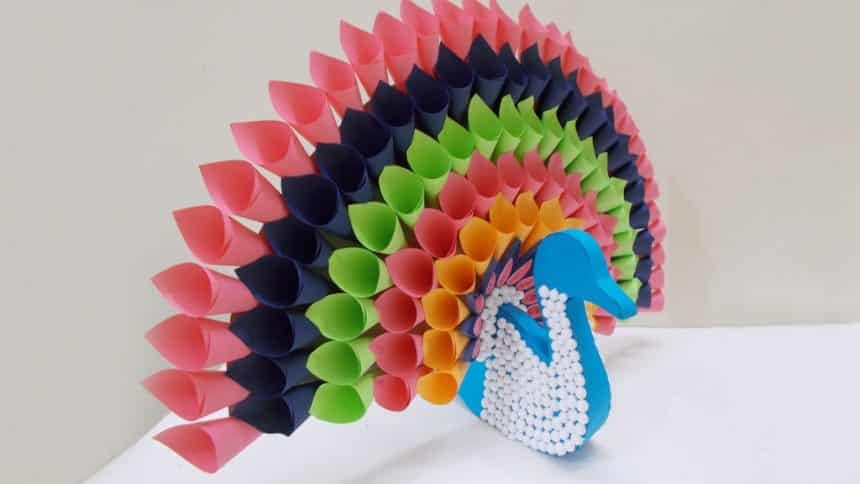
Cut styrofoam balls in half and paste them on the peacock’s body and the remaining space in the semicircle.
Color the beak and draw the eyes using black sketch pen and line the neck of the peacock using decorative pearls.
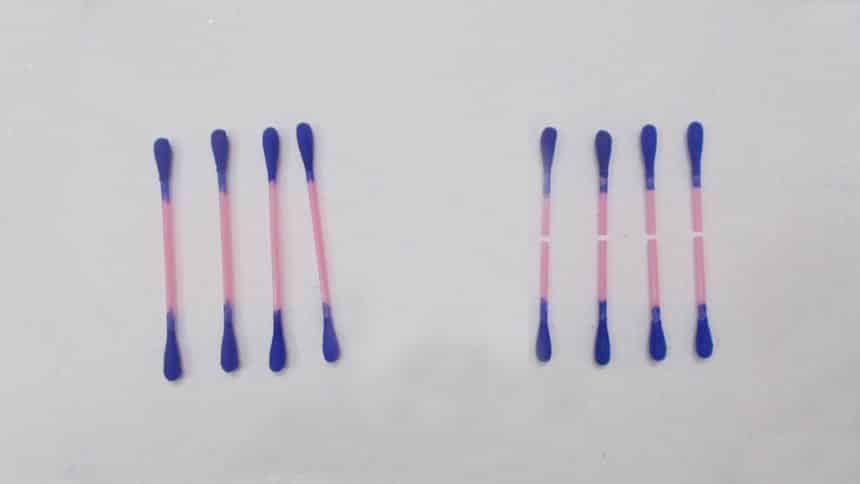
Paint both the ends of a few earbuds and cut the stick in the center.
Paste them on the peacock’s head to form the crest.
Add some glitter to the earbuds to be used as the crest.
Step 6: Your Craft Is Ready!
courtesy: instructables