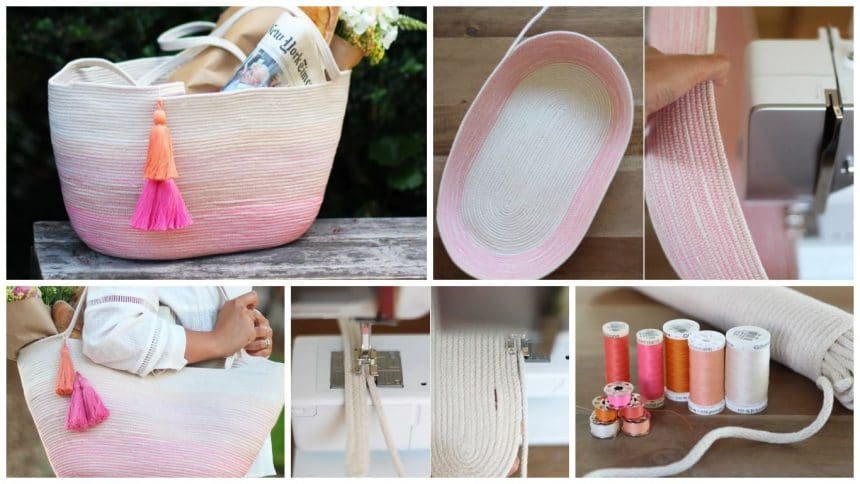
If you can sew a straight line on a sewing machine, I promise you can skillfully master this project.
You’ll need:
200-300 feet of 7/32″ or 1/4″ cotton clothesline rope
5-6 spools of thread of varying colors
sewing machine
scissors
measuring tape
pins
tassels (optional)
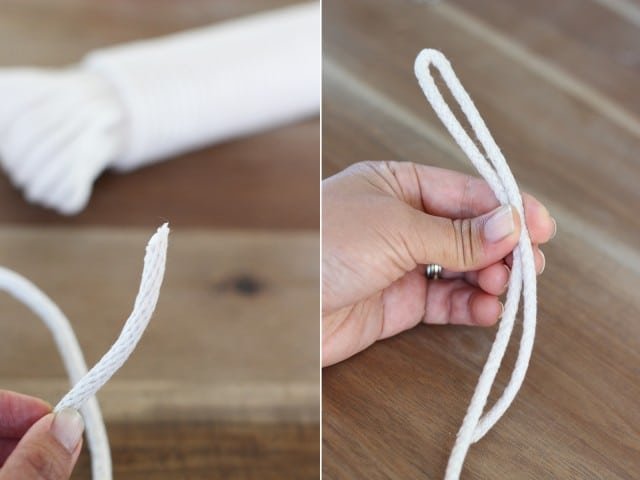
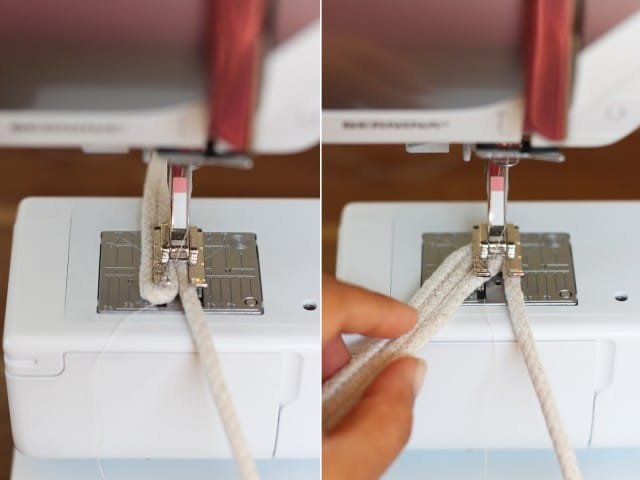
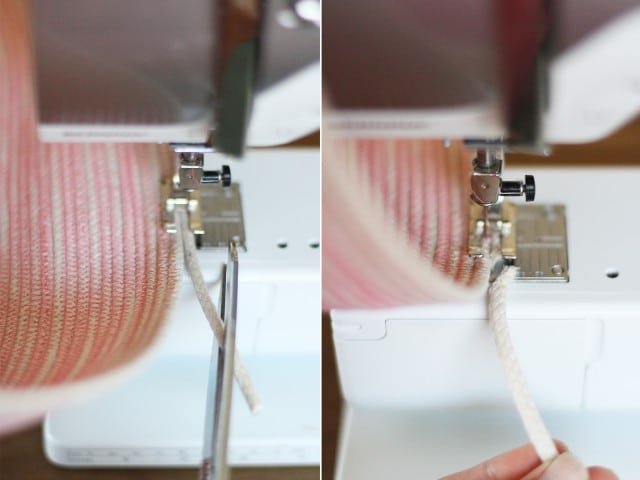
The first step is prepping your colors and cotton cord. Select the colors you want to use on your bag and wind a bobbin for each color so that when you’re sewing, everything is in order and you can just pop those bobbins in and out. I like to use a neutral thread, similar to the rope, for the base and top of the bag – you’ll need a large spool of that. As far as the clothesline is concerned, 1/4″ rope is probably the thickest you want to work with – only because even the heaviest duty needles might break with a thicker needle. And a thicker rope might not fit under the sewing machine foot. Also, use a heavy duty needle for this project – I like to use either a denim or leather sewing needle. Take the end of the rope and cut the end at a diagonal. Measure 12″ and fold it in half into a 6″ piece.
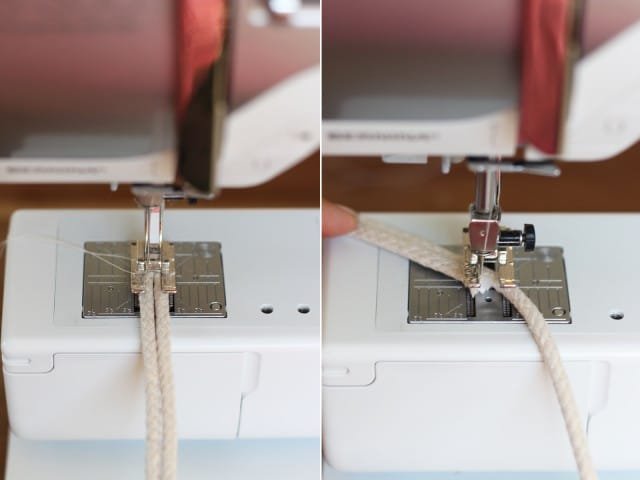
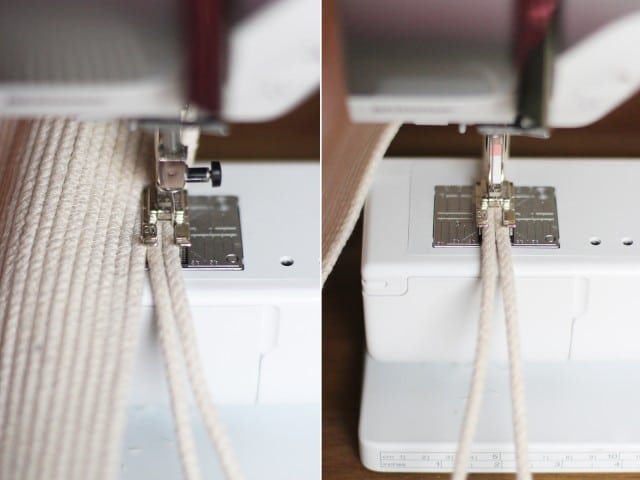
Place the fold under the presser foot of your machine. Set the machine to a zig zag stitch that is wide enough to reach both ropes. And keep the needle in the down position. Remember to keep both pieces of rope as close together as possible and keep them centered under the needle. Sew down towards the cut end and stop. With the needle in the down position, slowly rotate the sewed strip counter clockwise – meanwhile, using the zig zag stitch to stitch together the curve.
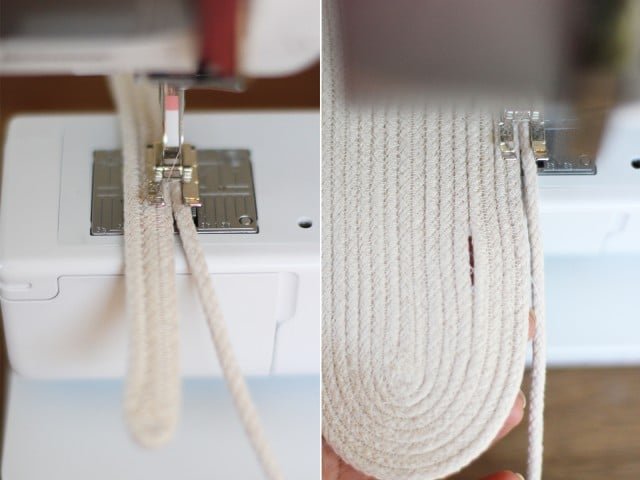
Keep rotating and sewing to the 6 o’clock position. Now sew down again.
When you’ve reached the end, rotate the strip counter clockwise until it’s parallel to the working rope – all while you’re continuing to sew.
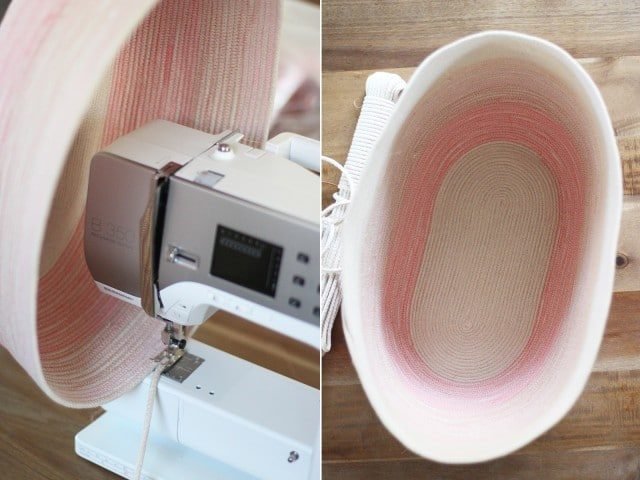
Keep going and you’ll notice you’re slowly creating an oval! This is the base of your bag. Remember, the working rope is always straight and under the presser foot. The bag (or oval piece) will always be on the left and be the moving, rotating piece. You might miss some sections – that’s okay.
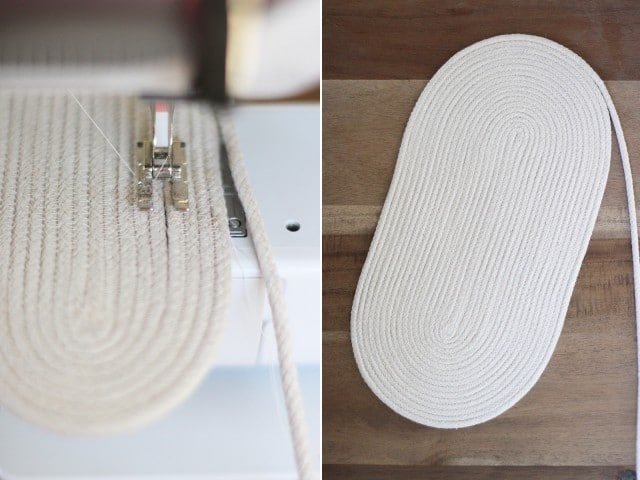
You’ll end up with gaps so when you notice them, just stop, cut your thread and patch up the sections. Then, pick up where you left off. After about 20-25 rounds, or when you feel like your base is big enough, stop but leave the rope intact. Remember, the bag will only get bigger so imagine that the top of the bag will be nearly double your base.
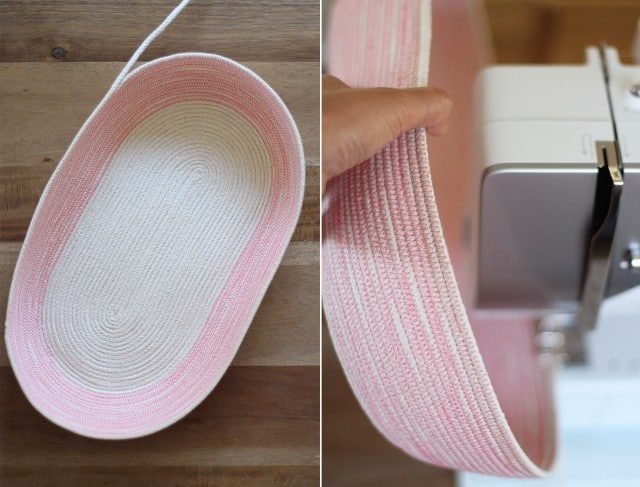
Now you’re ready to start building up the sides of the bag. This is where I like to change the color of the thread. Start with a few zig zag stitches and then immediately bring the bottom section upwards, hugging the side of the sewing machine. The rope will start attaching at a deep angle. The more perpendicular you hold the bottom of the bag to the sewing machine, the deeper the angle will be.
Keep the bottom of the bag at a 90-degree angle while rotating and sewing.
Keep going until you’re ready to change color. If you want the bag to graduate wider, start holding it at a slighter angle. You’ll notice the bag getting wider.
Continue rotating and sewing. Remember to keep the bag at a consistent angle for each rotation.
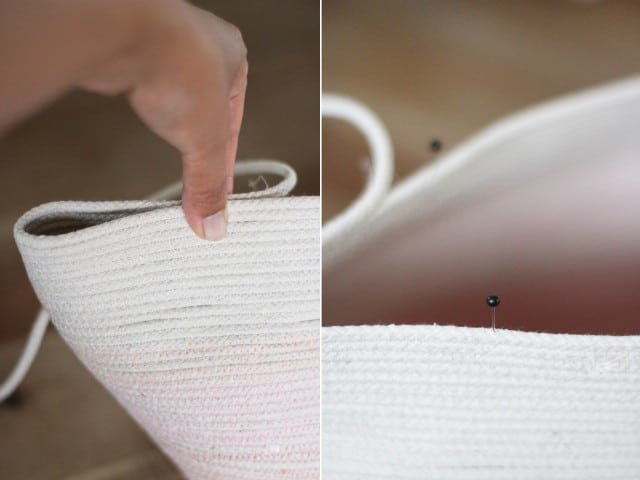
You can always bring your bag back up to 90 degrees to make straighten up the sides. Of if you want it even wider, hold the bag at say 30-40 degrees. Continue sewing until you’ve reached your desired height. When you’re ready to stop, stop sewing at the curved section and keep the rope attached!
Pinch the bag in half, lengthwise. Measure about 5 inches in from each end and mark those points with 4 pins. This is where your handles will start and end.
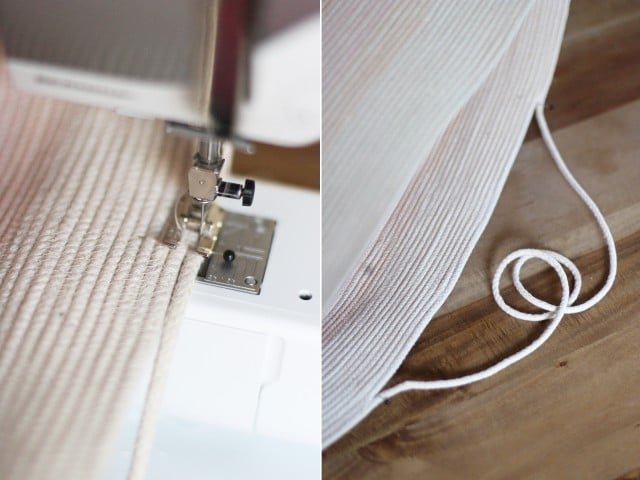
Put the bag back into the sewing machine and continue the zig zag stitch until you’ve reached the pin. Give it a few backwards and forward stitches to reinforce the handles. Cut the thread, remove the bag and measure about 28-30″ of rope. Attach the end of the handle to the existing pin and continue sewing until you reach the other side. Repeat the step, measuring the same amount of inches on the opposing handle.
Once you’ve made a full rotation and back of the first handle, keep sewing along the handle.
Repeat the steps until the handles are at least 3 rows thick. After sewing the last row on the handle, sew for another few inches, reverse and forward stitch a few times and trim the rope.
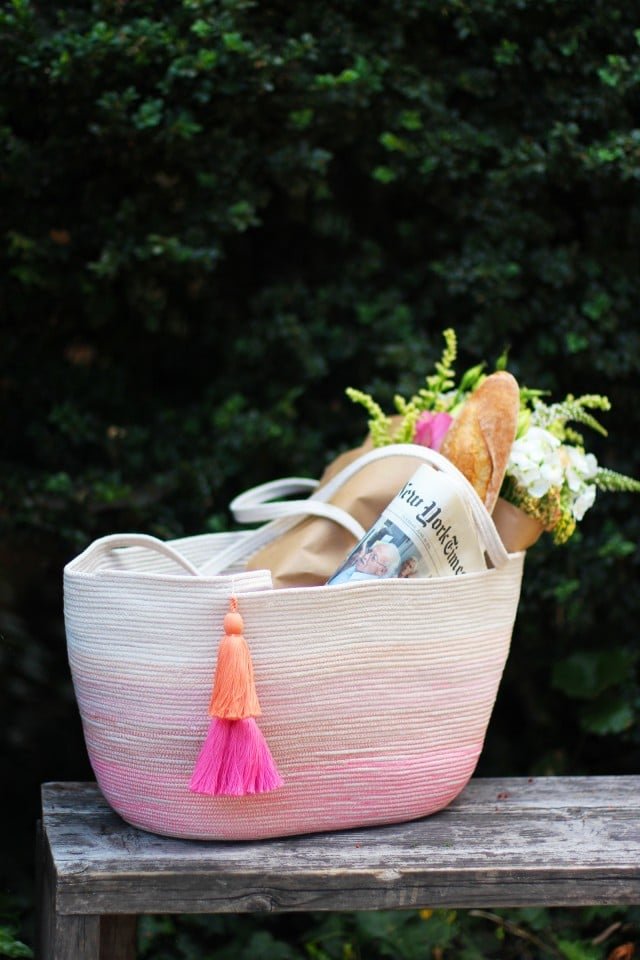
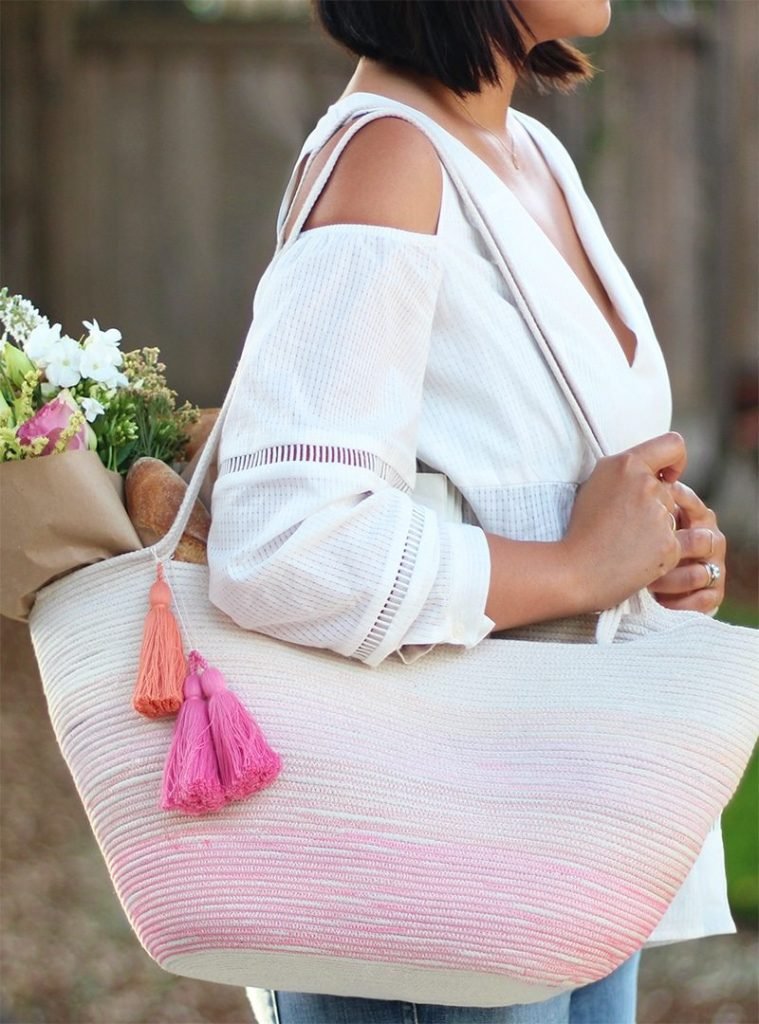
Add a couple of tassels or pompoms for good measure.