Thickened decorative edge for pillows
Thickened decorative edge – the traditional framing of pillows in the English style. We will show step by step how to do it.
STEP 1
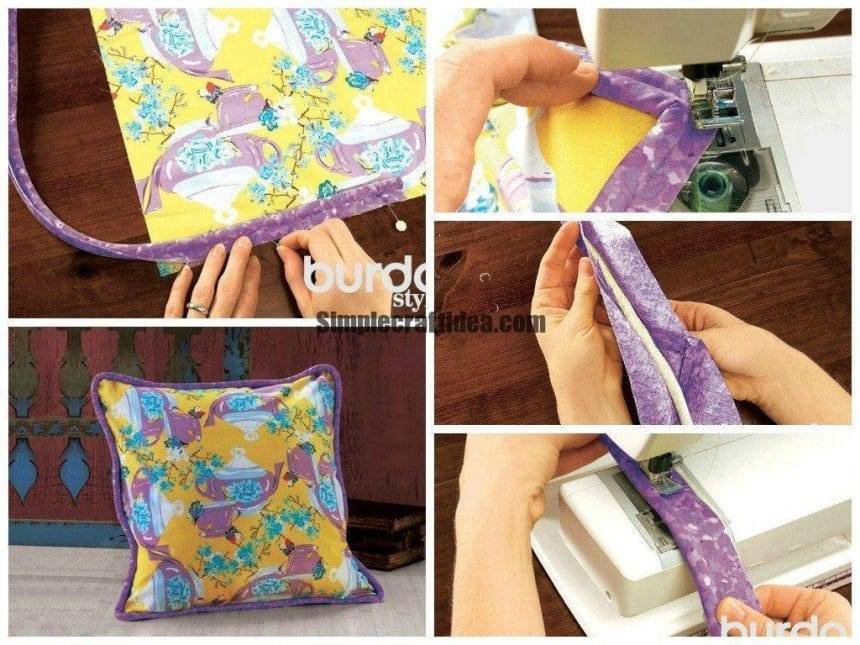
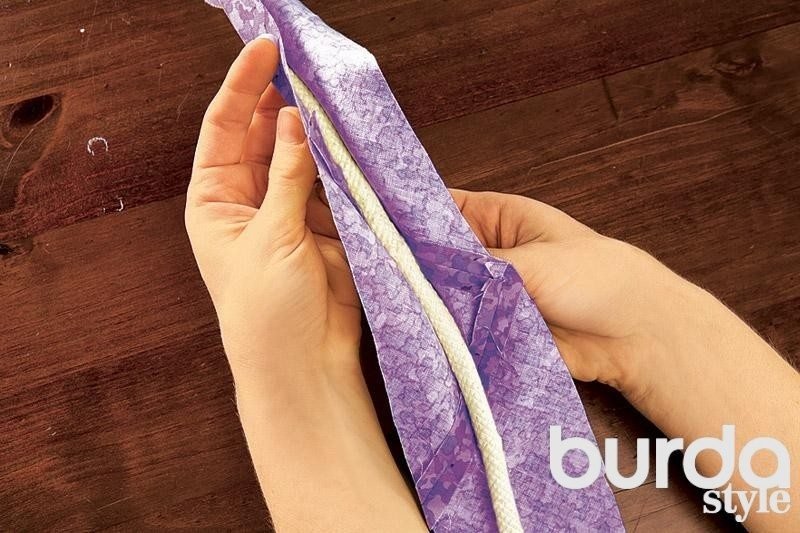
to carve out a rectangular or square parts for the front and rear sides of the cushion. To the rear side to provide a fastener such as a zipper. Measure the contour of the desired length .. with an allowance of 5-6 cm. Carve oblique Bakey this length. Yet you need a cord that must be put into the fold of the folded double piping.
STEP 2
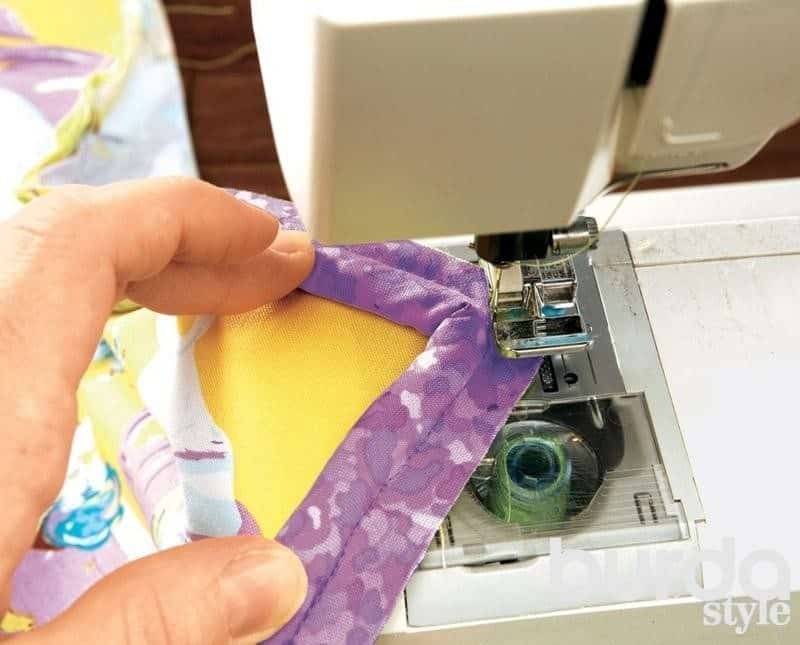
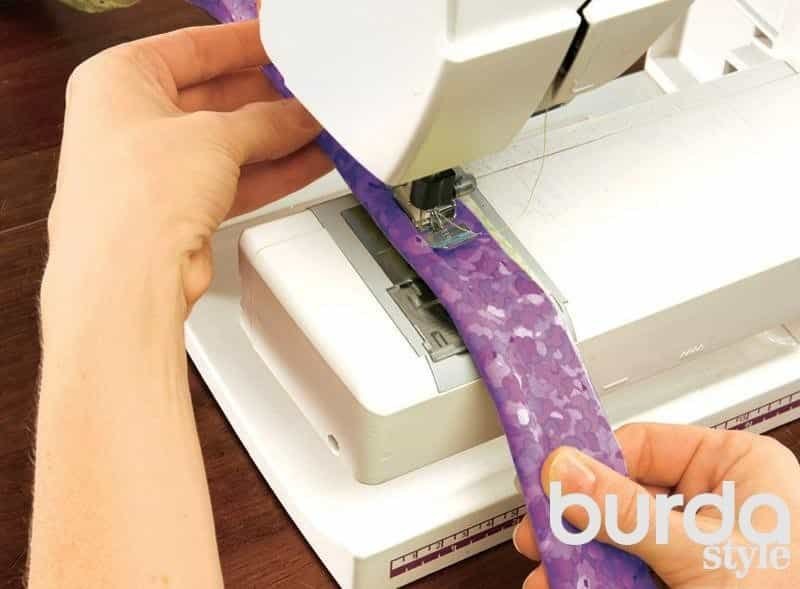
Diagon Bakey cord folded in half so that the cord lay precisely along the fold. Stitched on the machine as close as possible to the cord on the front side. To do this, use the foot zipper. Needle position also shifted to the left.
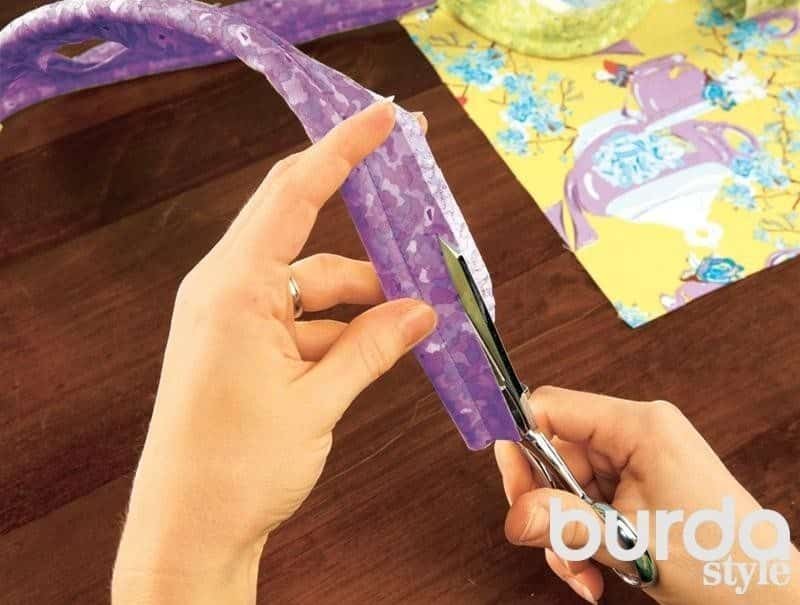
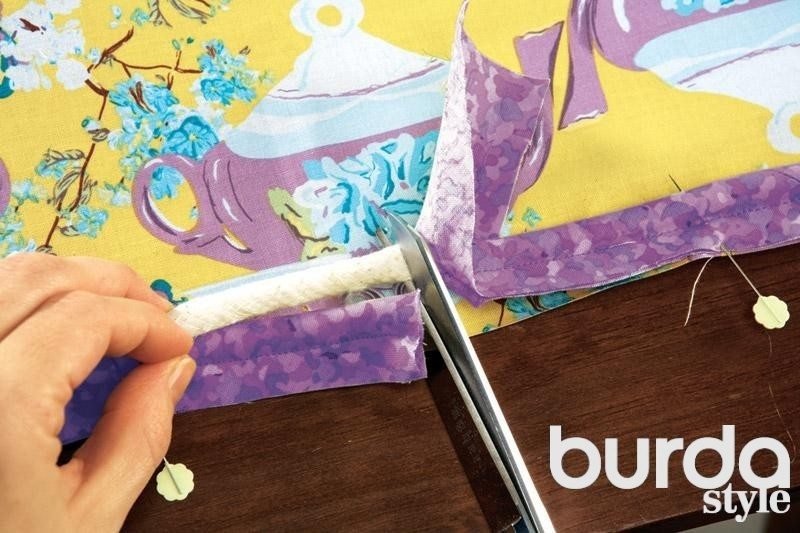
Step 3
allowances ready to cut to a width of 6 mm.
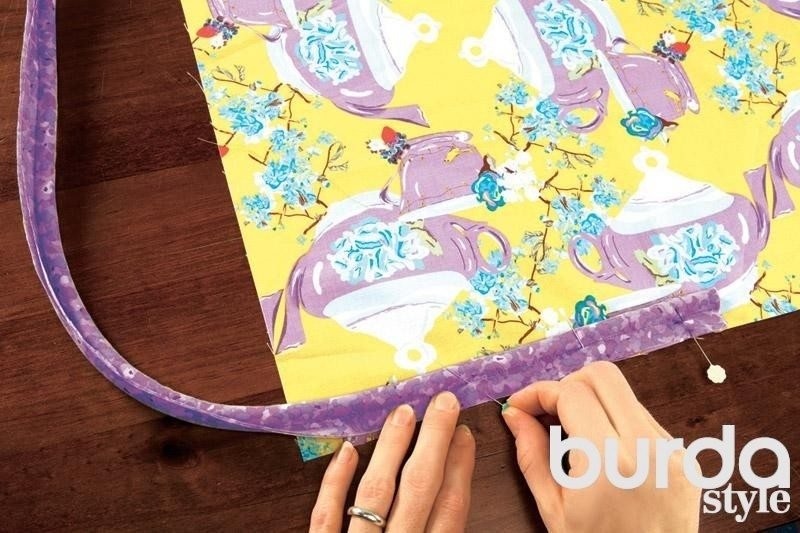
STEP 4
Trained on the front side of the pillow to the face contour, the front side is more suitable for basting, as it usually does not go the ends of the zipper. Start basting with the underside of the cushion. Just align slices and slices details pillows.
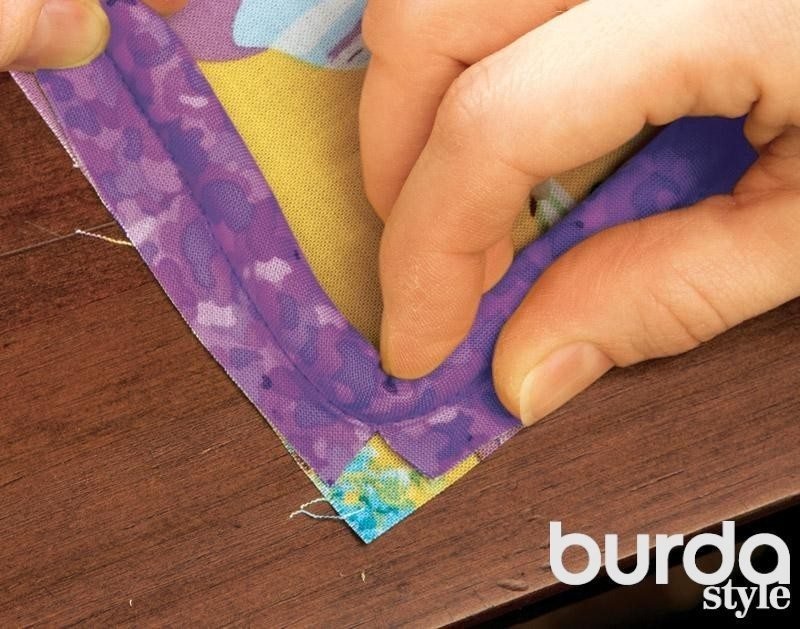
STEP 5
in the corner to get the exact fold under 90º, measure the distance allowance to the point of the angle (in this embodiment, it is 1.3 cm) and a notch allowance. Place around the corner and continue basting it to the edge of the cushion part.
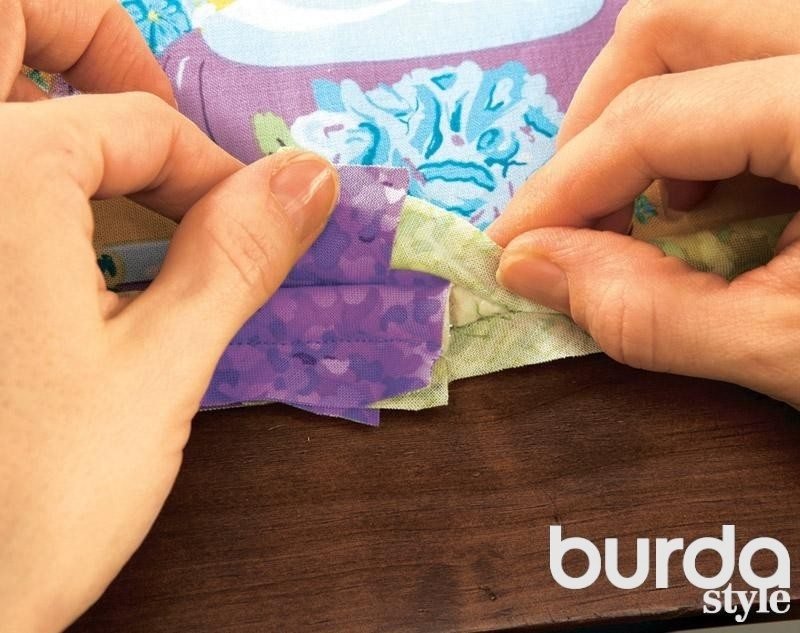
Step 6
When you are trained the edges of the pillow, the ends have to go at each other approximately 5 cm. At one end of the thrust seam and pull the cord out.
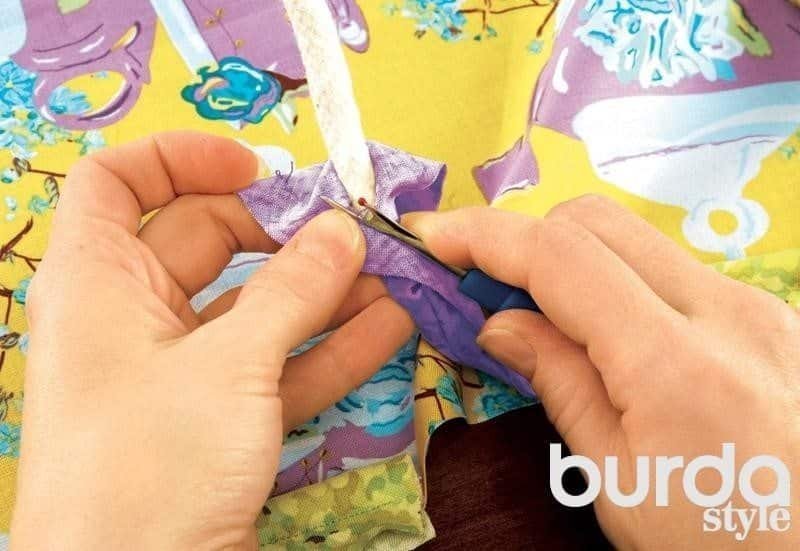
Step 7
The two ends Cord fold together cut the excess cord length so that both ends of the cord inside were combined butt.
Step 8
Pull one end on the other, with a ripped seam at the end. Allowances top tuck and sew by hand.
STEP 9
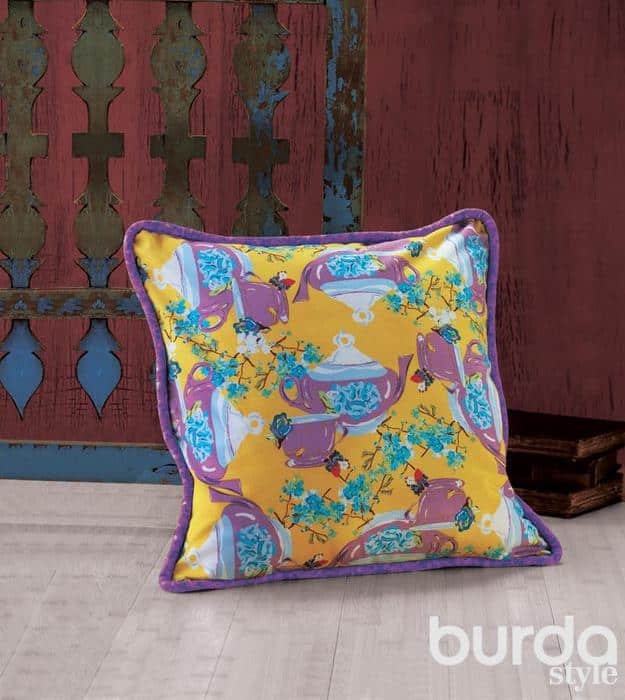
Scribbled on the contour detail cushions long Basting stitches. Fold to face the front and back (treated with clasp) Details Sew pillows and normal stitch length.