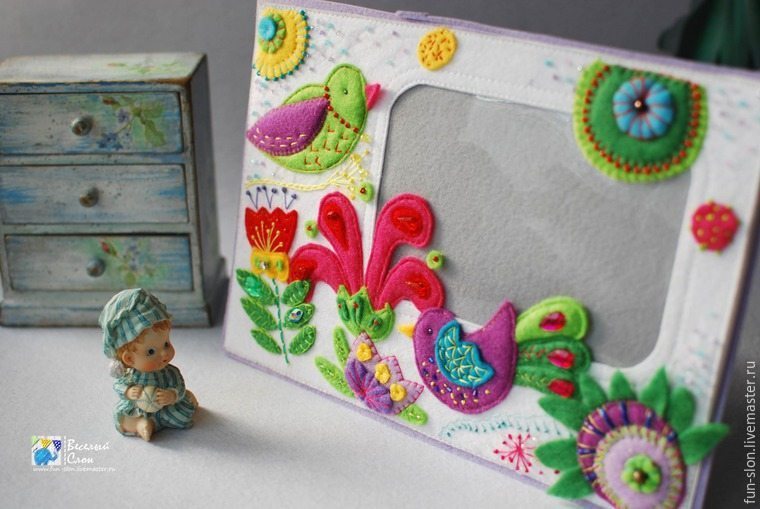
The sun was warm stronger, which means spring is just around the corner. And, despite the fact that the cold weather is not yet finished, so I want to have something warm and bright spring. That’s how I came floral frame made of felt, and with it, and a master class.
I went round the side of the embroidery for a long time, as it always seemed to me immense – thousands of stitches, hundreds of hours, superhuman precision and gigantic concentration …
But a little imagination, and a multi-colored felt positive mood – very heavy and kind of creativity turns into a pleasant pastime!

So, we need materials:
- Hard white, gray and purple felt for the base frame – 20 * 30 cm each.
- Transparent Vinyl 0.4 mm.
- Soft colorful felt (colors presented on the photo: turquoise, grassy, green, yellow, light magenta, lilac, violet, fuchsia, red).
- Beads, crystals, beads.
- Threads for sewing in tone felt (I was doing embroidery by them).
- Monofilament sewing beads.
- Thin tape to match the frame – 20 cm.
- Double sided tape.
- Sintepon / sintepuh – 50 g (I replaced the scraps of felt).
Instruments:
- Scissors for fabric;
- Tweezers for stuffing;
- Bead needle (or any other very fine);
- Stationery knife – optional;
- line Patchwork – optional;
- The cutting mat – optional;
- “Tsapelki” scissors (very useful for cutting small parts) – optional;
- Hands and / or sewing machine.
- Tools with the signature “option” – not required, but greatly facilitate life.

Stage 1 – Preparation of the base frame.
The frame is a standard photo 10 * 15. Mounting means that you can put the frame both horizontally and vertically.
1. Cut the hard white felt rectangle measuring 17 * 25 cm. On the wrong side of the mark up window for photo 9 * 14 cm with margins of 2 cm from the left and upper edge. I rounded angles with a radius of about 3.5 cm. For straight lines, you can use the cliche with circles.
To cut was smooth, straight line I cut stationery knife, rounded corners – scissor-tsapelkami.

2. Then cut out of vinyl film rectangle with sides 11 x 16 cm film convenient office knife cut out by putting under it (in addition to the cutting mat) white paper – so it is better seen when cutting.

3. And now a little secret. Since vinyl is very capricious – it is easily stretches and generally likes to stick to the surface and escape from the target site, and leave the pins on it (and on the felt, too) fatal punctures. So I came up with for yourself to fix it before pritachivaniya using double-sided tape. Importantly, do not glue it in those places where it is supposed to lay the line, because the glue will ruin the needle.

In my opinion, already it looks good? 🙂

4. Now we lay a line along the window at a distance of 1-2 mm from the edge.

The base is ready – you can start decorating it!
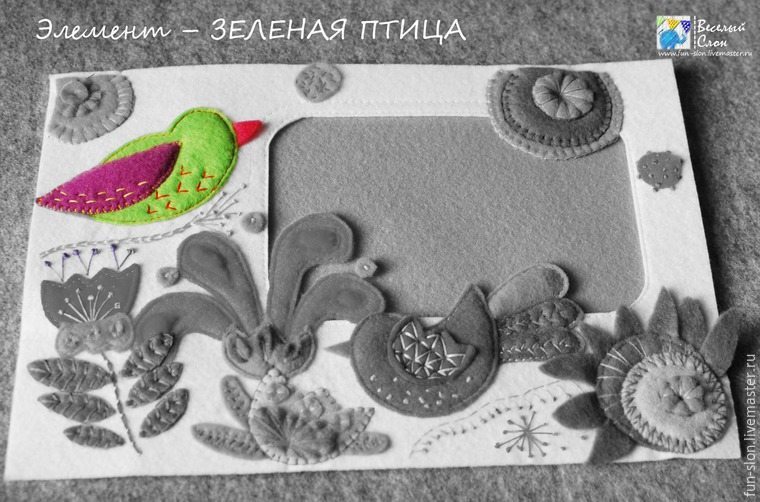
Stage 2. Decorating picture frames.
5. Cut decor items and decompose on the photo frame to make sure everything will fit and all we like. Details Speakers will continue to be cut off.

6. To elements intrude on vinyl film is not moved out during pritachivaniya, I also recorded their bilateral adhesive tape.

3. Now start pritachivaniya decor.
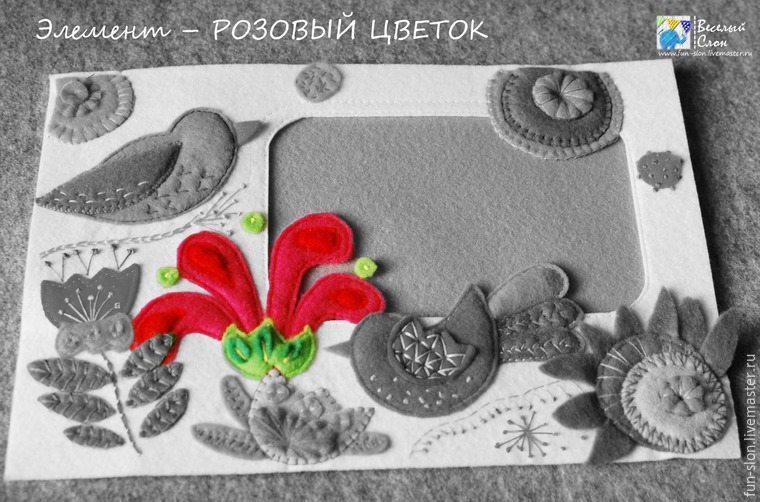
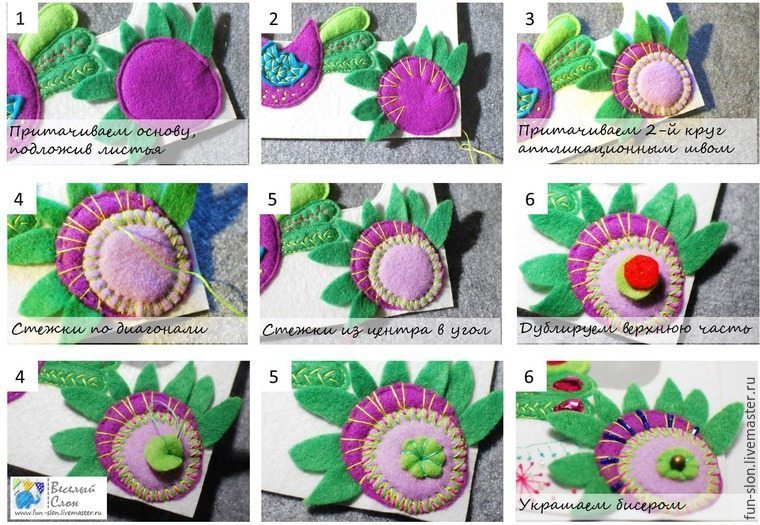
Pink flower
Most lines per application executed on the machine, it saves time and effort to puncture the vinyl film. Well, it is not easy to pierce …
Hereinafter I embroider conventional reel thread in 2 additions.

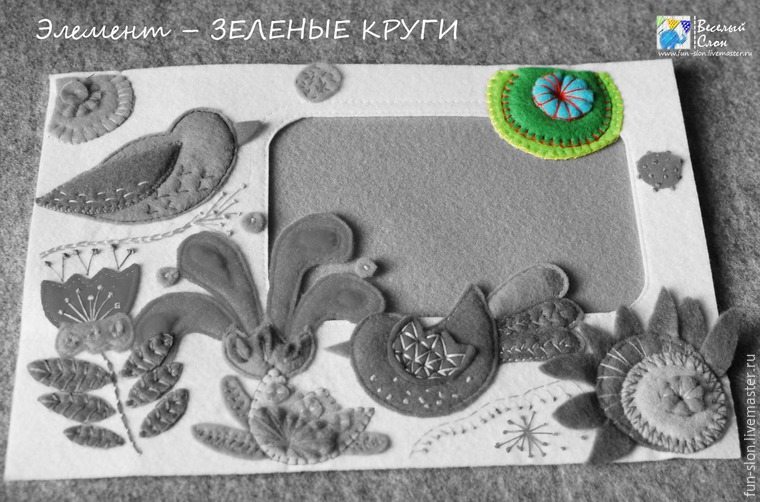
Green circles
Pritachivaem typed or hand applicator seam. For this flower I took a contrasting thread and do different joint widths. The upper part stuffed flower to give volume.


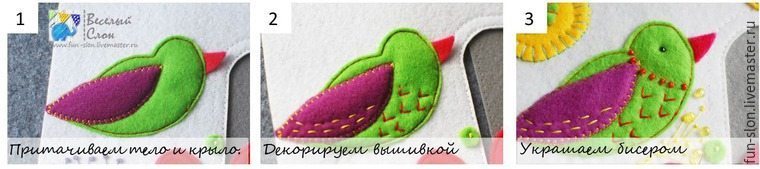
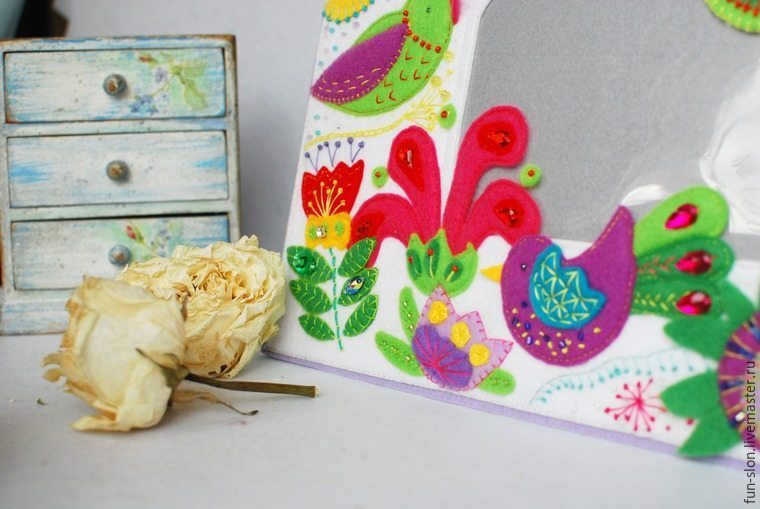
Purple bird
Threads for birds also take contrast, the bill does not sew, simply placed under the body. Wing started with parallel lines, then outlined the triangles between them.

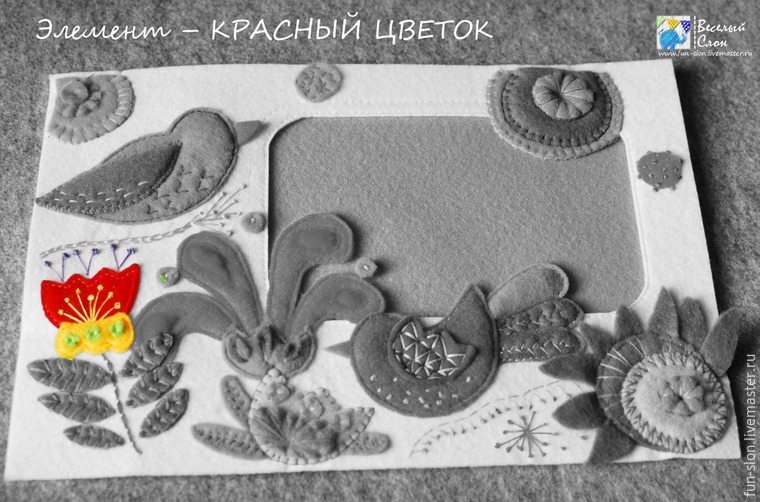
Red flower
This flower without packing, first completely embroider the upper part of the flower, and then nastrachivaem receptacle. French knot – my favorite :)!


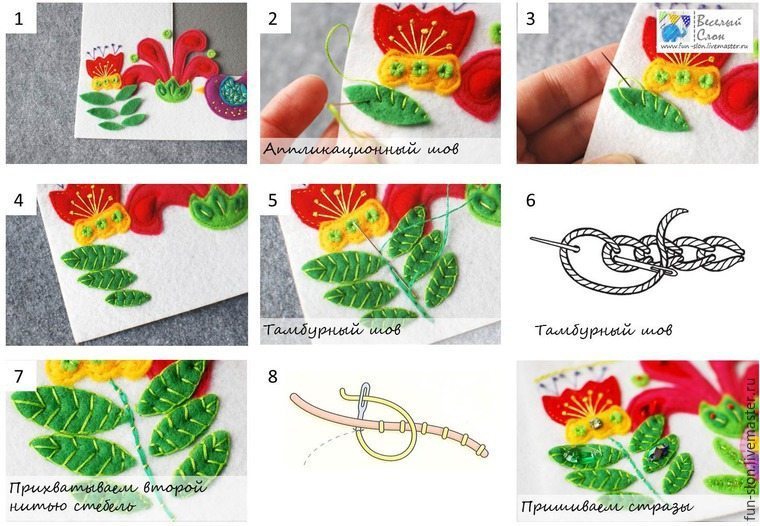
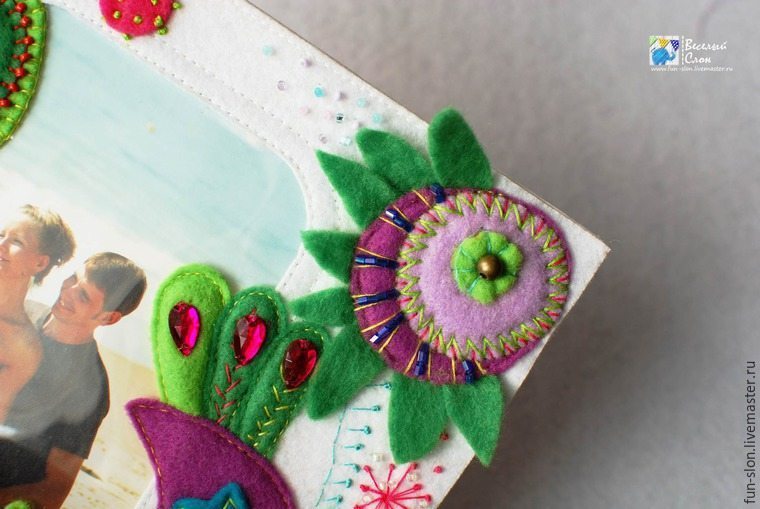
Leaves
The most important thing is not to overdo it with rhinestones 🙂 This is my favorite part – very much I enjoyed what turned out textured leaves. Just did not want to close this beauty sequins, so the sheets of paper, we have only two droplets.
Green bird
The bird lightly stuffed wing. Embroider wing parallel stitching needle forward, and breast in birds – ticks.

Lilac flower
Lilac flower of the scribbled on a typewriter, and the second part of the bright purple color I sewed by hand suture applicator. Beads for leaves in the chosen color, just to emphasize the texture of the paper.

violet circles
Under the uppermost part of the front stitching puts a round piece with a hole in the middle – so verhushechka be bulkier.
Beads recruit a few pieces and sew right track.

Small circles
Here, the bottom yellow circle also sewn on the machine, the upper – hand. I Beads is level at the ends of stitches.
The remaining two circles embroidered in random order with simple stitches and my favorite knots.

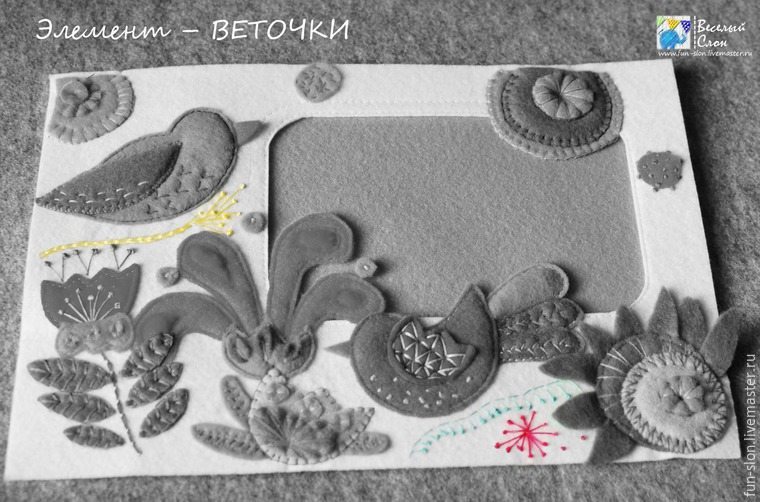
Sprigs
To embroider the blue element, first sew the seam line forward needle, then from it sticks with embroider French knot at the end.

After some thought, I decided to make a scattering of beads in the corners of the frame.

Here’s what happened.

Stage 4. Let us now again under the frame basis.
1. Cut the cardboard 2 parts:
– Rectangle with frame – 17 * 25 cm;
– Detail of a tie, which must be attached to the middle of the box, and go right on a diagonal.
- The angles equate to the corners of the frame. Immediately on this part make a fold along the marked lines. The second part is set aside.
- Stick double sided tape on cardboard, avoiding places where the window should be located.
- Glue the cardboard box and to lay a neat line around the perimeter of the frame to form a pocket for a photo. Wrote only where there are no applications. It does not matter if the line will not cover the entire perimeter – photo still does not fail.

Stage 5. Fixing support.
We now turn to the second part.
- Cut out the shape on its 0.5 cm allowance two pieces of gray felt and a rectangle of purple felt the size of 0.5 cm more than the basic frame on each side.
- Pre cementing bilateral parts with tape support, Stitch Sandwich: felt, cardboard, felt. On one edge of the tape put into pre-tied knot to the tip of the mounting strength. The tape will serve as a stopper, preventing a fully open support.
- Pritachivaem support a lilac rectangle. Make sure that the corners match.
- Raise and support the substrate underneath nastrachivaem rectangle to secure the second end of the tape. The tape also pritachivaniya to tie the knot at the end. So it does not jump out of the seam.
- We combine lilac item with the support and the frame, grind on the perimeter, leaving the right side of the hole to insert a photo.
- As you can see – well worth frame!

And now we admire ..


Thank you for reading my master class to the end! Enjoy your creativity and inspiration of spring!