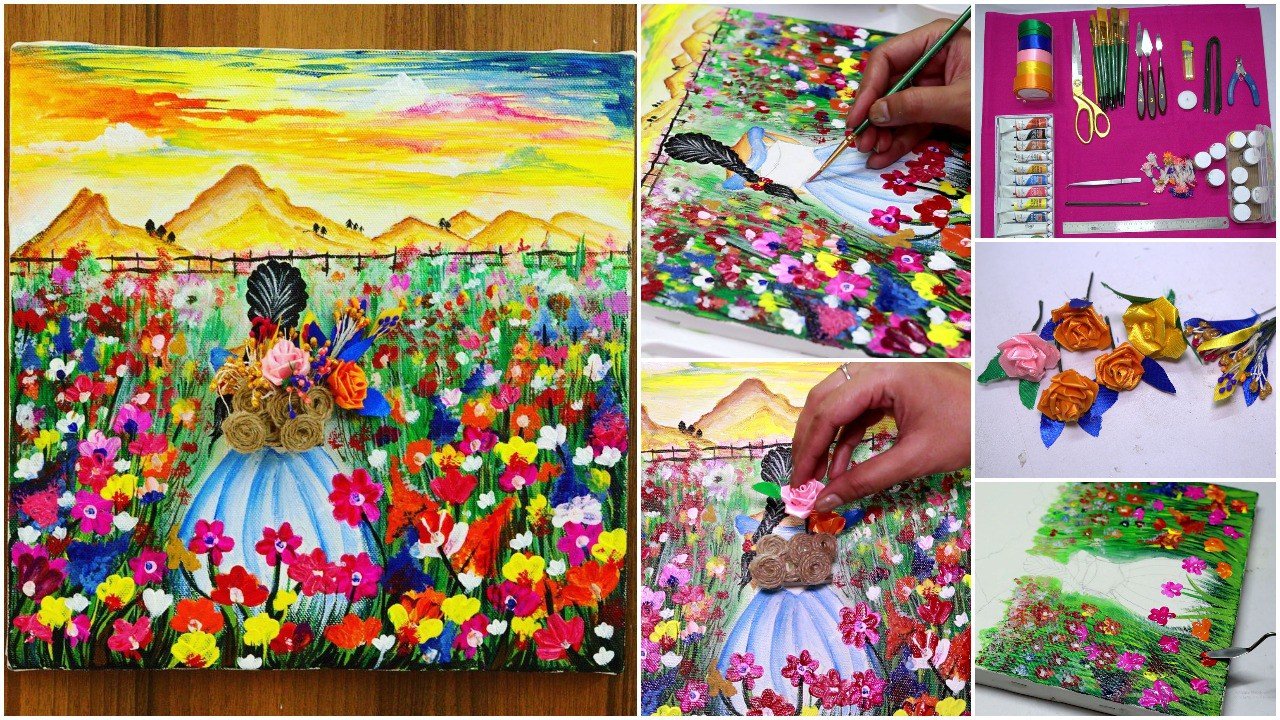
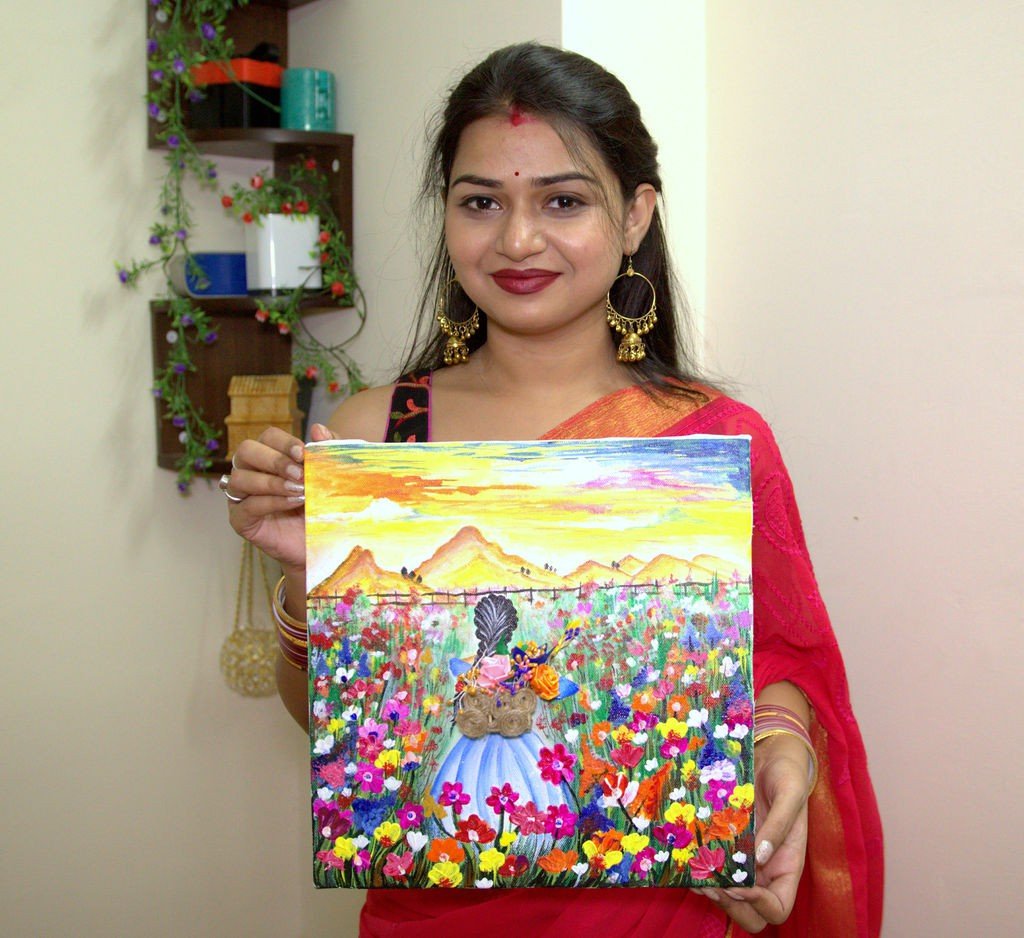
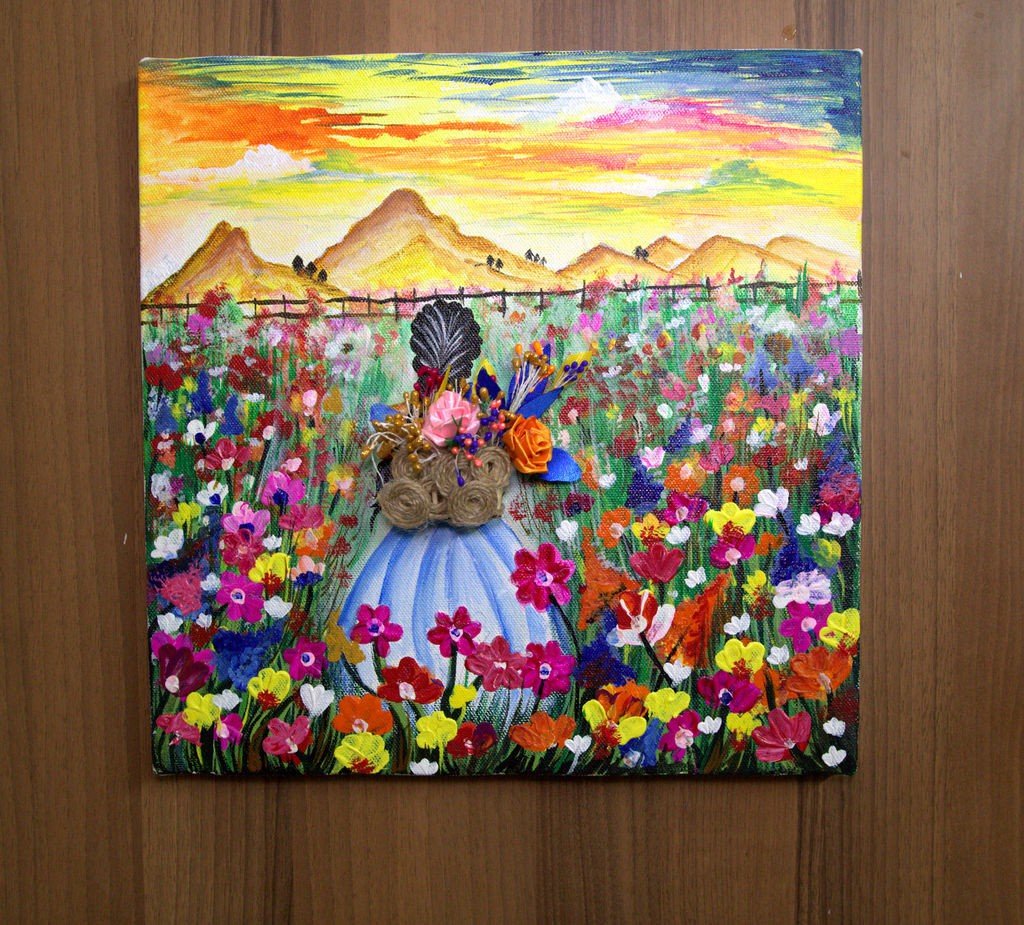
When I was going through Instructables, I saw this Flower contest is going on. So I wish to do a single canvas garden artwork. Here I have used brushes, pallet knives, and satin ribbons to make flowers.

 Step 1: MATERIAL REQUIRED
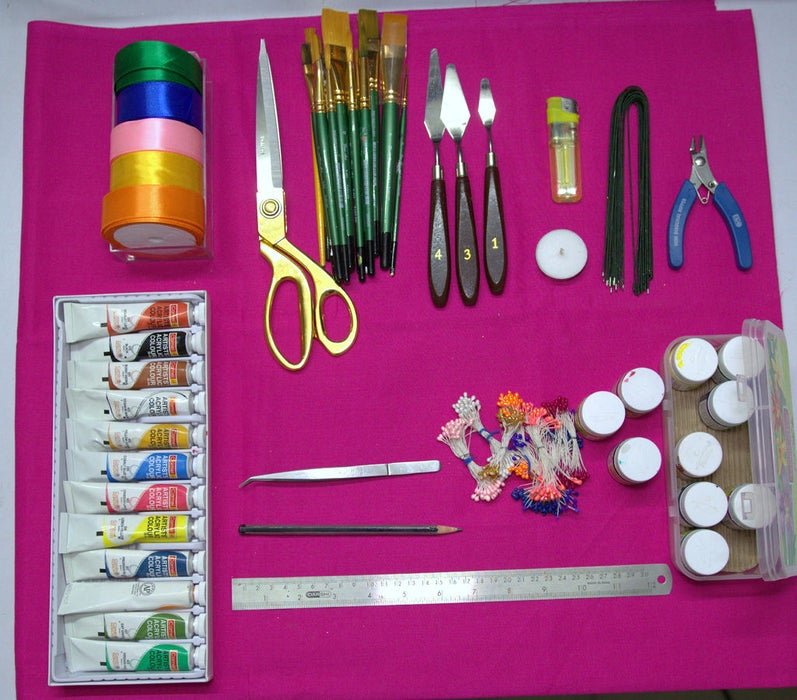
MATERIALS REQUIRED:
1.Canvas board
2.Pencil
3.Brushes
4. Acrylic paints
5.Artists’ acrylic color tubes
6. Pallet knives
7. Satin Ribbons
8. Glue sticks
9. Scissors
10. Candles
11. Green paper-wrapped wires
12.Matchsticks
13.3M mounting Square
14. Craft Jute Rope
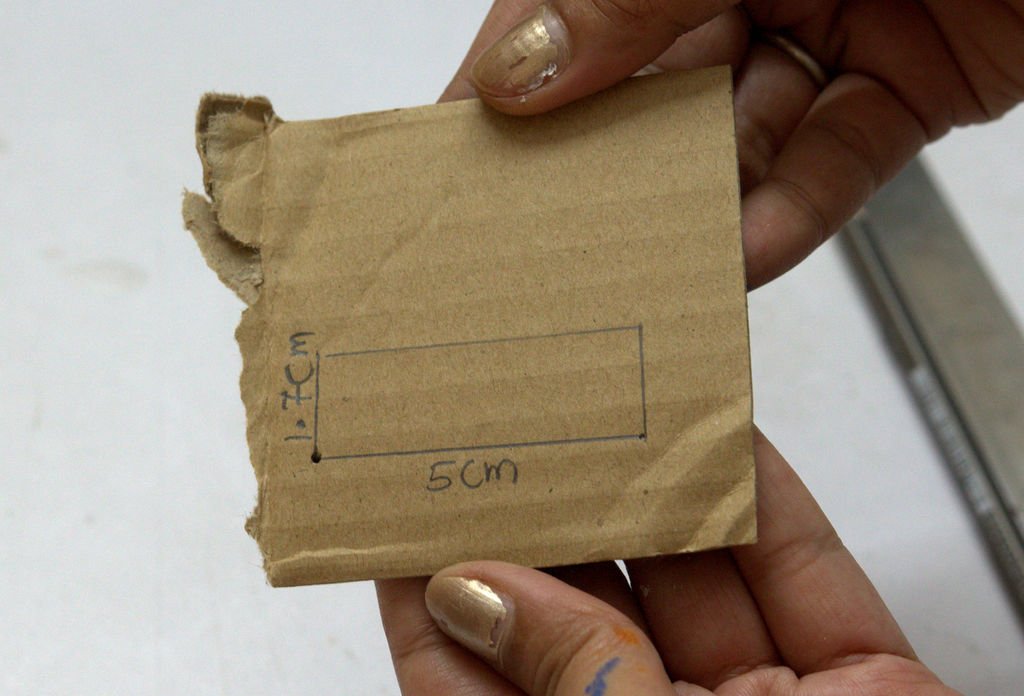
15. Cardboard
TOOLS REQUIRED:
1. Glue gun
2. Lighter
3. Ruler
4. Tweezers
5. Nipper cutter
Step 2: PREPARING PENCIL ART

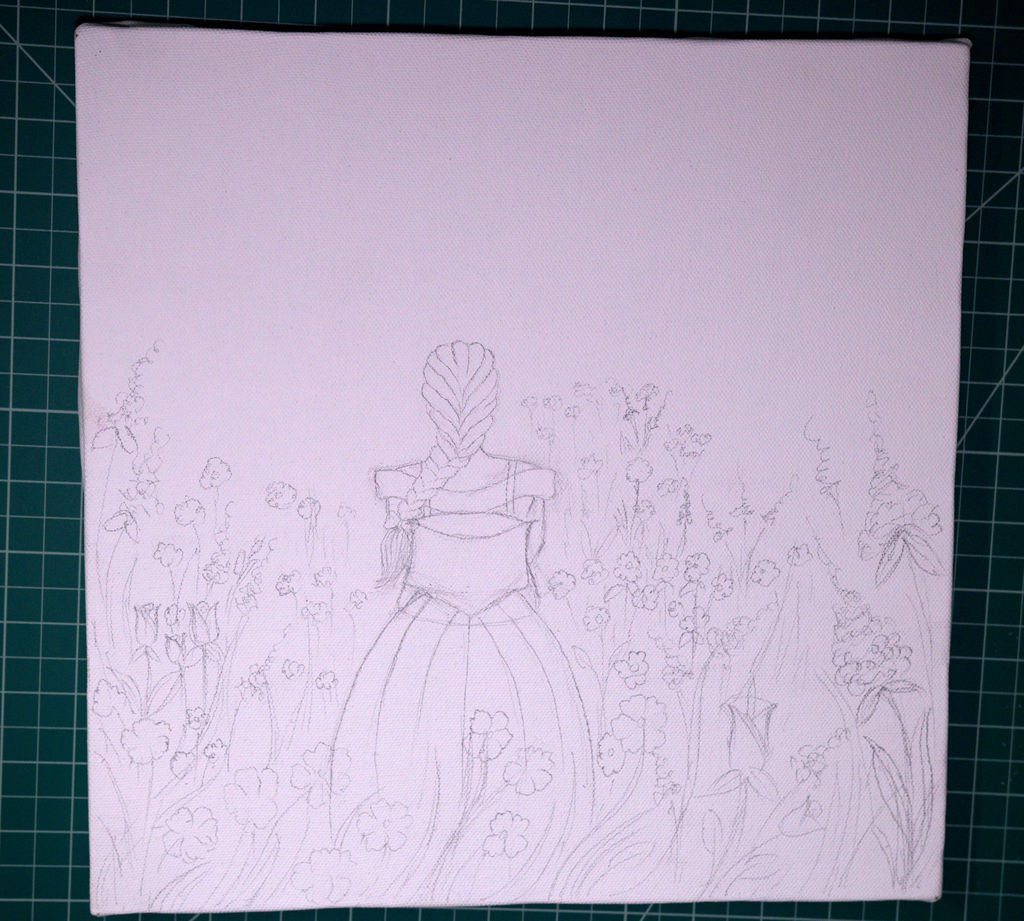
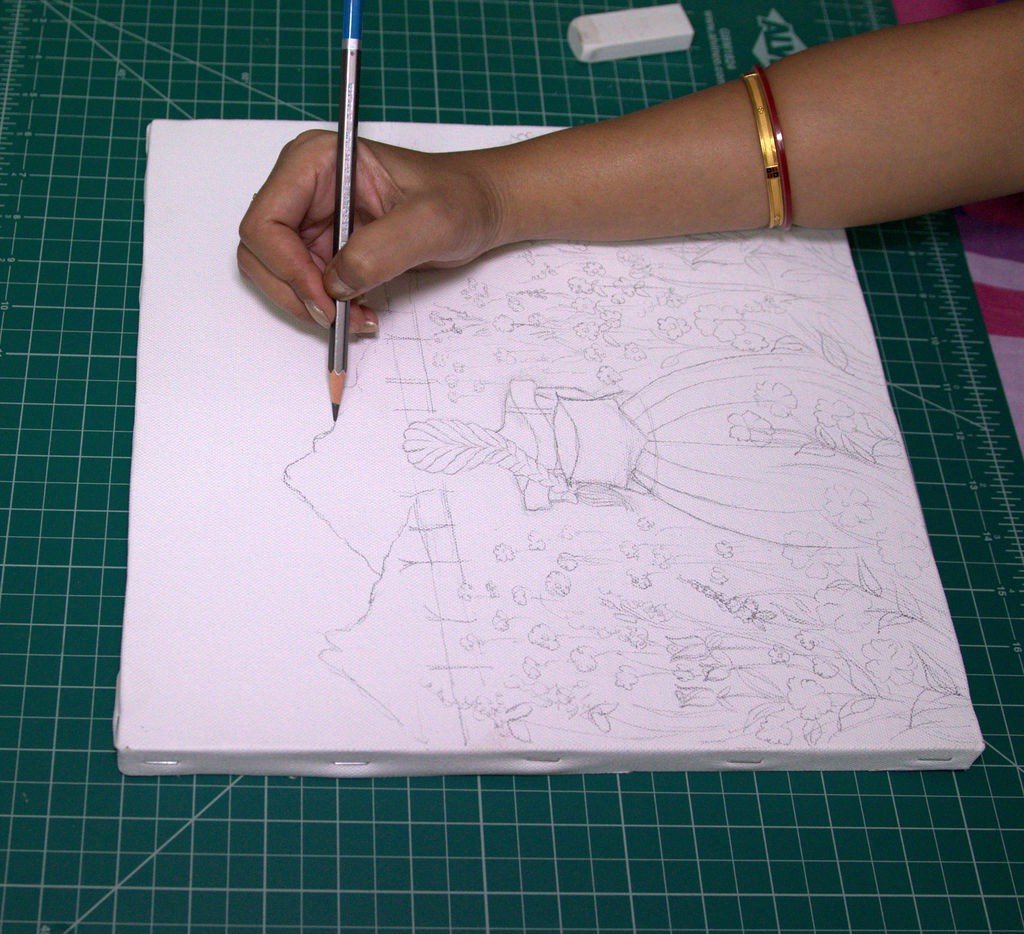
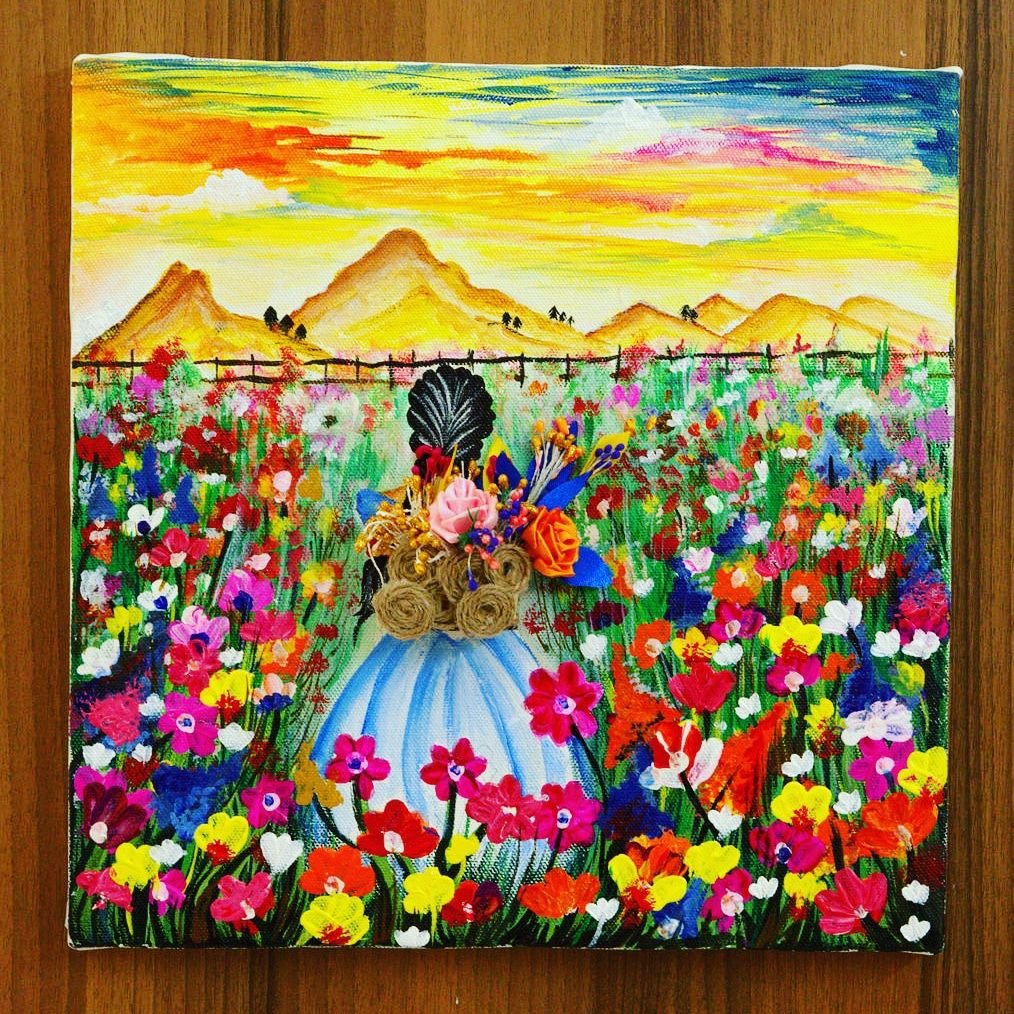
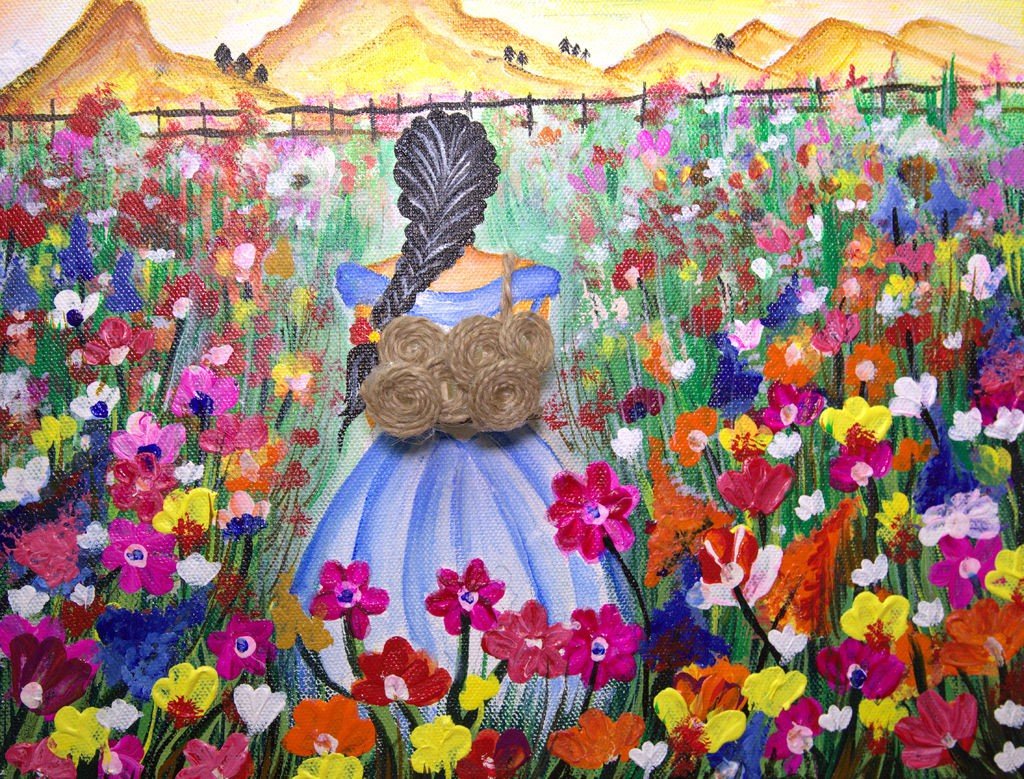
Take a canvas board and draw a garden art on it. As shown in the above pictures I did a flower garden and a girl having a flower basket on her back. Here I have used different kinds of methods to make flowers, which actually satisfy my contest theme and also give it a 3D look. To make enhance the beauty of the scenery, draw hills, sky, boundary etc…
Step 3: BASE COLOUR PREPARATION
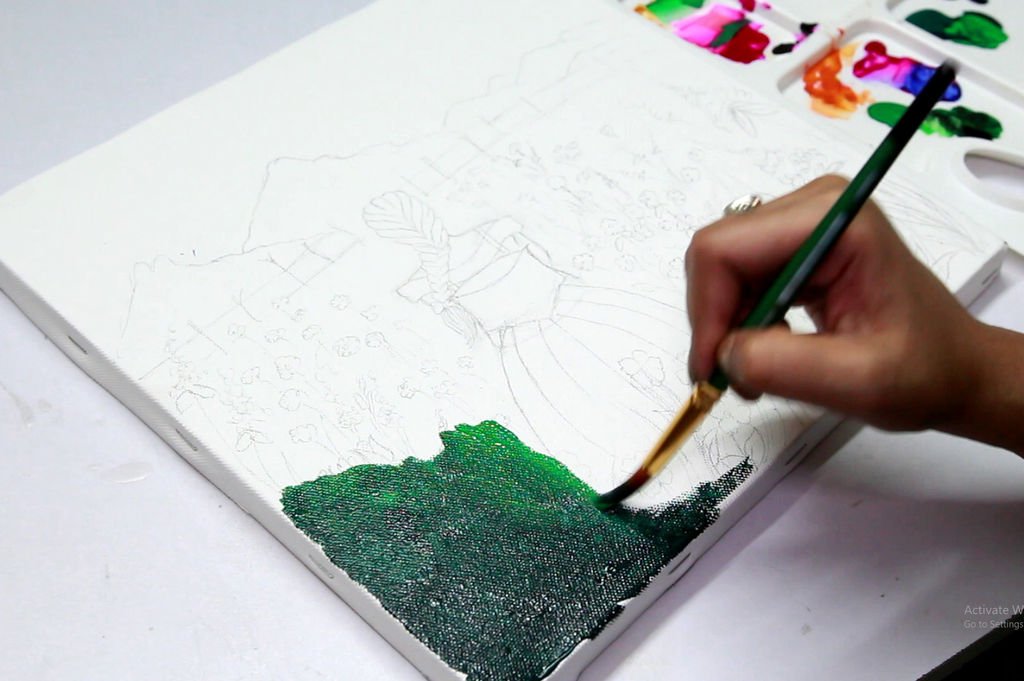
After completion of the drawing, do start colouring from the lower end of the canvas. You should imagine that you are looking at this flower garden right from the lower end of the canvas. As it is a painting, so you should make flowers of the lower end are big, bright and bold. By going towards the upper side, you should imagine that you are gradually looking far. So you need to light the colour shades gradually toward the top side of the canvas board. First, make the garden but not the girl within it. Make it dry first then go for next. But by the meantime, you can do hills and sky etc. which is basically apart from the garden so that you will not meet a colour mess up on your canvas.
Step 4: USE OF ACRYLIC COLOUR ON CANVAS
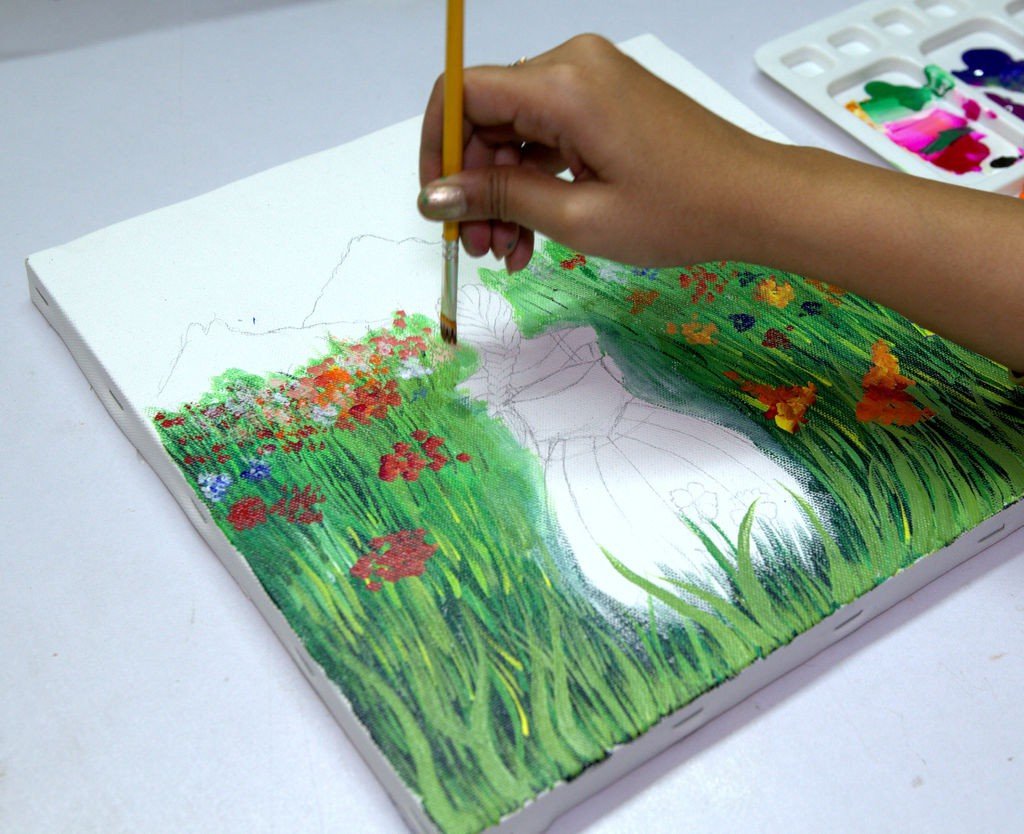
As told you before, to enhance the nearer flower objects I have used pallet knife, which I will show after this step Frist colour it with acrylic colour. For colouring, the flowers towards the upper end, use acrylic colour.
Then for sky and hills, you should remain your colour shades as light and simple as possible so that the objectives of your work can do give even a better result.
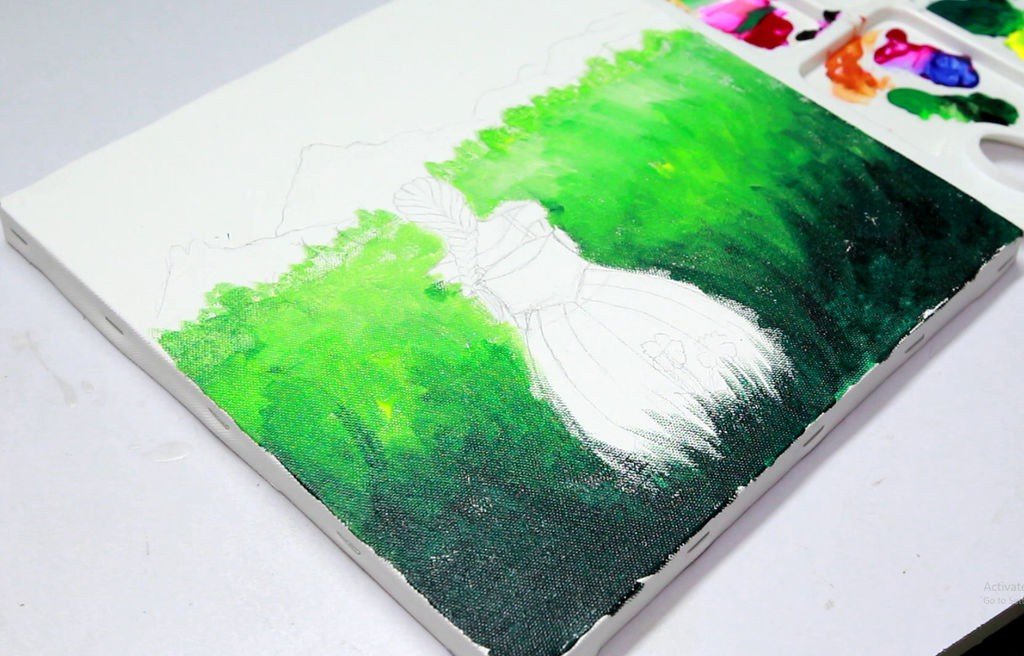
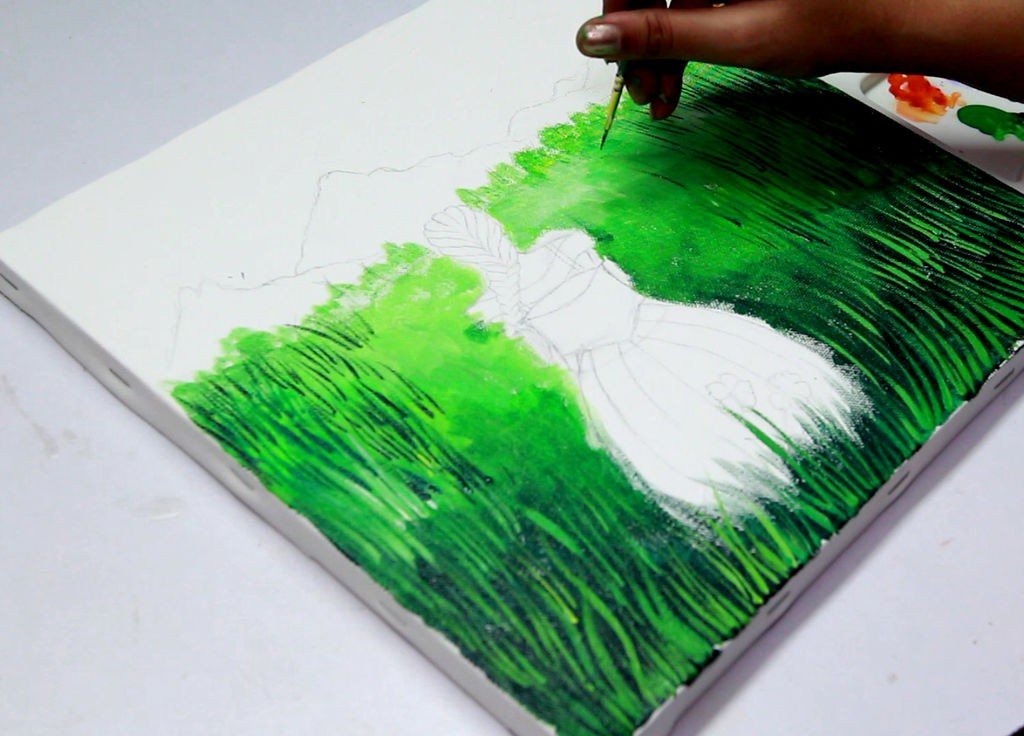
Step 5: USE OF PALLET KNIFE ON CANVAS
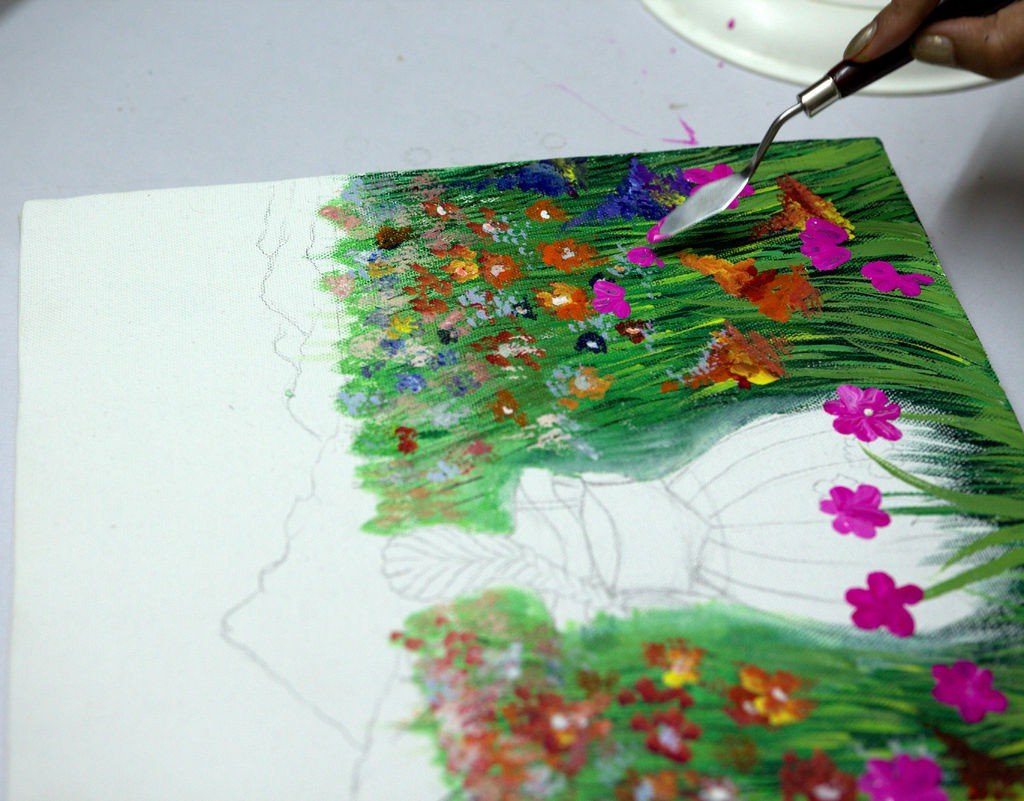
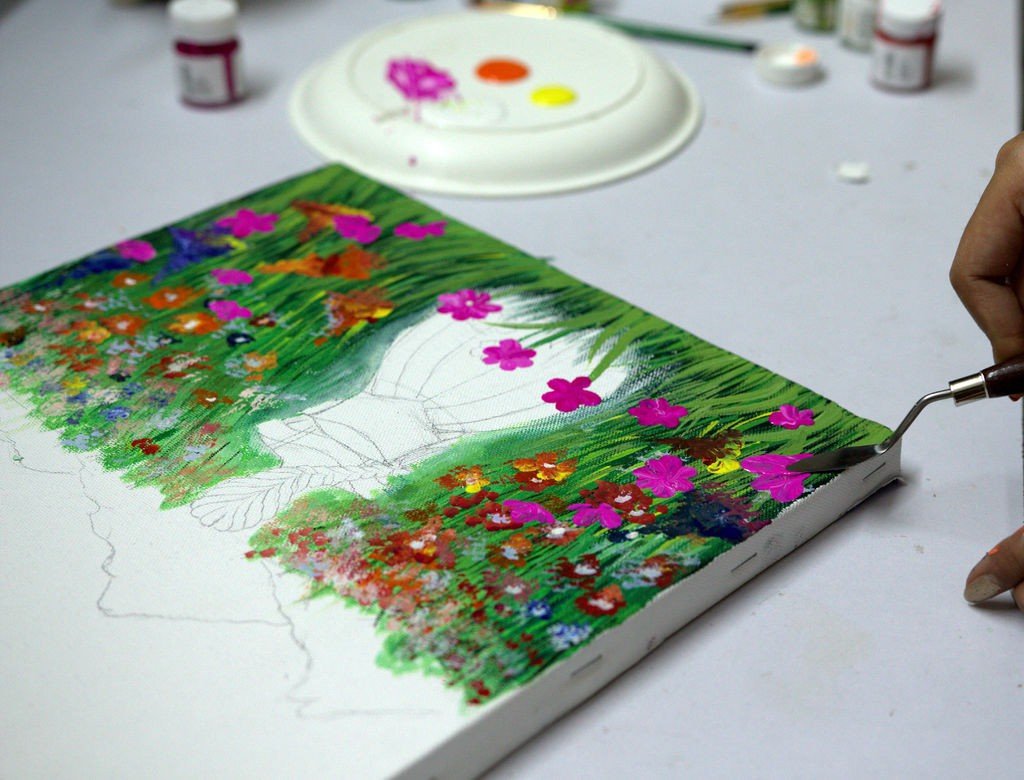
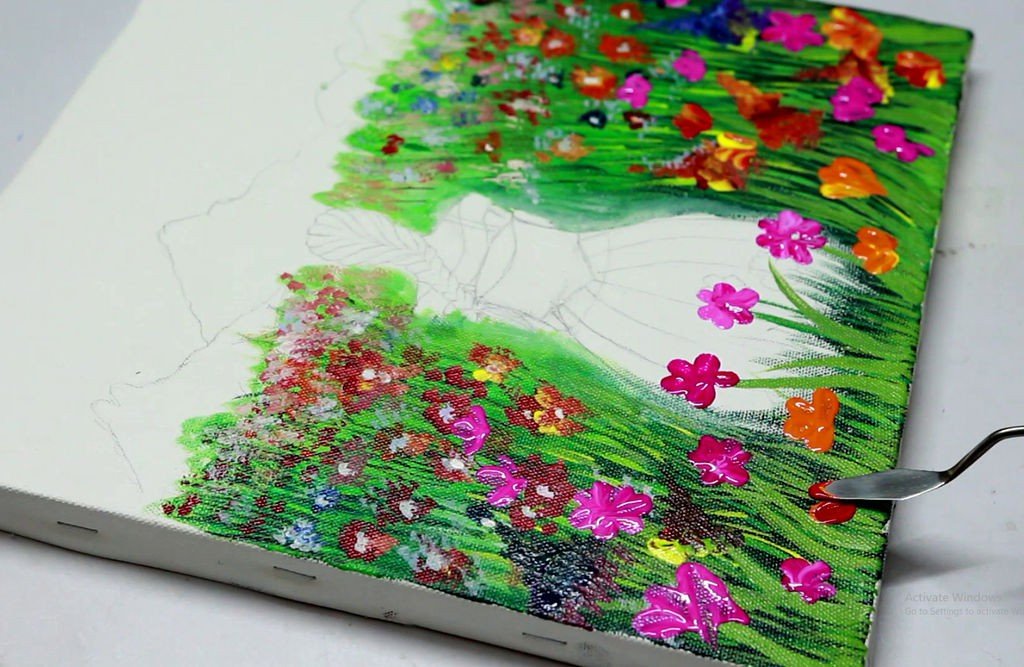
After the acrylic part is done, you should move forward to the pallet knife. HereI have use Artists’ acrylic colour tubes. As its a canvas of size 12″ * 12″, I have used pallet knife size No. 1. Choose a dark and bright colour for a better look.
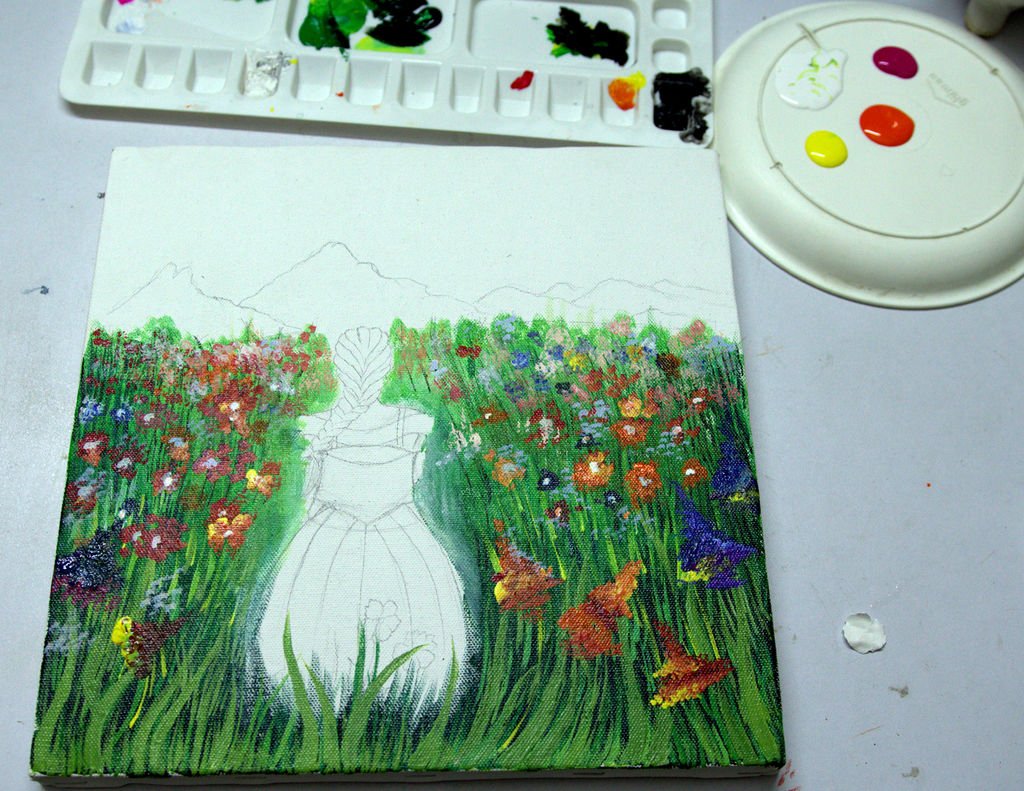
Step 6: MAKE COLOUR OF HILLS AND SKY
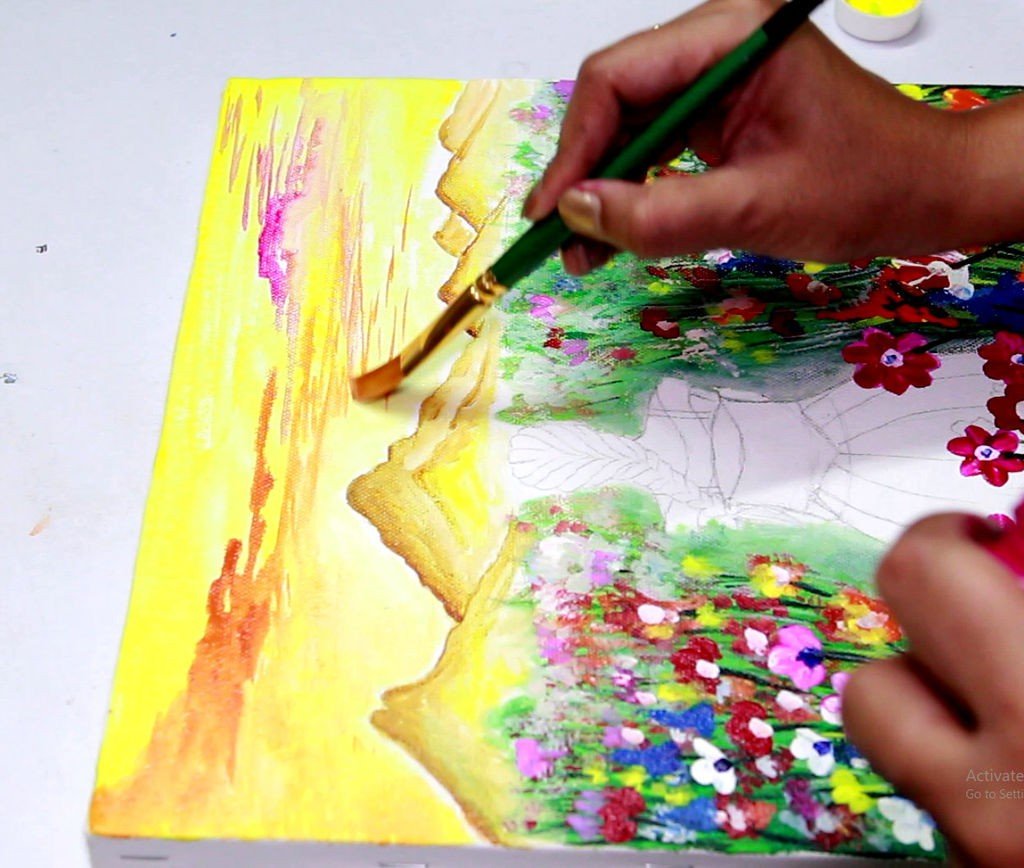


Then move towards hills and sky and other parts of the canvas sketch. Keep it as light as possible so that your main theme can do pop out easily.
Step 7: COLOURING THE GIRL


Now make it dry and go for the girl. As women are considered a beautiful creation herself, so you can feature out her in any way. As I have drawn it from her back. You can feature out her long hair and her beautiful dress. But make sure you make it too light that it can pop out itself between the flower garden.
If you wish her dress remains white as I did.you should follow one thing. As your base canvas colour is already white, you need to give the next colour shade of white that is light sky blue. Add some white acrylic colour to make it lighter. Then apply from the outer side of each flit of dress to inside.
I always love to do a girl long wavy hair. You need to give a light black and brown in colour and let it be dry. Then to enhance hairs it should use deep black colour as shown in the above pictures and let it dry again. After you need to give white strokes which basically gives a combed hair look.
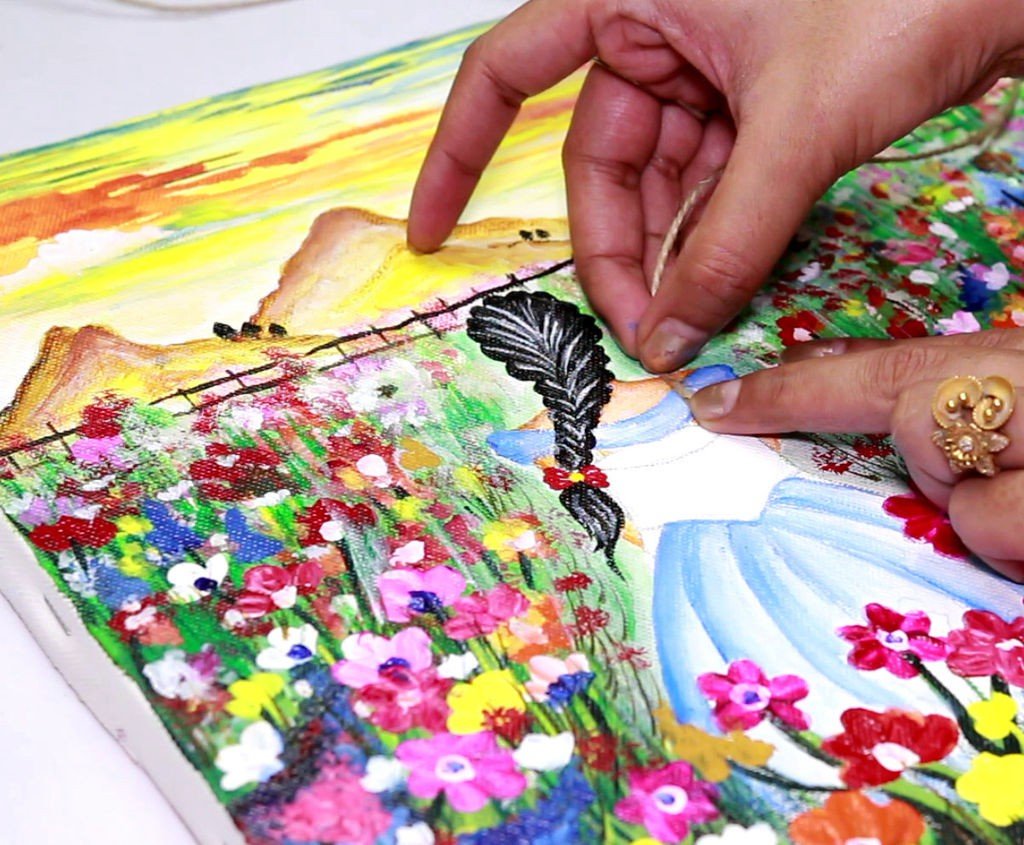
Step 8: Making of Basket
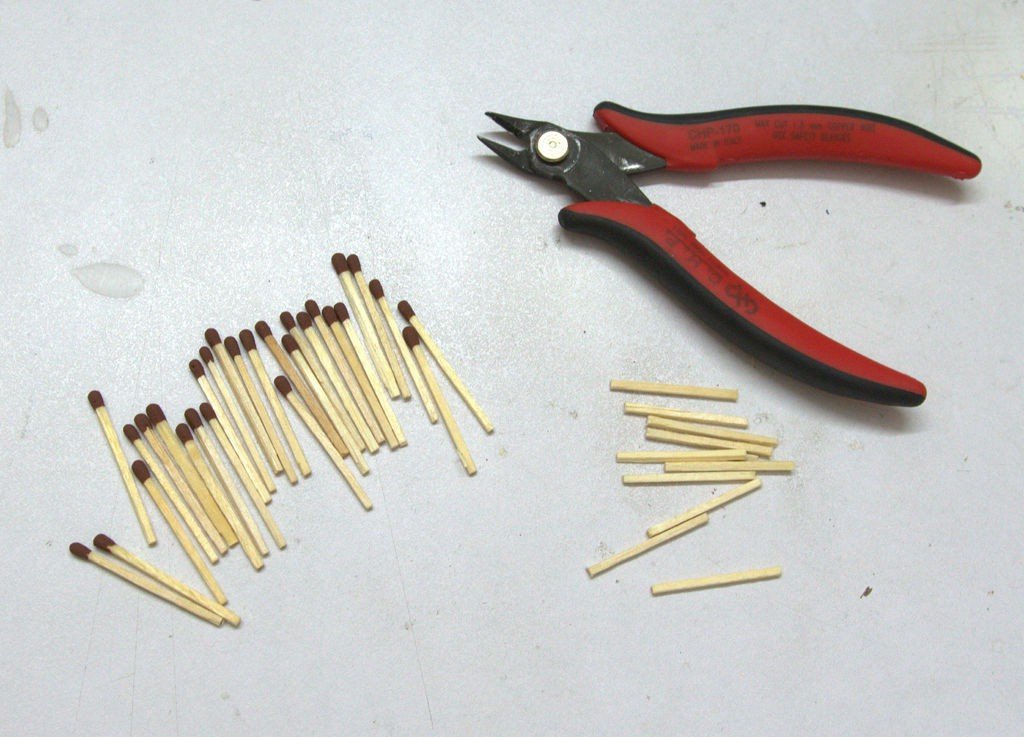
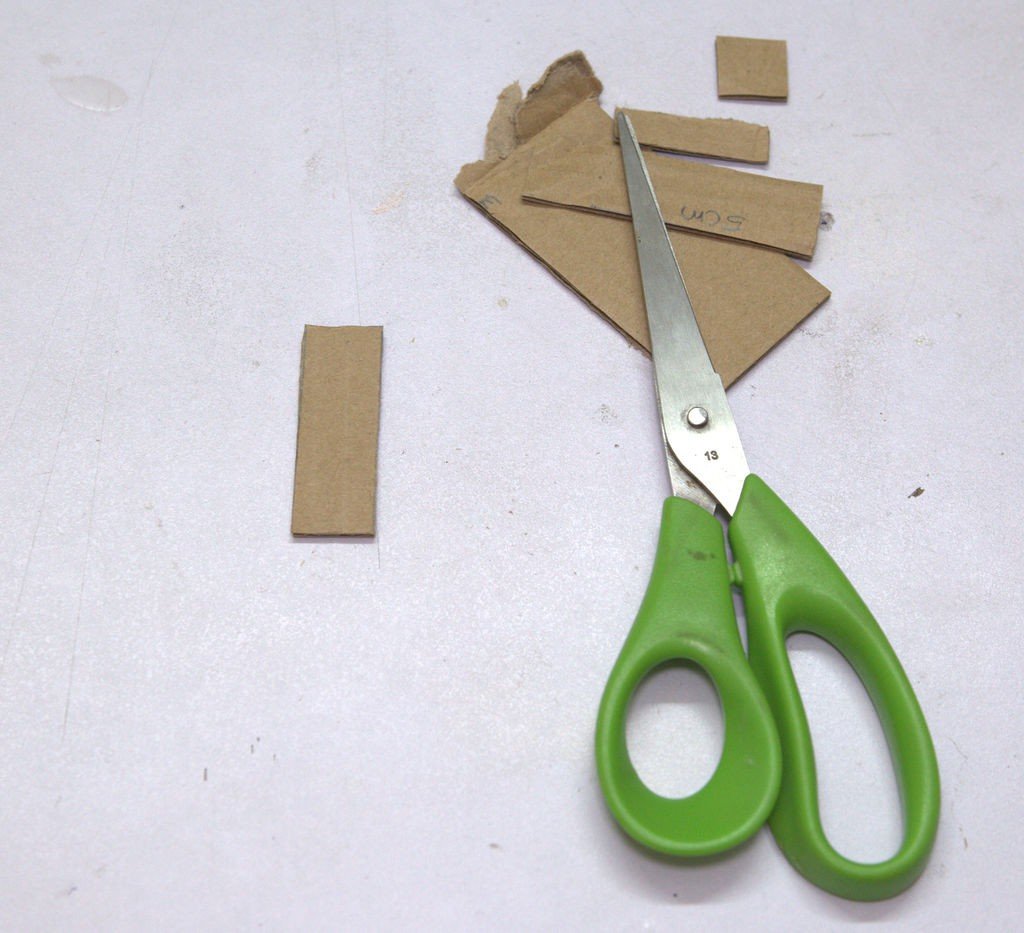
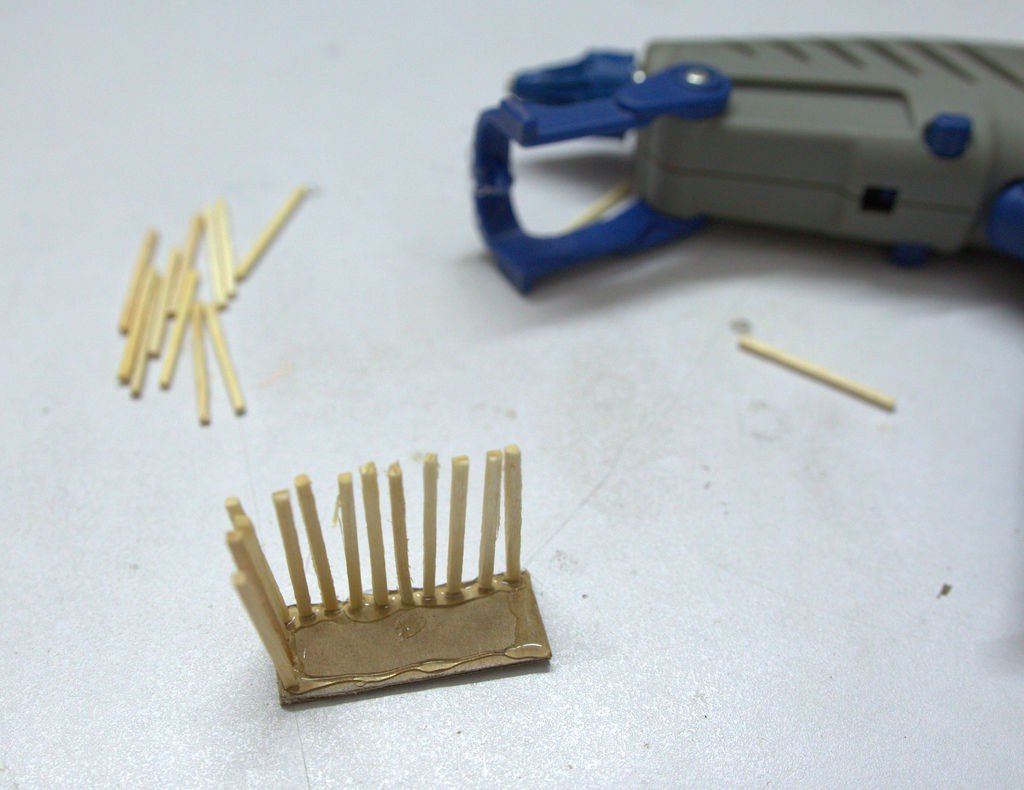


I wanted to give it a 3D look. So I used a piece of cardboard, match sticks and rope.
First, cut cardboard with measurable rectangular shape, fix match sticks around its periphery with the help of glue gun. Let it dry for sometimes.
To give the basket a natural look, use the rope. First, roll the rope with round shape a shown. Make these with a random diameter. Fix the last end of the rope with a glue gun and let it dry for sometimes. Then fix it with a proper manner on the front side of the basket. No need to give the rope on the back side.
Step 9: BASKET FIXING
No need to give the rope on the backside of the basket. You can directly apply glue on match sticks and make it fix.
As my sketch demands, I put the basket strap by cutting a piece of the rope. Then did fix the basket on a mentioned one.
Step 10: PREPARING SOME RANDOM COLOURFUL FLOWERS

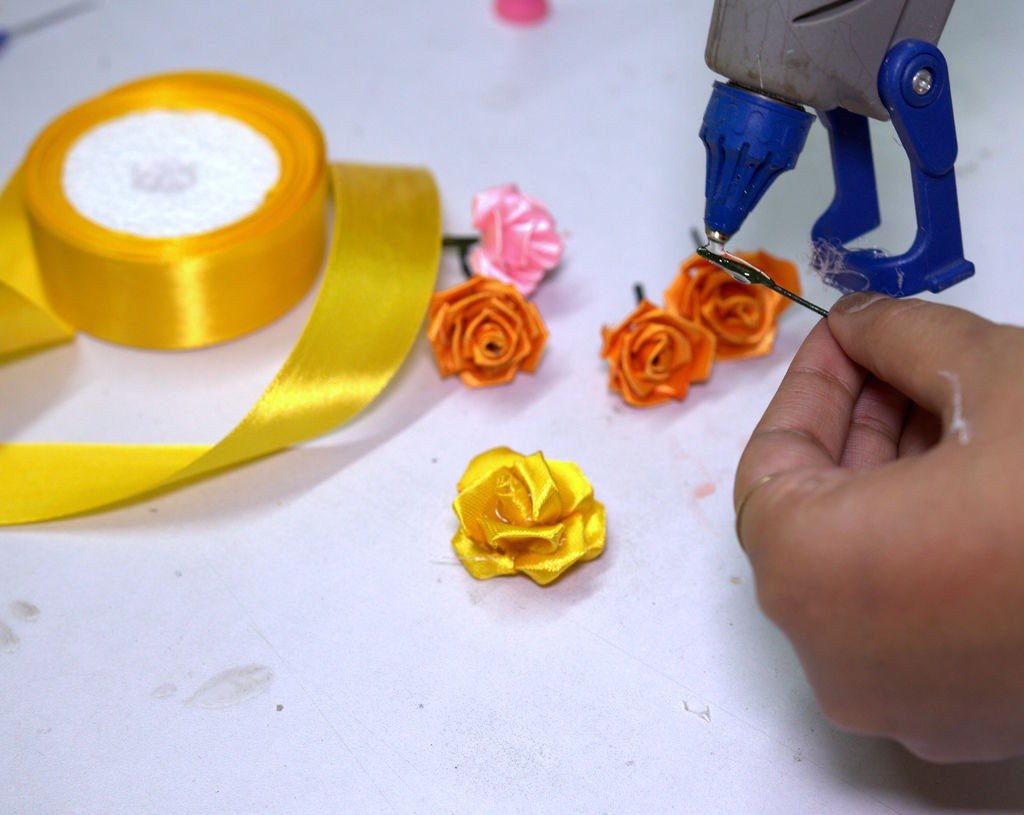
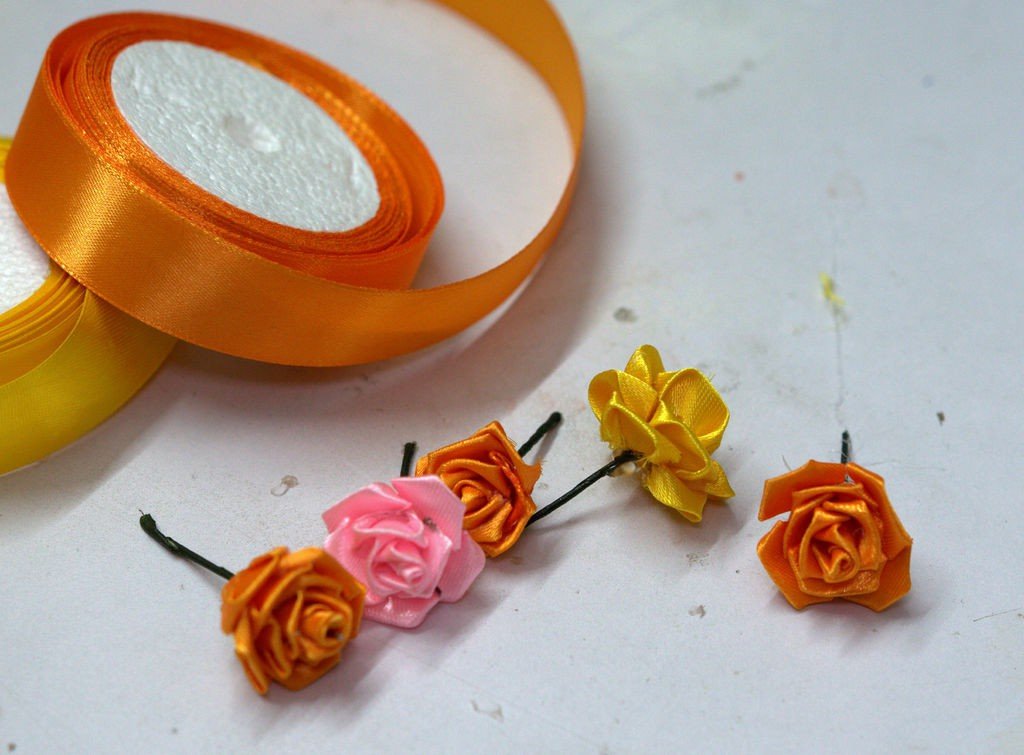

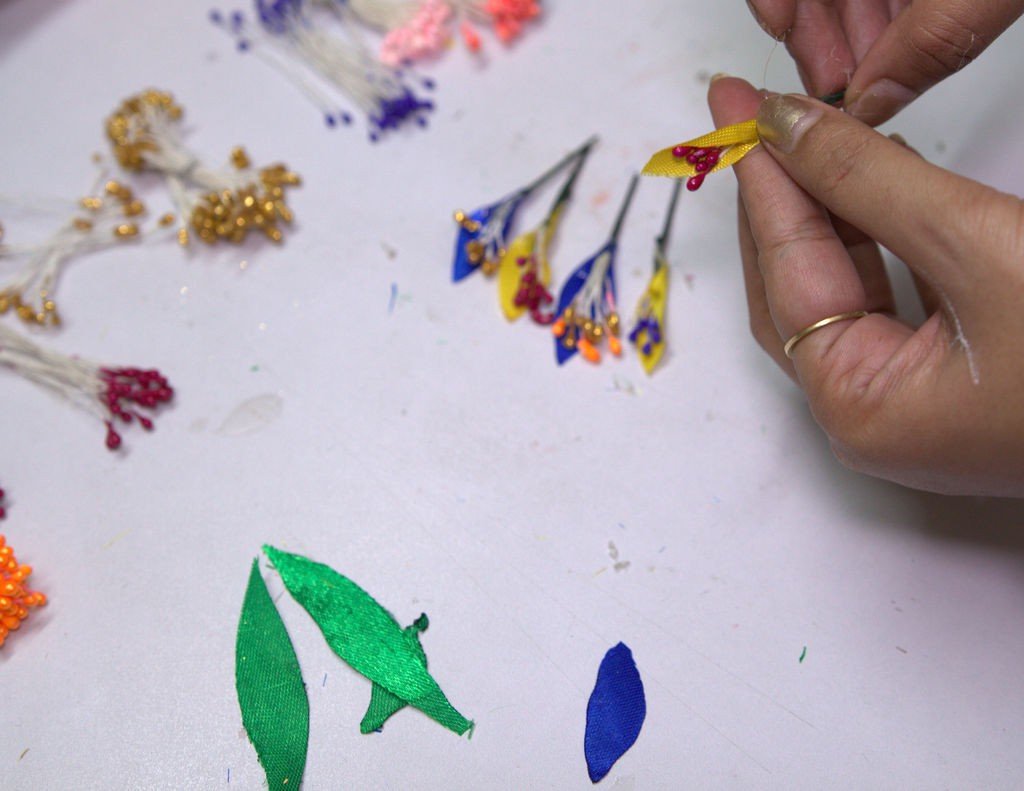

Then make some flowers with the help of satin colourful ribbons. As shown in the above pictures I have done flowers of different kinds.
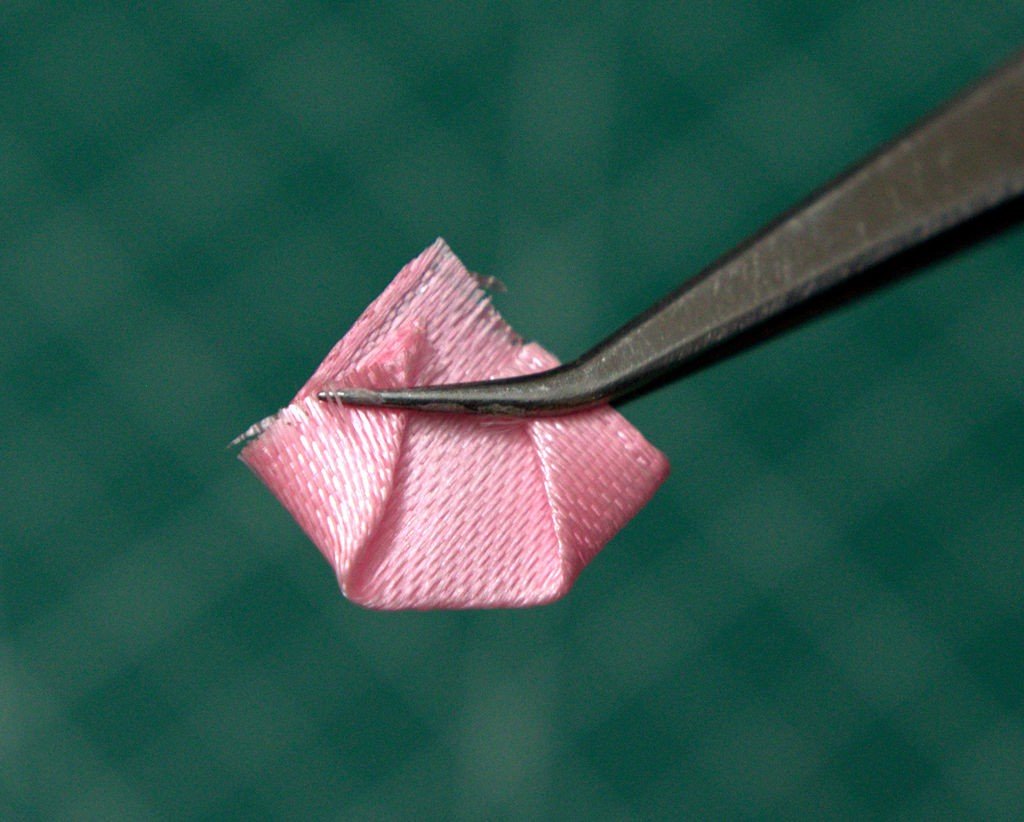
First, cut some colourful satin ribbons, make it a proper shape as shown above. Then to trim its edges put its edges nearer to the flame of a candle. For precaution, it needs to hold with tweezers.
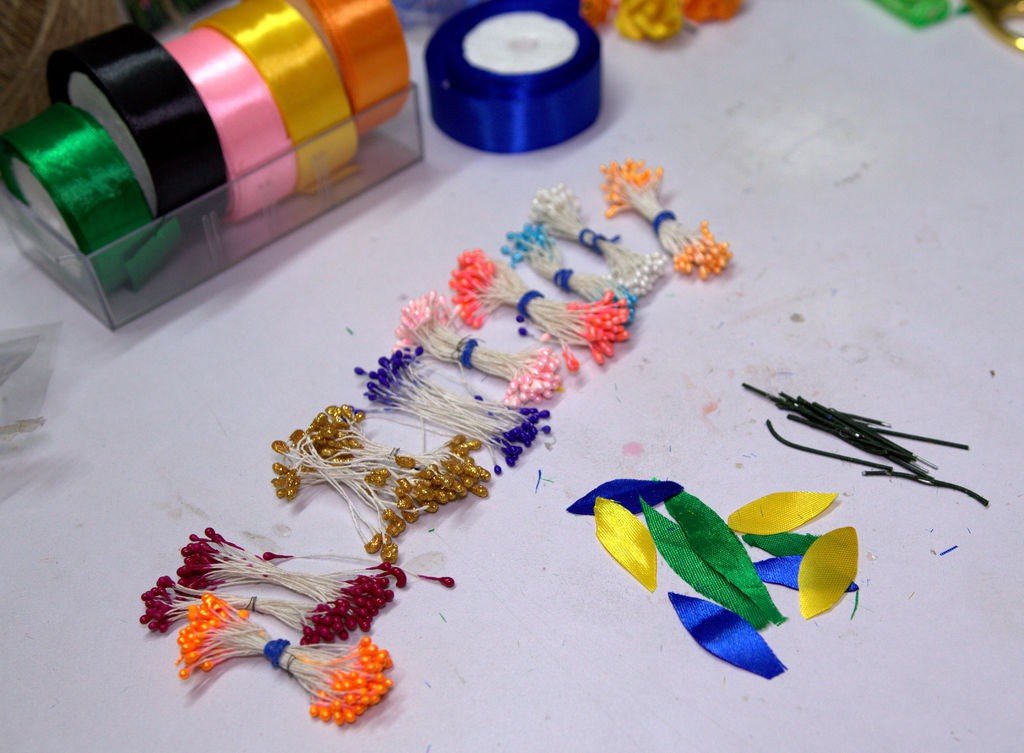
Make some leaves and trim it again as I told. Fix these on the backside of the flowers and let it be dry.
Now cut the readily available green wires to make the flowers stems, with the help of nipper cutter. Fix it on the lower side of the flowers with some hot glue and leave it for dry.
Step 11: MOUNTING THE CANVAS
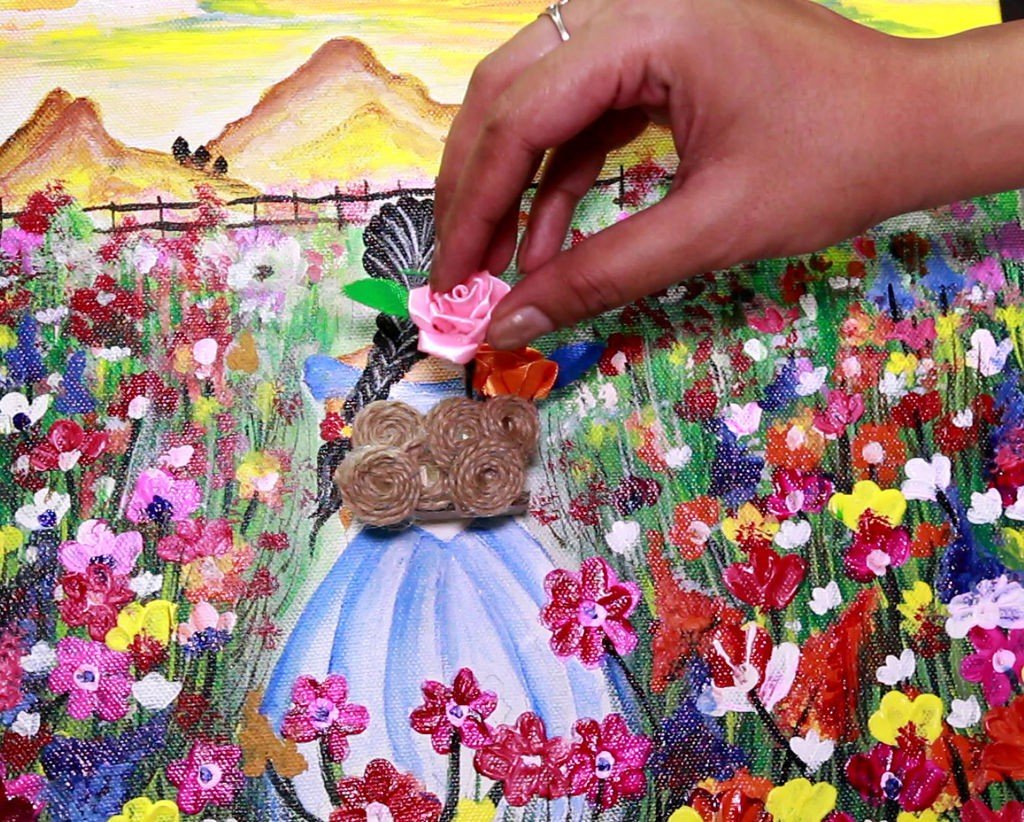
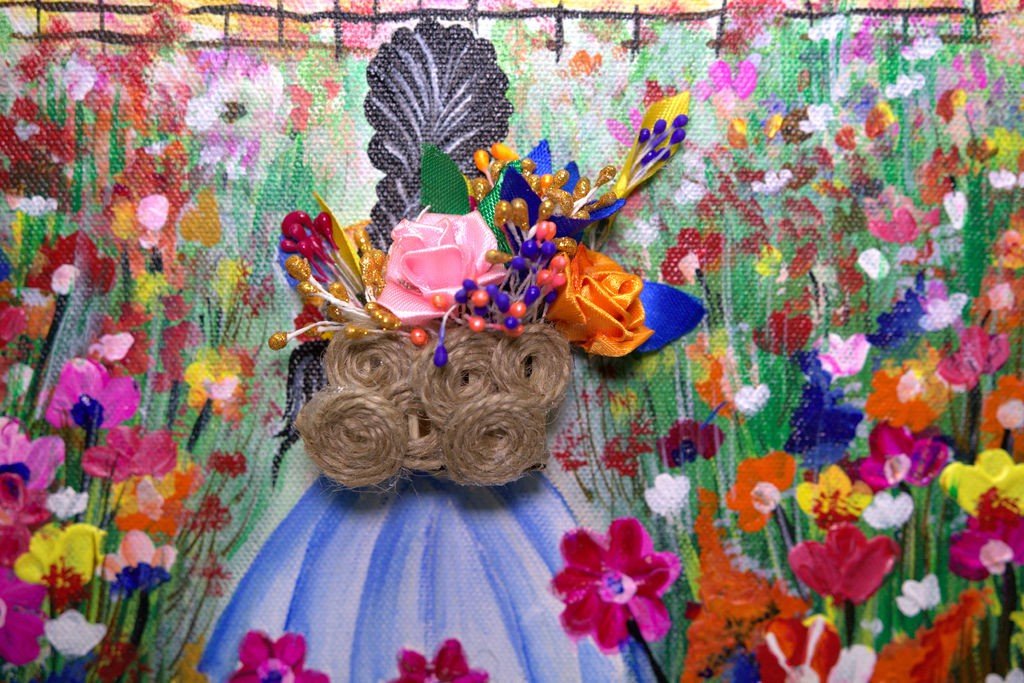
Finally put those prepared flowers, leaves and some readily available flower material within the basket with suitable manner.
Then by using the 3M double-sided tape use can make it mount on the wall.
Any suggestions and feedback are always welcome.
Thank You!
courtesy: instructables